
Microsoft Excel stands as an indispensable tool in today’s digital landscape, a cornerstone application for data organization, analysis, and visualization across virtually every industry. From finance professionals tracking market trends to students managing project budgets, small business owners forecasting sales, and researchers crunching complex datasets, Excel’s versatility makes it a must-have for anyone dealing with numbers and information. Its robust features, including powerful formulas, pivot tables, charting capabilities, and macros, empower users to derive meaningful insights and make informed decisions.
However, before harnessing the immense power of Excel, the crucial first step is to ensure it is properly installed and configured on your system. This comprehensive guide will walk you through the entire process, covering everything from understanding its various versions and system requirements to troubleshooting common issues. Whether you’re setting up Excel for the first time as part of a Microsoft 365 subscription or installing a standalone perpetual license, this article will provide clear, step-by-step instructions to get you up and running efficiently. We’ll delve into the nuances of preparation, installation, and post-installation checks, ensuring you can unlock Excel’s full potential without a hitch.
Understanding Microsoft Excel and Its Prerequisites
Before embarking on the installation journey, it’s essential to grasp what Microsoft Excel is, its common packaging, and the fundamental requirements your system needs to meet. This foundational understanding will streamline the entire process and help you select the right version for your needs.
What is Microsoft Excel?
At its core, Microsoft Excel is a spreadsheet program developed by Microsoft for Windows, macOS, Android, iOS, and iPadOS. It features calculation, graphing tools, pivot tables, and a macro programming language called Visual Basic for Applications (VBA). It has been a dominant spreadsheet application for decades, constantly evolving to incorporate new features and improve user experience. Excel is typically not sold as a standalone application but is rather a core component of the Microsoft Office suite (now primarily known as Microsoft 365).
System Requirements for Excel
To ensure a smooth installation and optimal performance, your computer must meet certain minimum system specifications. These requirements can vary slightly depending on the specific version of Excel you are installing (e.g., Excel 2016, 2019, 2021, or the version included with Microsoft 365). Generally, you’ll need to consider:
-
Operating System: Windows 10 or later for PC; macOS Ventura or later for Mac. For older perpetual licenses, older OS versions might be supported.
-
Processor: 1.6 GHz or faster, 2-core processor (Intel or compatible for PC; Intel or Apple Silicon for Mac).
-
Memory (RAM): 4 GB RAM for PC, 4 GB RAM for Mac.
-
Hard Disk Space: 4 GB of available disk space for PC; 10 GB of available disk space for Mac.
-
Display: 1280 x 768 screen resolution for PC; 1280 x 800 for Mac.
-
Graphics: DirectX 9 or later, with WDDM 2.0 or higher for Windows 10 (for PC).
-
Internet Connection: Required for downloading, activation, and for Microsoft 365 services.
Always check the official Microsoft support page for the most up-to-date and specific requirements for the version you intend to install.
Licensing and Subscription Models
Microsoft offers Excel through two primary licensing models, each with distinct installation and activation procedures:
-
Microsoft 365 Subscription (Recommended): This is the modern, cloud-connected version. A Microsoft 365 subscription (e.g., Personal, Family, Business, Enterprise) provides access to the latest versions of Excel, Word, PowerPoint, Outlook, and other Office applications. Benefits include continuous feature updates, cloud storage with OneDrive, and cross-device functionality. You typically sign in with your Microsoft account to activate and manage your subscription.
-
One-Time Purchase (Perpetual License): Historically known as Office Home & Business or Office Professional, this model allows you to purchase a specific version of Excel (e.g., Excel 2021) with a single, upfront payment. You own the license for that specific version indefinitely, but it does not include feature upgrades, only security updates. Installation usually involves a product key.
Understanding your license type is crucial, as it dictates where you download the software from and how you activate it.
Preparing for Installation
A successful software installation often hinges on proper preparation. Taking a few moments to ensure your system is ready can prevent common pitfalls and significantly speed up the entire process.
Checking Your Internet Connection
A stable and reasonably fast internet connection is paramount, especially if you are downloading the installation files or activating a Microsoft 365 subscription. Intermittent connections can lead to corrupted downloads or failed activation attempts. If you’re using Wi-Fi, ensure you’re close to your router or consider a wired connection for more stability during the download phase.
Freeing Up Disk Space
While modern hard drives offer ample storage, it’s always good practice to ensure you have sufficient free space. Excel, as part of the Office suite, can require several gigabytes. If your system is running low on disk space, consider uninstalling unnecessary programs or deleting old files to free up the required 4-10 GB. This prevents “disk full” errors during installation and ensures there’s room for temporary files created during the setup.
Closing Other Applications
Before initiating the installation, close all other running applications. This minimizes potential conflicts with other software, frees up system resources (RAM and CPU), and prevents installation files from being locked by other programs. A clean slate ensures the installer can operate efficiently without interruptions.
Locating Your Product Key or Microsoft Account Details
This is a critical step.
-
For Microsoft 365: You’ll need the email address and password associated with your Microsoft account where your subscription is active.
-
For a One-Time Purchase: You will need the 25-character product key. This key might be found on a physical card inside the software packaging, in an email confirmation if purchased digitally, or associated with your Microsoft account if you registered it online. Ensure you have this readily available before you begin.
Step-by-Step Installation Process
With the preparations complete, you’re ready to proceed with the actual installation. The steps vary slightly based on whether you have a Microsoft 365 subscription or a one-time purchase.
For Microsoft 365 Subscribers
This is the most common method for acquiring Excel today.
-
Access Your Microsoft Account: Open your web browser and navigate to account.microsoft.com/services or office.com/setup. Sign in with the Microsoft account associated with your Microsoft 365 subscription.
-
Download the Installer: Once signed in, you should see your Microsoft 365 subscription listed. Look for an “Install Office” or “Install apps” button. Clicking this will usually initiate the download of a small setup file (e.g., “Setup.exe”).
-
Run the Setup File: Locate the downloaded file (usually in your “Downloads” folder) and double-click it. You might be prompted by User Account Control (UAC) to allow the app to make changes to your device; click “Yes.”
-
Follow On-Screen Prompts: The Office installer will begin streaming the necessary files from Microsoft’s servers. You’ll see a progress window. Avoid shutting down your computer or disconnecting from the internet during this phase. The installation is largely automated.
-
Sign In and Activate: Once the installation is complete, you’ll see a message indicating it’s done. Open Excel from your Start Menu (Windows) or Applications folder (Mac). The first time you open an Office app, you may be prompted to sign in with your Microsoft account to activate the product. Do so to link the software to your active Microsoft 365 subscription.
For One-Time Purchase (Perpetual License)
This method applies if you bought a specific version of Excel (e.g., Excel 2021) outright.
-
Download or Use Installation Media:
-
Digital Purchase: If you bought it digitally, you might have received a link to download the installer via email, or you may need to go to setup.office.com to redeem your product key and download the software.
-
Physical Purchase: If you have a DVD, insert it into your computer’s optical drive. The setup wizard should launch automatically. If not, navigate to the DVD drive in “This PC” (Windows) or Finder (Mac) and double-click the setup file.
-
-
Enter the Product Key: During the initial steps of the installation wizard, you will be prompted to enter your 25-character product key. Type it carefully, including hyphens.
-
Follow On-Screen Instructions: The installer will guide you through accepting the license agreement, choosing installation options (default is usually fine), and beginning the installation process. Similar to Microsoft 365, do not interrupt this process.
-
Activation: After installation, open Excel. It may automatically attempt online activation. If successful, you’re done. If not, you might be given options for phone activation. Follow the prompts to complete the activation process.
Installing on Different Operating Systems
While the general steps are similar, there are minor differences for Mac users:
- Mac: After downloading the
.pkginstaller file, you’ll double-click it and follow the standard macOS installation wizard, dragging the Office applications into your Applications folder. Activation still requires signing in with your Microsoft account or entering a product key. The interface for managing your Office subscription on the web remains largely the same.
Post-Installation and Troubleshooting
Once Excel is installed, a few final steps and common troubleshooting tips can ensure a seamless experience.
Verifying the Installation
After the installation completes, perform a quick check:
-
Launch Excel: Open Excel from your Start Menu (Windows) or Applications folder (Mac).
-
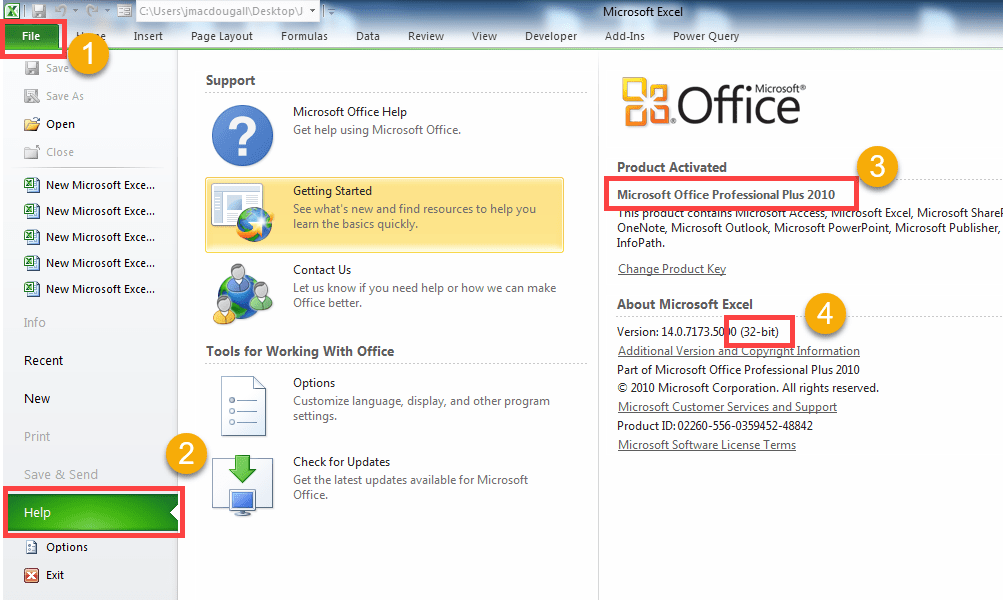
Check Activation Status: Go to
File > Account(Windows) orExcel > About Excel(Mac). You should see your subscription or product details and confirmation that the product is activated. -
Create a New Workbook: Open a new, blank workbook and ensure all basic functions (typing, saving, opening a file) work correctly.
Updating Excel
Keeping Excel updated is crucial for security, performance, and access to new features.
-
Microsoft 365: Updates are typically automatic. You can manually check by going to
File > Account > Update Options > Update Now. -
Perpetual License: Updates usually come through Windows Update (for PC) or Microsoft AutoUpdate (for Mac).
Common Installation Issues and Solutions
-
“Cannot install” errors or setup freezing:
- Solution: Ensure you meet system requirements, close all other programs, temporarily disable antivirus software, and try running the installer as an administrator (right-click setup file > Run as administrator).
-
Activation problems:
- Solution: Double-check your Microsoft account credentials or product key. Ensure your internet connection is active. If using Microsoft 365, confirm your subscription is current on your Microsoft account page. For perpetual licenses, try phone activation if online activation fails.
-
Slow installation:
- Solution: This can be due to a slow internet connection (for streamed installations) or insufficient system resources. Ensure your internet is stable and close other applications.
-
Previous Office version conflicts:
- Solution: It’s often best to uninstall older versions of Office before installing a new one to prevent conflicts. Use the “Add or Remove Programs” feature in Windows or simply drag to Trash on Mac, then restart your computer before installing the new version. Microsoft also provides an “Office Uninstall Tool” that can thoroughly remove prior installations.
Uninstalling Excel (Briefly)
Should you ever need to remove Excel:
-
Windows: Go to
Settings > Apps > Apps & features, find “Microsoft Office” or “Microsoft 365,” click it, and select “Uninstall.” -
Mac: Open Finder, go to the
Applicationsfolder, drag all Microsoft Office applications (Excel, Word, etc.) to the Trash, then empty the Trash. You might also need to remove associated license files for a clean uninstall.
Maximizing Your Excel Experience
Installing Excel is just the beginning. To truly leverage its power, consider these steps.
Integrating with Other Microsoft Office Apps
Excel rarely works in isolation. Understand how it integrates seamlessly with Word (for reports), PowerPoint (for presentations), Outlook (for scheduling and communication), and especially OneDrive/SharePoint for cloud collaboration and file sharing. This interconnected ecosystem boosts productivity.
Exploring Excel’s Features
Once installed, don’t shy away from exploring Excel’s vast feature set.
-
Templates: Use built-in templates for budgets, calendars, and trackers to get started quickly.
-
Formulas & Functions: Begin with basic formulas (SUM, AVERAGE) and gradually learn more advanced ones (VLOOKUP, IF, INDEX/MATCH).
-
Charts & Graphs: Experiment with different chart types to visualize your data effectively.
-
PivotTables: Learn to summarize and analyze large datasets with ease.
Continuous Learning and Support
The world of Excel is constantly evolving.
-
Online Tutorials: Websites like Microsoft’s official support, YouTube, and specialized educational platforms offer countless tutorials.
-
Community Forums: Join Excel communities to ask questions, share knowledge, and learn from others.
-
Microsoft Support: For technical issues with installation or activation, Microsoft’s official support channels are your best resource.
In conclusion, installing Microsoft Excel is a straightforward process when approached systematically. By understanding your licensing model, preparing your system, and following the clear step-by-step instructions provided, you can ensure a smooth setup. With Excel successfully installed and activated, you’re now ready to unlock a world of data management and analytical possibilities, transforming raw data into actionable insights and empowering your personal and professional endeavors.
aViewFromTheCave is a participant in the Amazon Services LLC Associates Program, an affiliate advertising program designed to provide a means for sites to earn advertising fees by advertising and linking to Amazon.com. Amazon, the Amazon logo, AmazonSupply, and the AmazonSupply logo are trademarks of Amazon.com, Inc. or its affiliates. As an Amazon Associate we earn affiliate commissions from qualifying purchases.