
Ubuntu, a popular and user-friendly Linux distribution, is celebrated for its flexibility and open-source nature. While its extensive software repositories offer a vast array of applications, there are times when you might need to install software that isn’t readily available through the standard channels. This is where .deb files come into play. A .deb file is a package format used by Debian-based Linux distributions, including Ubuntu, to distribute and install software. Understanding how to install these files is a fundamental skill for any Ubuntu user looking to expand their software library beyond what’s officially offered.

This guide will walk you through the various methods of installing .deb files in Ubuntu, catering to both beginners and those with a bit more technical inclination. We’ll cover graphical user interface (GUI) methods for a seamless experience and command-line interface (CLI) approaches for greater control and automation, all while keeping in mind the broader context of technology trends and the desire for efficient digital workflows.
Understanding .deb Packages and Their Importance
Before diving into the installation process, it’s crucial to understand what a .deb file is and why you might encounter them.
What is a .deb File?
At its core, a .deb file is an archive file containing all the necessary components to install a piece of software on a Debian-based system. This includes the program’s executables, libraries, configuration files, and metadata (like version information, dependencies, and installation scripts). Think of it as a self-contained installer package specifically designed for Ubuntu and its derivatives.
Why Use .deb Files?
There are several compelling reasons why you might need to install software directly from a .deb file:
- Latest Versions: Sometimes, the version of a particular application available in Ubuntu’s official repositories might be slightly older than the latest stable release. Developers often provide direct downloads of their software as
.debfiles, allowing you to get the most up-to-date features and security patches. - Proprietary Software: Certain proprietary applications, especially those for creative professionals or specific hardware, may not be included in open-source repositories due to licensing or distribution agreements. These are often distributed as
.debpackages. - Custom or Niche Software: Developers of niche or specialized software might offer their creations directly to users via
.debfiles, bypassing the formal packaging process for the main Ubuntu repositories. - Early Access or Betas: If you’re interested in testing beta versions or pre-release software,
.debfiles are frequently the method of distribution. - Offline Installation: In situations where an internet connection is unreliable or unavailable, downloading
.debfiles beforehand allows for offline installation of software.
While Ubuntu’s package management system (APT) is robust and generally the preferred method for software installation, .deb files offer a direct and often necessary alternative.
Installing .deb Files: The User-Friendly GUI Approach
For most users, especially those new to Linux or preferring a visual workflow, the graphical user interface (GUI) offers the simplest and most intuitive way to install .deb files. Ubuntu provides built-in tools that make this process straightforward.
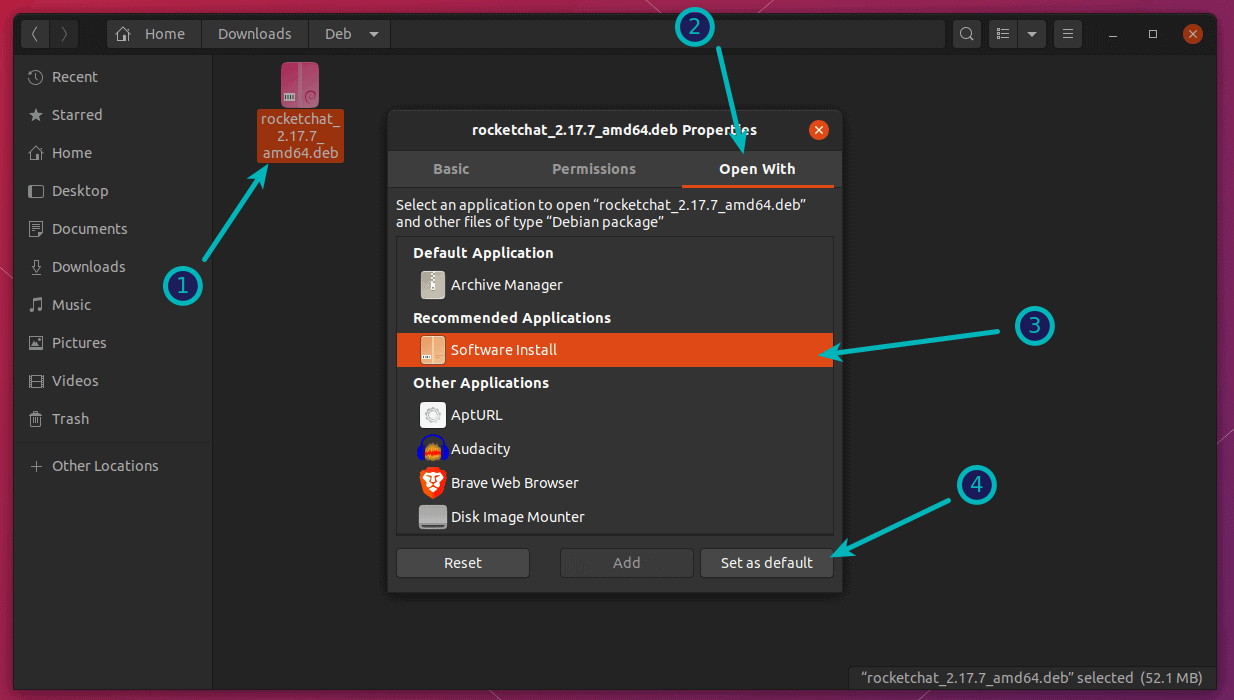
Using the Default Software Installer
Ubuntu’s default software management application, often called “Ubuntu Software” or “Software Center,” is designed to handle .deb files with ease.
- Locate the .deb file: Navigate to the folder where you have downloaded the
.debfile using your file manager (e.g., Nautilus). - Double-click the .deb file: Simply double-clicking the
.debfile will typically open it with the default software installer. - Review the installation details: A window will appear showing the name of the application, its version, and a brief description. You’ll also see an “Install” button.
- Click “Install”: After reviewing the details, click the “Install” button.
- Authenticate: You will be prompted to enter your user password to authorize the installation. This is a standard security measure in Ubuntu.
- Installation progress: The software installer will then proceed to install the package. You’ll see a progress bar indicating the status.
- Launch the application: Once the installation is complete, the “Install” button will usually change to “Launch” or a similar option. You can also find the newly installed application in your application menu.
This method is ideal for quickly installing individual .deb packages without needing to delve into complex commands. It provides a visual confirmation of what you’re installing and leverages Ubuntu’s integrated software management infrastructure.
Using GDebi Package Installer
While the default software installer is convenient, sometimes it might not resolve dependencies automatically, leading to installation errors. For a more robust GUI solution that explicitly handles dependencies, the GDebi Package Installer is a highly recommended tool.
Installation of GDebi:
GDebi is not installed by default in all Ubuntu versions. You can install it easily using the terminal:
- Open the Terminal: Press
Ctrl + Alt + Tto open a new terminal window. - Update package lists: It’s always a good practice to update your package lists before installing new software:
bash

sudo apt update
- Install GDebi:
bash

sudo apt install gdebi
- Authenticate: Enter your password when prompted.
Using GDebi to Install .deb Files:
Once GDebi is installed, you can use it in a couple of ways:
-
Via Right-Click Menu:
- Right-click on the
.debfile in your file manager. - Select “Open With GDebi Package Installer.”
- GDebi will open and scan the package for dependencies.
- If all dependencies are met, it will show an “Install Package” button. Click it.
- Enter your password when prompted.
- Right-click on the
-
Via GDebi Application:
- Open the GDebi application from your application menu.
- Click on “File” -> “Open…” and navigate to your
.debfile. - GDebi will display the package information and check for dependencies.
- Click “Install Package” and authenticate.
GDebi is particularly useful because it checks for missing dependencies and offers to install them from your configured repositories before proceeding with the installation of the .deb file. This significantly reduces the chances of encountering dependency-related errors.
Installing .deb Files: The Powerful CLI Approach
For users who are comfortable with the command line, or for automation purposes, the terminal offers a more direct and powerful way to manage .deb files. This method provides granular control and is essential for scripting or managing multiple packages.
Using dpkg – The Debian Package Manager
dpkg is the low-level package management tool that underlies APT. While APT handles repositories and dependencies, dpkg directly manipulates individual .deb packages.
Basic Installation with dpkg:
- Open the Terminal: Press
Ctrl + Alt + T. - Navigate to the directory: Change your current directory to where the
.debfile is located. For example, if it’s in your “Downloads” folder:
bash

cd Downloads
- Install the .deb file: Use the following command, replacing
your_package.debwith the actual name of your file:
bash

sudo dpkg -i your_package.deb
sudo: This command is necessary because installing software requires administrative privileges.-i: This flag tellsdpkgto “install” the package.
Handling Dependency Errors with dpkg:
A common issue when using dpkg -i is that it might fail if the package has unmet dependencies. It will usually list the missing dependencies. To fix this, you can use APT to resolve and install these missing dependencies:
- After
dpkg -ifails: If you encounter dependency errors, run the following command:
bash

sudo apt --fix-broken install
This command tells APT to find any broken dependencies and install the necessary packages from your repositories to satisfy them. Once this command completes, the.debpackage you were trying to install should now be correctly installed.
Advanced dpkg Options:
- Reinstalling a package:
bash

sudo dpkg -r your_package.deb
This will remove the package and then reinstall it, useful for troubleshooting. - Purging a package (removes configuration files too):
bash

sudo dpkg -P your_package.deb
Using apt – The High-Level Package Manager
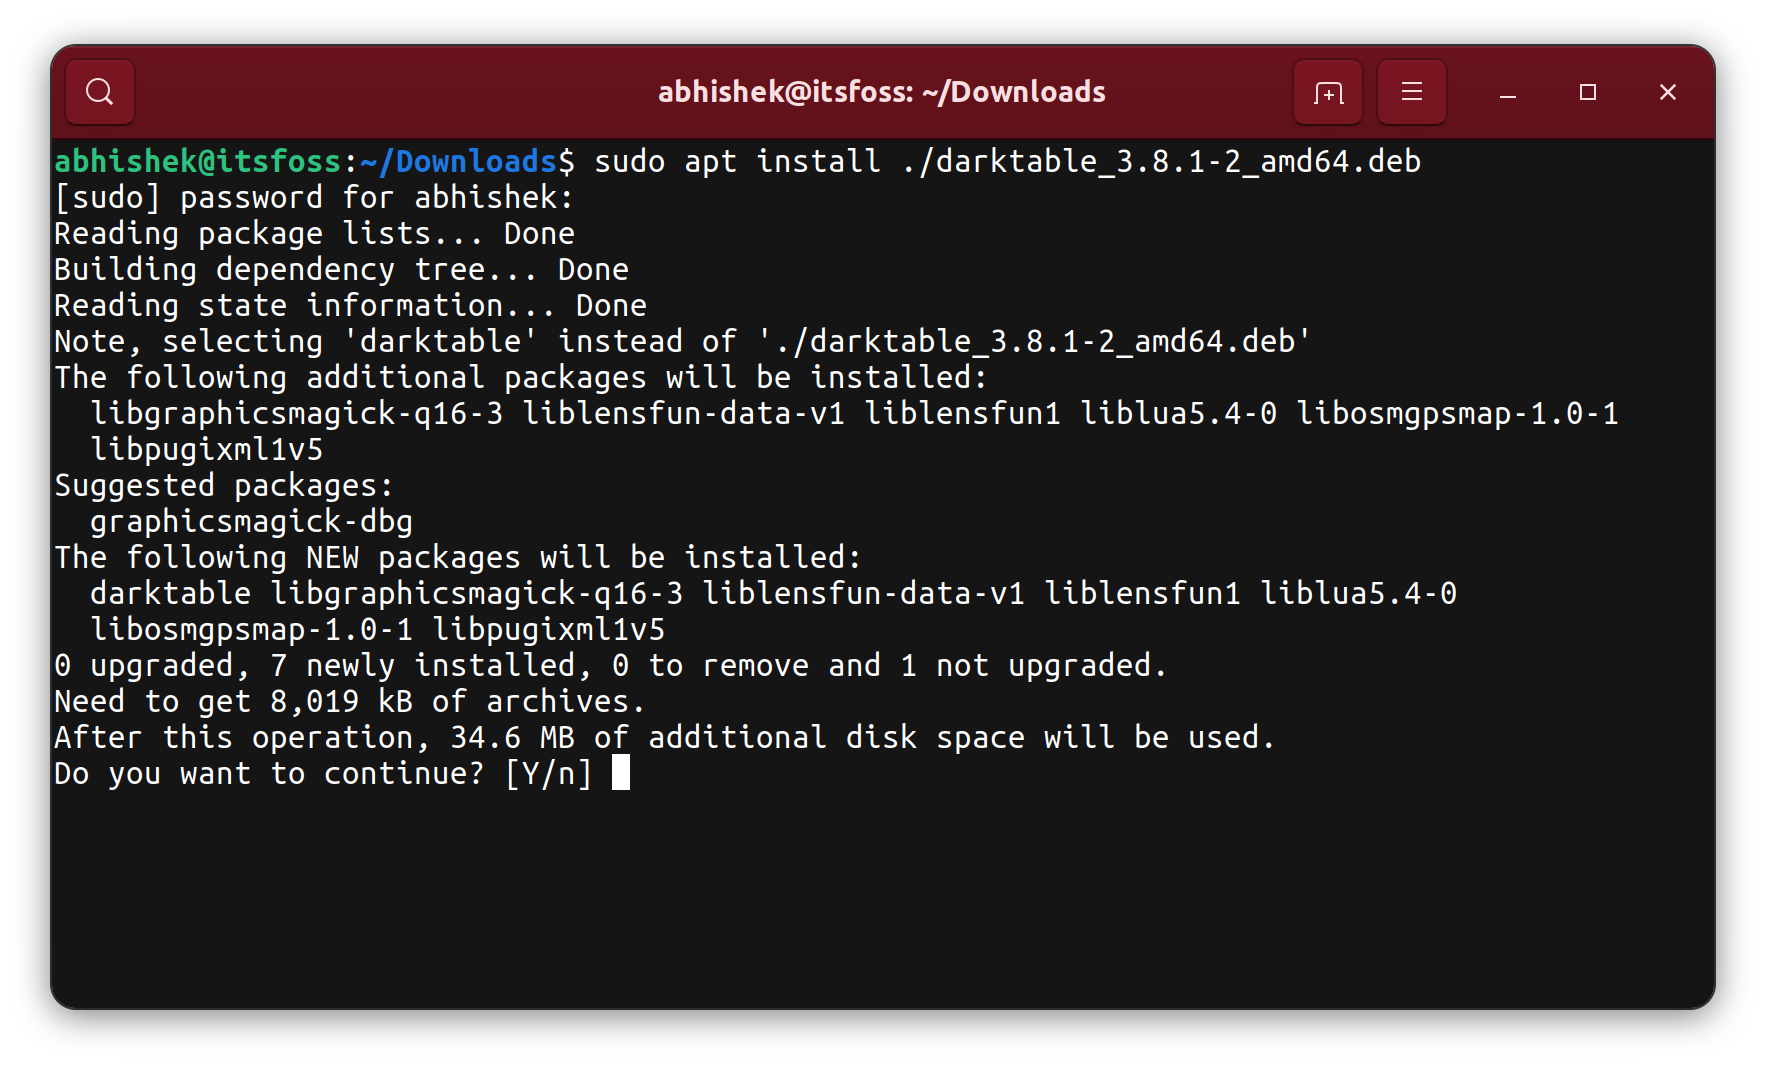
While dpkg is the direct tool, you can also use the more user-friendly apt command-line tool to install .deb files, and it’s generally preferred as it handles dependencies more seamlessly.
Installation with apt:
- Open the Terminal: Press
Ctrl + Alt + T. - Navigate to the directory:
bash

cd Downloads
- Install the .deb file:
bash

sudo apt install ./your_package.deb
apt install: This is the standard command for installing packages with APT../: The./prefix is important. It tellsaptto look for a local file in the current directory, rather than searching within its configured repositories.
The advantage of using apt install ./your_package.deb is that apt will automatically attempt to resolve and install any dependencies required by the .deb package from your configured software repositories. This significantly simplifies the process compared to using dpkg alone.
Key Differences and When to Use Which:
dpkg -i: Lower-level, directly installs the.debfile. You’ll needapt --fix-broken installto resolve dependency issues. Best for when you know dependencies are met or for specific scripting needs.apt install ./: Higher-level, usesapt‘s intelligence to resolve dependencies from repositories automatically. Generally the recommended command-line method for installing.debfiles.
Best Practices and Troubleshooting for .deb Installations
As with any software installation, there are best practices to follow and common issues to be aware of when working with .deb files. Adhering to these will ensure a smoother experience and prevent potential problems.
Verify the Source of .deb Files
This is arguably the most critical step for digital security. Only download .deb files from trusted and reputable sources.
- Official Developer Websites: Always prefer downloading from the official website of the software vendor or developer.
- Known Open-Source Platforms: Sites like GitHub, GitLab, or SourceForge can be good sources if the project clearly indicates where to find official
.debreleases. - Avoid Suspicious Links: Be extremely wary of downloading
.debfiles from random websites, forums, or email attachments. Malware can be disguised as legitimate software packages.
A compromised .deb file can install malicious software, steal your data, or disrupt your system. Always exercise caution.
Always Update Your System
Before installing any new software, especially from external sources, ensure your Ubuntu system is up-to-date.
- Open Terminal:
Ctrl + Alt + T - Update Package Lists:
bash

sudo apt update
- Upgrade Installed Packages:
bash

sudo apt upgrade
This ensures that your system has the latest security patches and that your package manager is aware of all available dependency versions, reducing the likelihood of conflicts.
Understand Dependencies
As discussed, .deb files often rely on other software packages (dependencies) to function correctly.
- GUI Installers (Software Center, GDebi): These tools are designed to check for and prompt you to install missing dependencies.
- CLI Installers (
apt):sudo apt install ./your_package.debis excellent at resolving these automatically. - CLI Installers (
dpkg): Requires manual intervention (sudo apt --fix-broken install) if dependencies are missing.
If an installation fails due to dependencies, carefully read the error messages. They often provide clues about what is missing.
Uninstalling .deb Packages
If you need to remove software installed from a .deb file, you can use the same package management tools.
-
Using APT (Recommended):
sudo apt remove <package_name>Replace
<package_name>with the actual name of the software (usually different from the.debfilename). To remove configuration files as well, use:sudo apt purge <package_name> -
Using
dpkg:
bash

sudo dpkg -r <package_name>
Or to purge:
bash

sudo dpkg -P <package_name>
You can often find the <package_name> by looking at the application’s name in the .deb file or by searching your installed applications.
Common Troubleshooting Scenarios
- “Package has no installation candidate”: This usually means the package name is incorrect or it’s not available in your repositories.
- Dependency conflicts: Sometimes, a
.debfile might require a version of a dependency that conflicts with another package you have installed. This is less common withapt install ./but can occur. In such cases, you might need to uninstall the conflicting package first or seek an alternative version of the.debfile. - Corrupted .deb file: If the download was interrupted or incomplete, the
.debfile might be corrupted. Try downloading it again from the source.
By understanding these methods and best practices, you can confidently install a wider range of software on your Ubuntu system, enhancing your productivity and customization options. Whether you prefer the simplicity of the GUI or the power of the command line, Ubuntu provides the tools to make .deb installations a breeze.