
In the dynamic world of technology, where operating systems and bootable media are foundational to almost every digital endeavor, tools that streamline these processes become indispensable. For users navigating the versatile landscape of Linux, particularly Ubuntu, the need to create reliable bootable USB drives or flash SD cards for single-board computers like the Raspberry Pi is a frequent occurrence. This is where BalenaEtcher steps in – a powerful, open-source, and remarkably user-friendly utility designed to make the disk imaging process as simple and foolproof as possible.
BalenaEtcher has distinguished itself as a preferred choice among developers, hobbyists, and everyday tech enthusiasts alike due to its intuitive interface, robust validation features, and cross-platform compatibility. Whether you’re aiming to install a new Linux distribution, revive a malfunctioning system with a recovery disk, or flash an operating system onto an SD card for an IoT project, Etcher provides a seamless experience, minimizing common errors and ensuring the integrity of your media. For the Ubuntu user, integrating such a vital tool into their workflow is a significant step towards enhanced productivity and greater control over their computing environment.
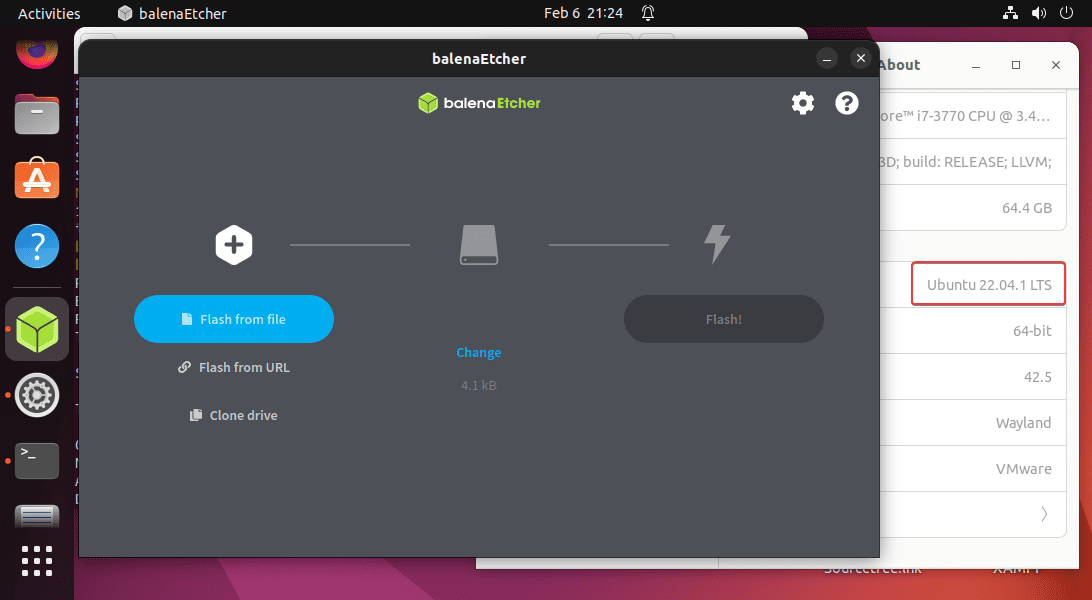
This comprehensive guide will walk you through the process of installing BalenaEtcher on Ubuntu, offering detailed instructions for two primary methods: leveraging the official APT repository for ongoing updates and utilizing the portable AppImage for flexibility. Beyond installation, we’ll delve into understanding why BalenaEtcher is so highly regarded, how to verify its successful setup, and even touch upon basic usage and troubleshooting tips. By the end of this article, you’ll not only have BalenaEtcher up and running on your Ubuntu system but also a deeper appreciation for the role such precise tools play in modern digital security and efficiency.
Understanding BalenaEtcher and Its Pivotal Role
Before diving into the installation process, it’s crucial to understand what BalenaEtcher is and why it has become such a cornerstone tool for anyone dealing with bootable media. BalenaEtcher, often simply called Etcher, is a free and open-source utility developed by Balena (formerly Resin.io). Its core function is to flash OS images to SD cards and USB drives reliably and safely.
The journey of digital exploration often begins with flashing an operating system. Consider a scenario where you want to try out a new Linux distribution like Fedora or Pop!_OS without modifying your existing Ubuntu installation. You’d need to create a bootable USB drive. Similarly, if you’re venturing into the world of single-board computers like the Raspberry Pi, you’ll need to flash its operating system (like Raspberry Pi OS) onto an SD card to get it running. Traditional methods involving dd commands in the terminal can be powerful but also perilous if not executed with extreme caution, as a single typo could overwrite your hard drive.
BalenaEtcher addresses these concerns with several key features:
- User-Friendly Interface: Its minimalist, step-by-step graphical user interface (GUI) makes the process incredibly straightforward. You select the image, select the drive, and then flash – it’s that simple. This eliminates the steep learning curve associated with command-line tools, making it accessible even for beginners.
- Image Validation: One of Etcher’s standout features is its built-in image validation. After flashing, it automatically verifies the written data against the source image. This critical step ensures that the bootable media is not corrupted and will function as expected, saving users countless hours of troubleshooting failed boots. This focus on data integrity is a major productivity booster, reducing frustrating trial-and-error cycles.
- Safe Drive Selection: Etcher goes to great lengths to prevent accidental overwrites of system drives. It intelligently detects and lists only external storage devices, making it difficult to accidentally select your primary hard drive. This robust safety mechanism is invaluable for preventing data loss.
- Cross-Platform Compatibility: BalenaEtcher is available for Windows, macOS, and Linux, ensuring a consistent experience across different operating systems. This consistency is beneficial for users who work in multi-OS environments.
- Open Source: Being open source means its code is publicly available for scrutiny, contributing to transparency, community development, and trust.
In the context of digital security, using a reliable flashing tool like Etcher also indirectly contributes to a safer computing environment. By ensuring that your bootable media is correctly written and validated, you reduce the risk of introducing corrupted or maliciously altered images onto your systems. For developers and tech enthusiasts, this level of reliability translates directly into higher productivity and less downtime spent on debugging faulty installations.
Prerequisites for a Smooth Installation
Before we embark on the installation journey, ensuring your Ubuntu system is prepared will help prevent potential hiccups. These prerequisites are generally simple but crucial for a seamless experience.
- An Ubuntu System: This guide is specifically tailored for Ubuntu. While the general steps might apply to other Debian-based distributions, specific commands or repository configurations might differ slightly. Ensure your Ubuntu installation is up-to-date for the best compatibility.
- Internet Connection: You’ll need an active internet connection to download the BalenaEtcher package, its repository key, or the AppImage file.
- Administrative Privileges (sudo): Installing software on Linux typically requires
sudo(superuser do) privileges to modify system files and install packages. You’ll be prompted for your user password when executingsudocommands. - Basic Terminal Knowledge: While Etcher itself is GUI-based, its installation often involves using the command line (Terminal). Familiarity with basic commands like
sudo,apt update,apt install,wget,chmod, andcdwill be beneficial. Don’t worry if you’re a beginner; we’ll provide the exact commands you need. - Sufficient Disk Space: BalenaEtcher is not a large application, but ensure you have a few hundred MBs of free space for the application and its dependencies. This is usually not an issue on modern systems.
By checking these boxes, you’ll set yourself up for a straightforward installation process, allowing you to quickly move on to creating your first bootable media.
Method 1: Installing BalenaEtcher via APT Repository (Recommended)
For most Ubuntu users, installing BalenaEtcher via its official APT (Advanced Package Tool) repository is the recommended approach. This method integrates Etcher directly into your system’s package management, allowing for easy updates alongside your other system software. It ensures you receive official, validated builds and keeps your installation current with minimal effort.
1. Adding BalenaEtcher’s Repository Key
The first step in using an external APT repository is to add its GPG (GNU Privacy Guard) key to your system. This key is used to verify the authenticity of the packages downloaded from the repository. It ensures that the software you’re installing genuinely comes from Balena and hasn’t been tampered with by a third party, enhancing your digital security.
Open your terminal (you can usually find it by searching for “Terminal” in your applications menu or by pressing Ctrl + Alt + T). Then execute the following command:
sudo apt-key adv --keyserver hkps://keyserver.ubuntu.com:443 --recv-keys 379CE192D401AB61
sudo: Grants administrative privileges for the command.apt-key adv: A utility for managing APT keys.--keyserver hkps://keyserver.ubuntu.com:443: Specifies the key server to retrieve the public key from, using a secure HTTPS connection.--recv-keys 379CE192D401AB61: Instructs the system to retrieve the specific GPG key ID associated with BalenaEtcher’s repository.
You might be asked for your user password. Type it in and press Enter. There might be a slight delay as the key is fetched. If you encounter issues with apt-key adv, especially on newer Ubuntu versions, an alternative method involving curl can be used:
curl -1sLf 'https://dl.cloudsmith.io/public/balena/etcher/gpg.DEB.key' | sudo gpg --dearmor -o /usr/share/keyrings/balena-etcher.gpg
This command directly downloads the GPG key and stores it in the /usr/share/keyrings/ directory, which is a modern and more secure way to manage keys in APT. If you use this curl method, you’ll need to adjust the repository command in the next step slightly to reference this keyring.
2. Adding the BalenaEtcher APT Repository
Once the GPG key is in place, you need to tell your Ubuntu system where to find the BalenaEtcher packages. This is done by adding the repository’s URL to your system’s software sources.
Execute the following command in your terminal:
echo "deb [arch=amd64 signed-by=/usr/share/keyrings/balena-etcher.gpg] https://dl.balena-cloud.io/etcher/deb stable etcher" | sudo tee /etc/apt/sources.list.d/balena-etcher.list
Let’s break this down:
echo "...“: This command prints the repository line.deb [arch=amd64 signed-by=/usr/share/keyrings/balena-etcher.gpg]: Specifies that this is a Debian package (deb), designed for 64-bit architecture (amd64), and its packages are signed by the GPG key stored at/usr/share/keyrings/balena-etcher.gpg. This assumes you used thecurlmethod to add the key. If you usedapt-key adv, you might omitsigned-by=/usr/share/keyrings/balena-etcher.gpgor refer to the key directly if your system requires it.https://dl.balena-cloud.io/etcher/deb stable etcher: This is the actual URL of the BalenaEtcher repository.stablerefers to the release channel, andetcheris the component name.| sudo tee /etc/apt/sources.list.d/balena-etcher.list: This pipes the output of theechocommand into theteecommand, which then writes it to a new file namedbalena-etcher.listinside/etc/apt/sources.list.d/. This directory is where APT looks for additional software repositories.
This command effectively adds a new line to your system’s software sources, pointing to the BalenaEtcher repository.
3. Updating Package Lists and Installing BalenaEtcher
With the repository and its key configured, your system now knows where to find BalenaEtcher. The final step is to update your package lists to reflect the newly added repository and then install the application.
Run these two commands sequentially:
sudo apt update
sudo apt install balena-etcher
sudo apt update: This command refreshes your system’s package index, downloading the latest information about available packages from all configured repositories, including the newly added BalenaEtcher one. It’s crucial for your system to “see” Etcher.sudo apt install balena-etcher: Once the package lists are updated, this command tells APT to download and install thebalena-etcherpackage. The system will prompt you to confirm the installation and any additional dependencies. TypeYand press Enter to proceed.
After the installation completes, BalenaEtcher will be available in your applications menu. This method ensures that future system updates (sudo apt update && sudo apt upgrade) will also automatically check for and install newer versions of BalenaEtcher, keeping your tool current with minimal manual intervention – a significant benefit for long-term productivity and digital security.
Method 2: Installing BalenaEtcher via AppImage (Portable/Alternative)
While the APT repository method is generally recommended for its ease of updates, there might be situations where you prefer a portable solution or don’t want to add extra repositories to your system. In such cases, the BalenaEtcher AppImage is an excellent alternative. An AppImage is a universal Linux software package that runs on most Linux distributions without needing explicit installation or dealing with package dependencies. It’s self-contained and highly portable.
1. Downloading the AppImage
First, you need to download the BalenaEtcher AppImage file from the official Balena website. Always download software from official sources to ensure authenticity and prevent malware.
Open your web browser and navigate to: https://www.balena.io/etcher
On the website, locate the download section and choose the “Linux x64 (AppImage)” option. The file will typically be named something like balenaEtcher-X.Y.Z-x64.AppImage, where X.Y.Z represents the version number.
Alternatively, you can download it directly from the terminal using wget. Before doing so, you might want to quickly check the latest version number on their website. For example, if the latest version is 1.18.11, you would use:
wget https://github.com/balena-io/etcher/releases/download/v1.18.11/balenaEtcher-1.18.11-x64.AppImage -P ~/Downloads/
wget: A command-line utility for retrieving content from web servers.https://github.com/balena-io/etcher/releases/download/v1.18.11/balenaEtcher-1.18.11-x64.AppImage: The direct download URL for a specific version. Remember to replacev1.18.11and1.18.11with the actual latest version available.-P ~/Downloads/: Specifies the directory to save the file. In this case, it saves it to yourDownloadsfolder.
2. Making the AppImage Executable
Once downloaded, the AppImage file usually doesn’t have execute permissions by default. You need to grant these permissions to run it.
Open your terminal and navigate to the directory where you downloaded the AppImage (e.g., cd ~/Downloads/). Then, execute the following command:
chmod +x balenaEtcher-X.Y.Z-x64.AppImage
chmod +x: Changes the file permissions to make the file executable.balenaEtcher-X.Y.Z-x64.AppImage: Replace this with the actual filename you downloaded.
3. Running BalenaEtcher from AppImage
With the execute permissions granted, you can now run BalenaEtcher directly from the AppImage file.
From the terminal in the same directory:
./balenaEtcher-X.Y.Z-x64.AppImage
Again, replace balenaEtcher-X.Y.Z-x64.AppImage with the correct filename.
Alternatively, if you prefer using the graphical interface, you can navigate to the directory where you saved the AppImage using your file manager (e.g., Nautilus), right-click the file, and select “Run” or “Open.” On some systems, you might need to right-click -> Properties -> Permissions tab, and then check “Allow executing file as program.”
The AppImage method is great for quick use, testing, or environments where persistent installation isn’t desired. The main drawback is that it doesn’t automatically update. To get a newer version, you’ll need to download the latest AppImage and repeat the permission steps. However, for a tool that might not be updated daily, this is a perfectly viable and secure approach.
Verifying the Installation and First Launch
Regardless of whether you installed BalenaEtcher via the APT repository or used the AppImage, it’s a good practice to verify the installation and perform a first launch to ensure everything is working correctly.
For APT Installation:
- Search in Applications: Click on the “Activities” overview (or your distribution’s equivalent application launcher) and search for “Etcher” or “BalenaEtcher.” You should see an icon for the application.
- Launch: Click on the icon to launch BalenaEtcher.
- Check Version (Optional): Once Etcher loads, you can often find the version number in the “About” section (usually accessible via a gear icon or the application menu).
For AppImage:
Simply execute the AppImage file as described in Method 2, step 3. If it launches, the verification is successful.
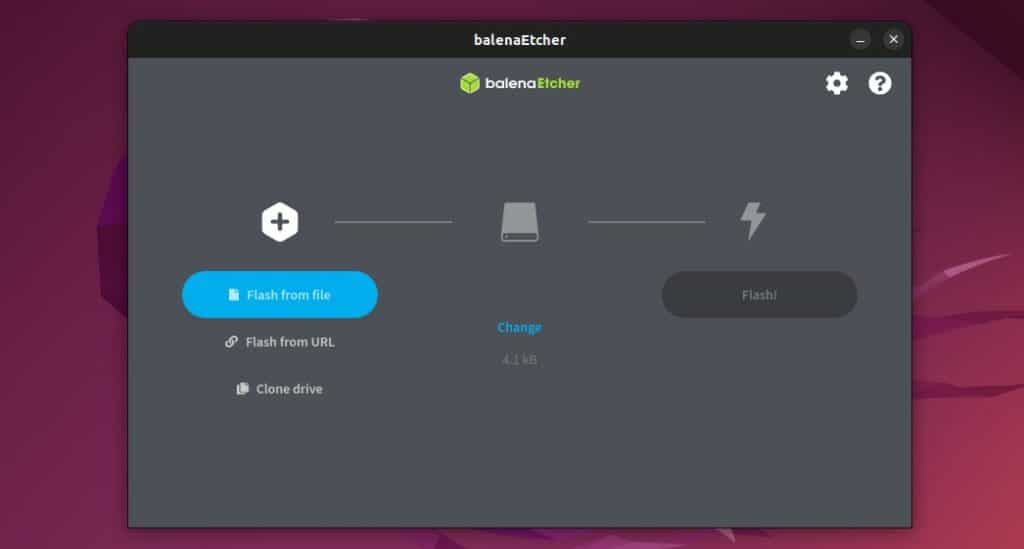
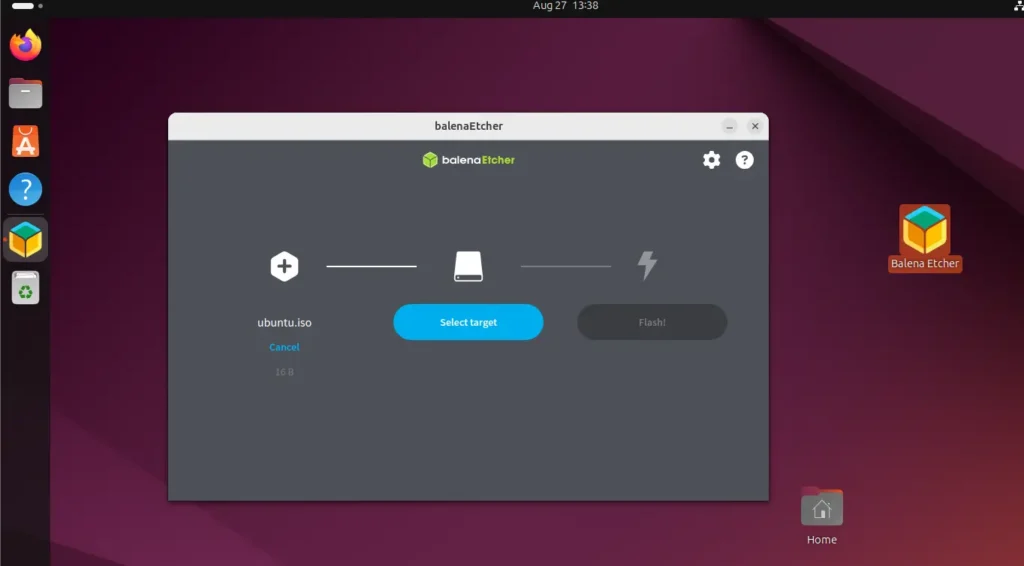
Upon successful launch, you’ll be greeted by BalenaEtcher’s clean and intuitive interface, typically featuring three main steps: “Flash from file,” “Select target,” and “Flash!” This visual confirmation signifies that the tool is ready for use. Take a moment to familiarize yourself with the layout. The simplicity of the interface is a testament to its design philosophy – making complex tasks straightforward and secure.
Using BalenaEtcher: A Quick Overview
Now that BalenaEtcher is installed and verified, let’s briefly touch upon its basic usage. The process is designed to be self-explanatory:
- Select Image (Flash from file): Click the “Flash from file” button and navigate to the
.iso,.img,.zip, or other compressed image file you wish to flash. This could be an Ubuntu ISO, a Raspberry Pi OS image, or a recovery image. - Select Target (Select target): Plug in your USB drive or SD card. Etcher will usually detect it automatically. Click “Select target” and carefully choose the correct drive. Exercise extreme caution here. Etcher tries to prevent you from selecting your main system drives, but it’s always good to double-check to avoid accidentally wiping important data.
- Flash! (Flash!): Once both the image and target are selected, the “Flash!” button will become active. Click it to begin the flashing process. Etcher will ask for your administrator password to proceed (as writing to drives requires elevated privileges).
Etcher will then perform three stages: Writing, Validating, and Finalizing. The validation stage is particularly important as it ensures the integrity of the written data. Once complete, you’ll receive a success message, and your bootable media will be ready for use.
Troubleshooting Common Issues
While BalenaEtcher is generally reliable, you might occasionally encounter minor issues. Here are some common problems and their solutions:
- “Permission Denied” When Running AppImage: This usually means you haven’t made the AppImage executable. Go back to Method 2, Step 2, and use
chmod +xon the file. - “balena-etcher not found” after
apt update: Double-check that you correctly added the GPG key and the repository line. A typo in either command will prevent APT from finding the package. Re-run the commands from Method 1, Steps 1 and 2 carefully. - Etcher doesn’t launch after APT installation:
- Ensure your system is fully updated:
sudo apt update && sudo apt upgrade. - Check for any error messages in the terminal if you try to launch it from there (e.g.,
balena-etcher). - Reinstall Etcher:
sudo apt remove balena-etcher && sudo apt install balena-etcher.
- Ensure your system is fully updated:
- Flashing fails or results in a non-bootable drive:
- Bad Image: The downloaded image file might be corrupted. Re-download it and verify its checksum (if provided by the source) to ensure integrity.
- Faulty USB/SD Card: The target media itself might be damaged or faulty. Try using a different USB drive or SD card.
- Power Issues: Ensure your computer has stable power during the flashing process, especially for large images.
- USB Port: Try a different USB port.
- “No removable devices found”: Ensure your USB drive or SD card reader is properly connected and detected by your system (e.g., check
lsblkin the terminal).
For more complex issues, the BalenaEtcher GitHub repository or user forums can be excellent resources for community support and bug reporting.
Maintaining and Updating BalenaEtcher
Keeping your software up-to-date is crucial for security, performance, and accessing new features.
- APT Installation: If you installed BalenaEtcher using the APT repository, updating is effortless. It will be updated automatically whenever you perform a standard system update:
bash

sudo apt update

sudo apt upgrade
This ensures you always have the latest stable version of Etcher without manual intervention. - AppImage Installation: For AppImage users, updates are manual. You will need to periodically visit the official BalenaEtcher website, download the latest AppImage file, and repeat the steps of making it executable. You can then delete the older AppImage file. While more manual, this gives you full control over when to update.
Conclusion
Installing BalenaEtcher on Ubuntu is a straightforward process that equips you with an incredibly powerful and reliable tool for creating bootable USB drives and flashing SD cards. Whether you opt for the convenience of the APT repository installation for seamless updates or the portability of the AppImage, you’re investing in a utility that enhances your productivity and digital security by ensuring precise and validated disk imaging.
In an era where exploring new operating systems, developing for IoT devices, or simply having a reliable recovery media is a common necessity, BalenaEtcher stands out as an essential component in any tech-savvy individual’s toolkit. Its intuitive design simplifies complex operations, making advanced system management accessible to everyone from seasoned developers to curious beginners.
By following the steps outlined in this guide, you’ve not only gained a valuable application but also a deeper understanding of Linux package management and the importance of secure software practices. Go forth and create, experiment, and explore the vast possibilities that reliable bootable media unlocks, all powered by the robust capabilities of BalenaEtcher on your Ubuntu system. Happy flashing!
aViewFromTheCave is a participant in the Amazon Services LLC Associates Program, an affiliate advertising program designed to provide a means for sites to earn advertising fees by advertising and linking to Amazon.com. Amazon, the Amazon logo, AmazonSupply, and the AmazonSupply logo are trademarks of Amazon.com, Inc. or its affiliates. As an Amazon Associate we earn affiliate commissions from qualifying purchases.