
In the fast-paced digital world, efficiency is paramount. From data entry and software testing to gaming and even simply navigating complex interfaces, repetitive mouse clicks can quickly become a tedious and time-consuming burden. This is where an auto clicker emerges as an invaluable tool, designed to automate these mundane actions and liberate your time for more strategic tasks. For anyone looking to enhance their digital productivity or streamline repetitive operations, understanding how to properly select, install, and configure an auto clicker is a fundamental skill.
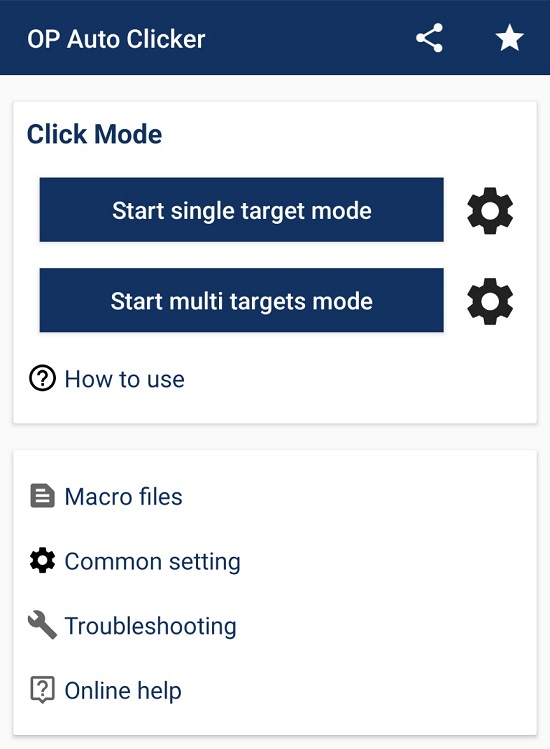
This guide will walk you through everything you need to know about setting up an auto clicker, covering critical aspects such as choosing the right software, navigating the installation process across different operating systems, and understanding the ethical considerations of its use. By the end, you’ll be equipped to integrate this powerful piece of software into your workflow, transforming repetitive clicks into automated efficiency and embracing a smarter approach to your digital interactions.
Understanding Auto Clickers: Features, Benefits, and Ethical Considerations
Before diving into the installation process, it’s crucial to grasp what an auto clicker is, its potential benefits, and the responsibilities that come with its use. This understanding will help you make informed decisions and leverage the technology effectively and ethically.
What Exactly is an Auto Clicker?
At its core, an auto clicker is a software utility that automates mouse clicks. Instead of manually clicking your mouse thousands of times, an auto clicker can be programmed to perform these clicks at a specified interval, location, and for a set duration or number of repetitions. These tools range from simple applications that only perform basic single clicks to advanced programs capable of recording complex click sequences, moving the cursor, and even integrating with keyboard inputs to simulate a user’s full interaction with an interface.
They typically operate in the background, executing commands based on user-defined parameters such as:
- Click Interval: The delay between each click (e.g., every 10 milliseconds, every 5 seconds).
- Click Type: Left, right, or middle mouse button.
- Click Option: Single click or double click.
- Click Location: Fixed coordinates on the screen, or wherever the mouse cursor currently resides.
- Repetition: A specific number of clicks, or continuous clicking until stopped manually.
- Hotkeys: Keyboard shortcuts to start, stop, or pause the auto clicker.
Why Use an Auto Clicker? Real-World Applications
The utility of an auto clicker extends across various domains, offering significant productivity boosts and convenience.
-
Enhancing Productivity in Professional Settings: For tasks involving extensive data entry, repetitive form filling, or routine software testing, an auto clicker can drastically reduce manual effort and human error. Imagine needing to click through hundreds of checkboxes or confirm countless dialogue boxes; an auto clicker handles this with unwavering precision and speed. It can also be invaluable for quality assurance engineers needing to simulate rapid user interactions to stress-test applications. This aligns perfectly with the “Productivity” aspect of technology, allowing individuals and teams to focus on higher-value activities.
-
Streamlining Gaming Experiences: In certain types of games, particularly idle games, clicker games, or those requiring rapid button mashing, auto clickers can provide a significant advantage or simply automate tedious grinding. While controversial in competitive gaming, for single-player experiences or specific genres, they can enhance enjoyment by bypassing repetitive mechanics. However, this is where ethical considerations become critical.
-
Improving Accessibility and Ergonomics: For individuals with physical limitations or conditions like carpal tunnel syndrome, repetitive clicking can be painful or impossible. An auto clicker offers an accessibility solution, enabling them to interact with computers without discomfort, promoting inclusivity in technology use. It reduces strain and repetitive stress injuries, contributing to better digital well-being.
-
Automating Web Interactions: Beyond desktop applications, auto clickers can also automate interactions on web pages, such as repeatedly refreshing a page, clicking “next” through galleries, or interacting with elements that require frequent clicks. This makes certain web-based research or monitoring tasks more efficient.
Navigating the Ethical Landscape
While the benefits are clear, the use of auto clickers also comes with a significant ethical dimension that users must consider. Misuse can lead to negative consequences, both for the individual and the wider digital ecosystem.
- Terms of Service Violations: Many online games, services, and platforms explicitly prohibit the use of automation tools like auto clickers. Violating these terms can result in account suspension, bans, or other penalties. It’s crucial to review the terms of service of any application or game before using an auto clicker with it.
- Fair Play and Competitive Integrity: In multiplayer or competitive environments, using an auto clicker provides an unfair advantage, undermining the spirit of competition and potentially ruining the experience for other players. This can damage your “personal brand” within a community and lead to a negative reputation.
- Security Risks and Malware: The allure of a free auto clicker can sometimes lead users to download software from untrusted sources, which may bundle malware, adware, or viruses. This compromises your digital security, potentially leading to data breaches or system damage. Always prioritize downloading from reputable sources.
- Over-reliance and Skill Erosion: While automation is beneficial, an over-reliance on auto clickers for tasks that genuinely require human interaction or skill development can hinder learning and the development of manual dexterity or strategic thinking.
Responsible use dictates that auto clickers should primarily be employed for legitimate productivity enhancements, accessibility support, and personal convenience in single-player, non-competitive, or explicitly permitted scenarios.
Choosing the Right Auto Clicker: Key Factors for a Secure and Efficient Tool
The market offers a plethora of auto clicker software, ranging from basic free utilities to feature-rich premium applications. Selecting the right one is crucial for a smooth and secure experience. This section guides you through the factors to consider.
Identifying Your Needs
Before you even start searching, clarify what you need an auto clicker to do. This will narrow down your options significantly.
-
Basic vs. Advanced Features: Do you just need simple, rapid clicks at a fixed point, or do you require more sophisticated capabilities? Advanced features include:
- Multiple Click Points: The ability to click at various pre-defined locations on the screen.
- Macro Recording: Recording a sequence of mouse movements and clicks, and even keyboard inputs, for complex automation.
- Conditional Clicking: Clicking based on specific screen conditions (e.g., color detection).
- Custom Hotkeys: More extensive keyboard shortcuts for controlling the software.
- Configurable Intervals: Precise control over delays, sometimes even randomized delays to mimic human behavior.
- Portable vs. Installable: Some auto clickers run directly from an executable file without installation, which can be convenient for temporary use or restricted environments.
-
Operating System Compatibility: Most auto clickers are designed for Windows, but many reliable options exist for macOS, and a few for Linux. Mobile platforms (Android/iOS) typically require specialized apps from their respective app stores, and full functionality might require device rooting or jailbreaking, which carries its own risks. Ensure the software you choose supports your operating system.
Free vs. Paid Solutions
Your budget and feature requirements will often dictate whether you opt for a free or paid auto clicker.
- Free Auto Clickers:
- Pros: Cost-effective, often open-source (allowing community review and improvement), and sufficient for basic needs. Many popular options like OP Auto Clicker, GS Auto Clicker, and Auto Click Typer fall into this category.
- Cons: May lack advanced features, receive less frequent updates, have limited or no official support, and sometimes come bundled with adware (if downloaded from untrusted sites) or display ads within the application.
- Paid Auto Clickers:
- Pros: Generally offer a broader range of advanced features, dedicated customer support, regular updates, a cleaner user interface, and often guarantee a malware-free experience. They are typically aimed at users with specific, complex automation requirements.
- Cons: Involve an upfront cost or subscription fee, which might be overkill for simple tasks.
For most users, a reputable free auto clicker will suffice. Only consider paid options if your needs are highly specialized and justify the investment.
Prioritizing Safety and Reputation
This is arguably the most critical factor. Downloading software from unknown sources is a leading cause of malware infections. Given that auto clickers interact deeply with your operating system, caution is paramount. This directly ties into “Digital Security” from the website’s tech topics.
- Source Reliability: Always download auto clickers from official developer websites, well-known software repositories (like GitHub for open-source projects), or highly reputable download portals (e.g., FileHippo, Softpedia – though always exercise caution). Avoid obscure websites, pop-up ads promising “free downloads,” or torrent sites, which are notorious vectors for malicious software.
- User Reviews and Community Feedback: Before downloading, search for reviews, forum discussions, and community feedback about the specific auto clicker. Look for consistent positive feedback regarding functionality, ease of use, and, most importantly, safety. Pay attention to any reports of malware or suspicious behavior.
- Malware Scans: Even from a seemingly reputable source, it’s good practice to scan any downloaded executable file with your antivirus software before running it. Tools like VirusTotal can provide a second opinion by scanning the file with multiple antivirus engines.
- Permissions: Be mindful of the permissions an auto clicker requests during installation or when you first run it. It should generally only need access to input devices (mouse, keyboard) and potentially system-level control for automation. Excessive permission requests should be a red flag.
By carefully considering these factors, you can select an auto clicker that meets your functional requirements while safeguarding your system and data.
Step-by-Step Installation Guide Across Platforms
The installation process for an auto clicker is generally straightforward, but it varies slightly depending on your operating system and the specific software. We’ll cover the most common platforms: Windows and macOS.
General Installation Principles
Regardless of the operating system, the basic flow for installing most auto clickers involves:
- Downloading the software: Obtaining the installation file from a trusted source.
- Running the installer/application: Executing the downloaded file.
- Following on-screen prompts: Accepting terms, choosing installation directories, etc.
- Initial setup/permissions: Configuring basic settings and granting necessary system permissions (especially on macOS).
Installing on Windows
Windows is the most common platform for auto clickers, with a wide array of options available. We’ll use a generic approach applicable to most.
-
Download the Auto Clicker:
- Navigate to the official website of your chosen auto clicker (e.g., “OP Auto Clicker official website” or search for “GS Auto Clicker download”).
- Locate the download link, often labeled “Download,” “Free Download,” or “Latest Version.”
- Click the link to download the
.exefile (executable installer) or a.zipfile if it’s a portable version. - Safety Check: After downloading, it’s highly recommended to right-click the downloaded file and select “Scan with [Your Antivirus Software]” or upload it to VirusTotal.
-
Run the Installer (for non-portable versions):
- Locate the downloaded
.exefile, usually in your “Downloads” folder. - Double-click the
.exefile to start the installation wizard. - User Account Control (UAC): Windows might ask, “Do you want to allow this app to make changes to your device?” Click “Yes.”
- Follow the Wizard:
- License Agreement: Read and accept the terms and conditions if you agree.
- Choose Installation Location: The default location (e.g.,
C:Program FilesAuto Clicker) is usually fine. You can change it if you prefer. - Create Start Menu/Desktop Shortcut: Select these options for easy access.
- Complete Installation: Click “Install” or “Next” until the process finishes.
- Launch: Often, there’s an option to “Launch Auto Clicker” immediately after installation.
- Locate the downloaded
-
Using a Portable Version:
- If you downloaded a
.zipfile containing a portable version, extract its contents to a folder of your choice (e.g., a new folder on your desktop or in your Program Files). - Inside the extracted folder, you’ll find the auto clicker’s executable file (e.g.,
autoclicker.exe). Double-click this to run the program directly without installation. This is useful for temporary use or if you want to avoid installing software on your system.
- If you downloaded a
-
Post-Installation (Windows Defender/Antivirus):
- Occasionally, Windows Defender or your third-party antivirus might flag an auto clicker as potentially unwanted software (PUP) or a generic threat, even if it’s legitimate. This is often a false positive because auto clickers interact at a low level with your system, mimicking malicious software behavior.
- If you’re confident you downloaded from a trusted source, you might need to “Allow” the application through your antivirus or “Add an exclusion.” Exercise caution and only do this if you are absolutely certain of the software’s legitimacy.
Installing on macOS
Installing auto clickers on macOS involves slightly different steps, primarily due to Apple’s robust security features.
-
Download the Auto Clicker for Mac:
- Find a macOS-compatible auto clicker (e.g., “Speed Auto Clicker for Mac,” “Auto Clicker for Mac by MurGaa” – note some require payment).
- Download the
.dmg(disk image) file, which is common for macOS applications. - Safety Check: Similar to Windows, scan the downloaded
.dmgfile for malware.
-
Install the Application:
- Double-click the downloaded
.dmgfile. This will mount it as a virtual drive and open a window. - Inside this window, you’ll typically see the application icon (e.g., “Auto Clicker.app”) and an alias to your “Applications” folder.
- Drag the “Auto Clicker.app” icon into the “Applications” folder alias. This copies the application to your Applications directory.
- After copying, you can eject the
.dmgfrom your sidebar.
- Double-click the downloaded
-
Granting Accessibility Permissions (Crucial for macOS):
- This is the most critical step for auto clickers on macOS. Due to security restrictions, applications cannot control your mouse and keyboard without explicit permission.
- Launch the Auto Clicker: Go to your “Applications” folder and double-click the auto clicker to launch it.
- Security Warning: macOS will likely display a warning: “Auto Clicker.app is an application downloaded from the internet. Are you sure you want to open it?” Click “Open.”
- Accessibility Prompt: The auto clicker will then likely prompt you that it needs “Accessibility” permissions to function.
- Go to System Settings (or System Preferences on older macOS):
- Click on the Apple menu (top-left corner) > “System Settings” (or “System Preferences”).
- Navigate to “Privacy & Security” > “Accessibility.”
- You’ll see a list of applications. Locate your auto clicker in the list.
- Click the lock icon at the bottom-left to make changes (you’ll need to enter your password or use Touch ID).
- Check the box next to your auto clicker’s name to grant it Accessibility permissions.
- If the auto clicker isn’t listed, you might need to click the ‘+’ button, navigate to your Applications folder, and add it manually.
- Restart the Auto Clicker: Close and relaunch the auto clicker for the permissions to take effect.
-
Gatekeeper Warning: If you downloaded the app from outside the Mac App Store, macOS Gatekeeper might block it initially. To bypass this, after attempting to open it once, go to “System Settings” > “Privacy & Security.” You should see a message stating the app was blocked, with an option to “Open Anyway.”
Other Platforms (Briefly)
- Linux: Auto clickers on Linux are often open-source projects. Installation typically involves using a package manager (e.g.,
sudo apt install xdotoolfor command-line tools orsudo snap install [app-name]for Snap packages) or compiling from source. Graphical tools also exist, often distributed as AppImages or through specific repositories. - Android/iOS: On mobile, auto clickers are usually apps downloaded from the Google Play Store or Apple App Store. Search for “auto clicker” or “tap assistant.” Be aware that fully functional auto clickers that can interact with any app may require rooting (Android) or jailbreaking (iOS), which can void warranties and pose significant security risks. Stick to official app store options designed for accessibility or specific game automation if you want to avoid these risks.
Initial Configuration and Mastering Your Auto Clicker
Once installed, the next step is to configure your auto clicker to meet your specific needs. While interfaces vary, most auto clickers share common configuration options.
Basic Settings to Optimize
These are the fundamental parameters you’ll adjust to get your auto clicker operational:
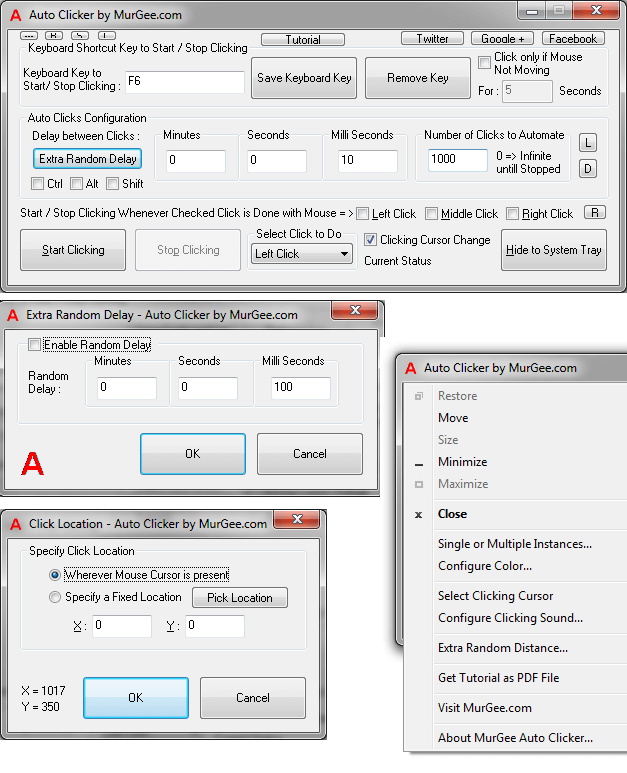
- Click Interval (Delay): This is perhaps the most crucial setting. It determines how fast your auto clicker clicks. Measured in milliseconds, seconds, minutes, or even hours. Start with a conservative interval (e.g., 100-200ms) and gradually decrease it if needed. Be mindful that excessively fast clicks can sometimes freeze applications or be detected by anti-cheat systems.
- Click Type: Select whether the auto clicker should perform a Left, Right, or Middle mouse click. Default is usually Left.
- Click Options: Choose between a single click or a double click per action.
- Click Location:
- Current Cursor Position: The auto clicker will click wherever your mouse cursor currently is. This is flexible but requires you to keep your cursor in place.
- Fixed Position: You define specific X and Y coordinates on your screen where the clicks should occur. This is ideal for automating clicks on unchanging interface elements. Most auto clickers offer a “Pick Location” or “Record Location” button where you can move your mouse to the desired spot and press a hotkey to capture its coordinates.
- Repetition:
- Repeat X times: Set a specific number of clicks (e.g., 1000 clicks).
- Repeat Until Stopped: The auto clicker will continue clicking indefinitely until you manually stop it.
- Hotkeys: Assign keyboard shortcuts to start and stop the auto clicker. This allows you to quickly activate or deactivate the automation without interacting with the software’s window. Choose combinations that don’t conflict with other applications (e.g.,
F6,Ctrl+Shift+Z).
Advanced Features (Briefly)
Many auto clickers, especially the more sophisticated ones, offer additional features that can expand their utility:
- Macro Recording: Record a sequence of mouse movements, clicks, and keyboard presses, then play them back on loop. This is powerful for complex, multi-step automations.
- Multiple Click Points: Set up several distinct fixed click locations, and the auto clicker will cycle through them.
- Randomization: Introduce slight random delays or cursor movements to make the clicks appear more “human-like,” which can be useful in certain contexts to avoid detection.
- Scheduler: Program the auto clicker to start or stop at specific times.
Testing Your Setup
Once you’ve configured your settings, perform a simple test to ensure everything works as expected:
- Open a text editor or a blank document.
- Position your mouse cursor where you want the clicks to occur (or ensure your fixed point is active).
- Activate the auto clicker using your assigned hotkey.
- Observe the clicks appearing in the text editor or on the screen.
- Deactivate the auto clicker with your stop hotkey.
Adjust the interval and other settings as needed based on your test results until you achieve the desired behavior.
Conclusion
The auto clicker, a deceptively simple piece of software, offers a potent solution for enhancing digital productivity and reducing the tedium of repetitive tasks. By automating routine mouse clicks, it frees up valuable time and effort, allowing users to focus on more complex and engaging aspects of their work or leisure. Whether you’re a professional navigating endless data entries, a tester rigorously validating software interfaces, or simply seeking to improve accessibility, an auto clicker is a powerful addition to your tech toolkit.
However, power comes with responsibility. The key to truly benefiting from an auto clicker lies not just in its installation and configuration, but in its judicious and ethical deployment. Always prioritize downloading from reputable sources to safeguard your digital security, respect terms of service, and consider the implications of automation in competitive environments. When used wisely, an auto clicker is more than just a convenience; it’s a smart investment in your personal efficiency and digital well-being, enabling you to work smarter, not harder, in the ever-evolving landscape of technology.
aViewFromTheCave is a participant in the Amazon Services LLC Associates Program, an affiliate advertising program designed to provide a means for sites to earn advertising fees by advertising and linking to Amazon.com. Amazon, the Amazon logo, AmazonSupply, and the AmazonSupply logo are trademarks of Amazon.com, Inc. or its affiliates. As an Amazon Associate we earn affiliate commissions from qualifying purchases.