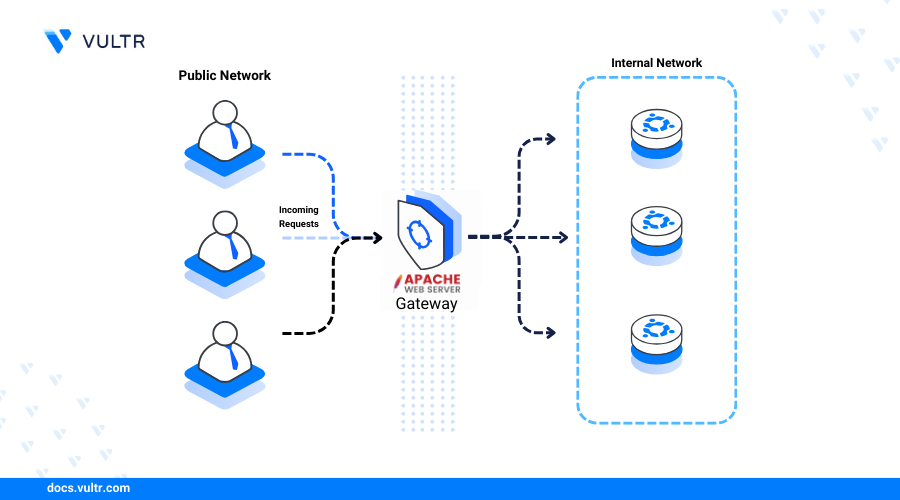
In today’s interconnected digital landscape, establishing a robust online presence is fundamental for individuals, developers, and businesses alike. At the core of many websites and web applications lies a powerful web server, diligently serving content to users across the globe. Among the pantheon of web servers, Apache HTTP Server stands out as a titan – a free, open-source, and highly versatile solution that has powered a significant portion of the internet since its inception.
This comprehensive guide is designed to walk you through the process of installing Apache on an Ubuntu server, one of the most popular and stable Linux distributions available. Whether you’re aiming to host a simple personal blog, a dynamic e-commerce platform, or a complex web application, getting Apache up and running on Ubuntu is a foundational step. We’ll cover everything from preparing your system to managing the Apache service and even delving into advanced configurations like virtual hosts. By the end of this tutorial, you’ll have a fully functional Apache web server, ready to bring your digital projects to life.
Preparing Your Ubuntu System for Apache Installation
Before we dive into the installation commands, it’s crucial to ensure your Ubuntu system is properly prepared. This involves verifying essential prerequisites and performing system updates to guarantee a smooth and secure installation process. Neglecting these initial steps can lead to compatibility issues, security vulnerabilities, or an unstable server environment down the line.
Essential Prerequisites: Ensuring a Smooth Start
To successfully install and run Apache on Ubuntu, you’ll need a few fundamental components in place. These prerequisites are standard for most server-side installations and lay the groundwork for a stable web hosting environment.
First and foremost, you’ll need an Ubuntu server or desktop installation. While the steps outlined here are primarily tailored for a server environment (which typically runs without a graphical user interface), they are largely applicable to a desktop installation as well. For production environments, a server installation is generally preferred due to its reduced resource footprint and enhanced security. Ensure your Ubuntu system is already installed and accessible, either directly or via SSH (Secure Shell) if it’s a remote server.
Secondly, you must have sudo privileges on the system. sudo stands for “superuser do” and allows a permitted user to execute commands as the root user, which is necessary for installing software and modifying system-wide configurations. If you are not logged in as the root user, ensure your current user account has been granted sudo access. Most Ubuntu installations provide this for the initial user created during setup.
Finally, a stable internet connection is vital. Apache and its dependencies will be downloaded from Ubuntu’s official package repositories. Without an active internet connection, the apt package manager will be unable to fetch the necessary files, halting the installation process. It’s also beneficial to have a basic understanding of using the command line (terminal), as all installation and configuration steps will be performed through it.
Updating Your System’s Package List: The First Critical Step
With your prerequisites confirmed, the very first command you should execute on any fresh or recently used Ubuntu system before installing new software is to update its package index. This ensures that your system is aware of the latest versions of packages and their dependencies, along with any critical security patches.
Open your terminal and run the following commands:
sudo apt update
sudo apt upgrade -y
Let’s break down what these commands do:
sudo apt update: This command downloads the latest package information from all configured repositories. It doesn’t install new software or upgrade existing ones, but rather refreshes the index of available packages, including their versions and dependencies. This is crucial for security, as it ensures you’re aware of the most recent security fixes and feature updates.sudo apt upgrade -y: After updating the package list, this command actually performs the upgrade. It compares the versions of installed packages with those listed in the updated index and upgrades any packages that have a newer version available. The-yflag automatically answers “yes” to any prompts, allowing the upgrade process to proceed without manual intervention. This step is vital for system stability and security, as it applies all the latest bug fixes and security patches, minimizing potential vulnerabilities that an older system might have. Running these commands regularly, especially before major installations, is a best practice for maintaining a healthy and secure Ubuntu environment.
Installing and Configuring the Apache Web Server
Once your Ubuntu system is fully updated and ready, the actual installation of Apache is remarkably straightforward. The apt package manager handles most of the heavy lifting, fetching the necessary files and setting up the basic configuration. However, simply installing Apache isn’t enough; you’ll also need to configure your firewall to allow web traffic and verify that the server is running as expected.
Installing Apache2: Bringing the Server Online
With the system prepared, installing Apache is a single, simple command. Ubuntu’s official repositories include the Apache HTTP Server package, conveniently named apache2.
Execute the following command in your terminal:
sudo apt install apache2 -y
Here’s what happens when you run this command:
sudo: Grants superuser privileges, allowing the installation of system-wide software.apt install apache2: This is the core command that tells theaptpackage manager to find and install theapache2package.aptwill automatically resolve any dependencies, meaning it will also install other necessary packages that Apache relies on to function correctly.-y: As before, this flag automatically confirms any prompts during the installation process, ensuring a non-interactive installation.
Upon successful completion, Apache will be installed on your system, and the apache2 service will typically start automatically. This means your web server is now technically running, but there’s one critical step remaining before it can serve web pages to external users: configuring the firewall.
Adjusting the Firewall: Opening the Gates for Web Traffic
Ubuntu systems often come with UFW (Uncomplicated Firewall) enabled or available. A firewall is a critical security component that controls incoming and outgoing network traffic, preventing unauthorized access to your server. By default, UFW might block all incoming connections, including those for HTTP and HTTPS traffic that Apache uses. Therefore, you must explicitly configure UFW to allow these connections.
First, check the available UFW application profiles that Apache registers upon installation:
sudo ufw app list
You should see output similar to this:
Available applications:
  Apache
  Apache Full
  Apache Secure
  OpenSSH
Let’s understand these profiles:
Apache: This profile opens port 80 (for unencrypted web traffic, HTTP).Apache Full: This profile opens both port 80 (HTTP) and port 443 (for encrypted web traffic, HTTPS).Apache Secure: This profile only opens port 443 (HTTPS).
For most initial setups, especially if you plan to implement SSL/TLS certificates later, Apache Full is the recommended choice. If you’re not planning on HTTPS immediately, Apache will suffice for basic testing.
To allow HTTP and HTTPS traffic, run:
sudo ufw allow 'Apache Full'
Next, ensure UFW is enabled and check its status:
sudo ufw enable
sudo ufw status
You’ll be asked to confirm enabling the firewall (type y and press Enter). The ufw status command will then show you which rules are active, confirming that traffic to ports 80 and 443 is allowed. Your firewall is now configured to let web requests reach your Apache server, a crucial step for digital security while maintaining accessibility.
Verifying the Apache Installation: Confirming Success
After installing Apache and adjusting the firewall, it’s essential to verify that the web server is running correctly. This involves checking the service status and then attempting to access the default Apache web page through a browser.
First, check the status of the Apache service using systemctl:
sudo systemctl status apache2
A successful output will indicate that the service is active (running), often highlighted in green. You’ll see details about the process ID, memory usage, and recent log entries. If it’s not running, you might see inactive (dead) or an error message, in which case you might need to investigate the logs (e.g., journalctl -xe) for troubleshooting.
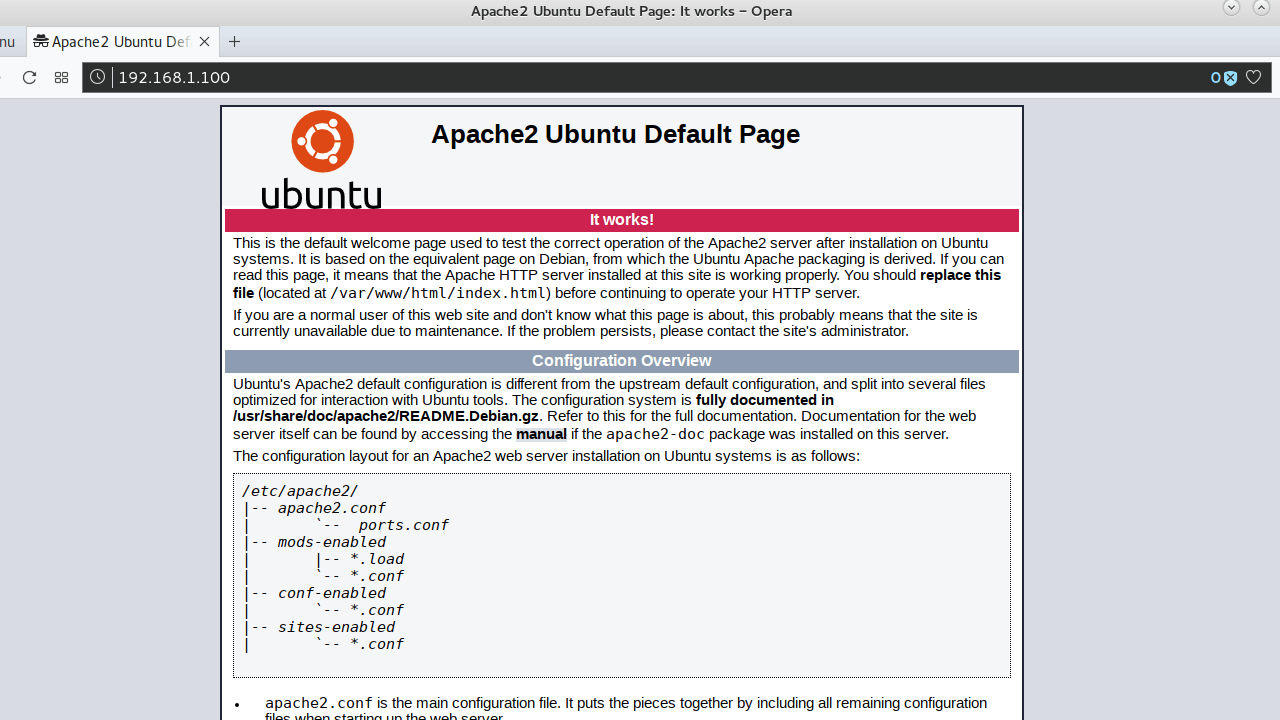
Next, open your web browser and navigate to your server’s IP address. If you’re installing on a local machine, you can typically use http://localhost or http://127.0.0.1. If you’re using a remote server, you’ll need its public IP address. You can find your server’s public IP address using a command like ip addr show eth0 (replace eth0 with your actual network interface, or simply curl ifconfig.me for a quick external IP check).
Upon entering the IP address in your browser, you should be greeted by the default Ubuntu Apache web page, which typically displays “Apache2 Ubuntu Default Page” along with some informational text. This page confirms that Apache is installed correctly, is running, and is accessible from your network through the configured firewall. This visual confirmation is the final step in establishing your foundational web server, indicating that your new software is installed and functional.
Managing Your Apache Web Server
Installing Apache is just the beginning. To effectively utilize and maintain your web server, you need to understand how to manage its service, including starting, stopping, and restarting it, as well as how to navigate and comprehend its core configuration files and directories. This knowledge is crucial for troubleshooting, applying changes, and ensuring your web applications remain online and performant.

Basic Apache Service Management Commands
The systemctl utility is the standard tool for controlling system services on Ubuntu (and other systemd-based Linux distributions). It allows you to manage the Apache apache2 service with simple, intuitive commands.
Here are the most common commands you’ll use:
sudo systemctl start apache2: This command initiates the Apache service. If Apache is not currently running, this will start it. You would typically use this if Apache was manually stopped or if it failed to start after a system reboot for some reason.sudo systemctl stop apache2: This command gracefully shuts down the Apache service. It’s useful when you need to perform maintenance, apply significant configuration changes that require a full restart, or temporarily take your web server offline.sudo systemctl restart apache2: This command stops the Apache service and then starts it again. This is often used after making substantial configuration changes to ensure they are fully applied, as it reloads all configurations from scratch. A full restart ensures a clean slate, but it will momentarily interrupt service for any active users.sudo systemctl reload apache2: This command tells Apache to reload its configuration files without stopping the entire service. This is the preferred method for applying most configuration changes (e.g., modifying a virtual host) because it allows Apache to read the new configurations while continuing to serve existing requests without interruption. Usereloadwhenever possible to minimize downtime.sudo systemctl enable apache2: This command configures Apache to start automatically every time your server boots up. This is essential for a production server to ensure your website is always available, even after a system reboot. Apache is usually enabled by default after installation.sudo systemctl disable apache2: This command prevents Apache from starting automatically at boot. You might use this if you’re decommissioning the server or temporarily don’t want Apache to consume resources on startup.
Mastering these commands provides you with full control over the lifecycle of your Apache web server, enabling you to manage its operational status efficiently and with confidence.
Understanding Apache’s Key Configuration Files and Directories
Apache’s strength lies in its modularity and extensive configurability. This flexibility is managed through a well-organized hierarchy of configuration files and directories, primarily located under /etc/apache2/. Familiarizing yourself with this structure is vital for customizing your server, hosting multiple websites, and troubleshooting issues.
Let’s explore the most important files and directories:
/etc/apache2/: This is the main configuration directory for Apache. All Apache-related configuration files reside here./etc/apache2/apache2.conf: This is the primary Apache configuration file. It contains global server settings, such asServerRoot,Timeout,KeepAlive, and directives for including other configuration files. You typically won’t make direct changes here unless absolutely necessary; instead, you’ll often use the included directories for modular configuration./etc/apache2/ports.conf: This file specifies the ports that Apache listens on. By default, it’s configured to listen on port 80 for HTTP and port 443 for HTTPS (if SSL is enabled). If you need Apache to listen on a non-standard port, this is where you’d modify it./etc/apache2/sites-available/: This directory contains configuration files for potential websites (virtual hosts) that Apache could serve. These files are not active until they are explicitly enabled.- Example:
000-default.confis the default virtual host configuration that serves the “Apache2 Ubuntu Default Page” you saw earlier.
- Example:
/etc/apache2/sites-enabled/: This directory contains symbolic links to the virtual host configuration files fromsites-available/that are currently active. Apache only loads configurations from this directory.- To enable a site:
sudo a2ensite your_domain.conf(creates a symbolic link fromsites-availabletosites-enabled). - To disable a site:
sudo a2dissite your_domain.conf(removes the symbolic link).
- To enable a site:
/etc/apache2/conf-available/: Similar tosites-available, this directory holds configuration snippets that can be enabled or disabled globally across all virtual hosts. Examples include settings for charset, security headers, or common CGI configurations./etc/apache2/conf-enabled/: Contains symbolic links to active configuration snippets fromconf-available/.- To enable/disable:
sudo a2enconfandsudo a2disconf.
- To enable/disable:
/etc/apache2/mods-available/: This directory stores configuration files for Apache modules. Modules extend Apache’s functionality, offering features like SSL support, URL rewriting, proxying, and more. Each module typically has a.loadfile (to load the module itself) and often a.conffile (for module-specific configuration directives)./etc/apache2/mods-enabled/: Contains symbolic links to active modules frommods-available/.- To enable/disable:
sudo a2enmodandsudo a2dismod.
- To enable/disable:
/var/www/html: This is the default document root directory where Apache looks for web files to serve for the default virtual host (000-default.conf). When you create new virtual hosts, you’ll typically specify a differentDocumentRootwithin that host’s configuration file, often located in a similar structure (e.g.,/var/www/your_domain.com/html)./var/log/apache2/: This directory contains Apache’s log files, includingaccess.log(records all incoming requests) anderror.log(records server errors). These logs are invaluable for monitoring server activity, diagnosing issues, and understanding user behavior.
Understanding this directory structure is key to efficient server administration. It empowers you to customize Apache, add new websites, and maintain a secure and performant web environment for your digital ventures.
Advanced Configuration and Best Practices
With a basic Apache installation up and running, and the fundamentals of service management under your belt, you’re ready to explore more advanced configurations. One of the most common and powerful features of Apache is virtual hosting, which allows a single server to host multiple websites. Beyond functionality, securing and optimizing your web server are crucial steps for any production environment.
Setting Up Virtual Hosts: Hosting Multiple Websites
Virtual hosts are Apache’s mechanism for running more than one website on a single server. Each virtual host can have its own domain name, document root, log files, and even separate configurations, all while sharing the same underlying Apache instance. This is incredibly efficient, allowing you to maximize server resources and host diverse web projects without needing a dedicated server for each.
Let’s walk through the steps to set up a new virtual host for a domain, say your_domain.com:
-
Create a Document Root Directory: First, create a new directory for your website’s files. It’s a common practice to create this under
/var/www/.sudo mkdir -p /var/www/your_domain.com/html -
Assign Ownership and Permissions: Ensure your web server has the correct permissions to read files in this directory. The Apache process typically runs as the
www-datauser.sudo chown -R $USER:$USER /var/www/your_domain.com/html sudo chmod -R 755 /var/www/your_domain.com(Note:
$USERwill be replaced by your current username when executed). -
Create a Sample Index Page: For testing, create a simple
index.htmlfile within your new document root.sudo nano /var/www/your_domain.com/html/index.htmlAdd some basic HTML content, for example:
<!DOCTYPE html>
<html>
<head>
    <title>Welcome to Your Domain!</title>
</head>
<body>
    <h1>Success! your_domain.com is working.</h1>
</body>
</html>
Save and exit (Ctrl+X, Y, Enter).
-
Create a Virtual Host Configuration File: Now, create a new virtual host configuration file in the
sites-availabledirectory. It’s a good practice to name it after your domain.sudo nano /etc/apache2/sites-available/your_domain.com.confPaste the following basic virtual host configuration:
<VirtualHost *:80> ServerAdmin webmaster@localhost ServerName your_domain.com ServerAlias www.your_domain.com DocumentRoot /var/www/your_domain.com/htmlErrorLog ${APACHE_LOG_DIR}/your_domain.com-error.log CustomLog ${APACHE_LOG_DIR}/your_domain.com-access.log combined <Directory /var/www/your_domain.com/html> Options Indexes FollowSymLinks AllowOverride All Require all granted </Directory></VirtualHost>
ServerAdmin: An email address for the server administrator.ServerName: The primary domain name for this virtual host.ServerAlias: Any other domain names that should also serve content from this virtual host (e.g.,www.your_domain.com).DocumentRoot: The directory where the website’s files are located.ErrorLogandCustomLog: Specify dedicated log files for this virtual host, which helps in debugging and analytics.<Directory>block: Defines permissions and options for theDocumentRoot.AllowOverride Allis important if you plan to use.htaccessfiles for per-directory configuration.
Save and exit the file.
-
Enable the Virtual Host: Use the
a2ensiteutility to enable your new virtual host.sudo a2ensite your_domain.com.confYou’ll usually want to disable the default Apache page to prevent conflicts or unintended exposure.
sudo a2dissite 000-default.conf -
Test Configuration and Reload Apache: Always test your Apache configuration for syntax errors before reloading.
sudo apache2ctl configtestIf you see
Syntax OK, you can safely reload Apache:sudo systemctl reload apache2 -
(Local Testing) Modify Your
hostsFile: If you’re testing this setup locally and your domainyour_domain.comisn’t yet pointing to your server’s IP via DNS, you can temporarily modify your local machine’shostsfile. On Linux/macOS, it’s/etc/hosts; on Windows, it’sC:WindowsSystem32driversetchosts. Add a line like this:your_server_ip your_domain.com www.your_domain.comReplace
your_server_ipwith your Ubuntu server’s IP address.
Now, when you navigate to http://your_domain.com in your browser (after adjusting your hosts file or DNS), you should see your custom index.html page. This effectively allows you to host multiple distinct websites on a single server, significantly enhancing the productivity and scalability of your web infrastructure.
Enhancing Security and Performance
Beyond basic setup, making your Apache server secure and performant is paramount, especially for public-facing websites. These best practices contribute to digital security and a better user experience, aligning with core “Tech” principles.
- Keep Apache and Ubuntu Updated: This is the most fundamental security measure. Regularly run
sudo apt update && sudo apt upgrade -yto apply the latest security patches and bug fixes for both your operating system and Apache. Unpatched software is a prime target for exploits. - Implement HTTPS with Let’s Encrypt: For any website handling sensitive information or simply for modern web standards and SEO, HTTPS (encrypted communication) is essential. Let’s Encrypt provides free SSL/TLS certificates, and tools like Certbot make implementation relatively straightforward. While beyond the scope of this installation guide, it’s a critical next step for any production site. This enhances brand trust and protects user data, directly touching on digital security.
- Disable Unused Modules: Apache is modular, but not all modules are needed for every website. Each active module consumes resources and potentially introduces a new attack vector. Review the modules in
/etc/apache2/mods-enabled/and disable any you don’t require usingsudo a2dismod module_name. - Harden
.htaccessFiles: IfAllowOverride Allis set for your document root, you can use.htaccessfiles to implement per-directory security. Examples include:- Disable Directory Listings: Prevent visitors from browsing the contents of directories without an
index.htmlfile. AddOptions -Indexesto your.htaccess. - Restrict Access by IP: Allow only specific IP addresses to access certain areas.
- Password Protect Directories: Basic authentication for sensitive areas.
- Disable Directory Listings: Prevent visitors from browsing the contents of directories without an
- Configure Logging and Monitoring: Apache’s log files (
/var/log/apache2/access.loganderror.log) are invaluable.- Access Logs: Provide insights into traffic, user agents, and requested resources. Useful for analytics and identifying suspicious patterns.
- Error Logs: Critical for troubleshooting server-side issues, misconfigurations, or script errors.
- Regularly review these logs, or integrate them with a log management solution for proactive monitoring.
- Resource Limits for Performance: For busy servers, Apache’s performance settings can be fine-tuned. Key directives in
apache2.conforconf-available/mpm_event.conf(depending on your Multi-Processing Module, MPM) include:MaxRequestWorkers: The maximum number of simultaneous client requests that will be served. Setting this too low can lead to slow response times, while setting it too high can exhaust server resources.KeepAlive: Allows multiple requests over a single TCP connection, reducing overhead.Timeout: How long the server will wait for various client actions.
Understanding and tuning these values based on your server’s resources and traffic patterns can significantly improve responsiveness and stability.
- Limit Information Disclosure: Avoid exposing too much server information. In
apache2.conf, setServerTokens ProdandServerSignature Offto minimize the details Apache reveals about its version and operating system in error pages and headers.
By implementing these advanced configurations and best practices, you move beyond a basic setup to a more resilient, secure, and performant web server. This ensures your online presence is not only functional but also trustworthy and efficient, providing a solid foundation for any brand or personal project you launch.
Conclusion: Your Web Server Awaits
Congratulations! You have successfully navigated the process of installing Apache on Ubuntu, from initial system preparation to configuring virtual hosts and understanding essential best practices for security and performance. This guide has equipped you with the foundational knowledge and practical steps to deploy and manage a powerful, open-source web server, capable of hosting a wide array of web applications and websites.
We started by preparing your Ubuntu environment, ensuring all prerequisites were met and your system packages were up to date – a critical step for both stability and digital security. We then proceeded with the core installation of Apache2, followed by the crucial firewall configuration to allow web traffic, and finally verified its operational status. Moving beyond the basics, you learned how to effectively manage the Apache service using systemctl commands and gained an understanding of its intricate configuration file structure, laying the groundwork for more advanced customization.
The ability to set up virtual hosts empowers you to manage multiple distinct websites on a single server, significantly enhancing productivity and resource utilization, which is invaluable for developers and entrepreneurs alike. Furthermore, the discussion on security and performance best practices underscores the importance of ongoing maintenance, from keeping software updated to implementing HTTPS, ensuring your web server remains robust, reliable, and secure against evolving digital threats.
With Apache now fully operational on your Ubuntu server, the possibilities are limitless. You can begin deploying your web applications, content management systems (like WordPress or Drupal), or simply host static websites. This web server serves as the backbone for your online presence, a critical component in the broader landscape of “Tech” – from software deployment to digital security and enhancing productivity for your projects. Continue to explore, experiment, and build, knowing you have a solid and secure platform powering your digital ambitions.
aViewFromTheCave is a participant in the Amazon Services LLC Associates Program, an affiliate advertising program designed to provide a means for sites to earn advertising fees by advertising and linking to Amazon.com. Amazon, the Amazon logo, AmazonSupply, and the AmazonSupply logo are trademarks of Amazon.com, Inc. or its affiliates. As an Amazon Associate we earn affiliate commissions from qualifying purchases.