In the ever-evolving landscape of technology, keeping your PC running at its peak performance is paramount. Whether you’re a seasoned gamer pushing the boundaries of graphical fidelity, a creative professional rendering complex projects, or a developer compiling demanding code, the heat generated by your CPU is a constant challenge. Overheating can lead to thermal throttling, reduced performance, system instability, and in the worst-case scenarios, permanent hardware damage. This is where an All-In-One (AIO) liquid cooler steps in, offering a significant upgrade over stock or basic air coolers. Installing one might seem daunting, but with a clear understanding of the process and careful execution, it’s a project any tech enthusiast can undertake.

This guide will walk you through the essential steps of installing an AIO cooler, transforming your PC’s thermal management and unlocking its full potential. We’ll delve into the preparatory stages, the physical installation, and the crucial post-installation checks, ensuring your investment in better cooling translates into a smoother, more reliable computing experience.
Preparing for the AIO Cooler Installation
Before you even think about unboxing your new AIO cooler, thorough preparation is key to a successful and stress-free installation. This stage involves understanding your current PC’s compatibility, gathering the necessary tools, and ensuring a clean and organized workspace. Rushing this phase can lead to frustrating mistakes and potentially damaged components.
1. Verifying Compatibility and Gathering Supplies
The first and arguably most critical step is to confirm that your chosen AIO cooler is compatible with your CPU socket and your PC case. This isn’t a matter of “it should fit”; it requires specific verification.
- CPU Socket Compatibility: AIO coolers are designed for specific CPU socket types (e.g., Intel LGA 1700, AMD AM5). Your motherboard’s manual or a quick online search of your CPU model will tell you which socket you have. The AIO cooler’s specifications will clearly list the sockets it supports. Most modern AIOs come with mounting hardware for a wide range of popular sockets, but it’s always best to double-check.
- Case Clearance and Radiator Mounts: Your PC case needs to have designated mounting points for the AIO’s radiator and sufficient clearance for its fans. Radiators come in various sizes (120mm, 240mm, 280mm, 360mm), and the size you choose will dictate where it can be installed. Common mounting locations include the front, top, or rear of the case. Check your case’s specifications for supported radiator sizes and their mounting locations. Pay attention to the thickness of the radiator and fans, as this can impact clearance with other components like RAM or motherboard heatsinks.
- RAM Clearance: Especially with larger radiators mounted at the top of a case, ensure there’s enough clearance for your RAM modules. Some AIO pump units are also bulkier than air coolers and might interfere with tall RAM sticks.
Once compatibility is confirmed, gather your tools:
- Screwdriver Set: A magnetic Phillips head screwdriver is essential for most PC components. Having a few different sizes can be helpful.
- Zip Ties or Velcro Straps: For cable management, keeping your build tidy and improving airflow.
- Anti-Static Wrist Strap: Highly recommended to prevent electrostatic discharge (ESD), which can damage sensitive computer components.
- Thermal Paste: While most AIOs come with pre-applied thermal paste on the pump block, it’s good practice to have a tube of high-quality thermal paste on hand for reapplication if needed or for future maintenance.
- Clean Cloth or Lint-Free Wipes: For cleaning off old thermal paste from your CPU and the cooler’s contact plate.
- Rubbing Alcohol (Isopropyl Alcohol): For a thorough cleaning of thermal paste residue.
2. Preparing Your PC and Workspace
A clean and organized workspace minimizes the risk of losing small screws or accidentally dropping components.
- Power Down and Unplug: Before you begin, ensure your PC is completely powered off and unplugged from the wall socket. For added safety, press and hold the power button for a few seconds to discharge any residual electricity in the capacitors.
- Ground Yourself: Wear your anti-static wrist strap and connect it to a metal, unpainted part of your PC case. This will safely discharge static electricity.
- Clear Your Workspace: Find a well-lit, spacious area to work in. Lay out a clean mat or cloth to protect your components from scratches and to catch any dropped screws.
- Organize Components: Unpack your AIO cooler and carefully lay out all its parts. Familiarize yourself with the different screws, brackets, and fans. Keep them organized, perhaps in their original packaging or small containers.
Installing the AIO Cooler: From Old Cooler Removal to Radiator Mounting
This section covers the core physical installation process, starting with the removal of your existing cooler and progressing to attaching the new AIO components.
1. Removing the Old CPU Cooler
If you’re upgrading from a stock or air cooler, this step is essential.
- Disconnect Fans: Carefully unplug the fan cable from the CPU_FAN header on your motherboard.
- Unscrew or Unclip the Cooler: The method for removing your current cooler will vary. For screw-mounted coolers, simply unscrew them in a diagonal or criss-cross pattern to ensure even pressure release. For clip-mounted coolers, follow the instructions specific to your model.
- Gently Twist and Lift: Once all fasteners are removed, gently twist the cooler to break the seal of the thermal paste. Then, carefully lift it straight up and off the CPU. Avoid yanking, as this can pull the CPU out of its socket if the thermal paste is very sticky.
- Clean the CPU and Motherboard: Use a lint-free cloth dampened with isopropyl alcohol to carefully clean the old thermal paste from the top of your CPU and the cooler’s contact plate. Ensure all residue is removed. Let it dry completely.
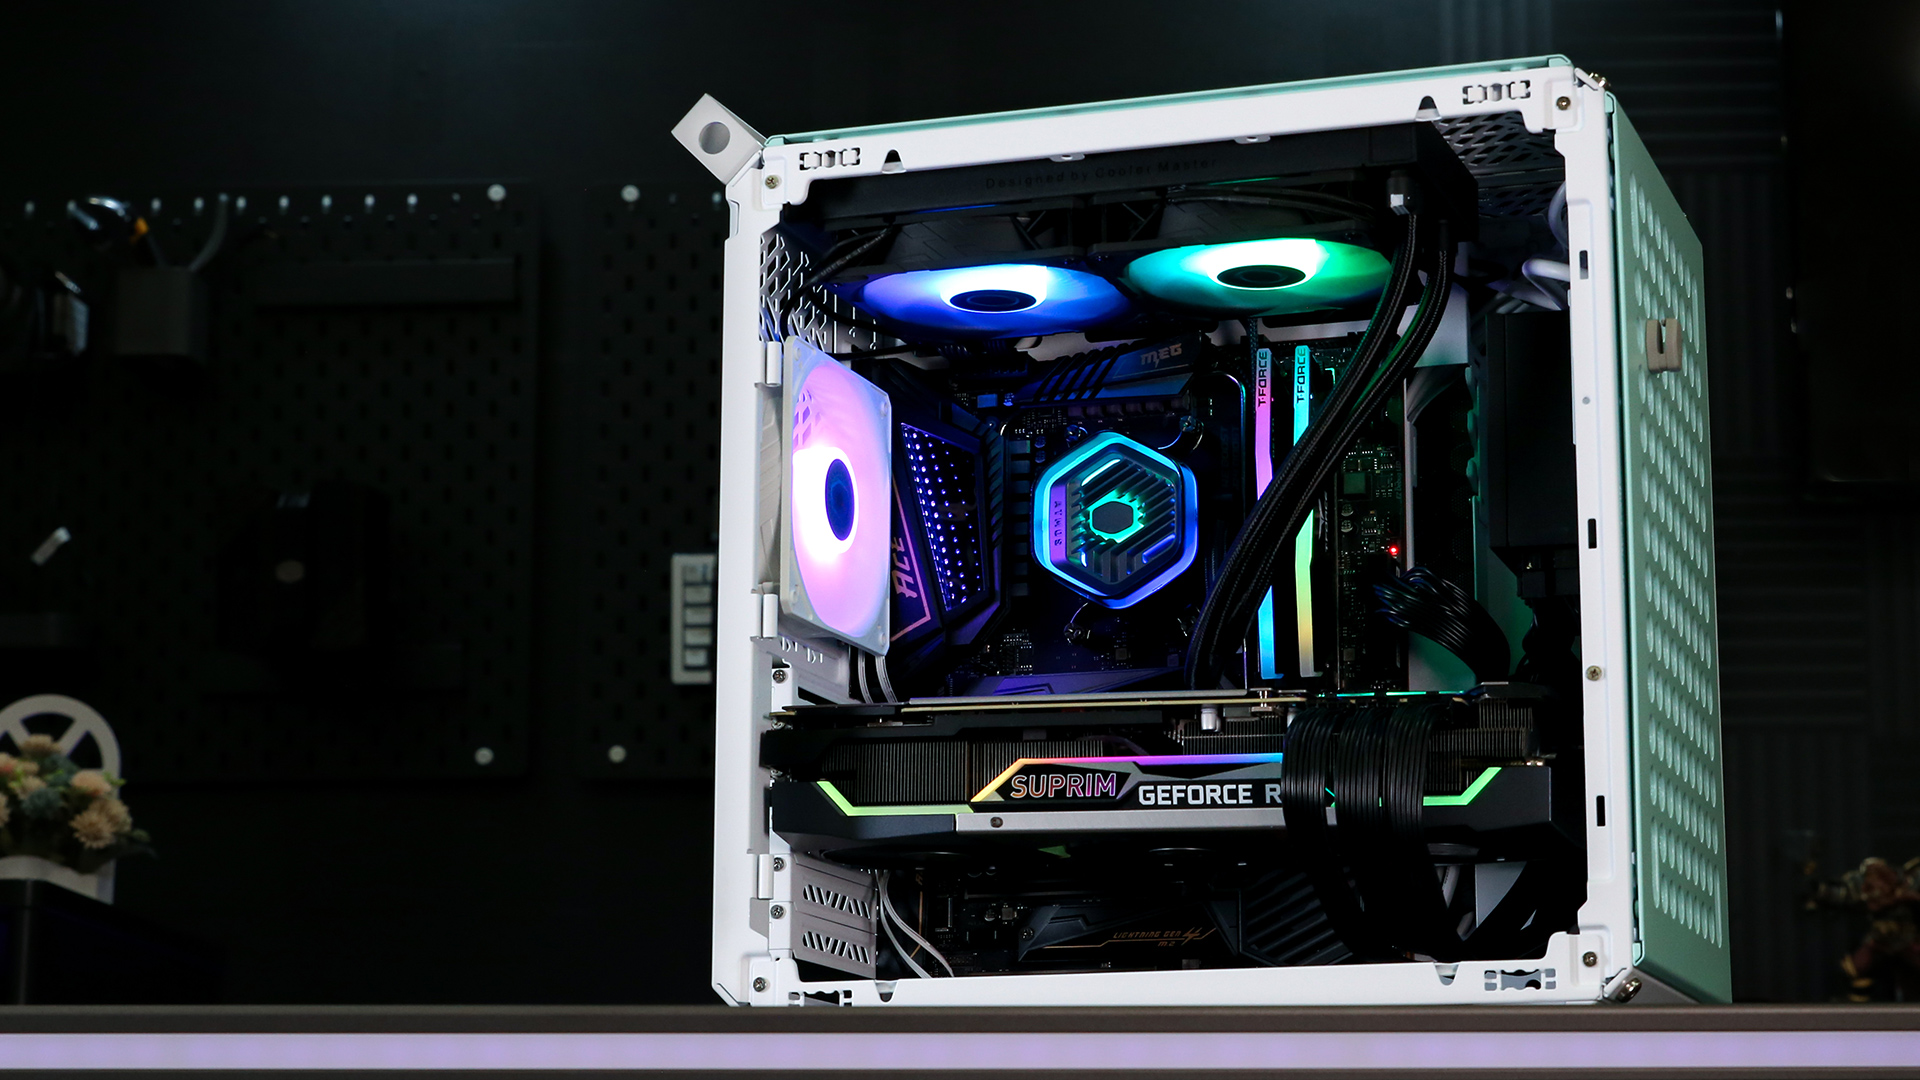
2. Mounting the Radiator and Fans
This is where the physical placement of the AIO becomes critical for both aesthetics and performance.
- Choose the Radiator Location: As discussed in the preparation phase, select the best location in your case for the radiator. Common choices are the front intake, top exhaust, or rear exhaust. The front intake is often preferred for optimal radiator cooling, as it draws in fresh air.
- Orient Fans for Airflow: If you’re mounting the radiator at the front as an intake, ensure the fans are oriented to push air through the radiator and into the case. If mounting at the top or rear as an exhaust, the fans should be oriented to pull air out of the case. The arrows on the fan shrouds indicate the direction of airflow.
- Attach Fans to the Radiator: Using the provided screws, attach the fans to the radiator. If your case allows for thicker radiators, you might have the option to mount the fans on the “outside” of the radiator mounts, pushing air through. Ensure screws are snug but not overtightened, which can strip threads.
- Secure the Radiator Assembly: Carefully position the radiator and fan assembly into your chosen mounting location in the case. Use the case’s specific screws or the AIO’s provided screws to secure it firmly. Ensure no cables are pinched and that the radiator is seated correctly.
3. Installing the CPU Block and Connecting Cables
This is the final step in the physical installation of the AIO components.
- Prepare the CPU Block: Refer to your AIO’s manual for the correct mounting bracket for your CPU socket. Attach the appropriate bracket to the CPU block. Most AIOs come with either a universal bracket system or specific brackets for Intel and AMD.
- Apply Thermal Paste (if not pre-applied): If your CPU block doesn’t have pre-applied thermal paste, apply a small pea-sized amount of thermal paste to the center of your CPU’s integrated heat spreader (IHS). Avoid spreading it manually; the pressure from the CPU block will distribute it evenly.
- Mount the CPU Block: Carefully align the CPU block over the CPU and gently press it down. Once seated, secure it using the provided mounting screws or clips. Again, tighten screws in a diagonal or criss-cross pattern to ensure even pressure distribution. Do not overtighten.
- Connect Fan and Pump Cables:
- Fan Cables: Connect the AIO’s radiator fans to the motherboard’s CPUFAN header, or if your AIO has a fan hub, connect them to the hub and then connect the hub’s signal cable to the CPUFAN header. Some AIOs offer PWM control for their fans, allowing for more dynamic speed adjustments based on temperature.
- Pump Cable: The AIO’s pump usually connects to the motherboard’s dedicated AIO_PUMP header, or sometimes a USB header for software control. Refer to your motherboard and AIO manuals for the correct header. This ensures the pump runs at its optimal speed.
- RGB Cables (if applicable): If your AIO has RGB lighting, connect the RGB cables to the appropriate headers on your motherboard or to a separate RGB controller.
Post-Installation Checks and First Boot
With the physical installation complete, it’s crucial to perform thorough checks before powering on your system and then monitor its behavior during the initial boot-up and beyond.
1. Double-Checking Connections and Clearances
Before you hit the power button, a final inspection can save you a lot of trouble.
- All Screws Tightened: Ensure all screws for the CPU block, radiator, and fans are securely fastened, but not overtightened.
- Cable Management: Tidy up all the cables. Ensure no cables are obstructing fan blades or airflow. Use zip ties or Velcro straps to bundle them neatly. Good cable management not only looks better but also improves airflow within the case.
- No Loose Parts: Visually inspect the motherboard and surrounding components for any loose screws or dropped items.
- RAM and GPU Clearance: Confirm that the CPU block and radiator hoses do not interfere with your RAM modules, graphics card, or other PCIe devices.
- Fan Rotation: Gently spin each fan by hand to ensure they move freely and don’t make any scraping noises.
2. First Boot and BIOS/UEFI Checks
The moment of truth. Powering on your system for the first time after an upgrade can be nerve-wracking, but also rewarding.
- Power On: Connect your PC power cable and turn on your system.
- Enter BIOS/UEFI: Immediately after powering on, press the designated key to enter your motherboard’s BIOS or UEFI settings (commonly DEL, F2, F10, or F12).
- Monitor CPU Temperature: Within the BIOS/UEFI, you should be able to see the current CPU temperature. It should be within a reasonable idle range (e.g., 25-45°C, depending on ambient temperature and CPU). If the temperature is abnormally high (e.g., exceeding 70-80°C) almost immediately, power off your system and re-check your installation, particularly the CPU block mounting and thermal paste application.
- Check Fan and Pump Speeds: Verify that the CPU fans are spinning and that the AIO pump is running. You might be able to see fan speed readings (RPM) in the BIOS/UEFI. Ensure the pump is set to run at a constant speed or controlled appropriately by the motherboard.
- Boot into Operating System: If the temperatures look good, save your BIOS settings and allow your system to boot into your operating system.

3. Monitoring Performance and Stress Testing
Once your OS is loaded, it’s time to see how your new cooler performs under load.
- Download Monitoring Software: Install software like HWMonitor, NZXT CAM, or your AIO manufacturer’s software to monitor CPU temperatures, fan speeds, and pump speeds in real-time within Windows.
- Idle Temperatures: Observe your CPU temperatures while your PC is idle (just running the desktop with no applications open). They should be significantly lower than with your old cooler.
- Stress Testing: To thoroughly test the AIO’s capabilities, run a CPU stress test. Software like Prime95, AIDA64, or OCCT are excellent for this. Run the stress test for at least 30 minutes to an hour.
- Monitor Under Load: During the stress test, keep a close eye on your CPU temperatures. For most CPUs, staying below 80-85°C under sustained heavy load is considered excellent. Temperatures consistently above 90°C indicate potential issues, requiring a re-evaluation of your installation.
- Listen for Unusual Noises: Pay attention to any unusual noises coming from the AIO, such as grinding, rattling, or excessive pump noise. A slight hum from the pump is normal, but loud noises can indicate a problem.
By following these comprehensive steps, you can confidently install your AIO cooler, ensuring your PC’s components are kept cool, stable, and performing at their best. This investment in superior cooling not only enhances your current computing experience but also contributes to the longevity of your hardware, making it a smart choice for any tech enthusiast.
aViewFromTheCave is a participant in the Amazon Services LLC Associates Program, an affiliate advertising program designed to provide a means for sites to earn advertising fees by advertising and linking to Amazon.com. Amazon, the Amazon logo, AmazonSupply, and the AmazonSupply logo are trademarks of Amazon.com, Inc. or its affiliates. As an Amazon Associate we earn affiliate commissions from qualifying purchases.