In an increasingly digital world, the need for physical documents might seem to be waning. Yet, for many, the ability to print remains a critical aspect of productivity, whether for professional reports, academic assignments, or simply tangible memories in the form of photos. The MacBook Air, with its sleek design, powerful performance, and exceptional portability, is a go-to device for students, professionals, and creatives alike. Connecting such a device to a printer, however, can sometimes feel like a technological hurdle. This comprehensive guide aims to demystify the process, ensuring you can seamlessly integrate your printer with your MacBook Air, enhancing your workflow and unlocking a new dimension of utility.
The beauty of macOS lies in its intuitive design and robust ecosystem. Apple has long prioritized user experience, extending this philosophy to peripheral management. Most modern printers are designed with macOS compatibility in mind, often supporting plug-and-play functionality or leveraging Apple’s native AirPrint technology. This guide will walk you through various installation methods, from the simplicity of wireless connections to the reliability of USB, and even delve into advanced configurations, ensuring that no matter your printer model or setup, you’ll be able to get it up and running.
Before we dive into the technicalities, it’s worth noting the broader context. In the realm of Tech, understanding how to manage your devices and peripherals is fundamental to maximizing your digital security and productivity. Properly installed and maintained drivers ensure not only functionality but also protect your system from potential vulnerabilities associated with outdated software. Furthermore, from a Brand perspective, seamless integration of hardware (like a MacBook Air) with peripherals (like a printer) enhances the overall user experience, reinforcing trust and loyalty in the Apple ecosystem, while also reflecting positively on printer manufacturers that prioritize cross-platform compatibility. While less about Money directly, efficient setup processes save valuable time, which, as any professional knows, translates directly into cost savings and increased output.
Essential Preparations Before Installation
Before you begin the printer installation process, a few preliminary steps will save you time and potential frustration. Proper preparation is key to a smooth setup, regardless of the method you choose.
Gather Your Tools and Information
- The Printer: Ensure your printer is unboxed, assembled, and connected to a power source. Turn it on.
- Ink/Toner and Paper: Verify that the printer has sufficient ink or toner cartridges installed and that there’s paper loaded in the tray. A test print is often part of the installation process.
- Cables: If you plan to use a wired connection, have the appropriate USB cable readily available. Remember that newer MacBook Air models often feature USB-C ports, so you might need a USB-C to USB-A adapter or a USB-C to USB-B printer cable.
- Wi-Fi Network Information: For wireless installations, you’ll need your Wi-Fi network name (SSID) and password. Ensure your MacBook Air is connected to the same Wi-Fi network you intend for your printer to use.
- Printer Manual & Driver CD (Optional): While macOS often handles drivers automatically, having the printer’s manual can be useful for specific instructions, especially for initial Wi-Fi setup directly on the printer. A driver CD might be included, but it’s often more reliable to download the latest drivers online.
- Internet Connection: Your MacBook Air will need an active internet connection to download necessary drivers or firmware updates. This falls under good Tech practice, ensuring you have the most secure and functional software for your peripherals.
Update Your MacBook Air’s macOS
Keeping your operating system up to date is crucial for optimal performance and compatibility with new hardware. Apple frequently releases updates that include enhanced printer drivers and improved system stability.
- Click the Apple menu in the top-left corner of your screen.
- Select “System Settings” (or “System Preferences” on older macOS versions).
- Click “General” > “Software Update.”
- If an update is available, follow the prompts to install it.
This proactive step aligns with best practices in digital security and productivity, minimizing potential conflicts and ensuring access to the latest features.
Method 1: Wireless Printer Installation (Recommended)
Wireless printing offers unparalleled convenience, allowing you to place your printer almost anywhere within your Wi-Fi network’s range without the clutter of cables. This is the most common and often the simplest method for modern printers.
Setting Up Your Printer for Wi-Fi
Before your MacBook Air can connect to the printer wirelessly, the printer itself needs to be connected to your home or office Wi-Fi network. This process varies slightly by printer brand and model, but generally involves these steps:
- On the Printer’s Control Panel: Navigate through the printer’s menu using its built-in screen and buttons. Look for a “Setup,” “Network Settings,” or “Wireless Settings” option.
- Wireless Setup Wizard: Select “Wireless Setup Wizard” or “Wi-Fi Setup.” The printer will scan for available networks.
- Select Your Network: Choose your Wi-Fi network name (SSID) from the list.
- Enter Password: Input your Wi-Fi password (WPA/WPA2 passphrase). This is often case-sensitive.
- Confirm Connection: The printer should confirm that it has successfully connected to the network. It might print a network configuration page.
If your printer supports Wi-Fi Protected Setup (WPS), you might have the option to connect by pressing a WPS button on your router, or by generating a PIN on the printer and entering it into your router’s settings. Consult your printer’s manual for specific instructions.
Adding the Wireless Printer to Your MacBook Air
Once your printer is connected to the Wi-Fi network, your MacBook Air can discover and add it.
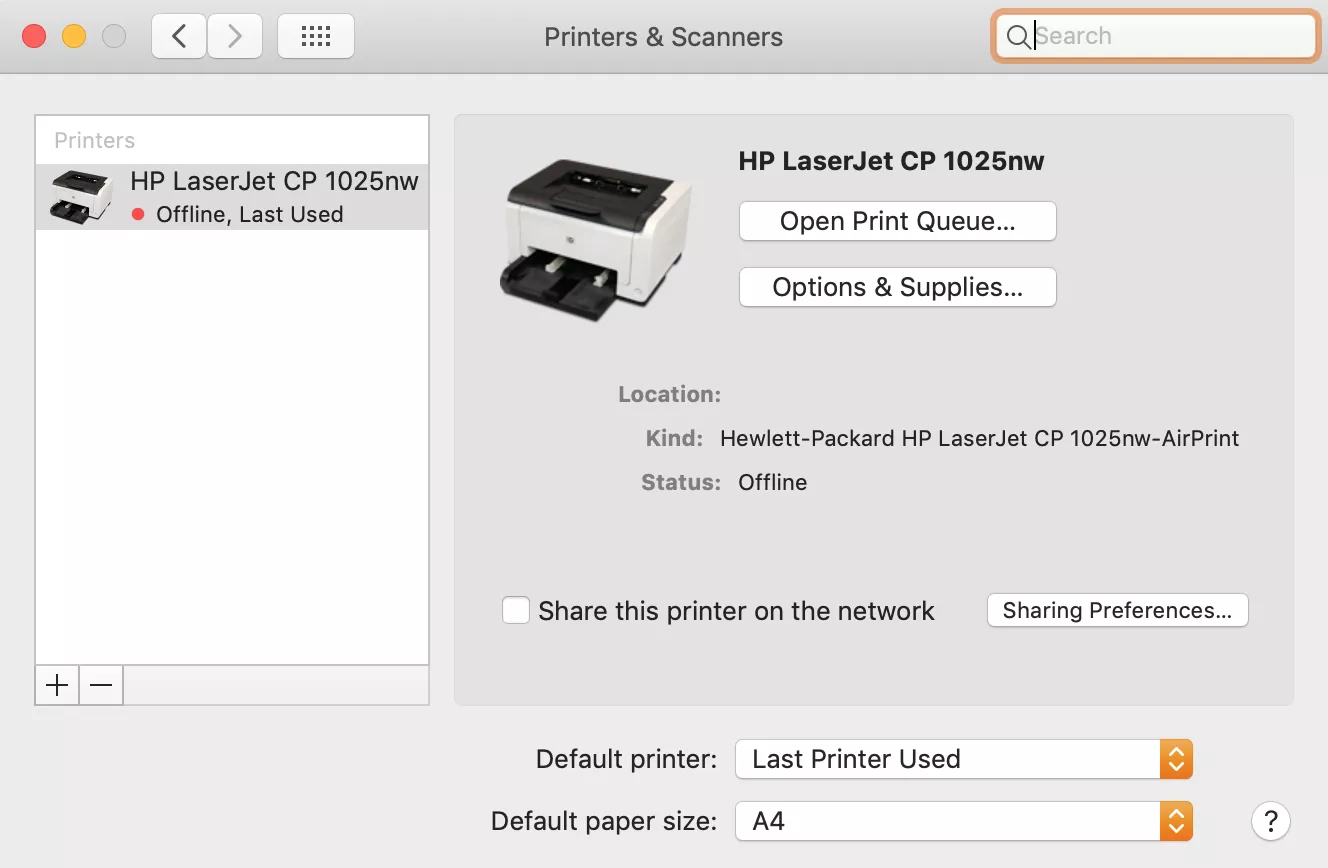
- Open System Settings: Click the Apple menu > “System Settings.”
- Navigate to Printers & Scanners: In the sidebar, click “Printers & Scanners.”
- Add Printer: Click the “Add Printer, Scanner, or Fax…” button (it looks like a plus sign “+”).
- Printer Discovery: Your MacBook Air will now search for available printers on your network.
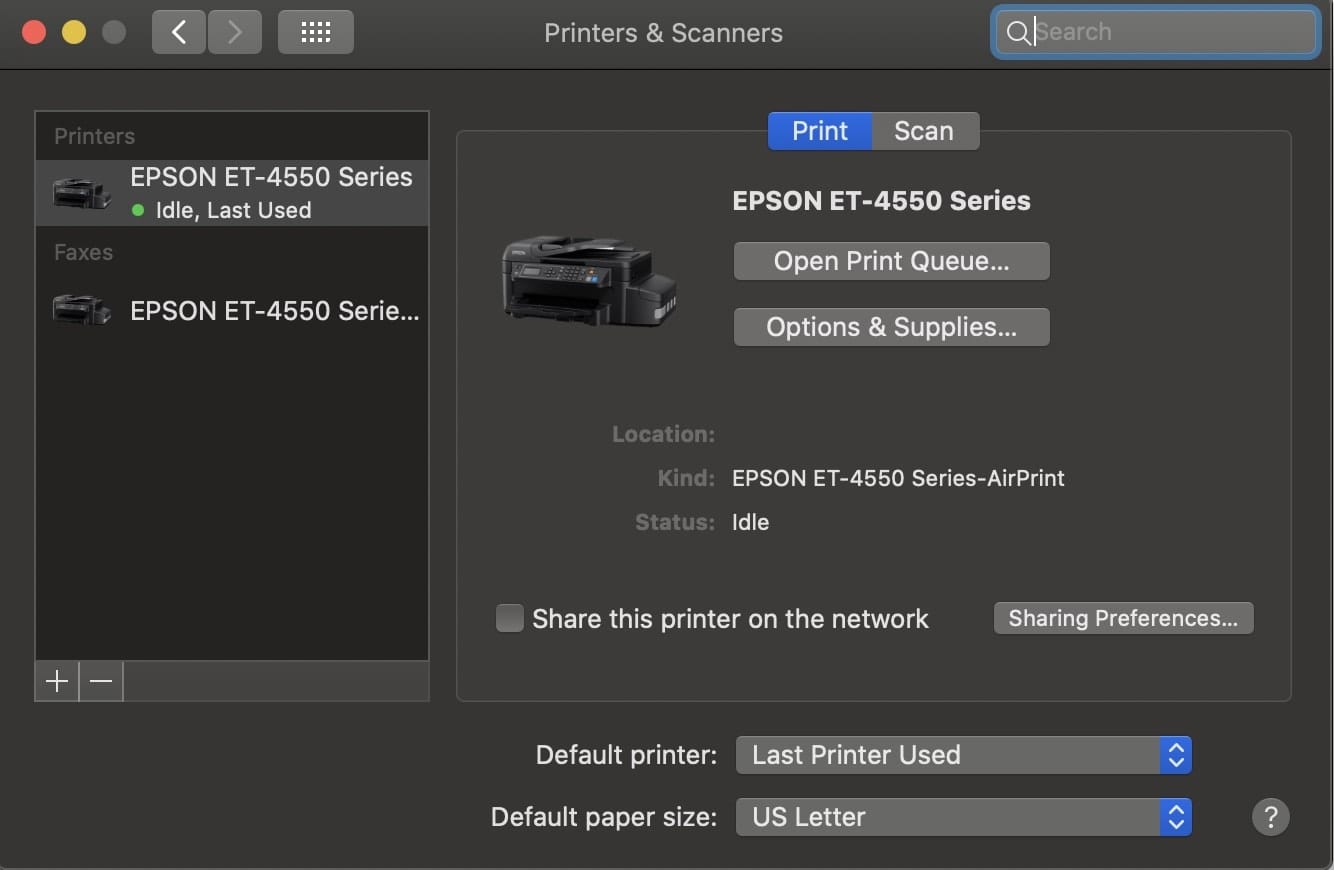
- Bonjour Printers: Most Wi-Fi printers supporting AirPrint or Bonjour will appear automatically in the “Printers” tab. If your printer appears here, select it.
- AirPrint: If your printer is AirPrint-compatible, macOS will automatically select “AirPrint” as the driver, which is usually the best option as it provides full functionality without needing separate driver downloads. AirPrint ensures a consistent user experience across different Apple devices, a testament to effective Brand integration.
- Select Software: If AirPrint isn’t an option or if you prefer a manufacturer-specific driver, click the “Use” dropdown menu and select “Select Software…” to choose a specific driver from the list, or “Other Software…” if you downloaded a driver package directly from the manufacturer.
- Add: Click the “Add” button to finalize the installation.
Your printer should now appear in the “Printers & Scanners” list and be ready for use. You can even try a test print from a document or photo application.
Method 2: USB Printer Installation (Wired Connection)
While wireless printing is popular, a direct USB connection offers reliability and can be particularly useful if you lack a Wi-Fi network or prefer a dedicated, stable link. This method is generally straightforward.
Connecting Your Printer via USB
- Power On: Ensure your printer is powered on and ready.
- Connect USB Cable: Connect one end of the USB cable to your printer and the other end to an available USB port on your MacBook Air.
- USB-C Adapter: If your MacBook Air only has USB-C ports, you’ll need a USB-C to USB-A adapter or a USB-C hub. Investing in a good quality adapter or hub is a practical Money consideration, as it expands your MacBook Air’s connectivity options for various peripherals, enhancing its overall value and versatility.
- Automatic Detection: macOS is typically very good at detecting USB printers automatically. In many cases, it will recognize the printer, download the necessary drivers (if available online), and add it to your “Printers & Scanners” list without further interaction from you. You might see a notification indicating a new printer has been detected and is being set up.
Manually Adding a USB Printer (If Not Automatically Detected)
If your MacBook Air doesn’t automatically detect and set up the USB printer, you can add it manually:
- Open System Settings: Click the Apple menu > “System Settings.”
- Navigate to Printers & Scanners: In the sidebar, click “Printers & Scanners.”
- Add Printer: Click the “Add Printer, Scanner, or Fax…” button (the plus sign “+”).
- Select the USB Printer: In the dialog box that appears, look for your printer listed with a “USB” connection type. Select it.
- Choose Driver:
- Automatic: macOS will often suggest a default driver (“AirPrint” or a generic one). This is usually sufficient.
- Select Software: If you have downloaded specific drivers from the manufacturer’s website, or if you want to use a more specific Apple-provided driver, click the “Use” dropdown menu and choose “Select Software…” to browse available drivers or “Other Software…” to locate a manually downloaded driver package.
- Add: Click “Add” to complete the process.
Your USB printer should now be listed and ready for printing.
Method 3: Advanced Printer Setup (IP Printer)
For users in more complex network environments, or with specific network printers, adding a printer using its IP address can be a robust solution. This method bypasses Bonjour discovery and directly addresses the printer on the network. This is common in office settings and advanced home networks, aligning with more specialized Tech requirements.
Finding Your Printer’s IP Address
- Printer’s Control Panel: The easiest way to find a printer’s IP address is often through its own control panel. Navigate to “Network Settings,” “Information,” or “Status” menus. Look for “TCP/IP,” “Network Status,” or “Print Network Configuration Page.” The IP address will typically be in the format
192.168.1.XXXor10.0.0.XXX. - Router’s Admin Page: You can also log into your Wi-Fi router’s administration page (usually by typing
192.168.1.1or192.168.0.1into a web browser) and look for a list of connected devices. - Manufacturer Utility: Some printer manufacturers provide utility software that can discover and display the IP address of their printers on the network.
Adding an IP Printer to Your MacBook Air
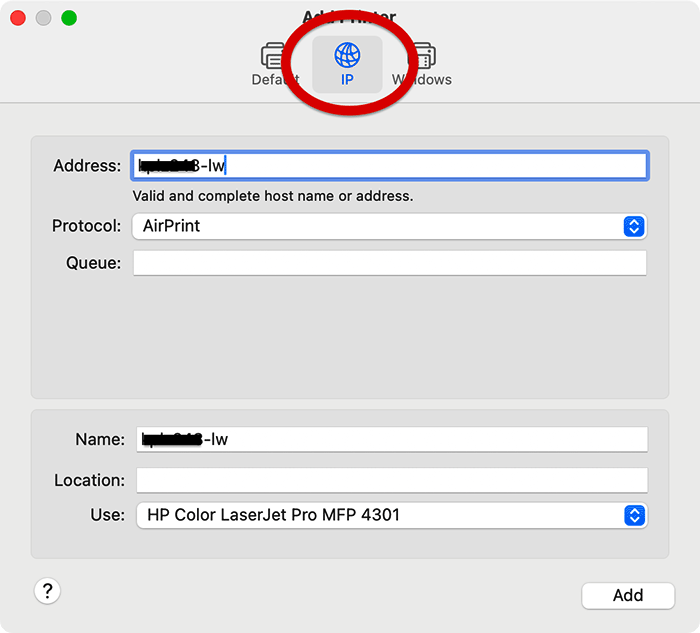
- Open System Settings: Click the Apple menu > “System Settings.”
- Navigate to Printers & Scanners: In the sidebar, click “Printers & Scanners.”
- Add Printer: Click the “Add Printer, Scanner, or Fax…” button (the plus sign “+”).
- IP Tab: In the dialog box, click the “IP” tab at the top.
- Enter Printer Details:
- Address: Enter the printer’s IP address you found earlier.
- Protocol: This is crucial. Common protocols include:
- AirPrint: If supported, this is usually the best.
- IPP (Internet Printing Protocol): A standard protocol for printing over IP networks. Often reliable.
- LPD (Line Printer Daemon): An older but still widely used protocol.
- HP Jetdirect – Socket: Specific for HP printers, but sometimes works with others.
- Consult your printer’s manual or network administrator if you’re unsure which protocol to use.
- Queue: For most home users, leaving this blank is fine. For some corporate networks, a specific queue name might be required.
- Name: Give the printer a descriptive name (e.g., “Office Laser Printer”).
- Location: (Optional) Add a location for easy identification.
- Choose Driver:
- Automatic: macOS will attempt to find a suitable driver.
- Select Software: If a specific driver is required or if you downloaded one, use the “Use” dropdown menu to select it.
- Add: Click “Add.”
This method gives you precise control over how your MacBook Air communicates with the printer, an important feature for network administrators and those who prioritize robust, predictable connectivity.
Troubleshooting Common Printer Installation Issues
Even with the most detailed guides, issues can arise. Here are some common problems and their solutions, keeping in mind the importance of digital security and productivity.
Printer Not Found or Offline
- Check Power and Connection: Ensure the printer is on and connected correctly (USB cable secure, Wi-Fi connected to the correct network).
- Restart Devices: Sometimes, simply restarting your printer, MacBook Air, and Wi-Fi router can resolve temporary network glitches.
- Verify Wi-Fi: Make sure both your MacBook Air and the printer are connected to the same Wi-Fi network.
- Firewall Settings: Briefly disable any third-party firewalls on your MacBook Air to see if they are blocking the printer discovery. Remember to re-enable them for security. This highlights a key Tech aspect: security configurations can sometimes interfere with functionality.
- Manual IP Address: If using Wi-Fi, try adding the printer using its IP address (Method 3).
“Software for this Printer Isn’t Available” or Driver Issues
- Check Manufacturer Website: Visit the printer manufacturer’s official support website. Search for your specific printer model and download the latest macOS drivers. Install them, then try adding the printer again. This is crucial for Tech longevity and performance.
- Software Update: Ensure your macOS is fully updated, as Apple often includes generic and specific printer drivers in its system updates.
- AirPrint Fallback: If your printer supports AirPrint, try to use that driver. It’s often the most stable and compatible option provided by Apple.
- Reset Printing System: This is a drastic but often effective step:
- Go to System Settings > Printers & Scanners.
- Right-click (or Control-click) on an empty space in the printer list.
- Select “Reset Printing System…”
- Confirm the action. This will remove all printers and scanners. You’ll then need to add your printer(s) back using one of the methods above. This can resolve deep-seated driver conflicts.
Printing Errors or Jobs Stuck
- Check Printer Status: Look at the printer’s control panel for error messages (e.g., “out of paper,” “low ink,” “jam”).
- Cancel and Resubmit: Open the print queue (click on your printer in System Settings > Printers & Scanners, then click “Open Print Queue”). Delete any stuck jobs, then try printing again.
- Restart Printer and MacBook Air: A simple restart can often clear up printing queues and minor software glitches.
- Driver Reinstallation: If errors persist, try reinstalling the drivers or resetting the printing system as described above.
Maintaining Your Printer and Enhancing Productivity
Installing your printer is just the first step. Proper maintenance and smart usage can significantly extend its lifespan and maximize your productivity.
Keep Drivers and Firmware Updated
Regularly check the printer manufacturer’s website for updated drivers and firmware. Firmware updates for the printer itself can improve performance, add new features, and patch security vulnerabilities – a vital aspect of digital security in networked environments. Outdated drivers are a common cause of printing issues and can sometimes even pose security risks.
Understand Ink/Toner Management
- Monitor Levels: Most printers offer a utility or display to check ink/toner levels. Don’t wait until cartridges are completely empty, as this can sometimes lead to printhead clogging.
- Genuine Cartridges: While third-party cartridges can be tempting from a Money perspective, genuine manufacturer cartridges often provide better print quality, reliability, and can prevent potential damage to your printer in the long run. The slight upfront saving might lead to higher maintenance costs or a shorter printer lifespan.
- Storage: Store spare cartridges according to manufacturer recommendations.
Optimize Printing Habits
- Print Preview: Always use “Print Preview” to avoid wasted paper and ink.
- Draft Mode: For internal documents or drafts, use your printer’s “Draft” or “Economy” mode, which uses less ink/toner and prints faster. This is a practical Money-saving tip over time.
- Two-Sided Printing: Utilize duplex printing (if your printer supports it) to save paper, contributing to both environmental and financial savings.
- Network Security: If your printer is connected to a network, ensure your Wi-Fi network is secure with a strong password. This is paramount for digital security, preventing unauthorized access to your printer or network.
Conclusion
Installing a printer on your MacBook Air doesn’t have to be a daunting task. With macOS’s user-friendly interface and modern printer technologies like AirPrint, the process is often seamless. By following the steps outlined in this guide – whether opting for the convenience of wireless, the reliability of USB, or the precision of IP configuration – you can quickly get your printer up and running.
Beyond installation, remember that consistent software updates, smart maintenance, and mindful usage are crucial for maximizing your printer’s efficiency and lifespan. Integrating your printer effectively into your MacBook Air ecosystem is a testament to leveraging Tech tools for enhanced Productivity and security, ensuring your digital efforts can effortlessly translate into tangible results. With your printer now ready, your MacBook Air becomes an even more versatile hub for both your digital and physical document needs.
aViewFromTheCave is a participant in the Amazon Services LLC Associates Program, an affiliate advertising program designed to provide a means for sites to earn advertising fees by advertising and linking to Amazon.com. Amazon, the Amazon logo, AmazonSupply, and the AmazonSupply logo are trademarks of Amazon.com, Inc. or its affiliates. As an Amazon Associate we earn affiliate commissions from qualifying purchases.