In the rapidly evolving world of technology, keeping your personal computer up-to-date is often a necessity, not just a luxury. Whether you’re a hardcore gamer chasing the latest high-fidelity visuals, a content creator rendering complex 3D models or editing 4K video, or simply someone looking to enhance their productivity with multiple high-resolution monitors, upgrading your graphics card (GPU) is one of the most impactful improvements you can make. It’s the central nervous system for all visual output, directly influencing everything from frame rates in games to the smoothness of your professional applications.
At GlobalizeThis, we understand the thrill of unlocking new capabilities from your hardware and the satisfaction of a successful DIY project. While the idea of delving inside your PC might seem daunting to some, installing a new graphics card is a surprisingly straightforward process that most users can accomplish with a little guidance and the right tools. This guide, falling squarely into our “Tech” category, is designed to demystify the process, offering a step-by-step walkthrough to ensure a smooth transition and a significant boost to your system’s graphical prowess. We’ll cover everything from crucial preliminary checks to the final software setup, ensuring you’re ready to harness the full power of your new GPU.
Preparation is Key: Setting the Stage for Success
Before you even think about opening your PC case, a thorough preparation phase is critical. Skipping these initial steps can lead to compatibility issues, lost data, or unnecessary frustration. Think of it as laying a solid foundation before building a house – a strong start ensures a stable and successful outcome.
Understanding Compatibility: The Foundation of Your Upgrade
The first and most crucial step is to ensure your new graphics card is compatible with your existing system. This isn’t just about whether it physically fits, but also if your other components can support it.
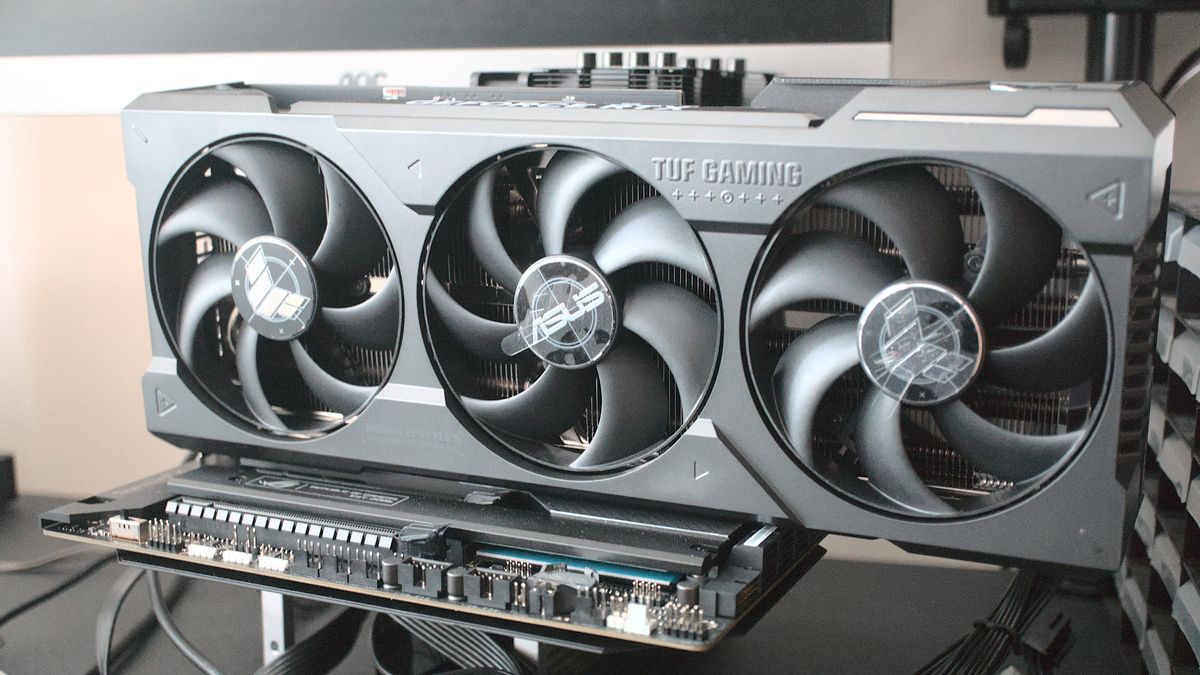
- Motherboard PCIe Slot: Virtually all modern graphics cards use a PCI Express x16 slot. Most motherboards will have at least one such slot, typically the topmost long slot. Ensure your motherboard has an available PCIe x16 slot and that your new card is compatible with its generation (e.g., PCIe 4.0 card in a PCIe 3.0 slot will work, but at reduced speeds; a PCIe 5.0 slot offers future-proofing).
- Power Supply Unit (PSU): Graphics cards are power-hungry components. Your PSU must have enough wattage to meet the new GPU’s requirements, plus enough headroom for the rest of your system. Check the recommended PSU wattage on your new GPU’s specifications sheet and compare it to your existing PSU’s output. Furthermore, verify that your PSU has the necessary PCIe power connectors (e.g., 6-pin, 8-pin, or 12VHPWR for NVIDIA’s latest cards). Using adapters is generally not recommended for high-power cards due to potential instability or fire hazards.
- Case Size and Airflow: Modern graphics cards can be exceptionally long, wide, and thick. Measure the internal dimensions of your PC case and compare them to your new GPU’s physical dimensions to confirm it will fit without obstructing other components or case fans. Adequate airflow is also vital to prevent overheating, especially with high-performance cards.
- CPU Bottleneck: While not a direct compatibility issue, a significantly older or lower-end CPU might “bottleneck” a powerful new GPU, meaning the CPU can’t feed data to the GPU fast enough, preventing it from reaching its full potential. Researching potential CPU-GPU bottlenecks for your specific components can help manage expectations or inform a future CPU upgrade.
Essential Pre-Installation Steps and Tools
Once compatibility is confirmed, it’s time to get your system ready for the swap.
- Backup Important Data: While a GPU installation is generally safe for data, it’s always wise to back up critical files before any internal PC work. This falls under the digital security aspect of our “Tech” topics, emphasizing a proactive approach to data safety.
- Download New Drivers (and DDU): Before removing your old card, download the latest drivers for your new graphics card from the manufacturer’s official website (NVIDIA, AMD, Intel). Also, download Display Driver Uninstaller (DDU), a free utility that thoroughly removes old GPU drivers, preventing conflicts. Store these on a USB drive or easily accessible location.
- Gather Your Tools: You’ll primarily need a Phillips head screwdriver. An anti-static wrist strap is highly recommended to protect sensitive components from electrostatic discharge (ESD). Good lighting and a clean, spacious workspace are also invaluable.
- Power Down and Disconnect: Completely shut down your PC, unplug it from the wall outlet, and disconnect all peripherals (monitor, keyboard, mouse, etc.). Press and hold the power button for 10-15 seconds after unplugging to discharge any residual power.
- Ground Yourself: Static electricity is the enemy of electronics. Before touching any internal components, ground yourself by wearing an anti-static wrist strap connected to a metal part of your PC case, or by periodically touching a grounded metal object.
The Uninstallation Process: Removing the Old Graphics Card
With preparations complete, it’s time to open your PC and carefully remove the existing graphics card. This step requires patience and a gentle touch to avoid damaging your motherboard or the card itself.
Opening the Case and Disconnecting Power
- Open the Side Panel: Lay your PC case on its side, ideally on a non-conductive surface. Locate and remove the screws holding the side panel in place (usually the left panel when looking at the front of the PC). Gently slide or swing the panel open and set it aside.
- Disconnect Power Cables: Inside the case, locate your current graphics card. You’ll likely see one or more PCIe power cables connected to it from your power supply. These can be 6-pin, 8-pin, or a combination. Gently press the small clip on the connector and pull the cable straight out. Avoid yanking.
Unscrewing and Releasing the Old GPU
- Unscrew the GPU from the Case: Graphics cards are secured to the PC case via one or two screws at the back, next to the video output ports. Use your Phillips head screwdriver to carefully remove these screws. Keep them in a safe place.
- Release the PCIe Retention Clip: This is a crucial step often overlooked. At the end of the PCIe x16 slot on the motherboard, there’s a small plastic or metal retention clip. This clip automatically locks the graphics card in place. You’ll need to gently push it away from the card (or sometimes push down/up, depending on the motherboard design) to release the lock. You should hear a faint click. Do not force the card out without releasing this clip, as it can damage both the card and the motherboard slot.
- Gently Remove the Old Card: With the screws removed and the retention clip released, grasp the graphics card firmly by its edges (avoid touching the heatsink fins or circuit board components) and pull it straight up and out of the PCIe slot. Place the old card in its anti-static bag or a safe, non-conductive location.
Installing Your New Graphics Card: A Step-by-Step Guide
Now for the exciting part – putting your new graphics card into its rightful place! This process largely mirrors the uninstallation but in reverse, with added attention to proper seating and power connections.
Unpacking and Preparing the Slot
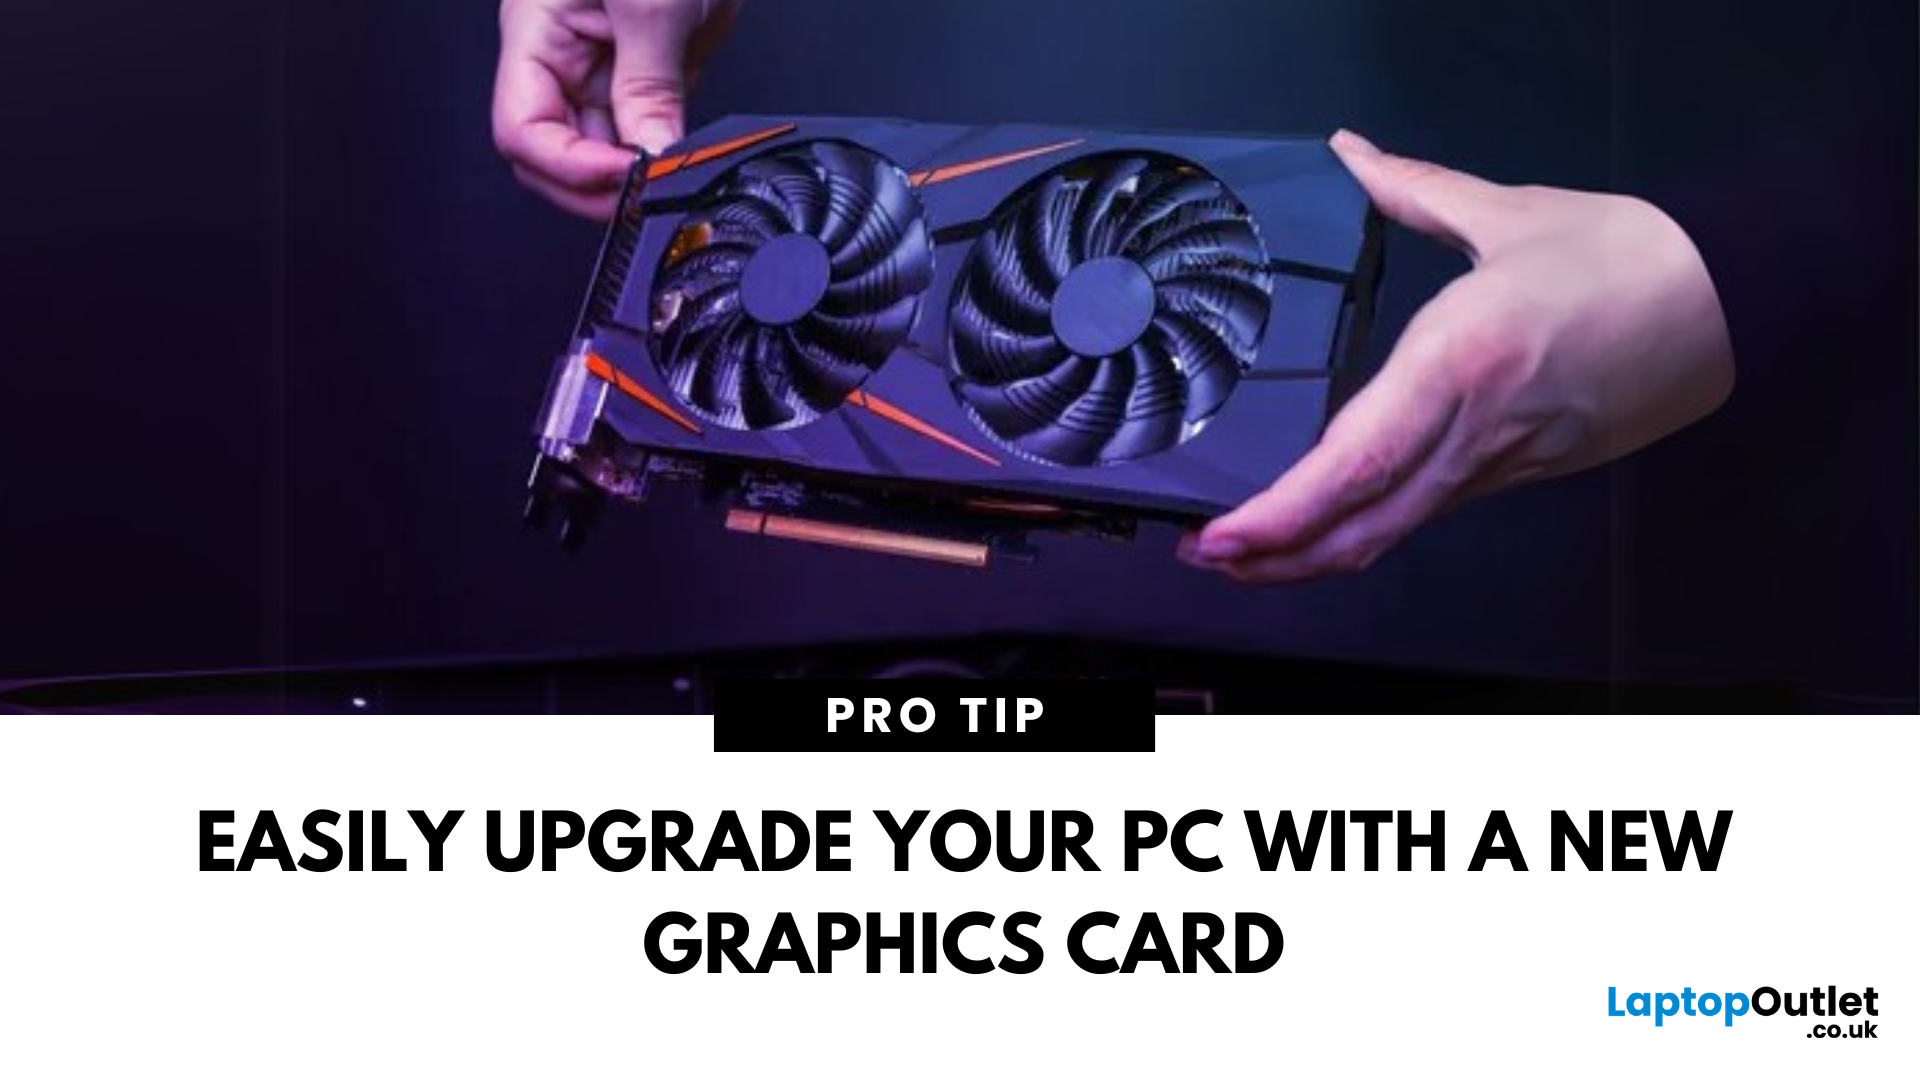
- Unpack Your New GPU: Carefully remove your new graphics card from its anti-static packaging. Avoid touching the gold contacts on the PCIe connector or any sensitive components.
- Remove PCIe Slot Covers (if necessary): If your new GPU is thicker than your old one, or if you’re installing it in a previously unused slot, you might need to remove additional metal slot covers from the back of your PC case. These are usually held in place by small screws or can be twisted off. Remove just enough covers to accommodate the thickness of your new card.
Seating the Card and Connecting Power
- Align and Insert the New GPU: Holding the new graphics card by its edges, carefully align the gold PCIe connector with the PCIe x16 slot on your motherboard. Ensure the card is perfectly perpendicular to the motherboard.
- Firmly Push Until it Clicks: Once aligned, apply even, firm pressure to the top edge of the graphics card until it seats fully into the slot. You should hear a satisfying click as the motherboard’s retention clip locks into place. Double-check that the clip has indeed closed and that the card is fully seated and level. A poorly seated card can lead to no display or instability.
- Secure the GPU to the Case: Use the screws you set aside earlier (or new ones that came with your case/GPU) to secure the graphics card to the back of your PC case. This prevents sag and ensures stability.
- Connect PCIe Power Cables: This is arguably the most critical connection. Take the appropriate PCIe power cables from your power supply and connect them firmly to the power ports on your new graphics card. Ensure all pins are properly inserted and the clips engage. Modern high-end cards may require two or even three 8-pin connectors, or the newer 12VHPWR connector. Refer to your GPU’s manual for exact requirements. Never mix and match power cables from different PSUs.
Final Checks Before Closing the Case
- Double-Check All Connections: Before closing up your PC, visually inspect all connections: the GPU seated in the PCIe slot, the retention clip engaged, and all necessary power cables connected securely. Also, ensure no loose cables are obstructing fans or airflow.
- Tidy Up Cables (Optional but Recommended): Use zip ties or Velcro straps to manage internal cables. Good cable management improves airflow and makes future maintenance easier, reflecting a professional “Brand” approach even to internal PC aesthetics.
- Close the Case: Carefully slide the side panel back into place and secure it with its screws.
Post-Installation Checklist: Powering On and Software Setup
The physical installation is complete, but your journey isn’t over yet. The next steps involve powering up your system, installing the necessary drivers, and ensuring everything is running optimally.
First Boot and Driver Installation
- Reconnect Peripherals and Power: Plug your PC back into the wall outlet, reconnect your monitor (preferably to one of the new GPU’s display outputs), keyboard, mouse, and any other peripherals.
- Power On Your PC: Press the power button. Your PC should boot up normally. If you encounter a “no display” issue, don’t panic; we’ll cover troubleshooting shortly.
- Install New Graphics Drivers: Once Windows (or your operating system) boots, navigate to the drivers you downloaded earlier.
- Run DDU First (Recommended): If you had an old GPU from a different manufacturer (e.g., switching from AMD to NVIDIA or vice-versa), it’s highly recommended to run Display Driver Uninstaller (DDU) in Windows Safe Mode to completely remove any remnants of old drivers. Reboot after DDU finishes.
- Install New Drivers: Run the driver installer you downloaded for your new graphics card. Follow the on-screen prompts. This process may involve screen flickering or temporary blackouts, which is normal. Reboot your PC after the driver installation is complete.
Verifying Installation and Performance Testing
- Check Device Manager: After rebooting, right-click on the Start button, select “Device Manager,” and expand “Display adapters.” You should see your new graphics card listed without any error symbols.
- Update BIOS/UEFI (If Necessary): In rare cases, an older motherboard BIOS/UEFI might not fully support newer graphics cards. If you experience instability or performance issues, check your motherboard manufacturer’s website for BIOS updates. Exercise caution when updating BIOS, as an improper update can brick your motherboard.
- Run Benchmarks and Games: The best way to test your new GPU is to put it through its paces. Run some demanding games or professional applications. Use benchmarking tools like 3DMark, FurMark, or Unigine Heaven/Superposition to gauge performance and monitor temperatures. Tools like HWMonitor or MSI Afterburner can help keep an eye on temperatures, clock speeds, and usage.
- Adjust Settings: Dive into your GPU control panel (NVIDIA Control Panel or AMD Adrenalin Software) to customize settings, optimize game profiles, and ensure you’re getting the best possible experience.
Troubleshooting Common Issues: What to Do When Things Go Wrong
Even with careful preparation, issues can sometimes arise. Knowing how to diagnose and address common problems can save you a lot of headache.
No Display Output
This is the most common and often most alarming issue.
- Check Display Cable: Ensure your monitor cable is securely plugged into one of the new graphics card’s output ports, not the motherboard’s integrated graphics ports (unless you specifically intend to use integrated graphics).
- Reseat the GPU: Power down, unplug, open the case, and firmly reseat the graphics card in its PCIe slot. Ensure the retention clip is fully engaged.
- Check Power Cables: Verify that all PCIe power cables are fully and securely plugged into the graphics card from the PSU.
- Clear CMOS: If the PC boots but still no display, try clearing your motherboard’s CMOS (Complementary Metal-Oxide Semiconductor). This resets BIOS settings to default and can often resolve display issues related to old hardware configurations. Consult your motherboard manual for the exact procedure (usually involves removing a battery or shorting pins).
- Test with Integrated Graphics (if available): If your CPU has integrated graphics, remove the new GPU, plug your monitor into the motherboard’s display output, and see if the PC boots. If it does, the issue might be with the GPU itself or the PCIe slot.
- Test with Old GPU: If possible, reinstall your old GPU to confirm the system still works with it. This helps isolate whether the problem is with the new GPU or the system.
Driver Issues
- Corrupted Drivers: If you’re experiencing crashes, freezes, or graphical artifacts, it often points to a driver issue. Re-run DDU in Safe Mode to completely uninstall all display drivers, then perform a clean installation of the latest drivers.
- Incorrect Drivers: Ensure you downloaded the correct drivers for your specific GPU model and operating system version.
Overheating and Instability
- Monitor Temperatures: Use monitoring software (e.g., HWMonitor, MSI Afterburner) to check your GPU’s temperatures under load. High temperatures can lead to throttling, performance drops, or crashes.
- Check Airflow: Ensure your case has good airflow, with intake and exhaust fans properly configured. Clean any dust from case fans or the GPU heatsink.
- Power Supply Issues: If your PC crashes under heavy load, your PSU might be insufficient or failing. Ensure it meets the recommended wattage for your new GPU.
Other Minor Annoyances
- Coil Whine: A high-pitched electrical buzzing sound from the GPU, especially under load. While annoying, it’s generally harmless and often more noticeable with high frame rates. It’s usually not a sign of a faulty card.
- Fan Noise: New, more powerful GPUs often have larger, more aggressive fans. You might notice increased fan noise under load compared to your old card. Adjusting fan curves in the GPU’s software can sometimes help.
Successfully installing a new graphics card is a rewarding experience that directly translates into a more powerful and responsive computing experience. By following this comprehensive guide, from careful preparation to meticulous installation and thorough post-setup checks, you’ll be able to confidently upgrade your system and enjoy the enhanced performance that a new GPU brings. This DIY approach not only saves you money on professional installation (a nod to our “Money” topic) but also empowers you with a deeper understanding of your own technology, aligning perfectly with our mission to make complex tech accessible and manageable for everyone. Enjoy your upgraded system, and welcome to a new realm of visual fidelity and speed!
aViewFromTheCave is a participant in the Amazon Services LLC Associates Program, an affiliate advertising program designed to provide a means for sites to earn advertising fees by advertising and linking to Amazon.com. Amazon, the Amazon logo, AmazonSupply, and the AmazonSupply logo are trademarks of Amazon.com, Inc. or its affiliates. As an Amazon Associate we earn affiliate commissions from qualifying purchases.