
In the ever-evolving landscape of technology, building or upgrading your own computer is a rite of passage for many enthusiasts and a smart financial move for savvy users. At the very heart of any PC lies the motherboard – the central nervous system that dictates how all other components communicate and function. A proper motherboard installation isn’t just about plugging in wires; it’s a meticulous process that ensures system stability, optimal performance, and longevity. This comprehensive guide will walk you through every step, transforming what might seem like a daunting task into an empowering experience, all while aligning with the principles of tech mastery, smart financial decisions, and even personal brand building through competence.
The Foundation of Your PC: Why Proper Motherboard Installation is Crucial
The motherboard, often called the mainboard or system board, is the primary circuit board within a computer that connects all other components, allowing them to receive power and communicate with each other. From the powerful CPU and graphics card to the speedy RAM and storage drives, every piece of hardware plugs into or communicates through the motherboard. Understanding its critical role underscores why its installation demands precision and care.
The Heart of Your PC: Understanding the Motherboard’s Role
Imagine your computer as a bustling city. The CPU is the city’s brain, processing all information. The RAM is its short-term memory, enabling quick access to data. The storage drives are its long-term archives. In this analogy, the motherboard is the intricate network of roads, power lines, and communication hubs that allow all these vital services to connect and interact seamlessly. Without a robust and correctly installed motherboard, your high-performance CPU might as well be a supercomputer stuck in traffic, unable to reach its destination.
A well-installed motherboard ensures stable power delivery, optimal data transfer speeds between components, and proper thermal management. It minimizes potential bottlenecks, allowing your system to perform at its peak efficiency, whether you’re engaging in high-fidelity gaming, intensive video editing, or complex AI model training. For those who rely on their machines for productivity or online income, this stability is paramount, preventing costly downtime and maintaining workflow continuity.
Benefits of DIY: Control, Cost-Effectiveness, and Learning
Opting to install your own motherboard, rather than paying for a professional service or buying a pre-built system, offers a multitude of advantages that resonate with both tech enthusiasts and financially savvy individuals.
Firstly, control. Building your own PC gives you complete control over component selection. You can handpick each part based on your specific needs, budget, and future upgrade path, avoiding the compromises often found in off-the-shelf machines. This empowers you to build a system perfectly tailored for your unique tasks, whether it’s specialized software for work, cutting-edge gaming, or a robust server setup.
Secondly, cost-effectiveness. While initially daunting, assembling your own PC can significantly reduce costs. You save on labor fees and often get better value for money by purchasing individual components during sales rather than buying a marked-up pre-built system. This DIY approach aligns perfectly with smart personal finance strategies, allowing you to allocate your budget more efficiently to get the most powerful machine for your investment. The money saved can be reinvested into better components, software, or even other side hustles.
Finally, the learning experience is invaluable. Successfully installing a motherboard and building a PC provides a deep understanding of computer hardware. This knowledge isn’t just a technical skill; it builds confidence and problem-solving abilities. It’s a fantastic way to develop your tech acumen, which can be leveraged in various ways, from troubleshooting your own system to assisting others, potentially even opening doors to tech-related income streams. This practical expertise contributes to your personal brand as someone capable and tech-literate.
Essential Pre-Installation Steps and Component Preparation
Before you even think about placing your motherboard into its new home, a series of crucial preparatory steps are required. These ensure safety, organization, and a smooth installation process, saving you time and frustration down the line.
Gathering Your Arsenal: Tools and Components
Preparation is key. Ensure you have all necessary components and tools laid out and easily accessible.
Required Components:
- Motherboard: Your chosen model.
- CPU (Processor): The central processing unit.
- CPU Cooler: Essential for thermal management, often comes with the CPU or is purchased separately (stock or aftermarket).
- RAM (Memory Modules): The sticks of random access memory.
- PC Case: The enclosure for all your components.
- Power Supply Unit (PSU): To provide power to your system.
- Storage Drives: SSDs (Solid State Drives) or HDDs (Hard Disk Drives).
- Graphics Card (GPU): If not using integrated graphics, or for gaming/intensive tasks.
- Screws and Standoffs: Usually included with the motherboard or PC case.
- Thermal Paste: If your CPU cooler doesn’t have it pre-applied.
Essential Tools:
- Phillips Head Screwdriver (Magnetic Tip Recommended): The primary tool for almost every screw.
- Zip Ties or Velcro Straps: For cable management, crucial for airflow and aesthetics.
- Anti-Static Wrist Strap: Absolutely critical for preventing ESD damage.
- Flashlight (Optional but Recommended): For illuminating dark corners of the case.
- User Manuals: For your motherboard and CPU cooler – these are your blueprints.
Prioritizing Safety: Static Electricity and Workspace
Static electricity (ESD – Electrostatic Discharge) is the silent killer of computer components. A small static shock, imperceptible to humans, can fry sensitive circuitry.
- Ground Yourself: Before touching any component, especially the motherboard or CPU, ground yourself. The simplest way is to wear an anti-static wrist strap connected to an unpainted metal object (like your PC case’s metal frame or a grounded outlet’s screw). Alternatively, frequently touch a grounded metal object, but a wrist strap offers continuous protection.
- Clean and Organized Workspace: Work on a flat, clean, and well-lit surface, preferably non-carpeted. Avoid working directly on carpet, as it generates static. Lay down a non-conductive surface like a cardboard box (from your motherboard, for example) to work on.
- Handle Components Carefully: Always handle components by their edges, avoiding contact with pins, gold connectors, or integrated circuits.
- Open Motherboard Box: Unbox your motherboard and place it on its anti-static bag or on the cardboard box it came in. This provides a safe, insulated surface for pre-installation steps.
Step-by-Step: The Core Motherboard Installation Process
With preparations complete, we can now dive into the hands-on installation. We’ll start with components that are easier to install outside the case.
CPU Installation: The Brain of Your System
The CPU is one of the most delicate and expensive components, so extreme care is necessary.
- Open the CPU Socket: Locate the CPU socket on your motherboard. It’s typically a square or rectangular slot with a metal retention arm. Gently push down and outward on the lever to release it, then lift the metal load plate or frame.
- Orient the CPU: On the corner of your CPU, you’ll find a small golden triangle or arrow. Match this with the corresponding triangle/arrow on the CPU socket or load plate. This ensures correct orientation. Do not force the CPU into the socket. It should drop in effortlessly with minimal pressure.
- Secure the CPU: Once the CPU is seated correctly, lower the metal load plate and push the retention arm back into its original position. You might feel a slight resistance, which is normal.
- Apply Thermal Paste (If Needed): If your CPU cooler does not have thermal paste pre-applied, apply a small, pea-sized dot of thermal paste to the center of the CPU’s integrated heat spreader (IHS). This paste is critical for transferring heat from the CPU to the cooler.
- Install the CPU Cooler: Follow the instructions for your specific CPU cooler. This usually involves aligning the cooler with the mounting holes around the CPU socket and securing it with screws or clips. Ensure even pressure and that the cooler makes full contact with the CPU. Connect the CPU cooler’s fan cable to the “CPU_FAN” header on the motherboard.
RAM Installation: Memory for Multitasking
RAM modules are relatively simple to install, but correct slot usage and proper seating are vital.
- Locate RAM Slots: Your motherboard will have 2 or 4 (sometimes more) long, thin slots, usually colored, on one side of the CPU socket.
- Open Latches: Push open the retention clips on both ends of the RAM slots you intend to use.
- Orient RAM Modules: Look at the notch on the bottom edge of your RAM stick. Align this notch with the corresponding ridge in the RAM slot.
- Insert RAM: Place the RAM module into the slot, apply firm, even pressure to both ends until the clips snap into place. You should hear an audible click. Verify both clips are fully closed.
- Populating Slots: Refer to your motherboard manual for the recommended slots if you’re not populating all of them (e.g., for dual-channel memory configuration, you usually use slots 2 and 4, or A2 and B2).
Mounting the Motherboard into the PC Case
Now it’s time to move the prepared motherboard into its new home – the PC case.
- Install I/O Shield: If your case didn’t come with one pre-installed, locate the I/O shield (a thin metal plate with cutouts for your motherboard’s ports). It presses into the rectangular opening at the back of your PC case from the inside. Ensure it’s flush and secure. Be careful of sharp edges.
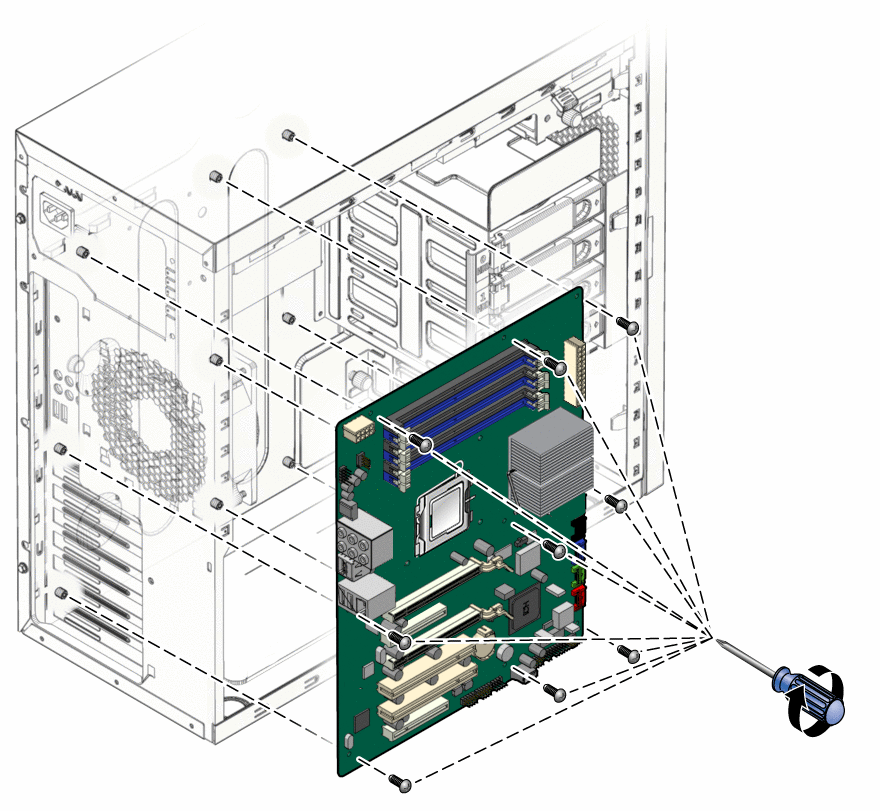
- Install Standoffs: Most modern cases have standoffs (small metal risers) pre-installed. These prevent the motherboard from shorting out on the metal case tray. Compare your motherboard’s screw holes to the standoffs in your case. If necessary, install or remove standoffs to match your motherboard’s form factor (ATX, Micro-ATX, Mini-ITX). You can use a standoff tool or pliers for this.
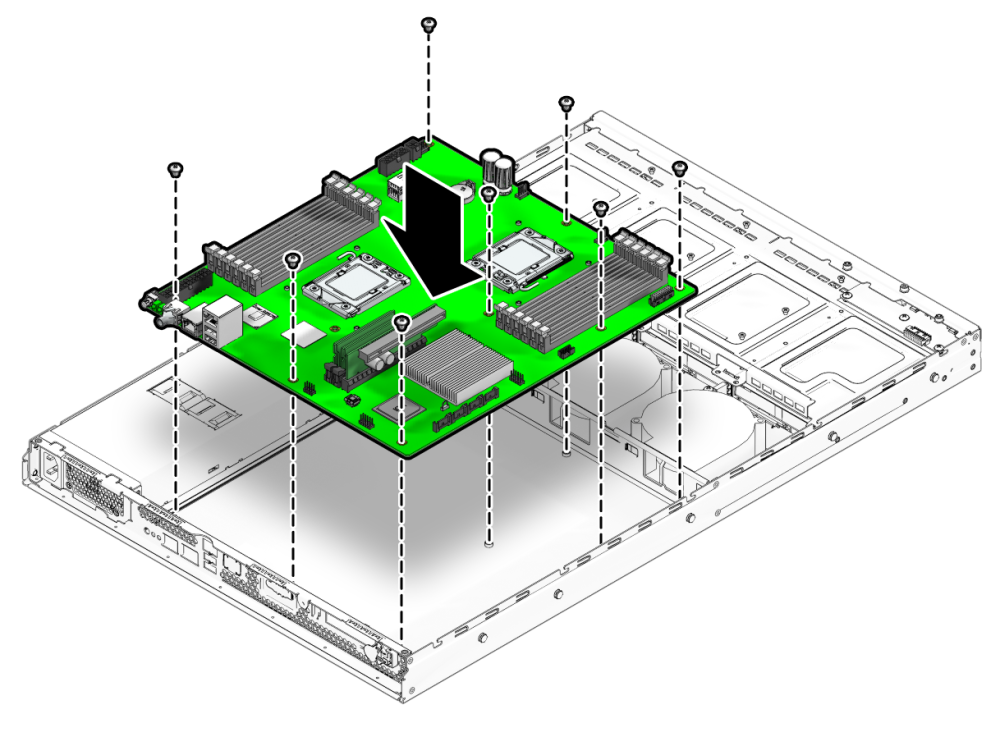
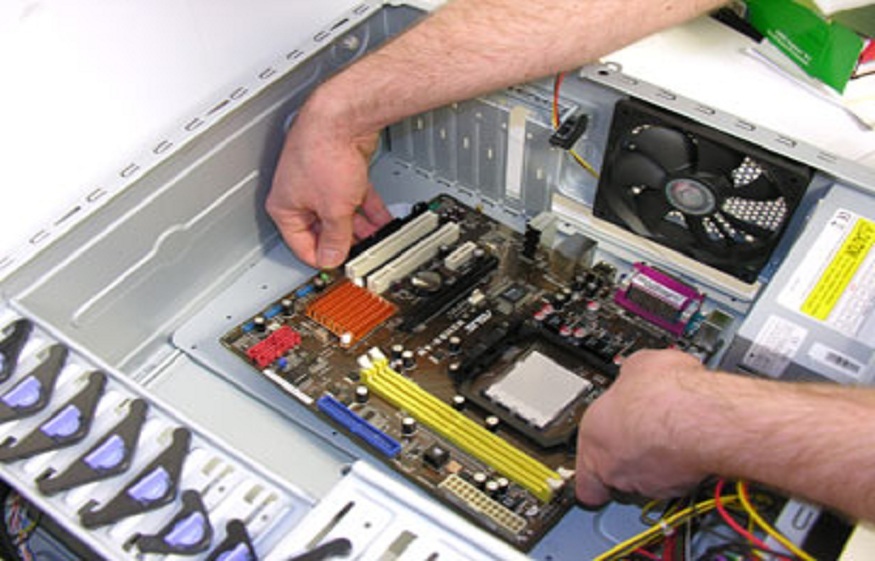
- Position the Motherboard: Carefully lower the motherboard into the case, aligning its screw holes with the installed standoffs. Ensure that the motherboard’s ports align perfectly with the cutouts on the I/O shield.
- Secure the Motherboard: Once aligned, use a Phillips head screwdriver to screw the motherboard into the standoffs. Do not overtighten, but ensure each screw is snug. Typically, there are 6-9 screws for a standard ATX motherboard.
Connecting Power and Front Panel Cables
This is where the system starts to come alive. Proper cable connections are vital for functionality.
- Main ATX Power (24-pin): Locate the largest power connector from your PSU. It’s a wide, rectangular plug. Align it with the corresponding 24-pin socket on your motherboard (usually on the side). Press firmly until it clicks into place.
- CPU Power (4/8-pin EPS): This connector supplies power directly to the CPU. It’s usually an 8-pin (4+4 pin) connector and located near the top-left of the CPU socket. Ensure it’s fully seated.
- Front Panel Connectors: These are the smallest and often the trickiest. They connect your case’s power button, reset button, USB ports, audio jacks, and indicator LEDs to the motherboard.
- Power Switch (PWRSW), Reset Switch (RESETSW), HDD LED, Power LED: These are tiny individual pins. Consult your motherboard manual for their exact orientation and location, usually labeled in the bottom-right corner of the motherboard. Polarity matters for LEDs (+/-).
- USB Headers (USB 2.0/3.0/3.1): Connect your case’s front panel USB cables to the corresponding headers. USB 3.0/3.1 headers are typically larger and blue.
- Front Panel Audio (HDAUDIO): Connect the case’s audio cable to the FAUDIO header, usually at the bottom-left of the motherboard.
- Cable Management Tip: Route these cables neatly through the back of the case (behind the motherboard tray) to keep the main compartment tidy for better airflow and aesthetics, contributing to a professional-looking build.
Integrating Storage and Expansion Cards
Almost there! Now for your storage drives and any additional cards like GPUs.
- SATA Drives (SSDs/HDDs):
- Mount Drives: Install your SSDs or HDDs into their designated bays in the PC case.
- Connect SATA Data Cables: Connect one end of the SATA data cable to a SATA port on your motherboard and the other end to your drive. Modern motherboards typically have 4-8 SATA ports.
- Connect SATA Power Cables: Connect a SATA power cable from your PSU to each drive.
- Graphics Card (GPU):
- Locate PCIe Slot: Identify the primary PCIe x16 slot on your motherboard (usually the top-most, reinforced slot).
- Remove Case Bracket: Remove the corresponding metal bracket from the back of your PC case.
- Insert GPU: Gently push the GPU into the PCIe slot until it clicks into place and the retention clip at the end of the slot automatically closes.
- Secure GPU: Screw the GPU into the case using the screw from the removed bracket.
- Connect PCIe Power: If your graphics card requires external power, connect the appropriate 6-pin or 8-pin PCIe power cables from your PSU to the card.
Post-Installation Checks and First Boot
The final stretch – verifying everything is in place and then the moment of truth.
Verifying Connections and Cable Management
Before hitting the power button, take a moment for a thorough inspection.
- Double-Check All Connections: Ensure every cable – power, data, front panel, CPU cooler fan – is securely seated and properly connected. Loose connections are a common source of troubleshooting headaches.
- Cable Management: Neatly route all cables using zip ties or Velcro straps. Good cable management isn’t just for aesthetics; it improves airflow within the case, helping to keep components cool and extending their lifespan. This also makes future upgrades or troubleshooting much easier.
- Clear the Case: Ensure no stray screws, tools, or packaging materials are left inside the case.
The Moment of Truth: Initial Power-Up
- Connect Peripherals: Plug in your monitor (to the graphics card, not the motherboard’s I/O unless you’re using integrated graphics), keyboard, and mouse.
- Connect Power: Plug the main power cable into your PSU and flip the PSU’s power switch to the “on” position.
- Press the Power Button: Take a deep breath and press the front panel power button on your case.
- Observe:
- Do the fans spin (CPU cooler, case fans, GPU fans)?
- Do any lights on the motherboard illuminate?
- Does anything appear on your monitor? (You should ideally see the BIOS/UEFI screen).
- Do you hear any beeps? (Motherboard beeps codes can indicate specific issues, refer to your motherboard manual).
If everything powers on and you see something on your screen, congratulations! You’ve successfully installed your motherboard. You can now proceed with installing your operating system.
Troubleshooting Common Installation Issues
Even experienced builders encounter hiccups. Don’t despair if your system doesn’t immediately spring to life. Troubleshooting is a core part of the tech journey.
- No Power / No Fans:
- Is the PSU switch flipped ON?
- Is the main 24-pin ATX power cable fully seated?
- Is the 4/8-pin CPU power cable connected?
- Are the front panel power switch pins correctly connected to the motherboard?
- No Display (Fans spin, lights on):
- Is your monitor connected to the graphics card (if you have one) or the motherboard’s video output?
- Is the monitor cable securely plugged in?
- Is the graphics card properly seated in its PCIe slot and receiving power?
- Are the RAM modules correctly seated in their recommended slots? Try reseating them.
- Boot Loops / Instability:
- Often RAM or CPU related. Recheck RAM seating.
- Verify CPU cooler is properly installed and making good contact.
- Clear CMOS (refer to motherboard manual for button/jumper location).
- Beep Codes: Listen for a series of beeps when you power on. These are diagnostic codes. Consult your motherboard manual to decipher them; they often point directly to issues with RAM, GPU, or CPU.
Patience is key during troubleshooting. Systematically recheck each connection and consult your motherboard manual. Online communities and forums are also excellent resources for specific issues.
Elevating Your Tech: The Long-Term Benefits of DIY
Successfully installing a motherboard is more than just assembling components; it’s an investment in your technological self-sufficiency. This hands-on experience not only saves you money now but equips you with a deeper understanding of your machine, enhancing your ability to perform future upgrades, diagnose problems, and maximize its potential.
In an age where technology trends constantly shift, having the confidence to build and maintain your own system is an invaluable asset. It empowers you to adapt to new software, leverage advanced AI tools, and stay productive without relying on external support for basic hardware issues. From a financial perspective, a well-built and maintained PC can serve as the backbone for various online income ventures or productivity tools, offering a robust platform for your digital pursuits.
Embrace the DIY ethos. You’ve just mastered a fundamental skill in PC building, paving the way for a more controlled, cost-effective, and ultimately, more rewarding tech journey. This knowledge solidifies your personal brand as a competent individual in the digital realm and provides a strong foundation for future technological explorations and advancements.
aViewFromTheCave is a participant in the Amazon Services LLC Associates Program, an affiliate advertising program designed to provide a means for sites to earn advertising fees by advertising and linking to Amazon.com. Amazon, the Amazon logo, AmazonSupply, and the AmazonSupply logo are trademarks of Amazon.com, Inc. or its affiliates. As an Amazon Associate we earn affiliate commissions from qualifying purchases.