In the rapidly evolving world of technology, a personal computer’s capabilities are often defined by its components, and few components are as critical as the graphics card, or GPU (Graphics Processing Unit). Whether you’re an avid gamer seeking to immerse yourself in the latest AAA titles with breathtaking visuals, a professional content creator demanding accelerated performance for video editing and 3D rendering, or simply looking to breathe new life into an aging system, upgrading your graphics card is one of the most impactful enhancements you can make. It’s a decision that touches upon key aspects of technology trends, smart financial investment, and even the personal branding of your computing setup.
This comprehensive guide aims to demystify the process of installing a new graphics card, transforming what might seem like a daunting technical task into a straightforward, empowering experience. We’ll walk you through every step, from crucial pre-installation checks and gathering the right tools to the physical installation and crucial post-setup configurations. By the end of this article, you’ll not only have successfully upgraded your PC but also gained a deeper understanding of the hardware that powers your digital world, ensuring you maximize your technological investment and enjoy a seamlessly enhanced computing journey.
Why Upgrade Your Graphics Card? Elevating Your Digital Experience
The decision to upgrade a graphics card is often driven by a desire for improved performance, but the benefits extend far beyond simply faster frame rates. In today’s landscape, a powerful GPU is a gateway to new experiences and enhanced productivity, touching upon the core aspects of modern technology and smart personal finance.
Enhanced Gaming Experience
For many, gaming is the primary catalyst for a GPU upgrade. Modern video games are increasingly demanding, pushing the boundaries of graphical fidelity with realistic lighting, complex textures, and vast open worlds. An older or integrated graphics solution simply cannot keep pace, leading to stuttering gameplay, reduced resolutions, and an inability to experience games as their developers intended.
Upgrading to a contemporary graphics card unlocks a world of possibilities:
- Higher Frame Rates: Experience smoother, more responsive gameplay, especially crucial in competitive online titles where every millisecond counts.
- Improved Visual Fidelity: Play games at higher resolutions (1080p, 1440p, 4K) with ultra settings, enabling features like real-time ray tracing for incredibly realistic lighting, shadows, and reflections.
- Virtual Reality (VR) Readiness: Many modern GPUs are VR-ready, opening the door to immersive virtual worlds and gaming experiences.
- Monitor Technologies: Leverage adaptive sync technologies like NVIDIA G-Sync or AMD FreeSync for tear-free gaming on compatible monitors, further enhancing visual smoothness.
The choice of GPU can even be seen as a form of personal tech branding – a statement about your commitment to high-performance gaming and your place within the enthusiast community.
Boosted Productivity for Creative and Professional Tasks
Beyond gaming, graphics cards have become indispensable tools for a wide array of professional and creative applications. Software across various industries leverages GPU acceleration to dramatically speed up computationally intensive tasks.
- Video Editing and Rendering: Applications like Adobe Premiere Pro, DaVinci Resolve, and Blender rely heavily on GPU power for faster timeline scrubbing, real-time effects preview, and significantly reduced rendering times. A powerful GPU can turn hours of waiting into minutes.
- 3D Modeling and Animation: Designers and animators using software such as Autodesk Maya, Cinema 4D, or ZBrush benefit from real-time viewport rendering, faster simulations, and quicker final renders.
- Graphic Design and Photo Editing: While less GPU-intensive than video or 3D, applications like Adobe Photoshop and Illustrator can utilize GPU acceleration for certain filters, effects, and complex image manipulations.
- Data Science and AI/Machine Learning: The parallel processing capabilities of modern GPUs make them ideal for training machine learning models, deep learning, and complex data analysis, turning a regular PC into a powerful workstation for cutting-edge AI tools.
- CAD and Engineering: Engineers and architects can render complex designs and run simulations much faster, improving workflow efficiency.
For professionals, a GPU upgrade is a direct investment in productivity, often yielding a significant return by saving valuable time and enabling more ambitious projects. This aligns perfectly with the “Money” aspect of our website, demonstrating how technological investment can directly impact earning potential and efficiency.
Future-Proofing Your Rig and Optimizing Your Investment
In the fast-paced tech world, components can become obsolete quickly. While no component can truly “future-proof” a system indefinitely, upgrading your graphics card is one of the most effective ways to extend the relevant lifespan of your PC. Instead of investing in an entirely new system, a GPU upgrade allows you to leverage your existing CPU, RAM, and storage, often at a fraction of the cost of a brand new build. This smart financial decision allows you to stay current with software and game requirements for several more years.
Moreover, a more powerful GPU enhances the overall value of your system, should you decide to sell or repurpose it down the line. It’s a strategic move that balances current performance needs with long-term technological relevance, offering a commendable return on investment in terms of both usability and potential resale value.
Essential Preparations Before Installation: The Foundation for Success
Before you even think about opening your PC case, thorough preparation is paramount. Skipping these critical steps can lead to compatibility issues, power problems, or even damage to your components. This phase is about minimizing risks and ensuring a smooth, successful upgrade.
Compatibility Check: GPU, Motherboard, and Case
The first and most crucial step is to verify that your chosen graphics card is compatible with your existing system.
- Motherboard: Almost all modern graphics cards use a PCI Express (PCIe) x16 slot. Ensure your motherboard has at least one available PCIe x16 slot. Most motherboards will have one or more, typically the top-most long slot, but it’s good to confirm. Also, be aware of the PCIe generation (e.g., PCIe 3.0, 4.0, 5.0). While newer GPUs are backward compatible with older PCIe slots, you might not get the full bandwidth in some extreme cases, though for most users, this performance impact is negligible.
- Physical Size (Case Clearance): Graphics cards come in various lengths and thicknesses. Measure the available space inside your PC case, from the rear expansion slots to the front drive bays or radiator. Compare this measurement with the dimensions of your new GPU (easily found on the manufacturer’s product page). Pay attention to both length and width (some cards are 2.5 or even 3 slots thick), ensuring it won’t interfere with other components like CPU coolers or front-mounted fans.
- Monitor Connections: Check the display outputs on your new GPU (HDMI, DisplayPort) and ensure they match the inputs on your monitor(s). You might need new cables or adapters.
Power Supply Unit (PSU) Requirements
The graphics card is often the most power-hungry component in your PC. An insufficient power supply can lead to system instability, crashes, or the card simply not working.
- Wattage: Every graphics card has a recommended minimum PSU wattage. Check the GPU manufacturer’s specifications. Then, identify the wattage of your current PSU (usually printed on the side of the unit itself). If your current PSU is below the recommended wattage, you must upgrade it before installing the new GPU.
- PCIe Power Connectors: Modern high-performance graphics cards require dedicated PCIe power cables directly from the PSU. These typically come in 6-pin or 8-pin configurations (or a combination, like 6+2 pin). Count the required connectors on your new GPU and ensure your PSU has the matching number and type of connectors available. Some older or lower-wattage PSUs might not have these dedicated connectors. Never use Molex-to-PCIe adapters for high-power GPUs, as they can be a fire hazard due to insufficient power delivery over the adapter.
Investing in a reliable, appropriately sized PSU is a non-negotiable part of a GPU upgrade, aligning with smart “Money” management for system longevity and safety.
Gathering Your Tools & Workspace Setup
Having the right tools at hand will make the installation process smoother and safer.
- Screwdriver: A Phillips-head screwdriver is usually all you need for opening the case and securing the GPU. Magnetic tips are helpful but not essential.
- Anti-Static Wrist Strap: This is highly recommended to prevent electrostatic discharge (ESD) from damaging sensitive components. ESD can be invisible but lethal to electronics.
- Flashlight or Headlamp: PC interiors can be dark, especially in tight spaces.
- Zip Ties or Velcro Straps: For cable management, making your PC look tidy and improving airflow.
- Small Container: To hold screws so they don’t get lost.
- Clean, Flat Workspace: A well-lit, clutter-free table or desk provides ample room to work. Avoid carpeted areas if possible, as they generate more static electricity.
- Canned Air (Optional but Recommended): For cleaning out dust from your PC case and components while you have it open.
Static Discharge and Safety Precautions
ESD is a real threat to computer components. Take these precautions seriously:
- Anti-Static Wrist Strap: Connect it to a grounded metal object (like the bare metal chassis of your PC).
- Unplug the PC: Always disconnect your PC from the wall outlet before opening the case.
- Touch Grounded Metal: Even without a wrist strap, frequently touch the bare metal of your PC case to discharge any static electricity built up on your body.
- Handle Components by Edges: Avoid touching the gold contacts or sensitive circuitry of the GPU or motherboard.
- Work on a Non-Static Surface: Avoid carpet, and ideally use a wooden or anti-static mat surface.
Safety also includes proper handling of tools and components to prevent physical damage. Work slowly and methodically.
Step-by-Step Graphics Card Installation: The Core Process
With all preparations complete, it’s time for the hands-on installation. Approach each step with care and patience.
Opening Your PC Case and Removing the Old GPU (If Applicable)
- Power Down and Disconnect: Shut down your PC completely, unplug the power cable from the wall and the back of your PC. Disconnect all peripherals (monitor, keyboard, mouse, etc.).
- Move to Workspace: Place your PC horizontally on your clean, flat workspace.
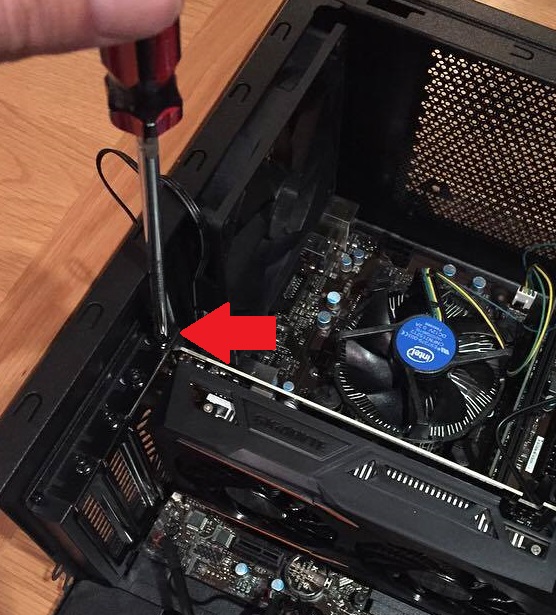
- Open the Side Panel: Use your screwdriver to remove the screws securing the side panel of your PC case (usually the left panel when looking from the front). Carefully slide or swing it open and set it aside.
- Locate the Old GPU (if any): Identify your existing graphics card. It will be plugged into a long PCIe x16 slot on your motherboard, usually the top-most one, and will likely have display cables connected to it from your monitor.
- Disconnect Power Cables: If your old GPU had PCIe power cables, carefully unclip and disconnect them.
- Unscrew the GPU: The GPU is typically secured to the case’s expansion slots with one or two screws at the back. Remove these screws.
- Release the PCIe Retention Clip: At the far end of the PCIe x16 slot, there will be a small plastic clip or lever. Gently push or pull this clip to release the GPU from the slot. Be careful not to force it.
- Carefully Remove the Old GPU: With the clip released and screws removed, gently but firmly pull the graphics card straight out of its PCIe slot. Place it in an anti-static bag or its original box for storage or resale.
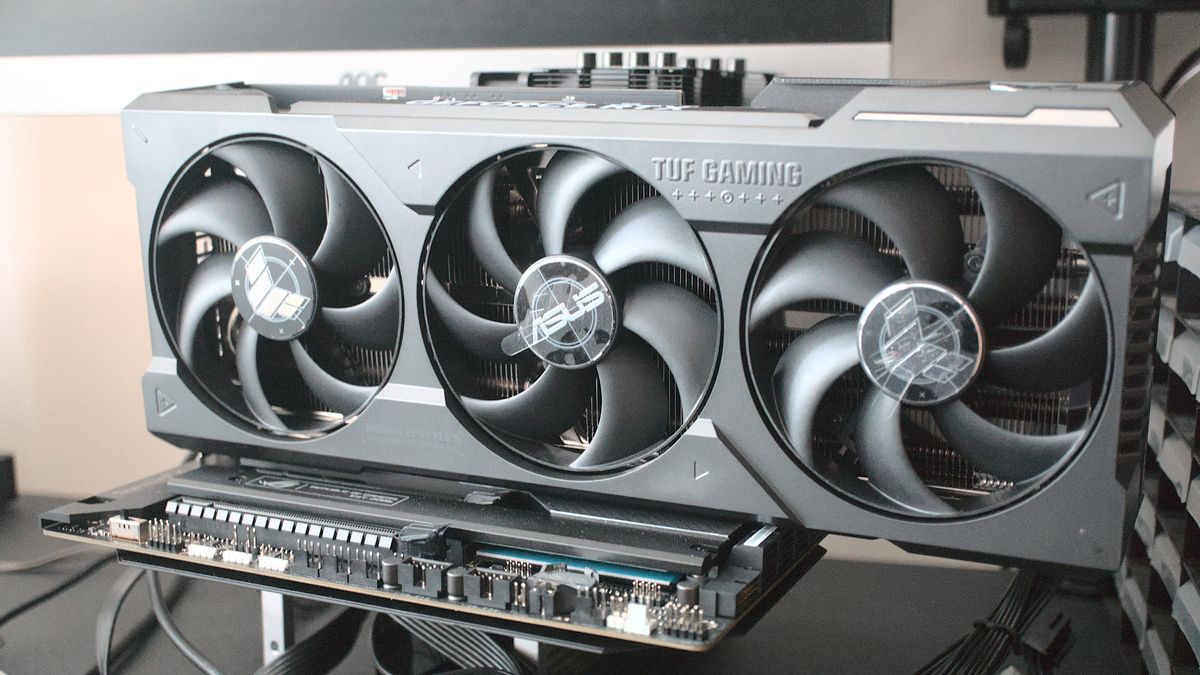
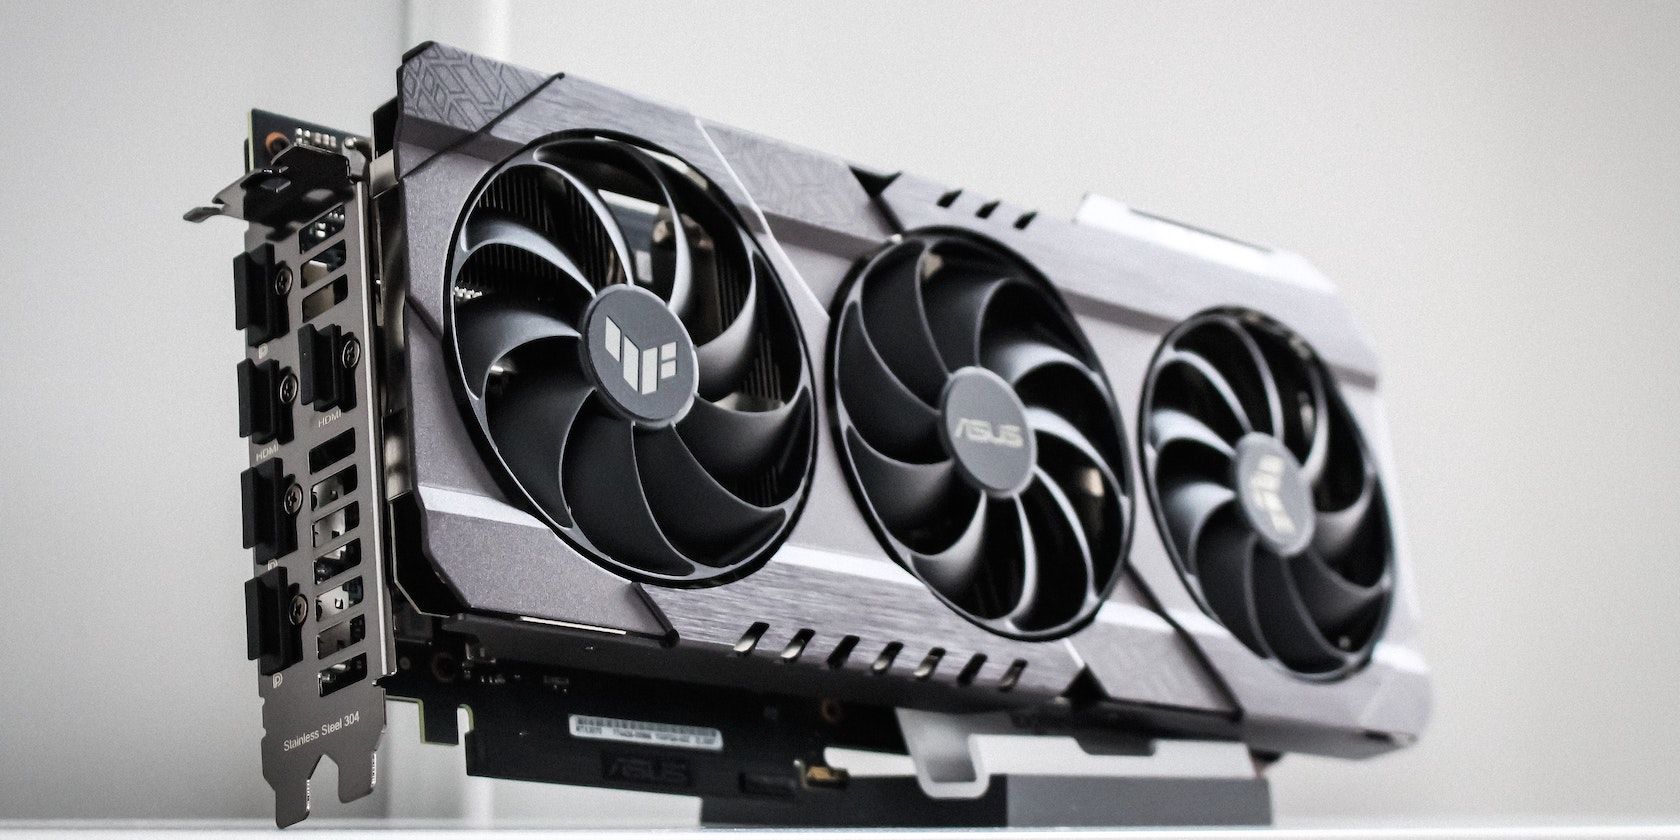
Seating the New Graphics Card
- Identify the PCIe Slot: Locate the primary PCIe x16 slot on your motherboard. It’s often reinforced with metal for heavier cards.
- Remove Expansion Slot Covers: Your new GPU will likely occupy two or three expansion slots at the back of your case. Remove the corresponding metal covers from the case by unscrewing them or twisting them off.
- Align the GPU: Carefully align the new graphics card with the PCIe x16 slot. Ensure the gold contacts on the card line up perfectly with the slot.
- Press Firmly and Evenly: With both hands, apply firm, even pressure to both ends of the graphics card until it clicks securely into place. You should hear a distinct “click” as the PCIe retention clip snaps shut. Visually confirm that the card is fully seated and level. If it’s not fully seated, your PC won’t detect it.
- Secure the GPU: Use the screws you removed earlier (or new screws provided with your case/GPU) to fasten the graphics card to the case’s expansion slots. This prevents sag and ensures stability.
Connecting Power Cables
This is a critical step. An unpowered or improperly powered GPU will not work.
- Identify Power Ports: Locate the 6-pin, 8-pin, or combination PCIe power ports on the new graphics card. These are usually on the top or side edge of the card, facing the side panel.
- Connect PCIe Power Cables: Take the corresponding PCIe power cables from your PSU and plug them firmly into the GPU’s ports. Ensure they click into place. If your GPU requires multiple connectors (e.g., two 8-pin), connect all of them. Do not leave any unpopulated.
- Cable Management: Route the power cables neatly using zip ties or Velcro straps to keep them away from fans and improve airflow. Good cable management not only looks professional (a touch of “Brand” for your PC) but also contributes to better cooling.
Securing the GPU and Closing the Case
- Double-Check Connections: Before closing up, quickly double-check that the GPU is fully seated, all power cables are securely connected, and no other cables are snagged or interfering with fans.
- Replace Side Panel: Carefully slide or swing the side panel back into place and secure it with its screws.
- Reconnect Peripherals: Reconnect your monitor, keyboard, mouse, and any other peripherals.
- Plug in Power: Finally, plug the PC’s power cable back into the wall outlet.
Post-Installation: Drivers, Testing, and Optimization
The physical installation is only half the battle. Software configuration is equally vital to ensure your new GPU performs at its best. This stage focuses on leveraging the “Tech” aspect of your upgrade.
Installing the Latest Drivers
Your operating system might detect the new GPU and install a generic driver, but for optimal performance and access to all features, you must install the latest drivers directly from the manufacturer.
- Boot Up Your PC: Power on your computer. If all went well, you should see your PC boot normally to your desktop. If you get no display, check the troubleshooting section below.
- Uninstall Old Drivers (Recommended): If you switched from an NVIDIA card to AMD, or vice-versa, it’s highly recommended to use a tool like Display Driver Uninstaller (DDU) in Windows Safe Mode to completely remove all traces of old display drivers. This prevents conflicts that can cause instability. If you’re upgrading from an older card of the same brand (e.g., NVIDIA to NVIDIA), this step is often less critical but still good practice.
- Download New Drivers: Visit the official website of your GPU manufacturer (NVIDIA.com or AMD.com). Navigate to their driver download section, input your specific graphics card model, and download the latest stable drivers for your operating system.
- Install Drivers: Run the downloaded driver installer. Follow the on-screen prompts. This process typically involves a few screen flickers and restarts.
- Verify Installation: Once installed, open your operating system’s device manager (search for “Device Manager” in Windows). Expand “Display adapters” and ensure your new graphics card is listed correctly. You can also open the manufacturer’s control panel software (NVIDIA Control Panel or AMD Adrenalin Software) to confirm detection and access settings.
Initial Testing and Troubleshooting Common Issues
After driver installation, it’s crucial to test your new GPU to ensure it’s functioning correctly.
- Basic Functionality: Open a few applications, browse the web, and check if everything feels responsive.
- Gaming/Benchmarks: Run a demanding game or a synthetic benchmark (like 3DMark or FurMark) to stress-test the GPU. Monitor temperatures and frame rates using software like MSI Afterburner or HWMonitor.
- Common Troubleshooting:
- No Display/Black Screen:
- Ensure the monitor cable is plugged into the new GPU’s output, not the motherboard’s integrated graphics output.
- Check if the GPU is fully seated in the PCIe slot.
- Verify all PCIe power cables are securely connected to the GPU.
- Try booting with only one RAM stick, or resetting CMOS (Clear Complementary Metal-Oxide Semiconductor) to clear motherboard settings.
- System Instability/Crashes:
- Often a sign of insufficient PSU power – double-check requirements.
- Could indicate driver issues – perform a clean driver installation using DDU.
- Overheating – monitor GPU temperatures during load. Ensure adequate case airflow.
- GPU Not Detected:
- Check Device Manager. If it’s not there, re-check seating and power connections.
- Ensure the PCIe x16 slot is enabled in your motherboard’s BIOS/UEFI settings (though usually auto-detected).
- No Display/Black Screen:
Optimizing for Peak Performance
Once your GPU is working, a few steps can help you squeeze out maximum performance.
- Game Settings: In games, experiment with settings to find the best balance between visual quality and desired frame rates. Utilize features like NVIDIA DLSS or AMD FSR if your card supports them for performance boosts.
- Manufacturer Software: Explore the features of NVIDIA Control Panel or AMD Adrenalin Software. These offer settings for resolution scaling, anti-aliasing, image sharpening, and game-specific profiles.
- Monitor Refresh Rate: Ensure your monitor’s refresh rate is set to its maximum (e.g., 144Hz, 240Hz) in Windows display settings for the smoothest experience.
- Case Airflow: Ensure your PC case has good airflow, with intake and exhaust fans properly oriented to prevent heat buildup, which can throttle GPU performance.
The Financial & Technological Impact of a GPU Upgrade: A Holistic View
Upgrading your graphics card isn’t just about plugging in a new piece of hardware; it’s a strategic decision that intersects technology, personal finance, and even your digital lifestyle’s “brand” identity.
Maximizing Your Investment
From a financial perspective, a carefully chosen GPU upgrade represents excellent value. It prolongs the lifespan of your existing PC, delaying the need for a full system replacement that could cost significantly more. For professionals, the increased productivity directly translates into time saved and enhanced output, offering a tangible return on investment. For gamers, it means unlocking years of cutting-edge entertainment without breaking the bank on an entirely new setup. Understanding the price-to-performance ratio, researching different brands and their offerings (e.g., NVIDIA’s CUDA cores for specific professional software, AMD’s open-source initiatives), and timing your purchase with market trends can further maximize this financial benefit. It’s an act of smart “Money” management within the tech realm.
Staying Ahead in the Tech Landscape
Technologically, your new GPU positions you at the forefront of modern computing. You gain access to the latest graphical innovations like ray tracing, advanced AI upscaling techniques (DLSS, FSR), and improved support for future applications and operating system features. This keeps your system relevant for AI tools, new software, and upcoming digital experiences. It demonstrates an understanding of “Technology Trends” and a proactive approach to maintaining a high-performance digital environment. Furthermore, choosing a reputable brand for your GPU, known for its driver support and cooling solutions, adds to the overall “Brand” quality and reliability of your personal computing experience.
By empowering yourself with the knowledge to perform this upgrade, you’re not just installing a component; you’re taking control of your digital future, enhancing your capabilities, and making a smart investment in your technological journey. Congratulations on your successful upgrade and welcome to a new realm of computing performance!
aViewFromTheCave is a participant in the Amazon Services LLC Associates Program, an affiliate advertising program designed to provide a means for sites to earn advertising fees by advertising and linking to Amazon.com. Amazon, the Amazon logo, AmazonSupply, and the AmazonSupply logo are trademarks of Amazon.com, Inc. or its affiliates. As an Amazon Associate we earn affiliate commissions from qualifying purchases.