In the vast and ever-evolving landscape of digital creation, fonts are often the unsung heroes. They dictate readability, set the tone, and fundamentally shape the visual identity of everything from a simple email to a sophisticated corporate presentation. For content creators, designers, marketers, and even everyday users looking to personalize their digital experience, knowing how to install and manage fonts is an indispensable skill. It’s an act of empowerment, unlocking a world of creative possibilities and allowing you to transcend the limitations of default system fonts.

Whether you’re aiming to refine your personal brand with a unique typeface, optimize your marketing materials for better engagement, or simply make your documents more aesthetically pleasing and readable, this comprehensive guide will walk you through the entire process. We’ll delve into understanding what fonts are, where to find them safely, and provide detailed, step-by-step instructions for installing them across various operating systems, ensuring your digital projects always look their best.
Understanding Fonts and Their Importance
Before diving into the mechanics of installation, it’s crucial to grasp what fonts are, their different forms, and why their selection and proper management can significantly impact your digital presence and productivity.
What is a Font? A Brief Overview
At its core, a font is a complete set of characters—letters, numbers, and symbols—that share a common design style, weight, and size. While often used interchangeably, “typeface” refers to the overall design of the characters (e.g., Arial, Times New Roman), and “font” refers to a specific style and size within that typeface (e.g., Arial Bold 12pt). In the digital realm, however, the term “font” is commonly used to refer to the digital file that contains the instructions for displaying a particular typeface.
Modern digital fonts primarily come in a few key formats:
- TrueType Font (TTF): Developed by Apple and Microsoft, TTF is one of the most common and widely supported font formats. It contains both screen and print font data in a single file, making it highly versatile.
- OpenType Font (OTF): A more advanced format developed by Adobe and Microsoft, OTF builds upon TTF. It offers greater capabilities for typographic features like ligatures, stylistic alternates, small caps, and extensive character sets, making it a favorite among professional designers.
- Web Open Font Format (WOFF & WOFF2): Specifically designed for web pages, WOFF fonts are essentially OpenType or TrueType fonts with compression and additional metadata. They load faster, making websites more efficient, and are crucial for consistent branding across online platforms.
Understanding these formats is useful, especially when downloading fonts, as some applications or operating systems might favor one over the other, though modern systems generally handle both TTF and OTF with ease.
Why Install New Fonts?
The default fonts provided by your operating system are functional, but they are designed for broad utility, not specific creative expression or optimized branding. Installing new fonts opens up a world of possibilities:
- Enhanced Design and Aesthetics: Custom fonts can elevate the visual appeal of any document, presentation, or digital graphic. They allow you to move beyond generic aesthetics and infuse your work with personality and professionalism. For graphic designers, a diverse font library is as essential as their software tools.
- Brand Identity and Consistency: For businesses and personal brands, a unique typeface is a cornerstone of corporate identity. It contributes significantly to how a brand is perceived, conveying traits like trustworthiness, innovation, or creativity. Consistent use of specific fonts across all touchpoints—website, marketing materials, social media—reinforces brand recognition.
- Improved Readability and User Experience (UX): While aesthetically pleasing, fonts also serve a crucial functional purpose: readability. Certain fonts are better suited for specific contexts, such as long-form articles, headlines, or data visualizations. Selecting the right font can significantly improve the user experience by making text easier to read and digest.
- Creative Freedom and Personalization: Beyond professional applications, new fonts allow you to personalize your digital environment, from your operating system’s UI to your favorite word processor. They provide a simple yet effective way to express individuality and tailor your tools to your preferences.
- Meeting Project Requirements: Many professional projects, especially those in design, publishing, or advertising, require specific fonts that may not be pre-installed on your system. Knowing how to quickly acquire and install these fonts is vital for meeting client expectations and project deadlines.
In essence, installing new fonts is not just about aesthetics; it’s about control, expression, and optimizing your digital communications for impact and clarity.
Where to Find and Download Fonts Safely
With a clear understanding of why new fonts are beneficial, the next logical step is to discover where to acquire them. The internet abounds with font resources, but it’s crucial to distinguish between reputable sources and those that might pose security risks or licensing issues.
Reputable Free Font Sources
For personal projects, hobbyists, or those on a budget, a wealth of high-quality free fonts is available. However, always double-check the licensing terms, as “free” often comes with restrictions (e.g., free for personal use only, requiring a commercial license for business applications).
- Google Fonts: An absolute powerhouse for web and print fonts, Google Fonts offers a vast, high-quality library of open-source fonts. All fonts are free for both personal and commercial use, making it an excellent starting point. The platform is also intuitive, allowing you to preview fonts and easily download entire families.
- DaFont: One of the oldest and most popular free font sites, DaFont boasts an enormous collection categorized for easy browsing. While it has a vast selection, pay close attention to the licensing terms displayed next to each font, as many are “free for personal use” only.
- Font Squirrel: This site curates a collection of high-quality, 100% free fonts that are also licensed for commercial use. Font Squirrel also provides a useful “Webfont Generator” and a “Font Identifier” tool, making it a fantastic resource for designers.
- Lost Type Co-Op: A unique foundry offering a selection of pay-what-you-want fonts, often with beautiful, distinctive designs. This model supports independent type designers, and many fonts are available for free for personal use.
Premium Font Marketplaces
For professional projects, advanced typographic features, or unique designs that stand out, investing in premium fonts is often worthwhile. These sources offer higher quality, more extensive character sets, broader language support, and clear commercial licensing.
- Adobe Fonts (formerly Typekit): Included with Adobe Creative Cloud subscriptions, Adobe Fonts provides access to thousands of high-quality fonts that can be seamlessly activated and synced across your Adobe applications. It’s an invaluable resource for designers already invested in the Adobe ecosystem.
- MyFonts: One of the largest and most comprehensive font marketplaces, MyFonts features fonts from hundreds of foundries worldwide. It offers an incredible variety, from classic typefaces to cutting-edge designs, suitable for every conceivable project.
- Creative Market: While offering more than just fonts (templates, graphics, themes), Creative Market hosts thousands of independent designers selling unique font packages, often bundled with extra graphics or vectors. It’s excellent for discovering trendy or niche typefaces.
- Fontspring: Known for its “worry-free licensing,” Fontspring offers a curated selection of fonts with clear, straightforward commercial licenses, simplifying the process for businesses.
Important Considerations Before Downloading
Before you click “download,” take a moment to consider these vital aspects:
- Licensing: This is paramount. Most free fonts are free for personal use but require a commercial license for any business, client, or revenue-generating project. Premium fonts typically come with various commercial licenses (desktop, web, app, ePub), so choose the one that matches your intended use. Misusing a font without proper licensing can lead to legal issues.
- File Types: As discussed, TTF and OTF are standard. Ensure the font you download is compatible with your operating system and the applications you plan to use it in.
- Security: Only download fonts from reputable websites. Malicious actors sometimes embed malware or viruses within font files. If a source looks suspicious or unsolicited, avoid it. Always use updated antivirus software and exercise caution.
- Completeness: Check if the font family includes all the weights and styles you need (e.g., regular, bold, italic, light, condensed). Some free fonts only offer a single weight.
By adhering to these guidelines, you can build a rich and legally sound font library that enhances your creative output without compromise.
Step-by-Step Font Installation Guides
Once you’ve found your desired font and reviewed its licensing, the installation process is relatively straightforward. While the core principle remains the same—placing the font file in a system directory where applications can access it—the specific steps vary slightly depending on your operating system.
Installing Fonts on Windows
Windows offers a simple and intuitive way to install fonts, making it accessible even for novice users.
- Download the Font File: Most fonts are downloaded as a
.zipfile. Locate the downloaded.zipfile, right-click on it, and select “Extract All…” to unpack its contents. You’ll typically find.ttfor.otffiles inside the extracted folder. - Locate the Font Files: Navigate into the extracted folder. You should see one or more font files with
.ttf(TrueType Font) or.otf(OpenType Font) extensions. - Install Method 1 (Right-Click Install):
- Select the font files you wish to install (you can select multiple by holding down Ctrl and clicking each file).
- Right-click on one of the selected font files.
- Choose “Install” from the context menu. If you’re installing multiple font files, Windows will quickly process them. If prompted, confirm administrator permissions.
- Pro Tip: For single users, the “Install for all users” option (if available) ensures the font is accessible to anyone using the computer. If you only need it for your profile, “Install” is sufficient.
- Install Method 2 (Via Windows Settings/Control Panel):
- Windows 10/11: Go to
Settings>Personalization>Fonts. You can drag and drop font files directly into the “Drag and drop to install” area. Alternatively, click “Get more fonts in Microsoft Store” to explore options. - Older Windows Versions (e.g., Windows 7/8): Open the
Control Panel, then search forFontsor navigate toAppearance and Personalization > Fonts. Once in the Fonts folder, you can drag and drop your.ttfor.otffiles directly into this window, or go toFile > Install New Font(if available) and browse to your font’s location.
- Windows 10/11: Go to
- Verify Installation: Once installed, the font should appear in the list within the Fonts settings window. You can then open any application (like Microsoft Word, PowerPoint, Photoshop) to confirm that the new font is available in its font selection menu. You might need to restart applications that were open during the installation process for the new fonts to appear.
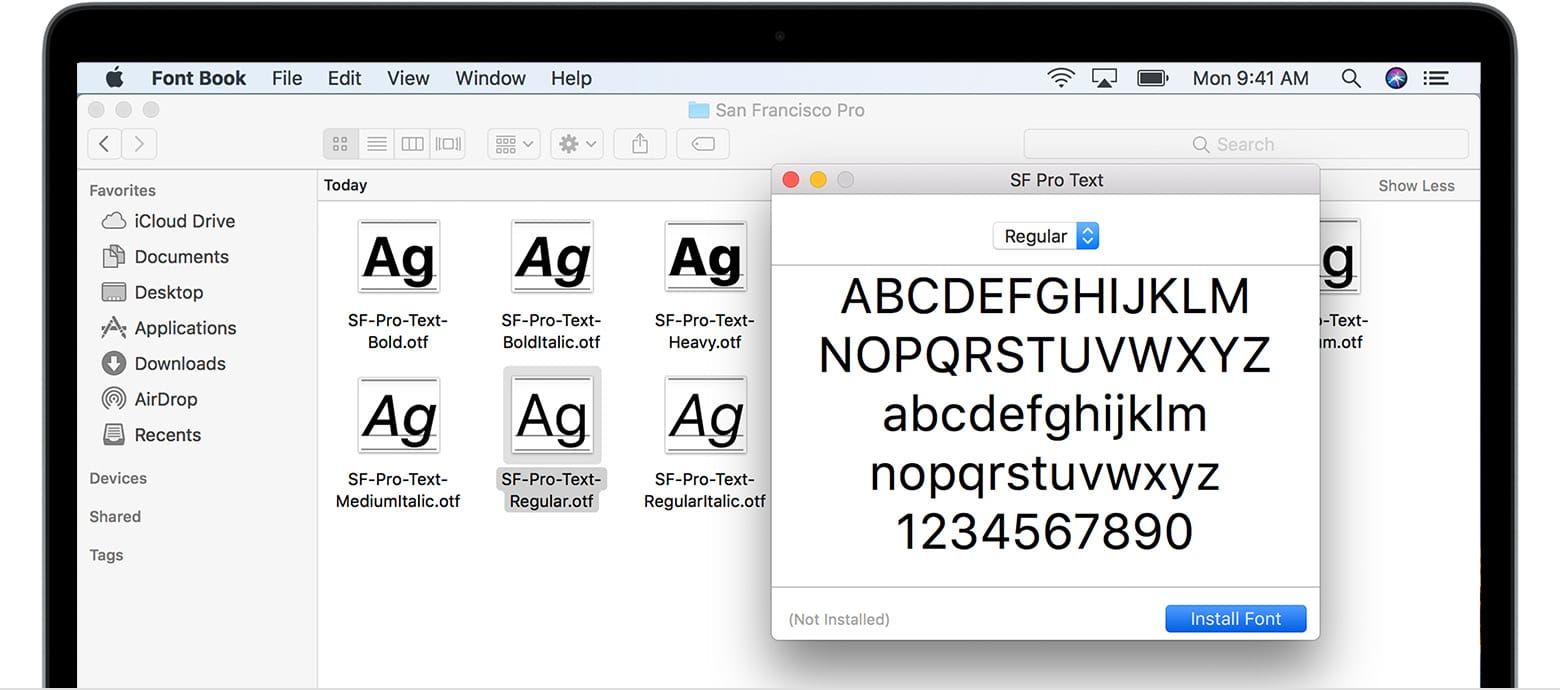
Installing Fonts on macOS
macOS provides a dedicated application, Font Book, which makes font management intuitive and robust.
- Download and Unzip: Just like Windows, macOS users will typically download fonts in a
.ziparchive. Double-click the.zipfile to extract its contents. You’ll find.ttfor.otffiles within. - Locate Font Files: Open the extracted folder and identify the
.ttfor.otffont files. - Install Method 1 (Double-Click):
- Simply double-click on an individual
.ttfor.otffont file. - This will automatically open the
Font Bookapplication, displaying a preview of the font. - Click the “Install Font” button at the bottom right of the preview window.
- Font Book will then validate the font (checking for common errors or duplicates) and add it to your system.
- Simply double-click on an individual
- Install Method 2 (Drag and Drop to Font Book):
- Open the
Font Bookapplication (you can find it inApplications > Font Bookor by searching with Spotlight Cmd + Space). - Drag and drop the
.ttfor.otffont files directly into the Font Book window. You can drag them onto “All Fonts” or into a specific collection you’ve created. - Font Book will perform validation and then install the fonts.
- Open the
- Verify Installation: After installation, the font will be listed in Font Book. Open any application (e.g., Pages, Keynote, Adobe Illustrator) to verify the font’s availability in its font menus. Again, restarting applications is often necessary for newly installed fonts to appear.
- Font Validation: Font Book’s validation step is very useful. If a font has issues, Font Book will alert you, allowing you to decide whether to proceed or discard a potentially problematic file.
Installing Fonts on Linux
Linux offers flexibility, but the process can vary slightly depending on your distribution and whether you want the font available system-wide or only for your user account.
- Download and Unzip: Download the font
.zipfile and extract its contents to reveal the.ttfor.otffiles. - User-Specific Installation (Recommended for most users):
- Open your file manager (e.g., Nautilus for GNOME, Dolphin for KDE).
- Navigate to your home directory (
~). - Look for a hidden folder named
.fonts. If it doesn’t exist, create it:mkdir ~/.fonts. (Remember the dot makes it hidden). - Copy the
.ttfor.otffont files from your extracted download folder into the~/.fontsdirectory. - Update Font Cache: After copying, you need to update the font cache so your system recognizes the new fonts. Open a terminal (Ctrl+Alt+T) and run the command:
fc-cache -fv.-fforces a rebuild of the cache.-vprovides verbose output, showing you what’s happening.
- System-Wide Installation (For all users on the machine):
- This usually requires root privileges.
- The common directories for system-wide fonts are
/usr/share/fonts/or/usr/local/share/fonts/. - It’s good practice to create a new subdirectory for your new fonts within one of these locations, for example:
sudo mkdir /usr/local/share/fonts/my_custom_fonts. - Copy your font files into this new directory:
sudo cp /path/to/downloaded_fonts/*.ttf /usr/local/share/fonts/my_custom_fonts/. (Replace/path/to/downloaded_fonts/with your actual path). - Update Font Cache: Open a terminal and run:
sudo fc-cache -fv.
- Verify Installation: Close and reopen any applications or log out and log back in (sometimes a full restart is best for system-wide changes). Your new fonts should now appear in applications like LibreOffice, GIMP, or other software that accesses system fonts.
Activating and Managing Your New Fonts
Installing a font is just the first step. To fully leverage your new typographic assets, you need to know how to activate them in your applications, troubleshoot potential issues, and manage your growing font library efficiently.
Using Newly Installed Fonts in Applications
Once a font is successfully installed on your operating system, it generally becomes available to most applications that interact with system fonts.
- Restart Applications: This is the most crucial step. Applications typically load their font lists upon launch. If an application (e.g., Word, Photoshop, email client) was open during the font installation, it might not recognize the new font until it’s restarted. Close and reopen the application to refresh its font directory.
- Locate in Font Menus: Open the application you wish to use. Navigate to the font selection dropdown menu (often labeled “Font,” “Typeface,” or similar). Scroll through the list, and your newly installed font should appear alphabetically alongside your other system fonts.
- Test the Font: Select your new font and type some text to ensure it displays correctly. Check different weights (bold, italic) if they were part of the installed font family.
Troubleshooting Common Font Installation Issues
While usually smooth, font installation can occasionally hit a snag. Here are common problems and their solutions:
- Font Not Appearing in Applications:
- Solution: Did you restart the application? This is the most frequent cause. If so, restart your computer. Sometimes a system-level refresh is required.
- Solution: Verify the font is actually installed. Check your OS font settings (Windows Fonts folder, macOS Font Book, or Linux
~/.fontsdirectory). - Solution: Check the file type. Ensure it’s
.ttfor.otf. Some applications might not support less common formats directly.
- “Font is Corrupt” or “Invalid Font File” Error:
- Solution: The font file itself might be damaged or incomplete. Redownload the font from the original source. If the issue persists across multiple downloads, consider trying a different font or contacting the font creator.
- Solution: On macOS, Font Book’s validation feature is excellent. If it flags an issue, you might choose to disable or remove the problematic font.
- Duplicate Fonts: Installing the same font multiple times can cause conflicts or lead to performance issues.
- Solution: Use your OS’s font management tools (Font Book on macOS is excellent for this, Windows Fonts settings also show duplicates) to identify and remove duplicate entries.
- Permissions Issues (Linux/macOS): Especially for system-wide installations, incorrect file permissions can prevent fonts from being read.
- Solution (Linux): Ensure the font files and their directories have appropriate read permissions for the users who need to access them (e.g.,
chmod 644 /path/to/font.ttf).
- Solution (Linux): Ensure the font files and their directories have appropriate read permissions for the users who need to access them (e.g.,
- Application-Specific Font Caches: Some professional design software (like Adobe InDesign or Illustrator) might have their own internal font caches.
- Solution: Look for options within the application’s preferences to clear its font cache, or search online for specific instructions for your software version.
Best Practices for Font Management
As your font library grows, effective management becomes essential for productivity and system performance.
- Organize Your Downloaded Fonts: Create a dedicated “Fonts” folder on your hard drive. Within it, categorize fonts by style (e.g., “Serif,” “Sans-Serif,” “Script”), by foundry, or by project. This makes finding original files easy if you ever need to reinstall or share them.
- Use Font Manager Software: For extensive font libraries, a dedicated font manager can be invaluable.
- macOS: Font Book (built-in) is quite robust. Adobe Fonts (part of Creative Cloud) also acts as a powerful manager.
- Windows: Some third-party options exist (e.g., NexusFont, FontBase).
- Cross-Platform: FontBase (free tier available) offers a sleek interface for organizing, previewing, and activating/deactivating fonts as needed, preventing system slowdowns from too many active fonts.
- These tools allow you to temporarily activate fonts only when you need them, reducing system resource usage.
- Deactivate Unused Fonts: Having hundreds or thousands of active fonts can slow down your system and applications. Deactivate fonts you rarely use, keeping only your essentials active. Font managers excel at this.
- Regularly Back Up Your Font Library: Custom fonts, especially premium ones, are valuable assets. Include your organized font folder in your regular backup routine to prevent loss.
- Understand Font Licensing Thoroughly: Reiterate the importance of knowing if a font is licensed for personal, commercial, web, or print use. Keeping a record of your licenses, perhaps in your organized font folder, is highly recommended for professional work.

Conclusion
Installing a font is more than just a technical task; it’s an act of empowerment that unlocks a new dimension of creative expression and professional polish. By understanding the different font formats, knowing where to safely acquire new typefaces, and mastering the straightforward installation processes for your operating system, you gain the ability to significantly enhance your digital projects.
From refining your brand’s visual identity to simply making your personal documents more engaging, the right font can profoundly impact communication and perception. Armed with this guide, you can confidently explore the vast world of typography, troubleshoot common issues, and manage your font library effectively. Dive in, experiment, and let your unique style shine through every character you type. Your digital presence will undoubtedly thank you for it.
aViewFromTheCave is a participant in the Amazon Services LLC Associates Program, an affiliate advertising program designed to provide a means for sites to earn advertising fees by advertising and linking to Amazon.com. Amazon, the Amazon logo, AmazonSupply, and the AmazonSupply logo are trademarks of Amazon.com, Inc. or its affiliates. As an Amazon Associate we earn affiliate commissions from qualifying purchases.