
In the digital age, where visual communication reigns supreme, typography plays a pivotal role in everything from personal projects to corporate branding. For Mac users, the ability to install and manage custom fonts is a powerful tool that unlocks endless creative possibilities, enhances productivity, and refines professional output. Whether you’re a graphic designer crafting a new logo, a student preparing a presentation, a marketer developing brand assets, or simply someone looking to personalize their documents, mastering font installation on your macOS device is an essential skill.
While Apple’s operating system comes pre-loaded with a robust selection of typefaces, the vast universe of available fonts allows for unparalleled customization and expression. This comprehensive guide will walk you through the entire process, from understanding font types and sourcing new ones to a detailed, step-by-step installation walkthrough, and even advanced tips for managing your growing font library. By the end, you’ll be well-equipped to transform your Mac into a typography powerhouse, ensuring your digital presence always makes the desired impact.
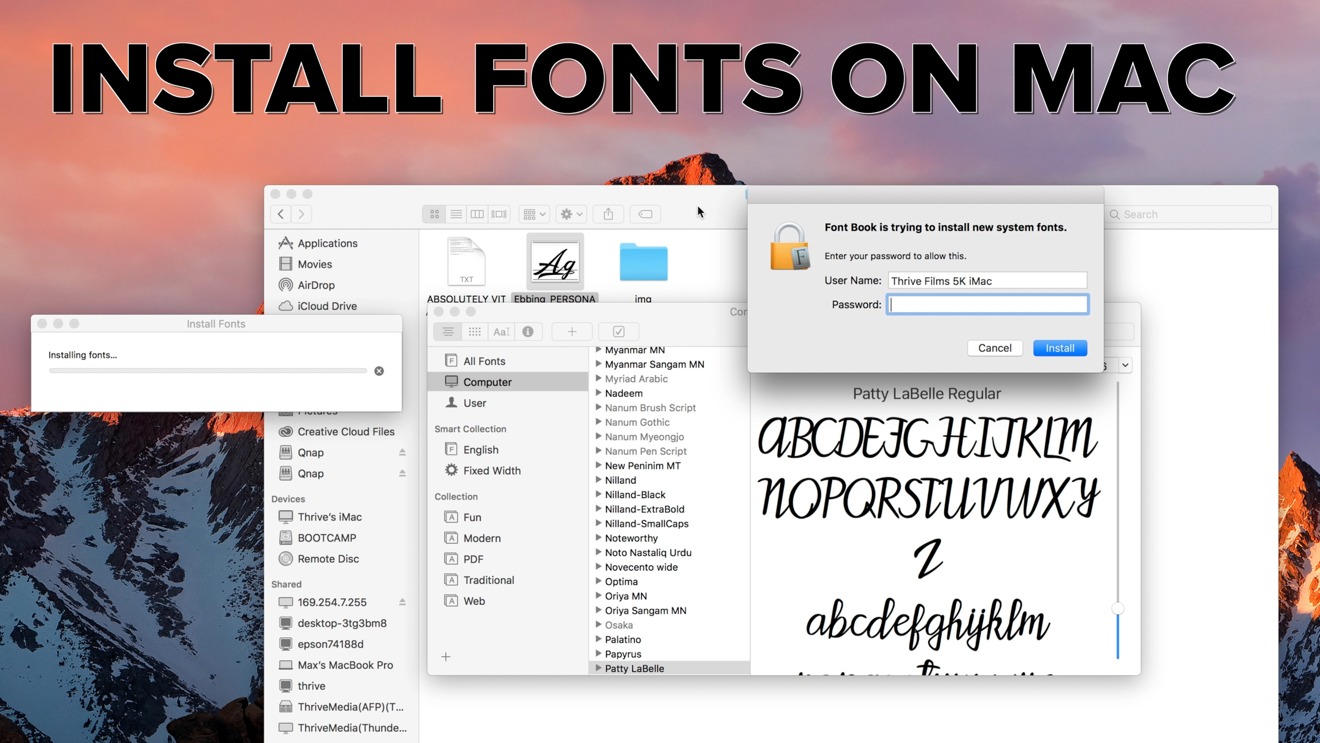
The Foundation: Understanding Fonts and Their Impact
Before diving into the installation process, it’s beneficial to grasp the fundamentals of digital typography on a Mac. This understanding not only demystifies the technical aspects but also highlights why choosing and installing the right fonts is so crucial for your projects, brand identity, and overall digital experience.
What Exactly Are Fonts?
Often used interchangeably, the terms “font” and “typeface” technically refer to different things, though in common parlance, “font” has become the umbrella term. A typeface is a family of related fonts sharing a common design – think Arial, Times New Roman, or Helvetica. A font, on the other hand, refers to a specific style and size within that typeface family (e.g., Arial Bold 12pt, Helvetica Light Italic 10pt). For practical purposes in computing, when we talk about installing a “font,” we’re usually referring to a digital file that contains all the necessary data to display a specific typeface style.
On a Mac, you’ll primarily encounter two main font file formats:
- TrueType Font (TTF): Developed by Apple and Microsoft, TTF fonts are widely compatible across different operating systems and applications. They are known for their scalability and on-screen readability.
- OpenType Font (OTF): An extension of TrueType, OpenType fonts were developed by Adobe and Microsoft. They support a larger character set, advanced typographic features like ligatures, alternate characters, and small caps, making them a favorite among professional designers.
- Datafork TrueType Font (DFont): These are Apple-specific TrueType fonts typically used by the system itself. While you might encounter them, most user-installed fonts will be standard TTF or OTF.
Understanding these formats helps you identify what you’re downloading and ensures compatibility with your system and applications.
Why New Fonts Are Essential for Creativity and Branding
The impact of typography extends far beyond mere readability; it conveys tone, evokes emotion, and establishes identity. For creative professionals, businesses, and even casual users, custom fonts offer significant advantages:
- Distinctive Branding: For businesses and personal brands, a unique font choice is a cornerstone of visual identity. It differentiates you from competitors, reinforces your brand personality, and ensures consistency across all communication channels, from websites and marketing materials to social media graphics. A well-chosen font can speak volumes about your brand’s professionalism, innovation, or friendliness.
- Enhanced Visual Appeal: Custom fonts can dramatically improve the aesthetics of any document, presentation, or digital graphic. They allow for a more polished, professional, or artistic look that standard system fonts might not provide.
- Improved Readability and User Experience: While often overlooked, the right font can enhance the user experience by improving readability, especially for long-form content or specific audiences. Specialized fonts for accessibility or unique niche uses can be incredibly valuable.
- Creative Expression: For designers, artists, and hobbyists, new fonts are tools for expression. They open up new avenues for creative projects, allowing for unique visual storytelling and personalized design outcomes.
- Productivity and Efficiency: Having a curated selection of go-to fonts can streamline your workflow. Instead of sifting through generic options, you can quickly access fonts that align with your project’s requirements, boosting efficiency in design and content creation.
Sourcing Your Typography: Where to Find New Fonts
The internet is a treasure trove of fonts, offering options ranging from free downloads to premium, professionally designed typefaces. Knowing where to look and understanding the associated licenses is paramount.
Navigating Free Font Repositories
Many websites offer a vast selection of fonts for free. These are excellent starting points for personal projects, quick designs, or exploring new styles without financial commitment.
- Google Fonts: A phenomenal resource for web designers, Google Fonts provides hundreds of open-source fonts that are not only free to download but also optimized for web use. Each font comes with clear licensing information, typically the SIL Open Font License, allowing both personal and commercial use.
- DaFont: One of the most popular free font sites, DaFont features thousands of fonts organized by theme. While an excellent resource, it’s crucial to check the licensing for each font, as many are “free for personal use” but require a commercial license for business applications.
- Font Squirrel: This site focuses on fonts that are 100% free for commercial use. Font Squirrel also offers a handy “Webfont Generator” and a “Matcherator” to identify fonts from images.
- 1001 Fonts: Similar to DaFont, 1001 Fonts offers a huge collection, but again, always double-check the individual font licenses for commercial use restrictions.
When using free fonts, always download from reputable sites to avoid potential malware or corrupted files.
Investing in Premium Font Libraries
For professional use, unique aesthetics, or advanced typographic features, investing in premium fonts is often worthwhile. These fonts typically come with more robust character sets, better kerning, multiple weights and styles within a family, and dedicated support.
- Adobe Fonts: Included with Adobe Creative Cloud subscriptions, Adobe Fonts offers an extensive library of high-quality typefaces that can be activated and synced directly to your Creative Cloud applications. This is a huge asset for designers working with tools like Photoshop, Illustrator, and InDesign.
- MyFonts: One of the largest commercial font marketplaces, MyFonts features fonts from numerous foundries. You can browse by style, designer, or popularity, and often find unique and exclusive typefaces.
- Creative Market: Beyond just fonts, Creative Market is a marketplace for creative assets, including many unique font bundles and standalone typefaces from independent designers.
- Fontspring: Known for its “worry-free” licensing, Fontspring offers a curated selection of high-quality fonts with simple, clear commercial licenses.
While paid fonts represent an upfront investment, they often provide a competitive edge in design and branding, ensuring your projects stand out with professional-grade typography.
Understanding Font Licensing: A Crucial Consideration
This is perhaps the most important aspect of font acquisition, especially when aligning with the “Brand” and “Money” topics of the website. Every font, whether free or paid, comes with a license agreement outlining how you’re permitted to use it.
- Personal Use License: Allows you to use the font for non-commercial projects, such as personal documents, school assignments, or hobby crafts.
- Commercial Use License: Grants permission to use the font for projects that generate revenue, directly or indirectly. This includes logos, websites, marketing materials, products for sale, and client work.
- Webfont License: Specifically allows the font to be embedded on websites using
@font-facerules. - Desktop License: Permits installation on a computer for use in desktop applications.
- App/Ebook License: Required for embedding fonts within mobile apps or digital publications.
Ignoring font licenses can lead to legal issues, including cease-and-desist orders or costly lawsuits. Always read and understand the terms before using a font, particularly for any commercial or public-facing work. If unsure, contact the font designer or foundry for clarification. This due diligence protects your brand and financial integrity.
The Installation Process: A Step-by-Step Guide
Once you’ve found and downloaded your desired fonts, the installation process on a Mac is straightforward, primarily utilizing the built-in Font Book application. You’ll typically download fonts as a compressed .zip file. Before installation, you’ll need to unzip the file by simply double-clicking it in Finder. Inside, you’ll find the actual font files, usually in .ttf or .otf format.
Method 1: The Quick Double-Click Installation
This is the fastest and most common way to install a single font on your Mac.
- Locate the Font File: Navigate to the folder where you unzipped your font files. You’ll typically see one or more files ending in
.ttfor.otf. - Double-Click the Font File: Simply double-click on the individual font file you wish to install.
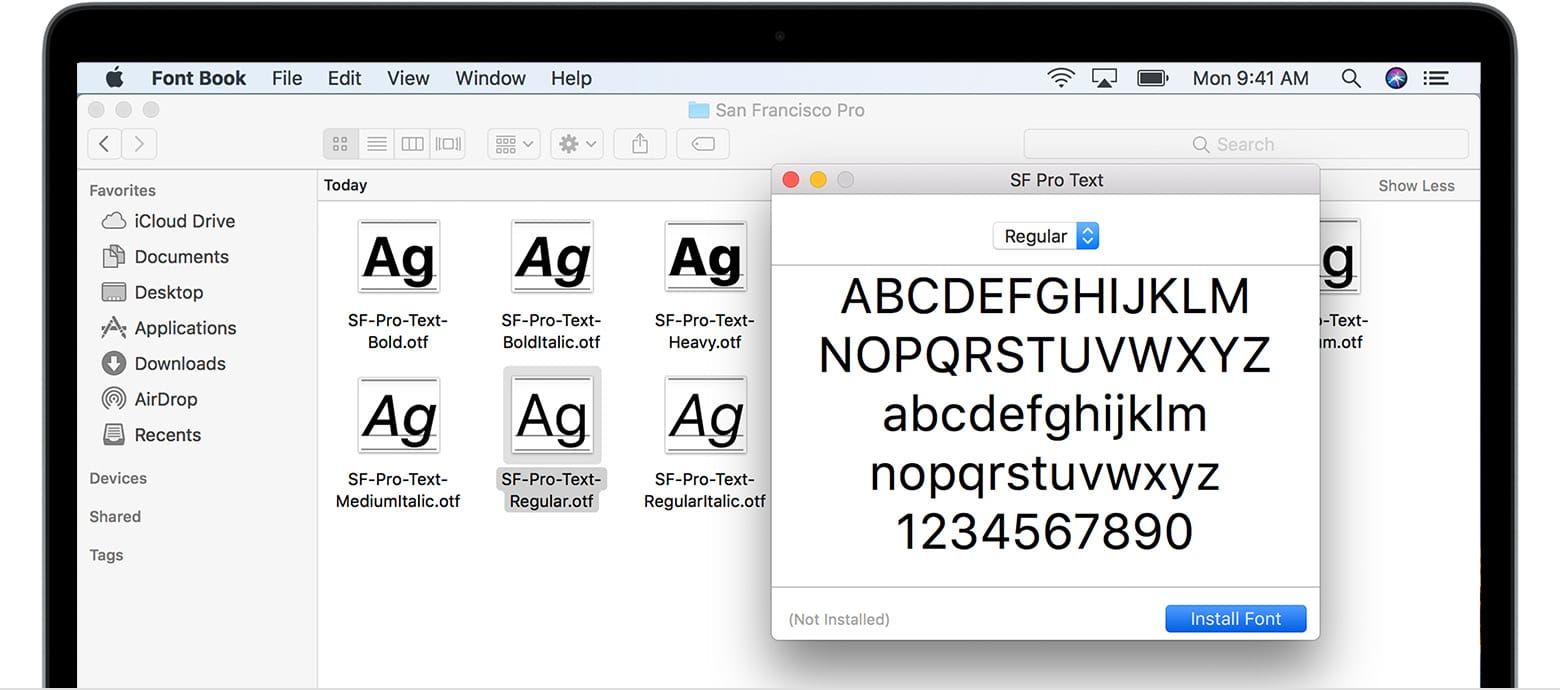
- Preview in Font Book: macOS will automatically open the Font Book application, displaying a preview of the font along with its details (font name, version, designer, copyright information).
- Click “Install Font”: In the Font Book window that appears, you’ll see a prominent “Install Font” button, usually located in the bottom-right corner. Click this button.
- Validation and Installation: Font Book will quickly validate the font to check for corruption or duplicate issues. If the font is healthy, it will be installed and added to your “All Fonts” list within Font Book. Any issues, like validation warnings (often for duplicate fonts), will be flagged.
- Use Your New Font: Your newly installed font is now available for use in most applications on your Mac, including Pages, Keynote, Microsoft Word, Adobe Creative Suite programs (Photoshop, Illustrator, InDesign), and many others. You may need to restart certain applications for the font to appear in their menus.
Method 2: Installing Via Font Book Application
This method is ideal if you prefer to manage your fonts directly through Font Book or if the double-click method doesn’t work for some reason.
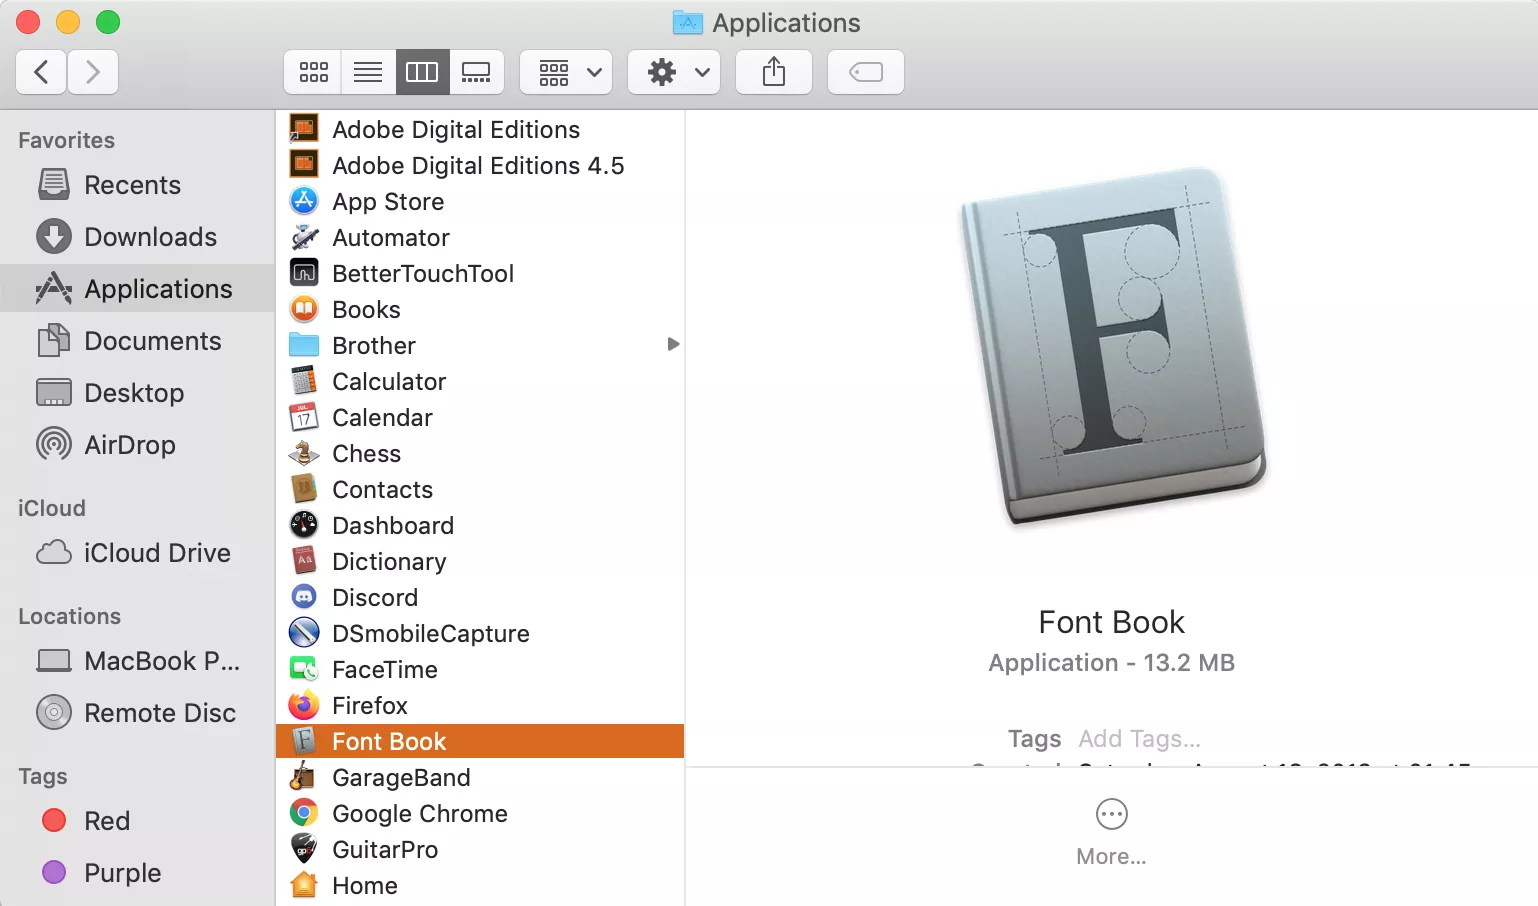
- Open Font Book: You can find Font Book in your
Applicationsfolder, or by searching for it using Spotlight (Cmd + Space and type “Font Book”). - Choose “Add Fonts”: In the Font Book application, go to the menu bar at the top of your screen. Click
Fileand then selectAdd Fonts...(or use the keyboard shortcutCmd + Shift + A). - Browse and Select: A Finder window will open, allowing you to navigate to the folder where your downloaded font files are located. Select the
.ttfor.otffile(s) you wish to install. - Click “Open”: After selecting the font file(s), click the “Open” button in the Finder window.
- Validation and Installation: Font Book will perform its validation process and then install the selected fonts into your system, making them available across your applications.
Batch Installation for Multiple Fonts
If you’ve downloaded a font family with several weights and styles, or a collection of different fonts, installing them one by one can be tedious. Font Book allows for efficient batch installation.
- Unzip the Font Folder: Ensure you’ve unzipped the main
.zipfile. You should have a folder containing all the individual.ttfor.otffiles. - Select All Font Files: Open the folder containing your fonts. Select all the font files within it. You can do this by dragging a selection box around them, or by clicking one file and then pressing
Cmd + A. - Drag and Drop into Font Book: With all the font files selected, simply drag them directly into the Font Book application window. You can drag them onto the “All Fonts” section or a specific collection if you’ve already set one up.
- Confirm Installation: Font Book will then prompt you to install these fonts. Click “Install Font” to proceed.
- Alternatively, Use “Add Fonts” for a Folder:
- Open Font Book and choose
File > Add Fonts...as described in Method 2. - Instead of selecting individual files, navigate to the folder containing all your fonts.
- Select the entire folder and click “Open”. Font Book is often smart enough to process all valid font files within the selected directory.
- Open Font Book and choose
After any installation method, it’s a good practice to restart any applications that were open during the installation process (e.g., Word, Photoshop) to ensure they recognize the new fonts.
Mastering Your Font Library with Font Book
Beyond just installing fonts, Apple’s Font Book application is a powerful, yet often underutilized, tool for managing your entire typography collection. Effective font management is key to maintaining system performance, organizing your creative assets, and ensuring consistent branding.
Activating, Deactivating, and Validating Fonts
Having too many active fonts can sometimes slow down your system or certain applications. Font Book allows you to manage which fonts are active.
- Activating/Deactivating: In Font Book, select one or more fonts. You’ll see a checkbox or a small blue “on” icon next to the font name. Clicking this will toggle the font between active (available for use) and inactive (hidden from applications). Deactivating fonts you don’t frequently use can help keep your font menus cleaner and potentially improve performance.
- Validating Fonts: Corrupted or poorly designed fonts can cause system instability or application crashes. Font Book has a built-in validation feature:
- Select the font(s) you want to check.
- Go to
File > Validate Fonts. - Font Book will report any errors or warnings, such as “minor problems” (often fixable by proceeding with installation) or “serious errors” (which might indicate a problematic font that should be avoided).
Organizing Fonts into Collections
For designers and professionals with extensive font libraries, organizing fonts into collections is a game-changer for productivity. You can group fonts by project, client, style, or any other criteria that makes sense for your workflow.
- Create a New Collection: In the left sidebar of Font Book, click the
+button at the bottom (or go toFile > New Collection). Give your new collection a descriptive name (e.g., “Client X Project,” “Serif Branding,” “Handwriting Fonts”). - Add Fonts to a Collection:
- Drag and drop fonts from your “All Fonts” list directly into your new collection in the sidebar.
- Select fonts, then right-click (or Control-click) and choose
Add to Collection > [Your Collection Name]. - Alternatively, you can select fonts, then go to
Edit > Add to Collection > [Your Collection Name].
Fonts can belong to multiple collections, and removing a font from a collection does not delete it from your system. This organizational feature drastically speeds up the process of finding the right font for a specific task, enhancing your design workflow and overall productivity.
Removing Unwanted Fonts
Just as you install new fonts, you might need to remove old or unused ones to declutter your library and maintain system hygiene.
- Select the Font(s): In Font Book, locate the font(s) you wish to remove from the “All Fonts” list or a specific collection.
- Delete the Font(s):
- Right-click (or Control-click) on the selected font(s) and choose
Remove "[Font Name]". - Alternatively, select the font(s) and go to
Edit > Remove "[Font Name]". - You can also simply select the font(s) and press the
Deletekey.
- Right-click (or Control-click) on the selected font(s) and choose
- Confirm Removal: Font Book will ask you to confirm if you want to remove the font(s). Click “Remove.”
- System Fonts: Be cautious when removing fonts, especially those marked as “Computer” or “System.” These are essential for macOS operation and application display. Font Book will usually warn you if you attempt to remove a system font. It’s generally best to leave system fonts untouched.
Regularly auditing and removing unused fonts contributes to a leaner, more efficient system, which can have subtle positive impacts on performance, especially for design-heavy applications.
Beyond Installation: Best Practices and Advanced Font Management
While Font Book is excellent for basic font installation and management, there are additional considerations and tools that can elevate your typography game, especially for power users, creative professionals, and those deeply involved in brand development.
The Pitfalls of Overloading Your System
It might be tempting to install every beautiful font you find, but a cluttered font library can have drawbacks:
- Performance Impact: While modern Macs are powerful, having thousands of active fonts can slightly slow down application launch times, especially for design software that needs to load all available fonts.
- Application Stability: Some older or poorly coded fonts can cause conflicts or crashes in certain applications.
- Decision Fatigue: A sprawling font menu can make it harder to find the right font, leading to wasted time and hindering your creative flow.
- Licensing Headaches: The more fonts you have, the harder it is to track their individual licenses, increasing the risk of accidental misuse for commercial projects.
It’s wise to be selective. Install fonts you genuinely need for current projects and keep your library tidy by deactivating or removing those that are no longer in use.
Exploring Professional Font Managers
For serious designers, branding agencies, or anyone managing hundreds or thousands of fonts across multiple projects and clients, Font Book’s capabilities might eventually feel limiting. Professional font management software offers advanced features:
- Automatic Activation: Fonts are activated only when needed by specific documents or applications, improving system performance.
- Cloud Syncing: Sync fonts across multiple devices and team members.
- Advanced Tagging and Search: More sophisticated organization and search functionalities beyond simple collections.
- Duplicate Management: Better tools for identifying and resolving duplicate fonts.
- Version Control: Tracking different versions of fonts.
Popular professional font managers include:
- Suitcase Fusion (now Connect Fonts powered by Extensis): A long-standing industry standard, offering robust features for individuals and teams.
- RightFont: A modern, sleek font manager with powerful organization features and seamless integration with design applications.
- FontBase: A free, cross-platform font manager that offers a clean interface and essential features for many users, with a pro version available for advanced capabilities.
Investing in a professional font manager can be a wise “money” decision for businesses and individuals whose livelihood depends on efficient and reliable creative workflows, directly impacting productivity and brand consistency.
Typography Tips for Enhanced Productivity and Brand Cohesion
Beyond the technicalities of installation, understanding the principles of good typography can exponentially increase the value of your newly installed fonts.
- Font Pairing: Learning to combine two or three complementary fonts (e.g., a strong display font for headings and a highly readable serif or sans-serif for body text) is a fundamental design skill. Resources like Google Fonts’ “Pairings” section or dedicated typography blogs can offer guidance.
- Hierarchy and Readability: Use different font sizes, weights, and styles to create a clear visual hierarchy in your documents and designs. This guides the reader’s eye and makes information more digestible, enhancing productivity both for you (in creating) and your audience (in consuming).
- Consistency is Key to Branding: Once you’ve chosen fonts for your brand (logo, website, marketing materials), stick to them. Consistency builds recognition and strengthens your brand identity. Document your brand’s typographic guidelines to ensure all team members follow them.
- Web vs. Print Considerations: Fonts behave differently across mediums. Ensure your chosen fonts are optimized for both web display (if applicable) and print to maintain visual integrity across all brand touchpoints.
- Experimentation: Don’t be afraid to try new fonts and see how they impact your designs. The vast world of typography is there to inspire and empower your creative projects.
Conclusion
Installing fonts on a Mac is a straightforward process, but its implications for creativity, productivity, and brand identity are profound. By leveraging the power of custom typography, you gain a significant advantage in expressing your unique vision, enhancing the professionalism of your work, and carving out a distinctive presence in a visually driven world.
From finding the perfect typeface among free and premium options to understanding critical licensing requirements, and finally, mastering the intuitive Font Book application, you now have the knowledge to take full control of your Mac’s typographic capabilities. Remember to manage your font library efficiently, validate your fonts, and consider exploring professional tools as your needs grow. Embrace the journey of typographic discovery, and watch as your documents, designs, and brand communication transform into more engaging, impactful, and memorable experiences.
aViewFromTheCave is a participant in the Amazon Services LLC Associates Program, an affiliate advertising program designed to provide a means for sites to earn advertising fees by advertising and linking to Amazon.com. Amazon, the Amazon logo, AmazonSupply, and the AmazonSupply logo are trademarks of Amazon.com, Inc. or its affiliates. As an Amazon Associate we earn affiliate commissions from qualifying purchases.