Typography is the silent backbone of the digital experience. Whether you are a software developer, a graphic designer, or a power user looking to customize your workspace, the fonts you choose significantly impact readability, aesthetics, and user interface efficiency. In the Windows ecosystem, font management has evolved from a clunky, hidden system folder into a streamlined process integrated into the modern Settings UI. However, beneath the surface lies a complex structure of file formats, registry entries, and rendering engines.
This guide provides a deep dive into the technicalities of installing fonts in Windows 10 and 11, ensuring that your system remains performant while providing the visual flexibility you require for your digital projects.

The Technical Anatomy of Digital Fonts
Before clicking the “Install” button, it is essential to understand the technology behind the files you are adding to your operating system. Not all font files are created equal, and choosing the right format can affect how text renders across different software applications.
TrueType (.ttf) vs. OpenType (.otf)
For decades, TrueType (TTF) was the standard for Windows and Mac environments. Developed by Apple and licensed to Microsoft, TTF files rely on a single-byte character set and are known for their high level of “hinting” (instructions that tell the OS how to render the font at small sizes).
In contrast, OpenType (OTF) is a more modern evolution developed jointly by Adobe and Microsoft. OTF files can support up to 65,000 glyphs, allowing for advanced typographic features like ligatures, small caps, and alternate characters. From a technical standpoint, Windows handles both formats natively, but OTF is generally preferred for professional design work due to its cross-platform compatibility and expanded feature set.
Variable Fonts and Web Open Font Format (WOFF)
The latest frontier in Windows typography is the “Variable Font.” Unlike traditional fonts where you must install a separate file for Bold, Italic, and Light, a variable font stores all these variations in a single, compact file. While Windows 10 and 11 support these, older applications might struggle to render them correctly. Additionally, you may encounter .WOFF or .WOFF2 files; these are compressed formats specifically designed for the web. To use these on Windows, they typically need to be converted back to TTF or OTF, as they are not natively supported for system-wide installation.
Methodical Approaches to Font Installation
Microsoft has provided several pathways to incorporate new typefaces into the OS. Depending on whether you need the font available for a single user or the entire system, the method you choose matters.
The Standard Installation and Context Menu
The most direct way to install a font is through the File Explorer context menu. Once you have downloaded a font—usually in a .ZIP archive—you must first extract the files. Right-clicking a .ttf or .otf file presents two distinct options: “Install” and “Install for all users.”
Choosing “Install” places the font in the current user’s local directory (%LocalAppData%MicrosoftWindowsFonts). This is the safest method for shared computers, as it does not require administrative privileges. However, choosing “Install for all users” moves the file to the protected C:WindowsFonts directory. This makes the typeface available to every account on the machine and is necessary for certain legacy applications that cannot “see” user-specific font folders.
Using the Modern Windows Settings App
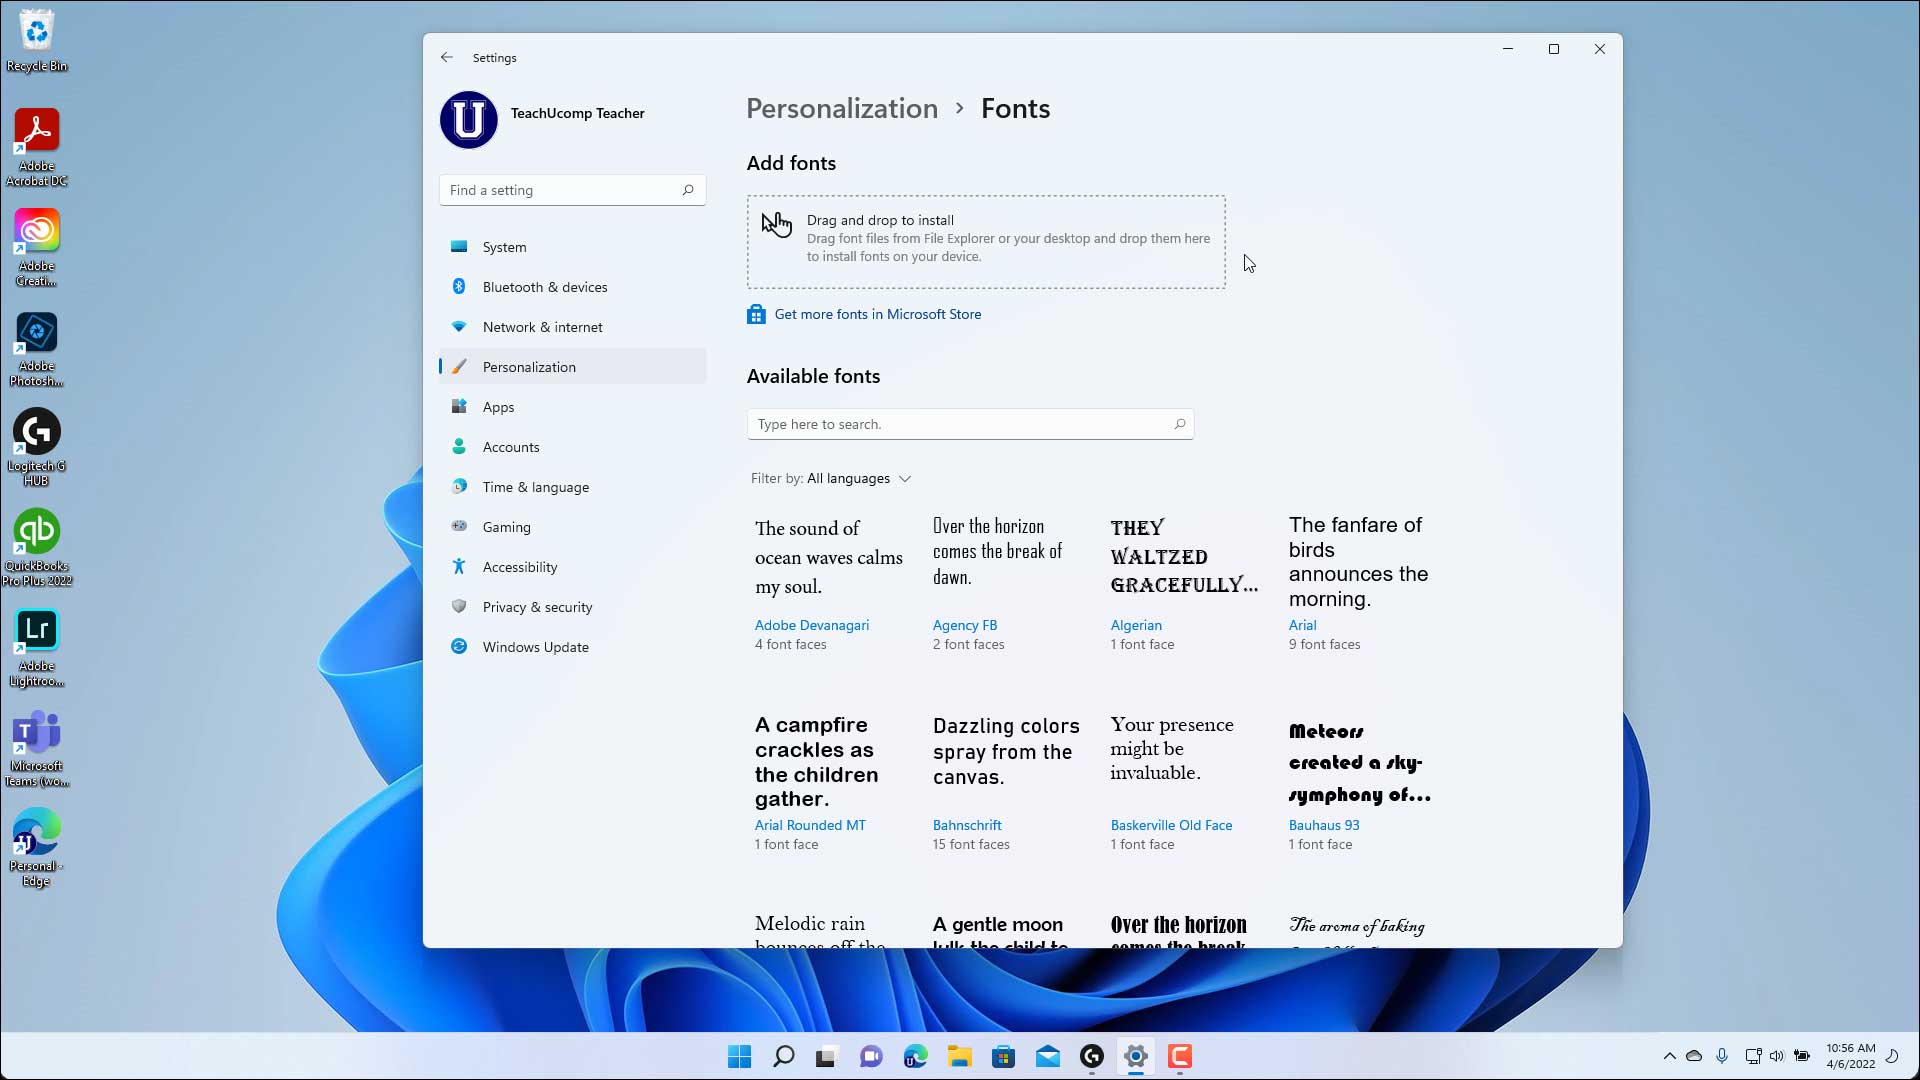
With the release of Windows 10 and its refinement in Windows 11, Microsoft introduced a centralized hub for personalization. Navigating to Settings > Personalization > Fonts offers a drag-and-drop interface.
This method is particularly useful for bulk installations. You can select dozens of font files from your folder and drop them into the “Add fonts” box. Windows will automatically process the metadata, verify the file integrity, and register the fonts with the system. This interface also provides a live preview of each font, allowing you to see how different weights and styles look before you decide to keep them.
The Legacy Control Panel Interface
For those who prefer the classic Windows 7-style management, the Fonts applet in the Control Panel remains accessible. By navigating to Control Panel > Appearance and Personalization > Fonts, you can view your library in a list format. The primary technical advantage of this method is the “Install as Shortcut” feature. By checking a box in the “Font settings” menu, you can link to a font file stored on a different drive without copying it to the system partition. This is a vital tool for professionals with massive libraries who want to save space on their primary SSD.
Advanced Font Management and Optimization
Installing a font is only the first step. As your library grows, it can become a burden on system resources. Each installed font requires a small amount of RAM and increases the load time for applications like Microsoft Word, Adobe Creative Cloud, or CAD software.
Organizing and Previewing the C:WindowsFonts Directory
The C:WindowsFonts directory is a “special” folder in the Windows Shell. Unlike a standard folder, it displays fonts as font families. If you install “Roboto” in six different weights, Windows groups them into a single icon. Double-clicking this icon allows you to preview the “Quick brown fox” string at various point sizes.
From a technical perspective, it is wise to periodically audit this folder. Overloading Windows with thousands of fonts can lead to “font substituted” errors or slow system boot times because the Windows Font Cache Service (FontCache) must index every glyph and metadata point.
Utilizing Third-Party Management Software
For users handling thousands of assets, the native Windows tools may fall short. Professional-grade software such as FontBase, MainType, or Adobe Fonts (integrated into Creative Cloud) offers “activation” rather than “installation.”
These tools allow you to keep your font files in a separate directory and only “activate” them when needed for a specific project. This keeps the Windows Registry clean and ensures that the system’s font cache remains lean. These apps also offer advanced filtering, such as searching for fonts by “Serif,” “Slab,” or “Monospace” tags, which Windows does not natively support in a granular way.
Resolving Technical Font Conflicts in Windows
Despite the robustness of the Windows Font engine, errors can occur. Whether it is a corrupted file or a registry mismatch, knowing how to troubleshoot is key to maintaining a stable environment.
Clearing the Windows Font Cache
If you find that a newly installed font is appearing as gibberish or not showing up in your application’s dropdown menu, the culprit is often a corrupted font cache. Windows stores pre-rendered versions of fonts to speed up the UI. To reset this:
- Open the “Services” app (services.msc).
- Stop the “Windows Font Cache Service.”
- Navigate to
%WinDir%ServiceProfilesLocalServiceAppDataLocalFontCacheand delete the contents. - Restart the service.
This forces Windows to re-scan every installed font file and rebuild the index from scratch, usually resolving display issues.
Handling Permissions and Registry Errors
Occasionally, an installation may fail with an “Access Denied” error, even if you are an administrator. This often happens if the font file is marked as “blocked” because it was downloaded from the internet. Right-click the font file, go to Properties, and check the Unblock box at the bottom.
If a font is uninstalled but still appears in software menus, it may be stuck in the Windows Registry. The registry path HKEY_LOCAL_MACHINESOFTWAREMicrosoftWindows NTCurrentVersionFonts contains the mapping for every system-wide font. Removing the string value associated with the problematic font (and restarting the PC) is the “nuclear option” for cleaning up ghost entries.

The Future of Typography in the Windows Ecosystem
As we move toward higher resolution displays (4K and 8K), the way Windows handles fonts continues to shift. The introduction of ClearType text tuner was a massive leap for LCD screens, and the ongoing transition to the WinUI 3 framework promises even smoother font rendering and better support for high-DPI scaling.
Understanding how to properly install and manage fonts in Windows is more than just a cosmetic skill—it is a technical necessity for anyone operating in a professional digital capacity. By mastering the distinction between user-level and system-level installations, leveraging variable fonts, and knowing how to clear the system cache, you ensure that your typography is always crisp, professional, and performant. Whether you are coding your next app or designing a brand identity, your fonts are now ready to perform at their best.
aViewFromTheCave is a participant in the Amazon Services LLC Associates Program, an affiliate advertising program designed to provide a means for sites to earn advertising fees by advertising and linking to Amazon.com. Amazon, the Amazon logo, AmazonSupply, and the AmazonSupply logo are trademarks of Amazon.com, Inc. or its affiliates. As an Amazon Associate we earn affiliate commissions from qualifying purchases.