
In the ever-evolving landscape of technology, drivers are the unsung heroes that enable your hardware to communicate effectively with your operating system. Think of them as translators, converting the complex commands from your software into instructions that your devices, from graphics cards and printers to network adapters and sound cards, can understand. While Windows typically handles driver installations automatically, there are numerous situations where a manual installation becomes not just beneficial, but essential. Whether you’re troubleshooting a stubborn piece of hardware, seeking to optimize performance with the latest driver version, or dealing with a system that’s refusing automatic updates, understanding how to install a driver manually is a crucial skill for any tech-savvy individual.

This comprehensive guide will walk you through the process, demystifying the steps involved and empowering you to take control of your system’s hardware performance. We’ll cover everything from identifying the correct driver to resolving potential issues, ensuring your devices function flawlessly.
Understanding Drivers and Why Manual Installation is Sometimes Necessary
Before diving into the “how,” it’s important to grasp the “why.” Drivers are specialized software programs that act as an intermediary between the hardware component (like your graphics card) and the operating system (like Windows). Without the correct driver, your hardware might not be recognized at all, or it could function with limited capabilities, leading to poor performance, errors, or a complete lack of functionality.
Windows Update is remarkably adept at identifying and installing drivers for most common hardware. However, this automated process isn’t foolproof. Several scenarios necessitate a manual driver installation:
- Troubleshooting Hardware Issues: If a device is not working correctly, or if you’re experiencing glitches, a corrupted or outdated driver is often the culprit. Reinstalling or updating the driver manually can resolve these problems.
- Accessing Latest Features and Performance Improvements: Manufacturers frequently release new driver versions that offer enhanced performance, new features, bug fixes, and improved compatibility with newer software or games. Windows Update might not always deliver these latest versions promptly.
- Specific Hardware or Older Systems: For specialized hardware, older devices, or components not widely supported by default Windows drivers, manual installation is often the only way to get them working.
- Clean Installations or System Migrations: After performing a clean installation of Windows or migrating to a new system, you might need to manually install drivers for all your hardware to ensure optimal operation.
- Preventing Conflicts: In rare cases, an automatically installed driver might conflict with other software or hardware. Manual installation allows you to select a specific driver version that you know is compatible.
The benefits of a correctly installed and up-to-date driver extend beyond mere functionality. For graphics cards, it can mean smoother gameplay and better visual fidelity. For network adapters, it can lead to faster and more stable internet connections. For audio devices, it can result in richer sound quality. Essentially, proper driver management is a cornerstone of a well-performing and reliable computing experience.
Preparing for Manual Driver Installation
Before you embark on the manual driver installation journey, careful preparation is key to a smooth and successful process. Rushing this stage can lead to installing the wrong driver, causing further issues. This preparation involves identifying your hardware accurately and locating the correct driver file.
Identifying Your Hardware
The first crucial step is to precisely identify the hardware for which you need to install a driver. Windows provides built-in tools to help you with this.
Using Device Manager to Find Hardware Information
Device Manager is your central hub for managing all the hardware components connected to your computer. It provides detailed information about each device, including its name, manufacturer, and unique identifiers.
-
Open Device Manager:
- Press the Windows key + X and select “Device Manager” from the power user menu.
- Alternatively, search for “Device Manager” in the Windows search bar and open it.
-
Locate the Device: Browse through the categories (e.g., “Display adapters,” “Network adapters,” “Sound, video and game controllers”) to find the device in question. If the device is experiencing issues, it might be marked with a yellow exclamation mark.
-
Gather Hardware Details:
- Right-click on the problematic or target device.
- Select “Properties.”
- Navigate to the “Details” tab.
- In the “Property” dropdown menu, select “Hardware Ids.”
You will see a list of strings. These are unique identifiers for your hardware. The most common format is
PCIVEN_XXXX&DEV_YYYY, whereXXXXis the Vendor ID andYYYYis the Device ID. These IDs are invaluable for searching for the correct driver on the manufacturer’s website or specialized driver databases.
Alternative Methods for Hardware Identification
- System Information: You can also access detailed system information by typing
msinfo32in the Windows search bar and pressing Enter. This tool provides a comprehensive overview of your hardware and software configurations. - Third-Party Tools: While not always necessary, some third-party system information utilities can provide even more detailed hardware breakdowns. However, stick to reputable tools if you choose this route.
Finding and Downloading the Correct Driver
Once you have your hardware identified, the next step is to find the correct driver. The safest and most reliable source for drivers is always the manufacturer of the hardware component itself.
Official Manufacturer Websites
This is the most recommended approach for obtaining drivers.
-
Identify the Manufacturer: Based on the information from Device Manager, determine the brand of your hardware (e.g., NVIDIA, AMD, Intel, Realtek, HP, Epson).
-
Visit the Manufacturer’s Support/Download Section: Navigate to the official website of the hardware manufacturer. Look for a “Support,” “Downloads,” or “Drivers” section.
-
Search for Your Product: Use the hardware name, model number, or the Vendor/Device IDs you found in Device Manager to search their driver database. Be as specific as possible.
-
Select the Correct Operating System and Architecture: This is a critical step. Ensure you download the driver that matches your specific version of Windows (e.g., Windows 10, Windows 11) and its architecture (32-bit or 64-bit). You can check your Windows architecture by going to “Settings” > “System” > “About.”
-
Download the Driver File: Download the driver installer. These are usually executable files (.exe) or compressed archives (.zip, .rar). If it’s a compressed file, you’ll need to extract its contents before proceeding.
Caution Regarding Third-Party Driver Update Tools
While many third-party driver update tools exist, exercise extreme caution. Some can be helpful, but others might bundle malware, install incorrect drivers, or overload your system with unwanted software. It’s generally best to rely on official manufacturer sources unless you’re an advanced user who thoroughly vets the tool.
Preparing for Installation
Before running the installer, it’s good practice to:
- Close Unnecessary Applications: This minimizes the chance of conflicts during the installation process.
- Backup Important Data (Optional but Recommended): While driver installations are usually safe, having a recent backup provides an extra layer of security, especially if you’re dealing with critical system components.
- Note Down Existing Driver Version (Optional): If you’re troubleshooting, noting the current driver version might be helpful for rollback purposes if the new driver causes issues.
Manually Installing a Driver Through Device Manager
The most common and often the most straightforward method for manual driver installation is through the Windows Device Manager. This allows you to point Windows to the specific driver files you’ve downloaded.
Step-by-Step Installation Process
-
Open Device Manager: As described earlier, press Windows key + X and select “Device Manager.”
-
Locate the Device: Find the hardware device you want to update or install a driver for within its respective category.
-
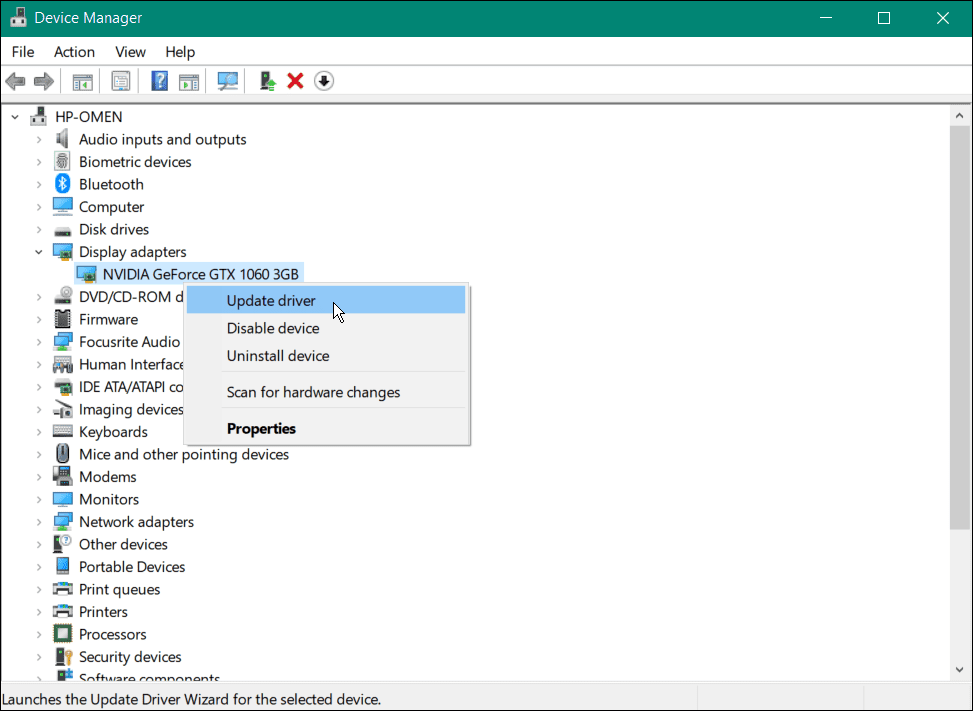
Initiate the Driver Update:
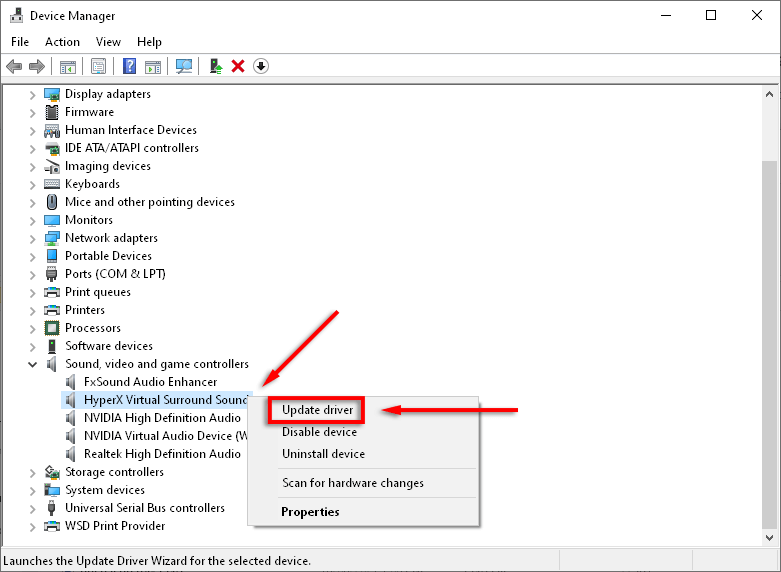
- Right-click on the device.
- Select “Update driver.”
-
Choose How to Search for Drivers: A new window will pop up with two options:
- “Search automatically for drivers”: This option lets Windows try to find a driver on your computer and online. Since we’ve already downloaded a specific driver, this is usually not the primary choice for manual installation.
- “Browse my computer for drivers”: This is the option you want to select for manual installation.
-
Specify the Driver Location:
- Click “Browse my computer for drivers.”
- Click the “Browse…” button.
- Navigate to the folder where you downloaded and extracted the driver files.
- Important: If the driver files were extracted into a folder, select that parent folder. Windows will then search within that folder and its subfolders for compatible driver files (typically .inf files).
- If you want to include older drivers in the search, you can check the “Include subfolders” box.
-
Confirm and Install:
- Click “Next.”
- Windows will now search for suitable drivers within the specified location. If it finds a match, it will display the driver it intends to install.
- Click “Next” to proceed with the installation.
-
Driver Installation and Verification:
- Windows will install the driver. You might see a progress bar.
- If a security warning appears regarding the publisher of the driver, and you’ve downloaded it from the official manufacturer website, you can typically proceed by clicking “Install this driver software anyway.”
- Once the installation is complete, you should see a confirmation message. Click “Close.”
-
Restart Your Computer: It’s highly recommended to restart your computer after installing or updating a driver, even if prompted to do so. This ensures that the new driver is fully loaded and all system changes take effect properly.
Verifying the Installation
After restarting your computer, you can verify that the driver has been installed correctly:
- Check Device Manager: Open Device Manager again and ensure the device is no longer showing any error symbols. Right-click on the device, select “Properties,” and go to the “Driver” tab. You should see the newly installed driver’s version and date.
- Test the Device: Try using the hardware to ensure it’s functioning as expected. For example, print a test page for a printer, play a video for a graphics card, or connect to the internet for a network adapter.
Alternative Manual Driver Installation Methods
While Device Manager is the most common route, there are other ways to manually install drivers, particularly if the standard method encounters issues or if you’re dealing with specific scenarios.
Installing Drivers from an Executable (.exe) File
Many hardware manufacturers provide drivers packaged as self-extracting executable files. This is often the simplest manual installation method.
-
Download the Executable Driver: Obtain the .exe driver file from the manufacturer’s official website.
-
Run the Installer:
- Locate the downloaded .exe file.
- Double-click on it to run the installer.
- Follow the on-screen prompts provided by the manufacturer’s installer. This usually involves agreeing to license agreements, choosing an installation location (often the default is fine), and confirming the installation.
-
Completion and Restart:
- The installer will typically guide you through the entire process.
- Once completed, you will likely be prompted to restart your computer. Always follow this recommendation.
Advantages: This method is user-friendly and often handles all necessary driver files and registry entries automatically.
Disadvantages: You have less direct control over the specific driver files being installed compared to the Device Manager method.
Installing Drivers from a .zip or .rar Archive
Sometimes, manufacturers provide drivers in compressed archives. In this case, you’ll need to extract the files first.
-
Download and Extract:
- Download the .zip or .rar file containing the driver.
- If you don’t have a program like 7-Zip or WinRAR, you might need to install one to extract .rar files. Windows has built-in support for .zip files.
- Right-click on the archive and select “Extract All…” (for .zip) or use your archiving software to extract the contents to a dedicated folder.
-
Proceed with Device Manager Installation: Once the files are extracted, you can proceed with the manual installation using Device Manager as described in the previous section, pointing it to the folder containing the extracted driver files (looking for the .inf file).
Using Command Prompt for Driver Installation (Advanced)
For advanced users or in scripting scenarios, you can use the command prompt to install drivers. This method is more complex but offers automation capabilities.
The pnputil Command
The pnputil.exe utility is a command-line tool for managing driver packages. It allows you to add, update, and delete driver packages from the driver store.
-
Open Command Prompt as Administrator:
- Search for “cmd” in the Windows search bar.
- Right-click on “Command Prompt” and select “Run as administrator.”
-
Add the Driver Package:
- Use the command:
pnputil /add-driver <path_to_driver.inf> /install- Replace
<path_to_driver.inf>with the actual path to the driver’s .inf file. - The
/installswitch attempts to install the driver for any matching devices currently connected.
- Replace
- Use the command:
-
Example:
- If your driver files are in
C:DriversMyDeviceand the INF file is namedmydevice.inf, the command would be:
pnputil /add-driver C:DriversMyDevicemydevice.inf /install
- If your driver files are in
-
Observe Output: The command prompt will provide feedback on the success or failure of the operation.
Advantages: Useful for scripting, automated deployments, and managing drivers in bulk.
Disadvantages: Requires a good understanding of command-line syntax and driver package structure. Incorrect usage can lead to system instability.
Troubleshooting Common Driver Installation Issues
Even with careful preparation, you might encounter problems during manual driver installation. Here are some common issues and their solutions:
Driver Not Found or Not Compatible
- Problem: Windows states it couldn’t find a driver, or the driver is not compatible with your system.
- Solutions:
- Double-check the Driver Source: Ensure you downloaded the driver from the official manufacturer’s website.
- Verify Operating System and Architecture: Confirm that you downloaded the correct driver version for your specific Windows OS (e.g., Windows 10 Home 64-bit).
- Check Hardware IDs: Revisit Device Manager and ensure you’re using the correct Vendor and Device IDs to find the driver.
- Extract All Files: If the driver was in a .zip or .rar, ensure all files were extracted correctly and that you are pointing Device Manager to the folder containing the .inf file.
- Look for Alternative Drivers: Sometimes, a generic driver from Microsoft might work, or a slightly older or newer version from the manufacturer could be compatible.
“Windows couldn’t verify the publisher of this driver software”
- Problem: A security warning appears during installation.
- Solution: If you are absolutely certain you downloaded the driver from the official manufacturer’s website, it is generally safe to proceed by clicking “Install this driver software anyway.” This warning often appears for drivers that are not digitally signed by Microsoft, which is common for hardware-specific drivers.
Driver Installation Fails or Device Still Doesn’t Work
- Problem: The installation completes, but the device shows an error, or the driver installation itself fails midway.
- Solutions:
- Rollback Driver: If you’re updating an existing driver, go to Device Manager, right-click the device, select “Properties,” go to the “Driver” tab, and click “Roll Back Driver” if the option is available. This reverts to the previously installed driver.
- Uninstall and Reinstall: In Device Manager, right-click the device and select “Uninstall device.” Crucially, check the box that says “Delete the driver software for this device” if it appears. Then, restart your computer and try the manual installation again.
- System Restore: If the issue persists and started recently, consider using System Restore to revert your system to a previous state when the hardware was functioning correctly.
- Hardware Issue: It’s possible the hardware itself has failed or is faulty. Test it on another computer if possible.
Driver Updates Causing Performance Issues or New Bugs
- Problem: After installing a new driver, your system becomes unstable, performance drops, or new bugs appear.
- Solutions:
- Roll Back Driver: As mentioned above, roll back to the previous version.
- Seek Older Drivers: Visit the manufacturer’s website and look for older, stable driver versions. Sometimes, the latest isn’t always the best.
- Check for Software Conflicts: Ensure no recently installed software is conflicting with the new driver.
- Clean Driver Installation: Some manufacturers offer utilities or specific procedures for performing a clean installation of their drivers, which can help resolve lingering issues from previous installations.
Secure Boot or Driver Signing Enforcement
- Problem: Drivers, especially older ones or those from less common sources, might be blocked by Windows’ driver signature enforcement.
- Solution: For advanced users, you can temporarily disable driver signature enforcement to install unsigned drivers. This is generally NOT recommended for everyday users as it weakens system security.
- Go to “Settings” > “Update & Security” > “Recovery.”
- Under “Advanced startup,” click “Restart now.”
- After restarting, navigate to “Troubleshoot” > “Advanced options” > “Startup Settings” > “Restart.”
- Once the computer restarts again, press 7 or F7 to “Disable driver signature enforcement.”
- Remember to re-enable this feature after you’ve finished installing your drivers.
Mastering the manual installation of drivers is a powerful skill that puts you in greater control of your PC’s hardware. By understanding your hardware, obtaining the correct drivers from trusted sources, and knowing how to use the tools available in Windows, you can ensure your devices perform optimally, troubleshoot issues effectively, and keep your system running smoothly.
aViewFromTheCave is a participant in the Amazon Services LLC Associates Program, an affiliate advertising program designed to provide a means for sites to earn advertising fees by advertising and linking to Amazon.com. Amazon, the Amazon logo, AmazonSupply, and the AmazonSupply logo are trademarks of Amazon.com, Inc. or its affiliates. As an Amazon Associate we earn affiliate commissions from qualifying purchases.