
In an era where security is paramount, both for personal peace of mind and the protection of valuable assets, investing in robust physical barriers is a fundamental step. While digital security often dominates conversations in the tech world, the foundational layer of protection for any home or business remains its physical integrity. A steel door offers an exceptional starting point for this defense, renowned for its durability and resistance to forced entry. However, a steel door is only as strong as the lock securing it. This comprehensive guide will walk you through the process of installing a deadbolt lock in a steel door, transforming it into an impenetrable fortress against intruders. We’ll delve into the nuances of preparation, execution, and even touch upon how this physical security intersects with broader themes of technology, personal branding through safety, and financial prudence.
Understanding Your Security Needs and the Steel Door Advantage
Before diving into the mechanics of installation, it’s crucial to understand why a deadbolt on a steel door is such a powerful combination and what makes these components individually effective. This foundational knowledge will not only guide your installation but also inform your choices regarding the type of deadbolt and additional security measures.
Why a Deadbolt for a Steel Door?
Steel doors are inherently superior to their wooden counterparts in resisting common break-in methods. They don’t splinter, warp, or crack under pressure as easily as wood. Their robust construction makes them difficult to kick in, pry open, or otherwise force. However, even the strongest door can be compromised by a weak lock. This is where the deadbolt comes in.
Unlike a standard spring-latch lock found on most doorknobs, a deadbolt operates with a solid metal bolt that extends deep into the door frame. This bolt cannot be “jimmied” open with a credit card or knife, nor can it be retracted by simply turning the doorknob. Its strength comes from its simple, robust design:
- Solid Bolt: A cylindrical or rectangular bolt of solid steel or brass that extends into the door jamb.
- No Spring Mechanism: The bolt is manually thrown into place, meaning it stays locked until manually retracted.
- Resistance to Kicking: When properly installed, the deadbolt anchors the door firmly to the frame, significantly increasing its resistance to brute force attacks like kicking.
- Pick Resistance: Higher-grade deadbolts often feature advanced cylinder designs (e.g., multi-pin, spool pins) that make them highly resistant to lock picking, a crucial aspect of modern digital security thinking applied to the physical world.
Marrying a high-quality deadbolt with a steel door creates a synergistic security solution. The door resists physical deformation, and the lock resists manipulation and brute force, creating a formidable barrier that deters most opportunistic criminals and significantly slows down more determined ones. This level of security is not just about protecting possessions; it’s about safeguarding privacy, data, and the general well-being that contributes to a positive personal and even corporate “brand” of safety and reliability.
Anatomy of a Deadbolt Lock
To install a deadbolt effectively, you need to be familiar with its core components. While designs vary, the fundamental parts remain consistent:
- Outer Cylinder (Keyway): Where the key is inserted on the exterior side of the door.
- Inner Thumbturn/Cylinder: On the interior side, used to lock/unlock the deadbolt manually without a key. Some high-security deadbolts are “double cylinder,” requiring a key on both sides. Note: Double-cylinder deadbolts can pose a fire safety risk, as they prevent quick exit without a key during an emergency. Always check local fire codes.
- Bolt/Latch Assembly: The mechanism housing the solid bolt that extends into the door frame.
- Strike Plate: A metal plate installed on the door frame that the bolt extends into. It protects the frame and provides a secure receptacle for the bolt.
- Mounting Screws/Hardware: Fasteners that secure the various components to the door.
Understanding these parts will help you identify them during the installation process and ensure each is correctly oriented and secured.
Essential Tools and Materials for the Job
Proper preparation is half the battle won. Having the right tools and materials on hand before you begin will save you time, frustration, and potential trips to the hardware store. Since you’re working with steel, specialized tools capable of handling metal are often required beyond what’s needed for wood.
Gathering Your Arsenal
Here’s a comprehensive list of what you’ll need:
- Power Drill: A corded or powerful cordless drill (18V or higher) is essential. Ensure it has variable speed settings.
- Hole Saw Kit for Metal: This is critical. You’ll need two sizes:
- 2 1/8-inch (54mm) hole saw: For the main bore through the door face, where the lock cylinders will pass. Ensure it’s rated for metal/steel.
- 1-inch (25mm) hole saw or spade bit: For the latch bore on the door edge. Again, metal-rated is crucial.
- Tape Measure: For accurate measurements. Precision is key to a professional-looking and functioning installation.
- Pencil or Marker: For marking drill points and outlines.
- Chisel (Sharp) and Mallet: For mortising the latch plate and strike plate into the door edge and frame, respectively. A sharp chisel is vital for clean cuts, especially if the door edge is not entirely flat steel but might have some composite material.
- Screwdriver Set: Phillips and flathead, appropriate for the screws included with your deadbolt.
- Safety Glasses and Gloves: Always protect your eyes and hands, especially when drilling metal, as shards and dust can be dangerous.
- Center Punch: To create a small indentation at your drill points, preventing the drill bit from “walking” on the smooth steel surface.
- Metal Files (Optional): Small files can help smooth rough edges after drilling.
- Deadbolt Installation Jig (Recommended): While not strictly essential, a good quality door lock installation jig can make the process significantly easier and more accurate, especially for steel doors. It clamps to the door and provides guides for your hole saws, ensuring perfectly aligned holes. This is an investment that pays off in accuracy and reduced effort.
- Cutting Oil/Lubricant: When drilling through metal with hole saws, cutting oil reduces friction, prolongs tool life, and helps achieve cleaner cuts.
Selecting the Right Deadbolt Kit
Not all deadbolts are created equal. When purchasing your deadbolt, consider these factors:
- Backset: This is the distance from the edge of the door to the center of the main bore hole. Most residential doors have either a 2 3/8-inch (60mm) or 2 3/4-inch (70mm) backset. Your deadbolt kit will typically come with an adjustable or dual backset latch, but confirm this.
- Security Grade: Deadbolts are rated by ANSI (American National Standards Institute) in three grades:
- Grade 1: Commercial-grade, highest security, best durability. Recommended for external doors.
- Grade 2: Residential security, offers good resistance to forced entry.
- Grade 3: Basic residential security, minimal resistance.
For a steel door, a Grade 1 or Grade 2 deadbolt is highly recommended to match the door’s inherent strength. Investing in higher security is a wise financial decision in the long run, reducing the risk of costly break-ins.
- Finish: Choose a finish that complements your door hardware and aesthetic preferences (e.g., brushed nickel, polished brass, oil-rubbed bronze).
- Compatibility: Ensure the deadbolt is specifically designed for doors with a standard thickness (usually 1 3/8 to 1 3/4 inches). Most steel doors fall within this range.
Step-by-Step Installation Guide
With your tools and chosen deadbolt ready, you can now proceed with the installation. Take your time with each step, paying close attention to measurements and alignment. Rushing can lead to errors that are difficult to correct, especially when drilling into steel.
Preparation and Marking
- Read the Instructions: Every deadbolt kit comes with specific instructions. Familiarize yourself with them, as there might be slight variations in component design or recommended steps.
- Determine Backset: Measure the backset distance from the door edge to the center of the cross-bore. Mark this point on the door face. If you’re replacing an existing lock, use the existing holes, but verify the backset.
- Mark the Main Bore Hole: Use the template provided with your deadbolt kit (or measure carefully) to mark the center point for the 2 1/8-inch hole saw on the door face, aligned with your backset measurement. Use a center punch to make a divot at this point; this prevents the drill bit from slipping when you start drilling into the steel.
- Mark the Latch Bore Hole: On the edge of the door, mark the center point for the 1-inch hole (latch bore). This point should align perfectly with the center of your main bore hole. Again, use a center punch.
Drilling the Main Bore and Latch Hole
- Drill the Main Bore Hole:
- Attach the 2 1/8-inch hole saw to your power drill.
- Crucial for steel: Apply cutting oil to the cutting teeth of the hole saw and the marked spot on the door.
- Start drilling slowly and steadily from the exterior side of the door. Apply firm, consistent pressure.
- Drill until the pilot bit emerges on the interior side of the door. Stop immediately.
- Switch to the interior side and continue drilling through the remaining steel, meeting the first cut. This technique prevents splintering or tearing out the steel on the opposite side, creating a much cleaner hole. Keep applying cutting oil as needed.
- Drill the Latch Bore Hole:
- Change to the 1-inch hole saw or spade bit.
- Apply cutting oil.
- Drill into the door edge at the marked center point, ensuring the drill is perfectly perpendicular to the door edge. Drill only deep enough for the deadbolt latch mechanism to fit (typically 2-3 inches).
Preparing the Door Edge for the Latch Plate

- Insert the Latch Mechanism: Place the deadbolt latch assembly into the 1-inch hole on the door edge. The latch plate (the rectangular metal plate surrounding the bolt) should sit flush with the door edge.
- Outline the Latch Plate: Trace around the latch plate with your pencil.
- Mortise the Area: This is where the chisel and mallet come in. Carefully chisel out the material within the outlined area to the depth of the latch plate, so it sits perfectly flush with the door edge. For steel doors, this “mortising” often involves removing only a very thin layer of material or filing down any burrs, as the steel itself is not usually carved out for depth like wood. Some steel doors might have a composite core under a thin steel skin, making chiseling more feasible. If it’s solid steel, you might need to use a grinding tool or accept a slightly raised plate, though flush is ideal for security and aesthetics.
- Secure the Latch: Once the mortise is complete and the latch plate fits flush, install the two small screws to secure the latch mechanism to the door edge. Do not overtighten, as this can strip the screws or damage the door.
Installing the Deadbolt Mechanism
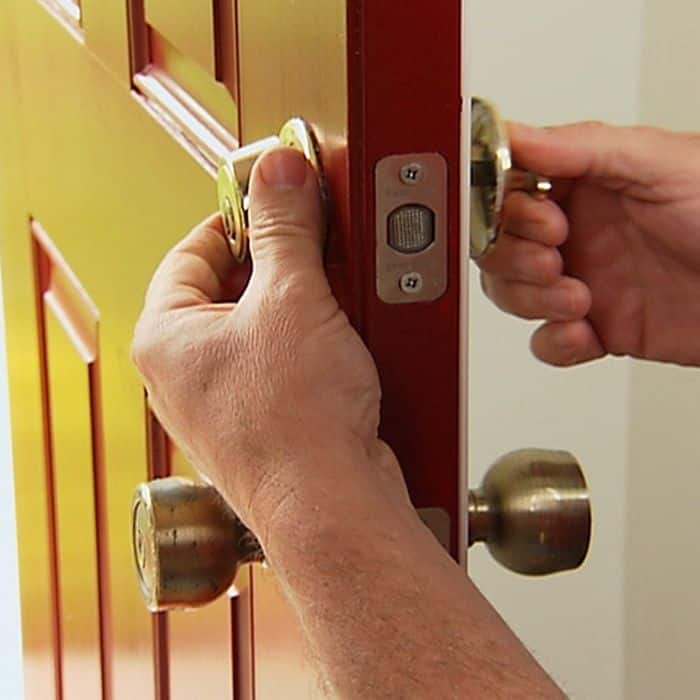
- Insert the Outer Cylinder: From the exterior side of the door, insert the deadbolt cylinder through the 2 1/8-inch main bore hole. Ensure the tailpiece (a flat bar extending from the back of the cylinder) aligns with the slot in the latch mechanism.
- Insert the Inner Mechanism: From the interior side, slide the interior thumbturn or cylinder assembly onto the tailpiece, ensuring it engages correctly with the latch mechanism.
- Secure the Assemblies: Align the mounting posts (or screw holes) from the interior and exterior assemblies. Insert the long mounting screws through the interior trim plate and into the mounting posts/holes of the exterior cylinder. Tighten these screws evenly, alternating between them, until the lock is snug and stable. Do not overtighten, as this can bind the lock and make it difficult to operate.
- Test Operation: Before securing completely, test the deadbolt by turning the thumbturn/key. The bolt should extend and retract smoothly. If it’s stiff, loosen the mounting screws slightly and re-adjust the components.
Creating the Strike Plate Mortise on the Door Frame
The strike plate is crucial for the deadbolt’s effectiveness. A properly installed strike plate will anchor the deadbolt deep into the door frame, significantly enhancing security.
- Mark the Bolt Position: Close the door gently. With the deadbolt fully extended, mark the exact top and bottom of the deadbolt’s position on the door frame with your pencil.
- Position the Strike Plate: Hold the strike plate on the door frame, aligning its opening with the marks you just made. Trace around the strike plate.
- Mark the Bolt Hole: Mark the center of the strike plate’s opening. This is where the deadbolt will enter the frame.
- Drill the Bolt Hole: Using your 1-inch hole saw or spade bit (and cutting oil if the frame is steel), drill a hole into the door frame at the marked center. This hole needs to be deep enough to fully accommodate the deadbolt bolt when extended (typically 1 inch or more into the frame’s stud). Drill straight and true.
- Mortise the Strike Plate: Chisel out the area outlined by the strike plate, to the depth of the strike plate itself, so it sits flush with the door frame. For steel door frames, similar to the door edge, you might be removing minimal material or filing. If the frame has a wood or composite core, chiseling will be more direct.
- Secure the Strike Plate: Place the strike plate in the mortised area and pre-drill pilot holes for its screws. Secure it with the provided long screws. Important: Use screws that are at least 2.5-3 inches long. These longer screws will penetrate through the door frame and into the structural stud behind it, providing exceptional resistance against forced entry and making the deadbolt truly effective. This is a critical security upgrade for any door.
Testing and Troubleshooting
- Open Door Test: With the door open, test the deadbolt operation using both the key and thumbturn. It should extend and retract smoothly without binding.
- Closed Door Test: Close the door and test the deadbolt. It should engage perfectly into the strike plate hole without any resistance.
- Adjustments:
- If the bolt doesn’t align with the strike plate hole, you may need to slightly enlarge the hole in the frame using a file or a larger drill bit.
- If the door rattles or the deadbolt feels loose, adjust the strike plate or door hinges.
- If the lock binds, check that the mounting screws on the door are not overtightened and that the internal components are correctly aligned.
Enhancing Your Door Security Beyond the Deadbolt
While a deadbolt on a steel door is a robust primary defense, modern security involves layers. Integrating additional measures and leveraging technology can further fortify your entrance. This aligns perfectly with the “Tech” focus of our platform, demonstrating how physical and digital security converge.
Reinforcement Plates and Frame Guards
Even the strongest deadbolt can be compromised if the door frame itself is weak.
- Strike Plate Reinforcers: These are larger, heavier gauge metal plates that extend beyond the standard strike plate, often covering a significant portion of the door frame. They use even longer screws (3 inches or more) to anchor deep into the wall studs, creating a much larger surface area to distribute impact force, making kick-ins incredibly difficult.
- Door Reinforcement Kits: These kits include metal plates that reinforce the door around the lock area, preventing the door itself from splitting or deforming under attack. Some also include hinge reinforcement plates. For steel doors, these are less about preventing splitting and more about preventing deformation around the lock body if the steel is thinner gauge.
- Security Hinges: Consider hinges with non-removable pins or set screws that prevent the door from being lifted off its hinges if the hinge pins are removed from the outside.
Smart Deadbolts: The Tech Integration
The physical security offered by a deadbolt can be greatly enhanced by integrating smart technology. Smart deadbolts offer a range of features that align with modern tech trends and digital security concerns:
- Keyless Entry: Use a keypad, smartphone app, or fingerprint scanner for entry, eliminating the risk of lost or stolen keys. This is particularly appealing for businesses (Brand: managing access for employees) or rental properties (Money: easier tenant turnover).
- Remote Access and Monitoring: Lock or unlock your door from anywhere via a smartphone app. Receive notifications when the door is locked or unlocked, providing real-time security updates.
- Activity Logs: Track who enters and exits and at what times, which is invaluable for home security, managing staff, or monitoring contractors.
- Temporary Access Codes: Grant temporary access to visitors, service providers, or delivery personnel, expiring after a set period. This avoids handing out physical keys.
- Integration with Smart Home Systems: Connect your smart deadbolt to broader home automation systems (e.g., Google Home, Amazon Alexa, Apple HomeKit) for integrated security and convenience. This is a prime example of Tech enhancing traditional security.
When choosing a smart deadbolt, prioritize those with strong encryption standards and a reputable manufacturer to safeguard against digital vulnerabilities, mirroring the importance of a Grade 1 physical deadbolt.
Professional Installation vs. DIY: A Cost-Benefit Analysis
While this guide empowers you to DIY, it’s worth considering the “Money” aspect: when to hire a professional.
- DIY Cost: Primarily the cost of the deadbolt and potentially some specialized tools (hole saw kit, jig). This can range from $50 to $200+ depending on the deadbolt’s grade and smart features.
- Professional Cost: A locksmith or handyman might charge $100-$300 or more for installation, plus the cost of the lock.
- DIY Benefits: Cost savings, satisfaction of doing it yourself, immediate gratification.
- DIY Drawbacks: Requires time, effort, and basic tool proficiency. Potential for errors if not careful, especially with steel. Incorrect installation can compromise security.
- Professional Benefits: Expertise, proper tools, guaranteed work, peace of mind that it’s done right, saving your time.
- Professional Drawbacks: Higher upfront cost.
For a steel door, if you’re uncomfortable with power tools, drilling metal, or precise measurements, a professional might be a wise investment to ensure optimal security and avoid damaging an expensive door. However, with careful adherence to instructions and the right tools, DIY is certainly achievable and rewarding. The financial benefit comes from the successful deterrence of theft, which far outweighs the initial installation cost, whether DIY or professional.
Maintaining Your Deadbolt for Longevity and Performance
Once installed, a deadbolt isn’t a “set it and forget it” component. Regular maintenance ensures its longevity and peak performance, upholding the integrity of your security system.
Regular Inspections and Lubrication
- Visual Inspection: Periodically check the deadbolt for any signs of wear, damage, or looseness. Ensure all screws (on the door and the strike plate) are tight.
- Lubrication: Over time, the internal mechanisms can become stiff. Apply a small amount of graphite lubricant (preferred for locks as it doesn’t attract dust like oil) into the keyway and to the bolt mechanism. Operate the lock several times after lubrication to distribute it. Avoid oil-based lubricants as they can attract dust and grime, potentially causing more issues.

When to Upgrade or Replace
- Wear and Tear: If the lock becomes consistently stiff, difficult to operate, or shows significant visible wear that lubrication doesn’t fix, it might be time for a replacement.
- Security Breach: If your home or business experiences an attempted break-in where the lock was compromised, always replace the deadbolt, even if it appears superficially intact. Internal damage might not be visible.
- Lost/Stolen Keys (for non-smart locks): If keys are lost or stolen, rekeying or replacing the deadbolt is crucial to maintain security.
- Technology Upgrade: As smart lock technology advances, you might consider upgrading to a newer model with enhanced features, security protocols, or better integration with your smart home ecosystem.
Installing a deadbolt lock in a steel door is a significant step towards enhancing your property’s physical security. By following these detailed steps, understanding the components, and leveraging the right tools, you can confidently undertake this project. Remember, a secure entrance is the first line of defense, protecting not just your physical belongings but also contributing to the overarching sense of safety and peace of mind – values that transcend mere technology and money, forming the very foundation of personal and professional well-being.
aViewFromTheCave is a participant in the Amazon Services LLC Associates Program, an affiliate advertising program designed to provide a means for sites to earn advertising fees by advertising and linking to Amazon.com. Amazon, the Amazon logo, AmazonSupply, and the AmazonSupply logo are trademarks of Amazon.com, Inc. or its affiliates. As an Amazon Associate we earn affiliate commissions from qualifying purchases.