
The central processing unit (CPU) is often referred to as the “brain” of your computer. It’s responsible for executing instructions, performing calculations, and managing the flow of information that makes your system function. Whether you’re building a new PC from scratch, upgrading an aging system, or simply replacing a faulty component, installing a computer processor can seem like a daunting task. However, with the right guidance, careful preparation, and a steady hand, it’s a perfectly manageable DIY project that offers immense satisfaction and a deeper understanding of your machine.
In the realm of modern technology, where performance and efficiency are paramount, knowing how to correctly install your CPU is more than just a mechanical step; it’s a critical process that directly impacts your computer’s speed, stability, and longevity. A properly installed processor, paired with an effective cooling solution, ensures that your system can handle demanding applications, games, and multitasking without faltering. This comprehensive guide will walk you through every step, from preparing your workspace to the crucial first boot, equipping you with the knowledge and confidence to successfully install your computer processor like a seasoned tech enthusiast.
Preparing for Processor Installation: The Foundation of Success
Before you even touch the CPU or motherboard, proper preparation is key. This initial phase sets the stage for a smooth installation, minimizing risks and ensuring you have everything you need at your fingertips. Rushing this stage can lead to costly mistakes, so take your time and follow these guidelines carefully.
Essential Tools and Components
Having the right tools is paramount. Most of what you need is likely already in a standard household toolkit or readily available.
- Your New CPU: Naturally, the star of the show! Ensure it’s compatible with your motherboard’s socket type (e.g., Intel LGA 1200, AMD AM4) and chipset. Double-check this against your motherboard’s specifications before purchasing.
- Motherboard: The foundation for your CPU and all other components. If you’re building a new PC, it will likely be out of the case. If you’re upgrading, you might need to remove it or ensure sufficient access within the chassis.
- CPU Cooler: This is absolutely critical. Processors generate significant heat, and without a cooler, they will quickly overheat and shut down (or sustain damage). This could be the stock cooler that came with your CPU, an aftermarket air cooler, or an all-in-one (AIO) liquid cooler. Ensure it’s compatible with your CPU socket.
- Thermal Paste: This highly conductive compound is applied between the CPU’s integrated heat spreader (IHS) and the base of the CPU cooler. Its purpose is to fill microscopic imperfections on both surfaces, maximizing heat transfer. Some new coolers come with pre-applied thermal paste; otherwise, you’ll need a tube.
- Phillips Head Screwdriver: A magnetic tip is a bonus for easily handling small screws.
- Rubbing Alcohol (Isopropyl Alcohol 90% or higher) and Lint-Free Cloths/Coffee Filters: Essential for cleaning off old thermal paste if you’re replacing a CPU or cooler, and for cleaning surfaces if needed.
- Anti-Static Wrist Strap (Recommended): This simple device grounds you, preventing electrostatic discharge (ESD) which can irreversibly damage sensitive electronic components. While not strictly mandatory for every user, it’s a cheap and highly effective safeguard.
- Your Motherboard Manual: A treasure trove of information regarding your specific motherboard’s socket type, cooler mounting points, and other crucial details. Keep it handy.
Safety First: Static Electricity and Workspace
Electronic components are incredibly sensitive to static electricity. A small static shock that you might not even feel can be enough to fry a delicate chip. Preventing electrostatic discharge (ESD) is therefore crucial.
- Ground Yourself: The simplest way to prevent ESD is to ground yourself. If you have an anti-static wrist strap, connect it to a metal part of your computer case (unpainted) or a grounded metal object. If you don’t have a strap, periodically touch a grounded metal object (like a radiator or an unpainted metal part of your PC case) before handling components.
- Work on a Clean, Non-Conductive Surface: Avoid working on carpets, which are notorious for generating static. A wooden table or a clean, anti-static mat is ideal. Keep pets and children away from your workspace to prevent accidental bumps or hair contamination.
- Keep Components in Anti-Static Packaging: Until you are ready to install them, keep your CPU, motherboard, and other components in their original anti-static bags.
- Handle Components by the Edges: When handling the CPU or motherboard, always touch them by their edges, avoiding contact with the gold pins or sensitive circuitry. Do not touch the CPU’s integrated heat spreader (the metal lid) or the bottom of the CPU any more than necessary.
Understanding Your Motherboard and CPU Socket
Before you unbox your CPU, take a moment to familiarize yourself with your motherboard’s CPU socket. There are two primary types you’ll encounter:
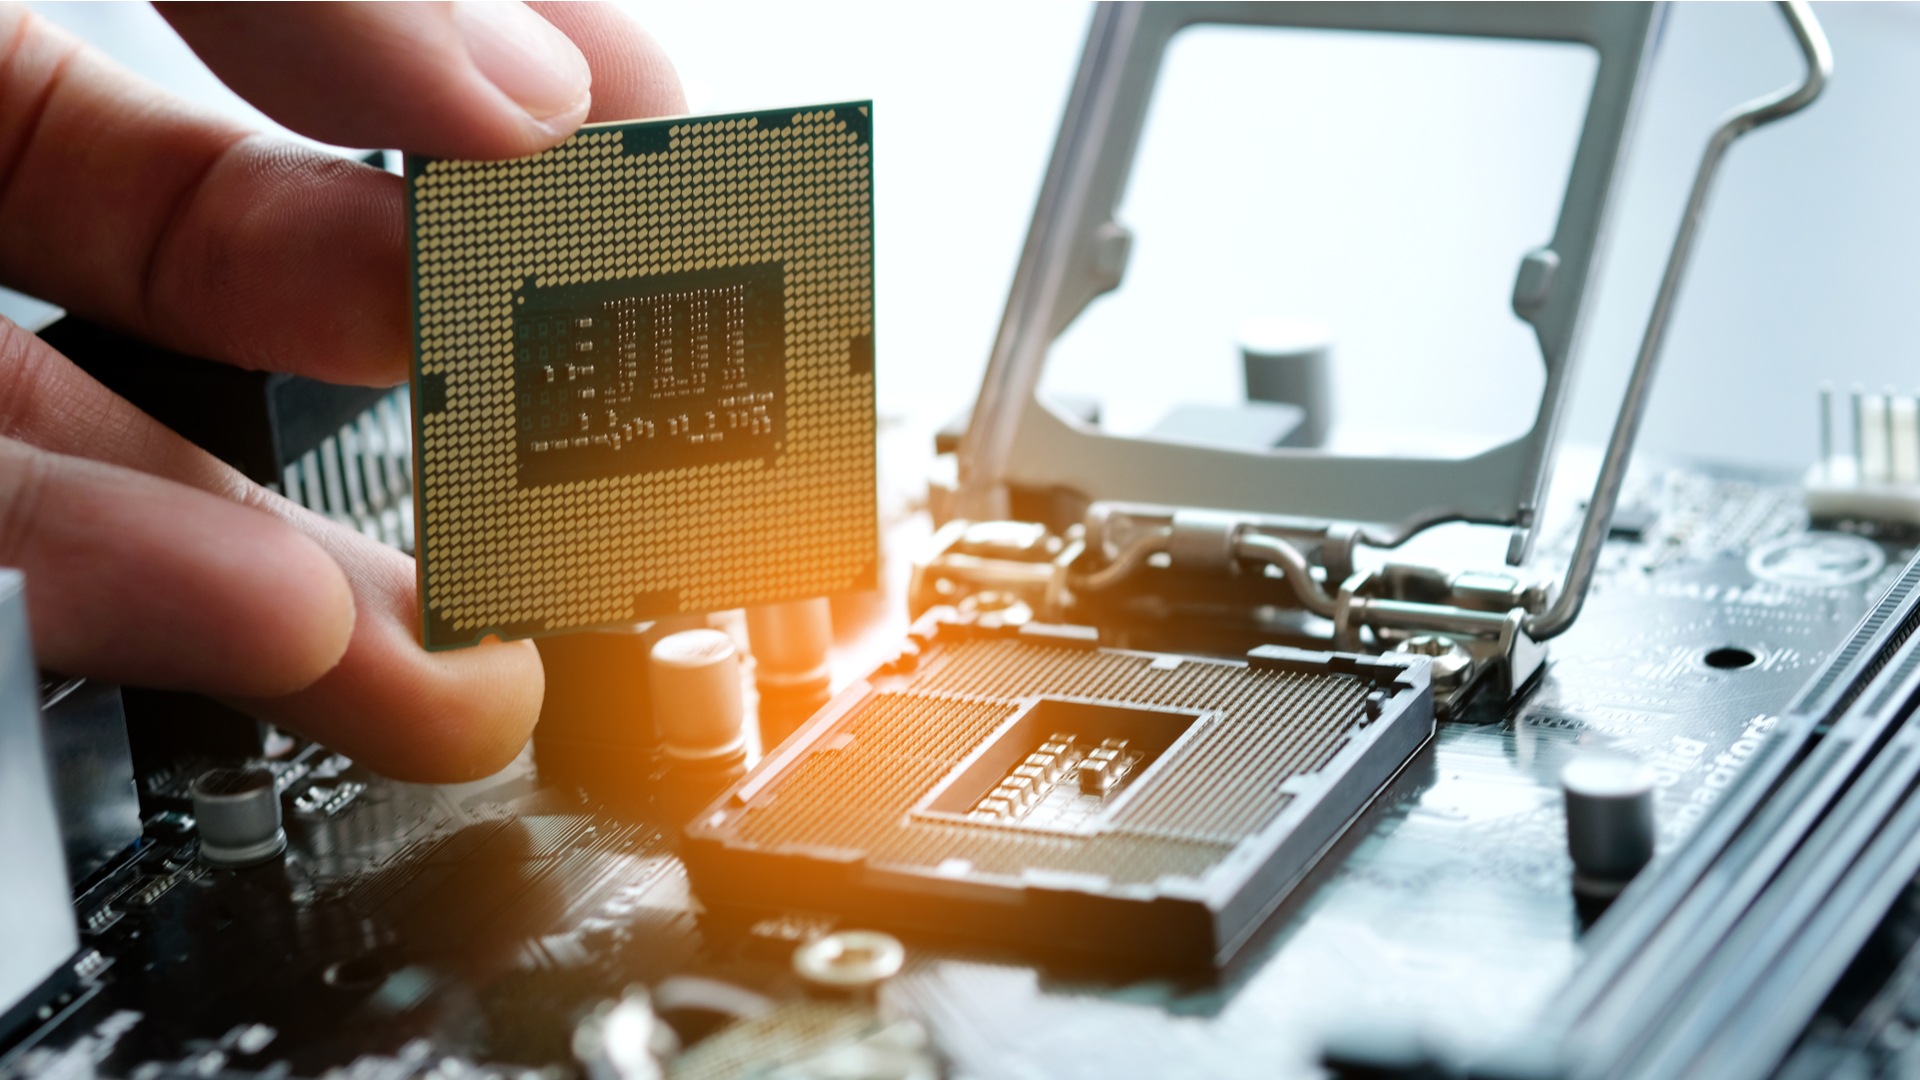
- LGA (Land Grid Array) – Primarily Intel: With LGA sockets, the pins are on the motherboard, not on the CPU. The CPU has flat contact pads. These sockets usually have a metal retention arm and a hinged load plate that secures the CPU.
- PGA (Pin Grid Array) – Primarily AMD (e.g., AM4): With PGA sockets, the pins are on the CPU, and the motherboard socket has corresponding holes. These sockets typically have a lever that opens and closes a clamping mechanism.
Locate the CPU socket on your motherboard. It will usually be a large square in the center, surrounded by mounting holes for the CPU cooler. Identify the socket lever or retention arm. Gently lift it to open the socket mechanism. On Intel LGA sockets, you might see a plastic protective cover over the pins; this will come off automatically or manually after you open the load plate. On AMD PGA sockets, lifting the lever will slightly raise the internal mechanism, allowing the CPU pins to drop in freely.
Crucially, look for the alignment indicator. This is usually a small triangle or a gold arrow on one corner of the CPU socket, matching a similar mark on the CPU itself. This indicator is vital for correctly orienting the processor. Incorrect orientation can lead to bent pins (PGA) or damaged pads/socket pins (LGA), rendering the CPU or motherboard unusable.
Step-by-Step CPU Installation Guide: Precision and Care
With preparations complete, it’s time for the actual installation. Each step requires precision and a gentle touch. Remember, never force anything when working with delicate computer hardware.
Unboxing and Motherboard Preparation
- Remove Motherboard from Anti-Static Bag (if building new): Place the motherboard on your clean, non-conductive workspace. If it’s already in a PC case, ensure you have ample light and space to work comfortably.
- Open the CPU Socket:
- For Intel LGA Sockets: Locate the small metal lever on the side of the socket. Push it down and outwards to unlatch it, then swing the metal retention arm open. This will usually lift a metal load plate. The plastic protective cover (if present) will either pop off with the plate or can be gently lifted away once the plate is open. Store this cover safely; it’s useful if you ever need to send the motherboard in for RMA.
- For AMD PGA Sockets: Locate the small metal lever on the side of the socket. Gently push it outwards and then lift it straight up until it’s fully vertical. This releases the internal clamping mechanism.
Seating the CPU Correctly
This is arguably the most critical step. Misalignment or force can destroy your processor or motherboard.
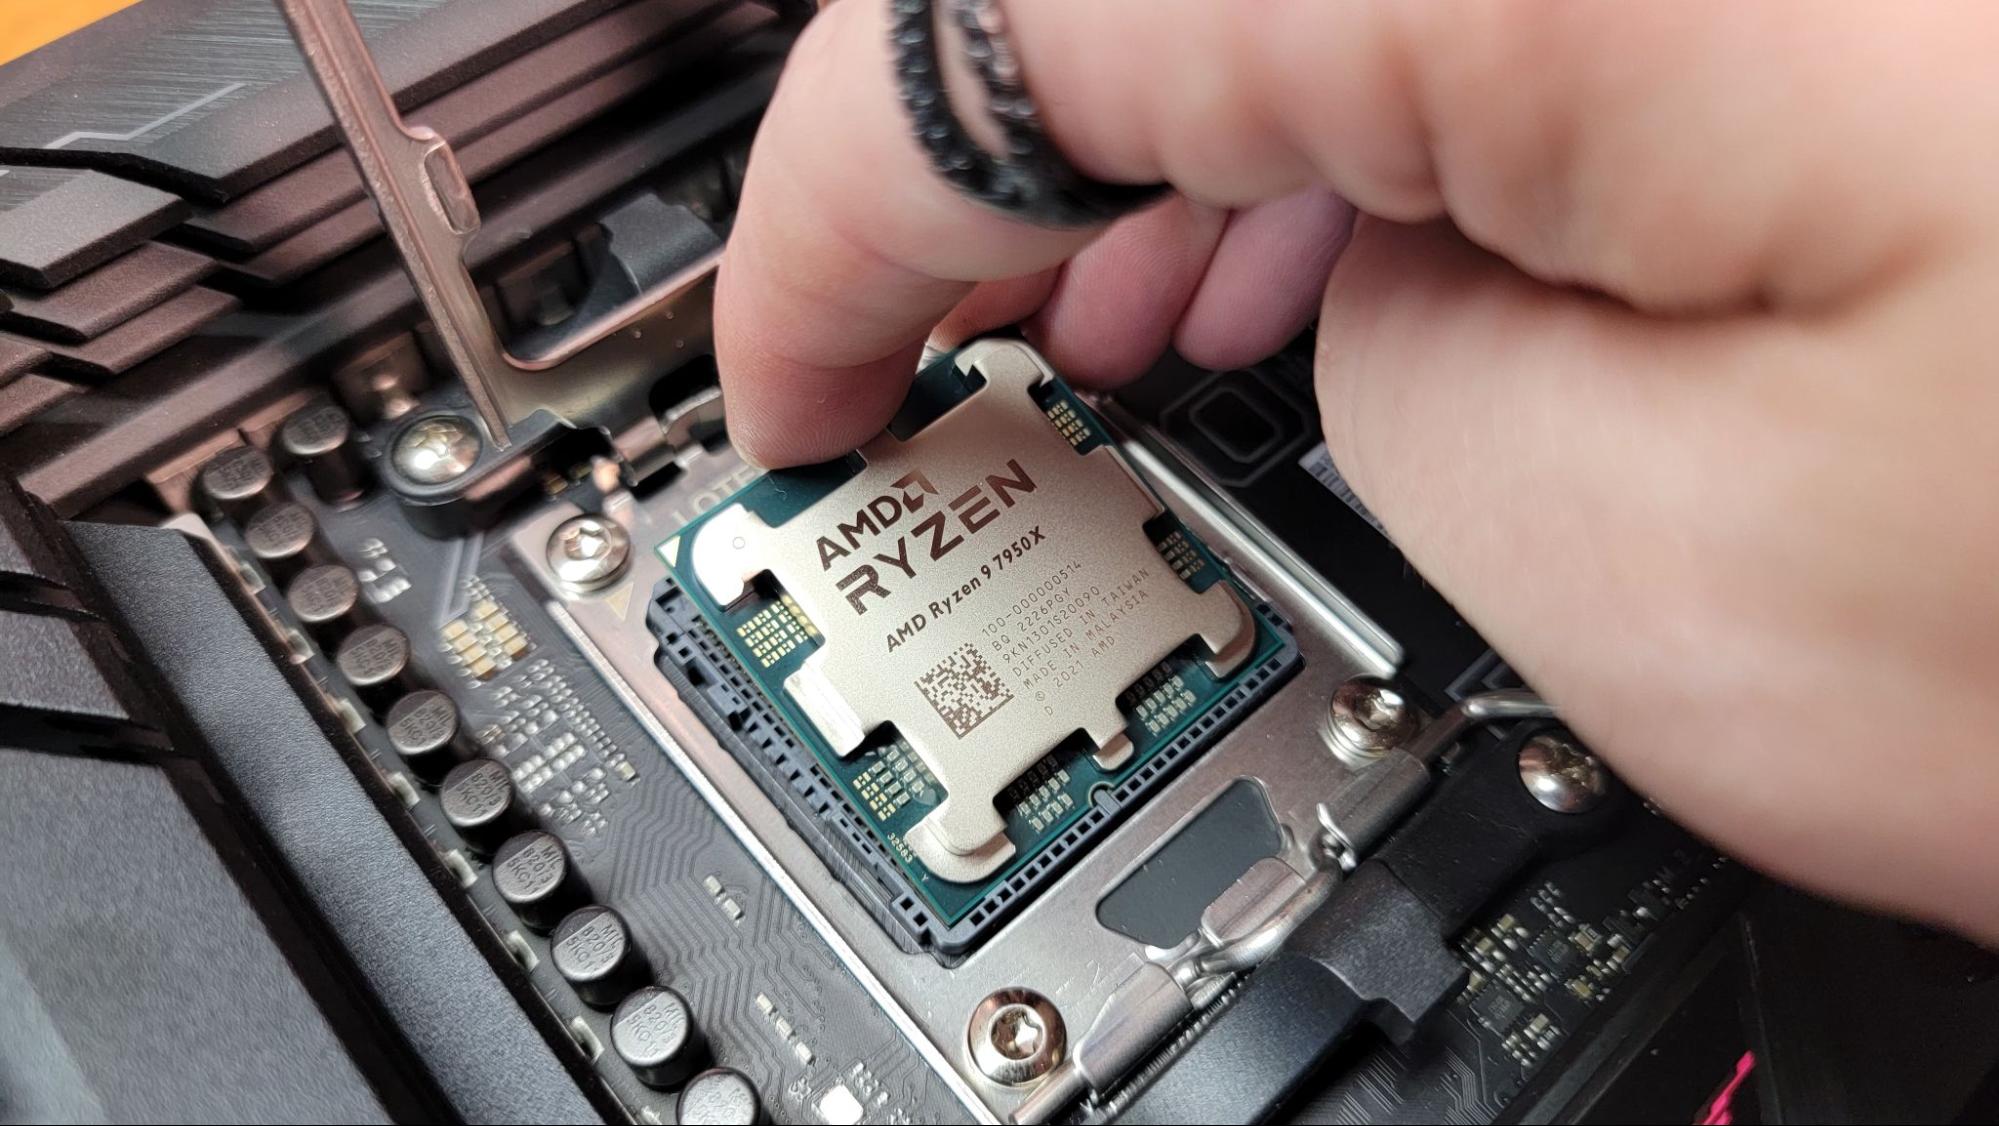
- Unbox Your CPU: Carefully remove your new processor from its protective packaging. Handle it only by the edges. Do not touch the gold contacts or pins on the underside.
- Align the CPU:
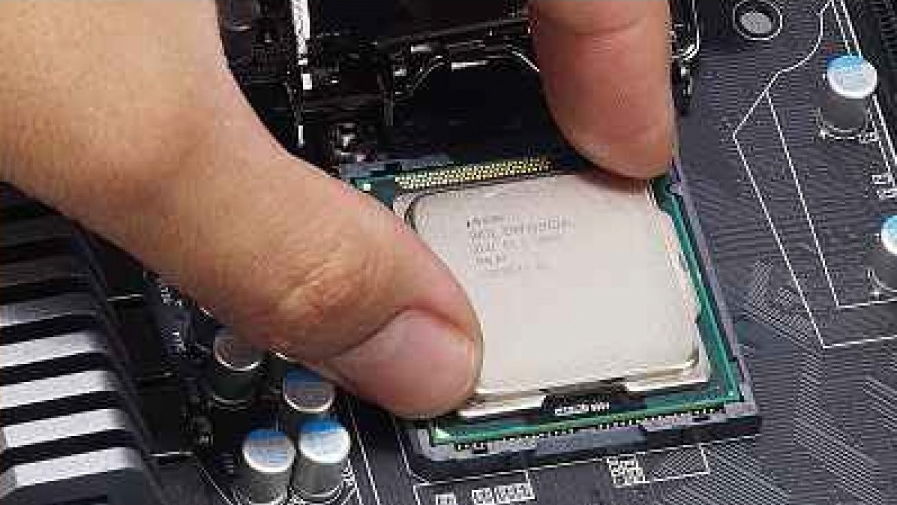
- For Intel LGA Sockets: Match the golden triangle/arrow on one corner of the CPU with the corresponding mark on the motherboard socket. Carefully lower the CPU straight down onto the socket. It should drop perfectly into place with no resistance. The notches on the sides of the CPU should align with the small posts on the socket.
- For AMD PGA Sockets: Match the golden triangle/arrow on one corner of the CPU with the corresponding mark on the motherboard socket. Carefully lower the CPU straight down onto the socket. The pins should slide effortlessly into the holes. You should not need to apply any pressure. If it doesn’t drop in freely, re-check the alignment. Gently jiggling it slightly might help, but never force it.
- Secure the CPU:
- For Intel LGA Sockets: Once the CPU is seated, gently lower the metal load plate back over the CPU. Then, push the retention arm back down and under the small hook to latch it in place. You might feel a bit of resistance and hear a slight click as the lever locks into place; this is normal.
- For AMD PGA Sockets: Once the CPU has fully dropped into place and is sitting flush with the socket, gently push the lever back down until it clicks securely into its locked position. This clamps the pins in place.
Applying Thermal Paste (The Crucial Layer)
Thermal paste is essential for efficient heat transfer from the CPU to the cooler. Without it, your CPU would quickly overheat.
- Check for Pre-Applied Paste: Many new stock coolers or aftermarket coolers come with thermal paste pre-applied to their base. If yours does, you can skip applying more, unless you prefer to clean it off and use your own high-performance paste.
- Clean Surfaces (if necessary): If you’re reusing a cooler or replacing a CPU/cooler, ensure both the CPU’s metal lid (IHS) and the cooler’s base are immaculately clean. Use isopropyl alcohol and a lint-free cloth to gently wipe away any old thermal paste residue. Allow to dry completely.
- Apply Thermal Paste (if not pre-applied): There are several accepted methods, but the most common and effective for most users are the “pea-sized dot” or the “single line” methods.
- Pea-Sized Dot: Squeeze a small, pea-sized (or grain of rice sized, depending on CPU size) blob of thermal paste directly in the center of the CPU’s metal lid.
- Single Line: For rectangular CPUs (like many Intel models), a thin line from one end of the IHS to the other is also effective.
- Avoid Excess: Do not apply too much paste; a thin, even layer is what you want. The pressure from the cooler will spread it out. Too much can sometimes impede performance slightly, but more importantly, can make a mess.
- Do Not Spread Manually (for most pastes): With modern thermal pastes, it’s generally best to let the pressure from the CPU cooler spread the paste for you. Spreading it manually with a finger or tool can introduce air bubbles, which reduce efficiency.
Installing the CPU Cooler
The cooler is responsible for dissipating the heat generated by the CPU, preventing thermal throttling and damage. Installation methods vary widely between different coolers.
- Consult Your Cooler’s Manual: This is paramount. Stock coolers, aftermarket air coolers, and AIO liquid coolers all have unique mounting procedures. Follow your specific cooler’s instructions precisely.
- Position the Cooler: Gently place the cooler’s base directly onto the CPU, ensuring the mounting holes or clips align with the corresponding points on the motherboard. Be careful not to slide the cooler around once it touches the thermal paste, as this can create air gaps.
- Secure the Cooler:
- For Screw-Down Mounts: Typically, you’ll have four screws. Tighten them in a diagonal pattern (e.g., top-left, bottom-right, top-right, bottom-left) a few turns at a time for each screw. This ensures even pressure and prevents cracking the motherboard or CPU. Do not overtighten; once they are snug, stop.
- For Clip-Based Mounts: Some stock coolers or simpler aftermarket coolers use a clip mechanism. Follow the instructions to securely latch these clips onto the motherboard’s mounting bracket.
- Connect the Cooler Fan: Locate the “CPU_FAN” header on your motherboard (check your motherboard manual for its exact location). Plug the CPU cooler’s fan cable into this header. This is a critical step; if the fan isn’t connected, your system might not even boot, or the CPU will quickly overheat. Ensure the connector is fully seated.
- Cable Management (Optional but Recommended): Route the fan cable neatly to prevent it from interfering with other components or becoming tangled.
Post-Installation and First Boot: Bringing Your System to Life
With the CPU and cooler securely installed, the most critical hardware steps are complete. Now, it’s time to connect the remaining components and perform the crucial first boot.
Connecting Cables and Initial Power On
Before powering up, make sure all necessary power cables are connected to the motherboard:
- 24-Pin ATX Power: The large power connector usually located on the right side of the motherboard. Ensure it’s fully seated and latched.
- CPU Power (4/8-Pin EPS): Typically found near the top-left of the CPU socket. This provides dedicated power to the processor. Ensure it’s fully seated.
- GPU Power (if applicable): If you have a dedicated graphics card, connect its PCIe power cables from the power supply.
- RAM: Install your RAM sticks into the appropriate slots (consult your motherboard manual for correct dual-channel or quad-channel configuration).
- Storage Devices: Connect SATA data and power cables to your SSDs/HDDs.
- Front Panel Connectors: Connect the tiny wires from your case (power button, reset button, USB, audio) to the motherboard. This can be the trickiest part, so refer to your manual.
Once all essential components are connected, you’re ready for the moment of truth.
BIOS/UEFI Verification and Troubleshooting Tips
- Initial Power On: Press the power button.
- If it Boots Successfully: You should see fans spin, lights illuminate, and eventually, a display on your monitor showing the motherboard’s logo or prompting you to enter BIOS/UEFI. Congratulations!
- If it Doesn’t Boot (No POST – Power On Self Test):
- No Power/Fans: Double-check all power supply connections (24-pin, 8-pin CPU, GPU), ensure the power supply switch is ON, and verify front panel power button connection.
- Fans Spin, No Display: This is common.
- RAM: Reseat your RAM sticks firmly. Try booting with just one stick.
- GPU: Ensure your graphics card is properly seated in its PCIe slot and has power. If your CPU has integrated graphics, try connecting your monitor directly to the motherboard’s video output (remove the dedicated GPU if necessary).
- CPU: While less common if installed correctly, a poorly seated CPU or cooler can cause this. Recheck the CPU cooler fan connection to the CPU_FAN header. Many motherboards won’t boot if they don’t detect a CPU fan.
- Motherboard Diagnostic LEDs/Beep Codes: Many modern motherboards have small diagnostic LEDs (CPU, RAM, VGA, BOOT) that light up to indicate where the POST process failed. Consult your motherboard manual for their meaning or for beep codes if your motherboard has a speaker.
- Enter BIOS/UEFI: As your system boots, repeatedly press the designated key (usually Del, F2, F10, or F12) to enter the BIOS/UEFI setup utility.
- Verify CPU Recognition and Temperature:
- CPU Model: In the BIOS/UEFI, navigate to a section that displays system information or hardware monitoring. Confirm that your CPU is correctly recognized (e.g., “Intel Core i7-13700K” or “AMD Ryzen 7 7700X”).
- CPU Temperature: Check the CPU temperature readings. At idle, it should be relatively low (e.g., 30-50°C). If it’s alarmingly high (e.g., above 70°C immediately after boot), shut down your system immediately. This indicates a problem with cooler mounting or thermal paste application.
- Save and Exit: If everything looks good, save your settings and exit the BIOS/UEFI. Your system should now proceed to boot into your operating system or prompt you to install one.
Why Proper Installation Matters: Performance and Longevity
Successfully installing your processor is not just about getting your computer to turn on; it’s about ensuring it operates at its peak potential and remains reliable for years to come. The quality of your installation directly impacts two critical aspects: performance and longevity.
Impact on System Performance
A correctly installed CPU and cooler are fundamental to achieving optimal system performance.
- Thermal Throttling Prevention: Modern CPUs are designed to dynamically adjust their clock speed based on workload and temperature. If a CPU gets too hot due to poor cooler mounting or insufficient thermal paste, it will “throttle” – meaning it will automatically reduce its clock speed to lower its temperature. This directly results in a significant drop in performance, causing stuttering, lag, and slower processing times, especially during demanding tasks like gaming, video editing, or complex computations. Proper installation ensures efficient heat transfer, allowing the CPU to maintain its boost clocks and deliver consistent high performance.
- Stability and Reliability: Overheating can also lead to system instability, including crashes, blue screens of death (BSODs), and unexpected shutdowns. A stable operating temperature ensures reliable operation, preventing data corruption and giving you a smooth, uninterrupted user experience.
- Overclocking Potential: For enthusiasts who wish to push their CPU beyond its factory specifications through overclocking, a perfect installation and robust cooling solution are absolutely non-negotiable. Without excellent heat dissipation, any attempt at overclocking will quickly lead to thermal throttling or system instability.
Avoiding Common Pitfalls and Ensuring Longevity
Beyond immediate performance, a meticulous installation protects your investment and extends the lifespan of your components.
- Preventing Physical Damage: Forcing a CPU into its socket can bend pins (on PGA sockets) or damage the delicate contact pads/pins (on LGA sockets). This type of damage is often irreversible and can render the CPU or motherboard useless, requiring expensive replacements. Taking your time and aligning correctly avoids this catastrophic error.
- Optimizing Thermal Paste Application: Too little thermal paste, too much, or improper spreading can create air pockets that act as insulators, hindering heat transfer. This leads to higher CPU temperatures, increased fan noise (as the cooler struggles), and potential long-term damage from sustained heat stress.
- Secure Cooler Mounting: An improperly mounted cooler can wobble, apply uneven pressure, or simply not make full contact with the CPU’s IHS. This severely compromises its ability to dissipate heat. Over time, constant high temperatures can degrade the silicon of the CPU, shortening its operational life.
- Protecting Against ESD: The simple act of using an anti-static wrist strap or grounding yourself periodically can save your components from invisible, destructive electrostatic discharge. While an ESD event might not immediately kill a component, it can cause latent damage that manifests as intermittent problems weeks or months later.
By meticulously following each step of the installation guide, you’re not just assembling hardware; you’re building a foundation for a reliable, high-performing, and long-lasting computer system. The satisfaction of a successful DIY CPU installation extends beyond the immediate moment, providing confidence in your tech skills and a deeper appreciation for the intricate engineering within your machine. Welcome to the world of PC building and upgrading, where every carefully placed component contributes to a powerful whole.
aViewFromTheCave is a participant in the Amazon Services LLC Associates Program, an affiliate advertising program designed to provide a means for sites to earn advertising fees by advertising and linking to Amazon.com. Amazon, the Amazon logo, AmazonSupply, and the AmazonSupply logo are trademarks of Amazon.com, Inc. or its affiliates. As an Amazon Associate we earn affiliate commissions from qualifying purchases.