
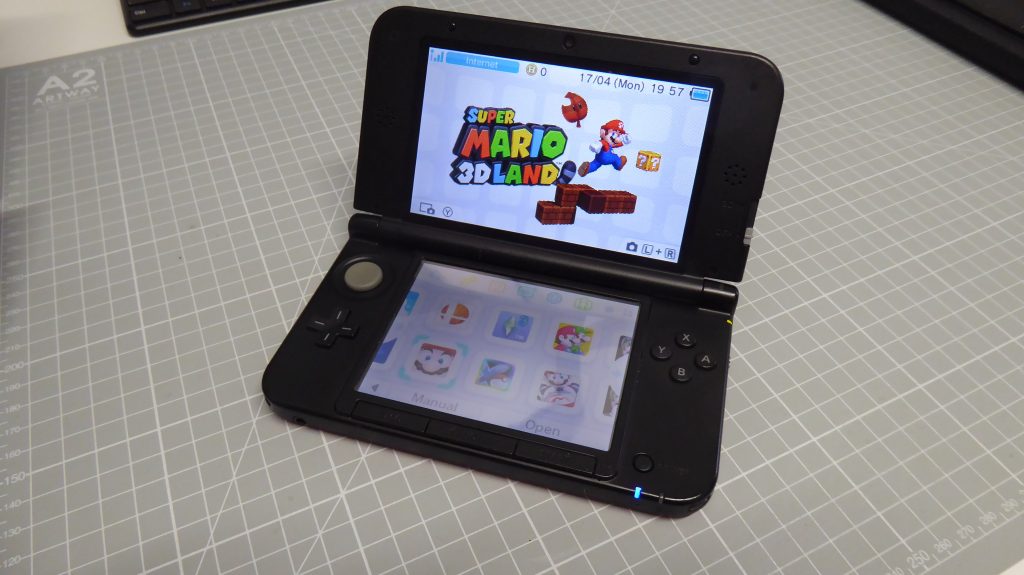
The Nintendo 3DS, a marvel of portable gaming technology, captured the hearts of millions with its unique stereoscopic 3D display and an impressive library of games. Even years after its discontinuation, a vibrant community continues to cherish and extend the life of this iconic handheld. For many tech enthusiasts, the journey into the world of “homebrew” represents the ultimate mastery of their device – a way to transcend factory limitations and unlock a realm of custom applications, enhancements, and functionalities not originally envisioned by Nintendo. This guide delves deep into the process of installing homebrew on your 3DS, providing a detailed, step-by-step walkthrough while also exploring the broader implications for technology enthusiasts, digital preservationists, and even those looking to maximize the value of their gaming investments.
I. Understanding 3DS Homebrew: What It Is and Why It Matters
At its core, “homebrew” refers to software developed by hobbyists and independent developers for proprietary hardware platforms, often bypassing official distribution channels and security measures. For the Nintendo 3DS, homebrew allows users to run custom firmware (CFW), unofficial applications, emulators, and much more, significantly expanding the console’s capabilities. This isn’t merely about tweaking; it’s about transforming a consumer device into an open-ended platform for digital exploration and personalization.
A. What is Custom Firmware (CFW) and Its Role?
Custom Firmware (CFW) is modified system software that replaces or works alongside the official firmware (OFW) on your 3DS. Unlike official updates from Nintendo, CFW is developed by the homebrew community, granting users privileges that are normally locked down. The most prominent CFW for the 3DS is Luma3DS, which acts as a boot manager and provides the foundation for running a vast array of homebrew applications. Without CFW, your 3DS operates strictly within Nintendo’s walled garden, adhering to its rules and limitations. With CFW, you gain control over boot processes, system settings, and the ability to install unsigned applications.
B. The Multifaceted Benefits of a Homebrewed 3DS
The reasons for installing homebrew are diverse, catering to various needs and interests within the tech and gaming communities:
- Game Backups and Preservation: One of the most compelling reasons is the ability to back up your own purchased game cartridges and digital titles. This not only protects your investment against physical damage or data loss but also ensures that you can continue playing your games long after Nintendo’s eShop has shut down or cartridges become unreadable. It’s a critical aspect of digital preservation for a console nearing the end of its official lifecycle.
- Region Unlocking: The 3DS, like many consoles, is region-locked, preventing users from playing games purchased in different geographical regions. Homebrew instantly removes this restriction, allowing you to import and play any 3DS game, regardless of its origin. This significantly expands your gaming library and makes certain niche titles more accessible.
- Emulators and Retro Gaming: CFW opens the door to powerful emulators, transforming your 3DS into a portable retro gaming powerhouse. You can enjoy titles from classic consoles like the Game Boy, Game Boy Advance, SNES, NES, and even some PlayStation 1 games, all on one device. This extends the entertainment value of your 3DS far beyond its original intent.
- System Customization and Enhancements: Beyond games, homebrew allows for deep system customization. You can install custom themes, modify splash screens, change system fonts, and even overclock your console for better performance in some demanding titles. Applications like Anemone3DS streamline theme management, while others enable cheats for games or provide advanced system monitoring tools.
- Access to Community-Developed Apps: The homebrew ecosystem is rich with applications designed by and for the community. These range from utility tools like file managers and screenshot utilities to media players, IRC clients, and even ports of classic PC games. It fosters a spirit of innovation and resourcefulness among users.
- Extending Device Longevity: As hardware ages, official support wanes. Homebrew breathes new life into older devices, keeping them relevant and functional. For many, a homebrewed 3DS becomes more versatile and valuable than a stock one, maximizing the return on their initial investment and delaying the need for newer, more expensive hardware.
The act of homebrewing a 3DS is, for many, a statement of digital autonomy – a decision to take full control over their purchased hardware and dictate how it functions. It aligns perfectly with the ethos of technology enthusiasts who seek to understand, modify, and optimize their devices beyond their commercial specifications.
II. Preparing for Your Homebrew Journey: Essential Prerequisites and Tools
Embarking on the 3DS homebrew installation requires careful preparation. This section outlines the necessary hardware, software, and crucial preliminary steps to ensure a smooth and successful process. Treat this phase with meticulous attention to detail, as overlooking any component can lead to complications.
A. Gathering Your Arsenal: What You’ll Need
Before diving into the technical steps, ensure you have the following readily available:
- A Nintendo 3DS Console (Any Model): This guide is applicable to all models of the 3DS family, including the original 3DS, 3DS XL, 2DS, New 3DS, New 3DS XL, and New 2DS XL. Ensure your console is charged and functional.
- An SD Card: This is perhaps the most critical component. A high-quality SD card (or microSD for New 3DS/2DS models) is essential. While the console comes with a small one, you’ll need at least 8GB, with 32GB or 64GB being ideal for storing games, emulators, and applications. Ensure it’s formatted to FAT32, which is the standard file system for the 3DS. If using a card larger than 32GB, you might need a third-party formatting tool as Windows’ default formatter may not offer FAT32 for larger drives.
- A Computer with Internet Access: You’ll need a PC (Windows, macOS, or Linux) to download files, transfer them to your SD card, and follow the instructions. A reliable internet connection is necessary for downloading the required software packages.
- An SD Card Reader: To transfer files between your computer and the SD card, an SD card reader is indispensable. Most modern laptops have one built-in, but an external USB reader is cheap and reliable.
- A Stable Internet Connection on Your 3DS: Some installation methods may require the 3DS itself to access the internet to download small files or communicate with specific servers.
B. Understanding Essential Software and Entry Points
The 3DS homebrew process relies on specific software and “exploits” that serve as entry points to gain initial unauthorized access to the console’s system. Over time, these exploits have evolved, with some being patched by Nintendo and new ones discovered by the community. While the most robust and up-to-date guide is always available at 3ds.hacks.guide, we’ll discuss some common concepts here.
-
Exploits (Entry Points): These are vulnerabilities in the 3DS’s software that allow arbitrary code execution. Historically, popular exploits included:
- Browserhax: Utilized vulnerabilities in the 3DS’s web browser. It was often a quick, software-only method but became increasingly unstable as Nintendo patched vulnerabilities.
- Soundhax: Exploited the 3DS Sound application, often requiring specific audio files.
- Seedminer/Magnethax/Fredtool: These methods leverage specific game save data or software flaws that can be written to the SD card. These are often more reliable and current, relying on an initial “seed” to generate an exploit.
- Hardmod: A physical modification involving soldering wires to the console’s motherboard to directly inject CFW. This is for advanced users only and is generally unnecessary for most.
The goal of any entry point is to load the Homebrew Launcher, which then allows you to install CFW.
-
Homebrew Launcher (HBL): This is the graphical interface where you can launch various homebrew applications. It’s usually the first user-facing component you’ll interact with after successfully triggering an exploit.
-
Luma3DS: As mentioned earlier, Luma3DS is the de facto custom firmware for the 3DS. It’s loaded early in the boot process and grants extensive control over the system. It enables region-free gaming, title installation, game patching, and much more. It also provides a robust configuration menu (accessible by holding SELECT during boot) where you can tweak various system settings.
-
FBI: This is an essential homebrew application, often referred to as the “package installer.” FBI allows you to install
.cia(CTR Importable Archives) files, which are the equivalent of Nintendo’s.cdnfiles, containing games, applications, and system updates. Without FBI, installing downloaded homebrew applications and game backups would be significantly more difficult.
C. The Critical Step: Backing Up Your Data

Before making any significant modifications to your 3DS, performing a full NAND backup is paramount. The NAND is the console’s internal flash memory, containing the operating system, user data, and crucial security keys. While homebrewing is generally safe when following instructions, unforeseen issues (like power loss during a critical step) can potentially “brick” your console, rendering it unusable.
A NAND backup acts as an emergency restore point. If something goes wrong, you can theoretically restore your console to its original state. This step is usually integrated into the CFW installation process itself, where tools will guide you through creating a copy of your NAND onto your SD card. Do not skip this. It’s your digital insurance policy, safeguarding your existing digital purchases, save data, and the console’s unique identifiers.
III. Step-by-Step Installation Guide: Injecting Custom Firmware
The precise steps for installing 3DS homebrew can vary slightly depending on the specific model, current firmware version, and the chosen entry point. However, the general workflow involves establishing an initial exploit, installing the custom firmware, and then setting up essential utilities. This section outlines a generalized, conceptual process based on common modern methods, emphasizing the underlying logic of each stage. Always refer to the most current and detailed guide at 3ds.hacks.guide for real-time, precise instructions specific to your device’s exact firmware version.
A. Establishing an Initial Entry Point
The first hurdle is to gain initial code execution. This is where an “exploit” comes into play. For many users, this process might involve:
- Identifying Your Console’s Firmware: Knowing your 3DS’s current firmware version (e.g., 11.16.0-49U) is crucial, as specific exploits work on specific versions. Navigate to System Settings on your 3DS to find this information.
- Downloading Exploit-Specific Files: Based on the recommended method for your firmware (e.g., Seedminer, NTRBoot, etc.), you’ll download specific files to your computer. These often include an exploit payload and other necessary components.
- Preparing Your SD Card: Copy the downloaded exploit files and the Homebrew Launcher payload (usually
boot.firmorboot.3dsx) to the root of your prepared SD card. Ensure the SD card is properly inserted into your 3DS. - Triggering the Exploit: This is the magic moment. Depending on the exploit, you might:
- Visit a specific website in the 3DS browser (for Browserhax, though largely obsolete).
- Launch the 3DS Sound application and play a specially crafted audio file (for Soundhax, also largely obsolete).
- Use a friend’s already homebrewed 3DS to generate a
seedfile for Seedminer. - Employ a flashcart like an R4 or NTRBootHax to boot into a temporary custom firmware environment.
Upon successful execution, your 3DS should launch the Homebrew Launcher interface, indicating that you’ve bypassed initial security.
B. Installing Custom Firmware: Focusing on Luma3DS
Once in the Homebrew Launcher, the next critical step is to install Luma3DS, the custom firmware that will reside permanently on your console.
- Downloading Luma3DS: Download the latest release of Luma3DS (
boot.firmandboot.3dsxfiles) from its official GitHub repository to your computer. - Placing Luma3DS Files on SD Card: Copy
boot.firmto the root of your SD card. This file is the core of Luma3DS and will be loaded by the console’s bootloader. - Running the Installer/Flashing Tool: From the Homebrew Launcher, you’ll typically launch an application (often named
GodMode9orSafeSysUpdater) that allows you to install Luma3DS to the console’s internal NAND. This process involves flashing the custom firmware to a specific partition. - Creating a NAND Backup: During this phase, the tool will almost certainly prompt you to create a full NAND backup. Save this backup to your SD card and, crucially, copy it to your computer for safekeeping. This backup is device-specific and irreplaceable.
- Installing Luma3DS to NAND: Follow the on-screen prompts to complete the installation of Luma3DS. This usually involves injecting it into the console’s boot chain, ensuring it loads every time the 3DS starts up.
- Configuring Luma3DS: After installation, the 3DS will reboot. You might be greeted by the Luma3DS configuration menu (if you hold SELECT during boot-up) where you can enable options like “Show NAND or user string in System Settings” and “Enable game patching.” Enabling these features provides greater flexibility and visual confirmation that Luma3DS is active.
C. Post-Installation: Essential Utilities and Customization
With Luma3DS successfully installed, your 3DS is now “homebrewed.” The final steps involve installing essential homebrew applications to truly unlock its potential.
- Installing FBI (The Package Installer):
- Download the latest
FBI.ciafile from its GitHub page to your computer. - Place the
FBI.ciafile somewhere easily accessible on your SD card (e.g., create a folder namedcias). - Access the Homebrew Launcher (usually by holding L during boot-up and selecting it from the menu, or through a dedicated application icon).
- Launch
FBIfrom the Homebrew Launcher (if it’s already there) or useDecrypt9WIP/GodMode9to installFBI.ciadirectly. Once installed,FBIwill appear as a standard application icon on your 3DS home screen.
- Download the latest
- Installing Homebrew Launcher Wrapper (Optional but Recommended): For convenience, install a Homebrew Launcher wrapper (
hbl_loader.cia). This creates a permanent icon on your 3DS home screen, allowing you to launch the Homebrew Launcher without needing to hold buttons during boot or rely on specific game exploits. - Installing Checkpoint (Save Data Manager): Download
Checkpoint.cia. This application allows you to back up and restore game save data for both cartridge and digital titles, providing peace of mind and flexibility for managing your progress. - Exploring Further: Once FBI is installed, the possibilities are vast. You can use it to install:
- Anemone3DS: For custom theme management.
- Universal-Updater: An app store for homebrew, making it easy to discover and install other tools.
- Various Emulators: For classic gaming experiences.
- Digital Backups:
.ciafiles of your legitimately owned 3DS games.
IV. Navigating the Homebrew Ecosystem and Best Practices
Having successfully homebrewed your 3DS, you’ve entered a vibrant and continuously evolving ecosystem. To ensure a smooth and secure experience, understanding best practices and navigating the community wisely is key.
A. Exploring the Homebrew Launcher and Recommended Applications
The Homebrew Launcher is your gateway to a world of custom software. Spend some time exploring the applications you’ve installed and discovering new ones.
- FBI (ForkBomb Installer): As your primary
.ciainstaller, FBI is indispensable. Use it to install new homebrew applications, games you’ve backed up, and even system updates (though proceed with caution on official system updates once CFW is installed). It also allows you to manage titles, delete installed software, and browse your SD card. - Checkpoint: Crucial for game data management. Regularly back up your game saves, especially before applying game patches or making significant system changes. This prevents losing hours of progress.
- Anemone3DS: For those who appreciate aesthetics, Anemone3DS simplifies the process of downloading and applying custom themes for your 3DS interface, offering a personalized touch to your console.
- Universal-Updater: Often considered an “app store” for 3DS homebrew, Universal-Updater provides an easy way to browse, download, and update a wide range of popular homebrew applications directly from your 3DS.
- Emulators: RetroArch is a popular multi-system emulator available on the 3DS, capable of running games from various classic consoles. Specialized emulators for specific systems (like mGBA for Game Boy Advance) often offer better performance.
B. Staying Safe, Secure, and Up-to-Date
While homebrew unlocks incredible potential, it also introduces responsibilities. Adhering to best practices is vital for maintaining the stability and security of your homebrewed 3DS.
- Prioritize Official Sources: Always download homebrew applications and Luma3DS updates from their official GitHub repositories or trusted community platforms. Avoid unofficial mirror sites that might host modified or malicious software.
- Regularly Update Luma3DS: The developers of Luma3DS frequently release updates, not only for new features but also for bug fixes and compatibility with new official Nintendo firmware versions. Update Luma3DS by replacing the
boot.firmfile on your SD card with the latest version. This ensures your CFW remains stable and compatible. - Exercise Caution with Official System Updates: Once CFW is installed, it is generally safe to update your 3DS using the official system update method, as Luma3DS is designed to be firmware-agnostic. However, always check the 3DS homebrew community resources (like 3ds.hacks.guide or popular forums) before updating to ensure the latest Luma3DS version is compatible with the new official firmware. Updating without proper Luma3DS support can lead to temporary issues or, in rare cases, a soft-brick.
- Backup Your SD Card: Periodically back up the entire contents of your SD card to your computer. This provides an additional layer of protection for your installed games, applications, and save data.
- Understand the Risks: While the current homebrew methods are very stable and unlikely to brick your console if followed correctly, acknowledge that modifications always carry inherent risks. You are operating outside of Nintendo’s official support channels, and your warranty is voided.
- Ethical Considerations and Digital Security: The ability to install
.ciafiles also means the ability to install pirated games. The homebrew community generally discourages piracy. Using homebrew for legitimate purposes like game backups, region unlocking, and customization enhances the value and longevity of your device, aligning with principles of digital freedom and responsible ownership, without infringing on creators’ rights. From a digital security perspective, always be aware of what you’re installing and where it comes from, treating your homebrewed 3DS like any other customized computing device.
Conclusion
Installing homebrew on your Nintendo 3DS is a journey into advanced digital customization and device mastery. It transforms your handheld from a closed gaming system into a versatile platform for retro gaming, extensive customization, and digital preservation. By carefully following the steps, understanding the tools, and adhering to best practices, you can unlock a new realm of possibilities for your beloved console. This endeavor not only extends the functional life of the 3DS but also empowers users to fully realize the potential of their hardware, a core tenet for any true technology enthusiast. Embrace the journey, explore the vast homebrew ecosystem, and enjoy your newly liberated Nintendo 3DS!
aViewFromTheCave is a participant in the Amazon Services LLC Associates Program, an affiliate advertising program designed to provide a means for sites to earn advertising fees by advertising and linking to Amazon.com. Amazon, the Amazon logo, AmazonSupply, and the AmazonSupply logo are trademarks of Amazon.com, Inc. or its affiliates. As an Amazon Associate we earn affiliate commissions from qualifying purchases.