In today’s fast-paced digital world, efficiency is paramount. Whether you’re a coder juggling multiple IDEs, a graphic designer perfecting intricate visuals, a financial analyst tracking market trends, or simply someone who enjoys multitasking across various applications, a single monitor often feels like a bottleneck. The solution? A dual monitor setup. This seemingly simple upgrade can revolutionize your workflow, significantly boosting productivity, improving multitasking capabilities, and providing a more immersive computing experience.
This comprehensive guide will walk you through everything you need to know about installing two monitors, from the initial planning stages and hardware considerations to the step-by-step setup and troubleshooting common issues. By the end, you’ll have a fully functional dual-screen workstation ready to tackle any digital challenge.
Why a Dual Monitor Setup is a Game-Changer
Before diving into the technicalities, let’s explore why investing time and effort into setting up dual monitors is a truly worthwhile endeavor. The benefits extend far beyond mere convenience, impacting your work quality and speed.
Boosting Productivity and Workflow Efficiency
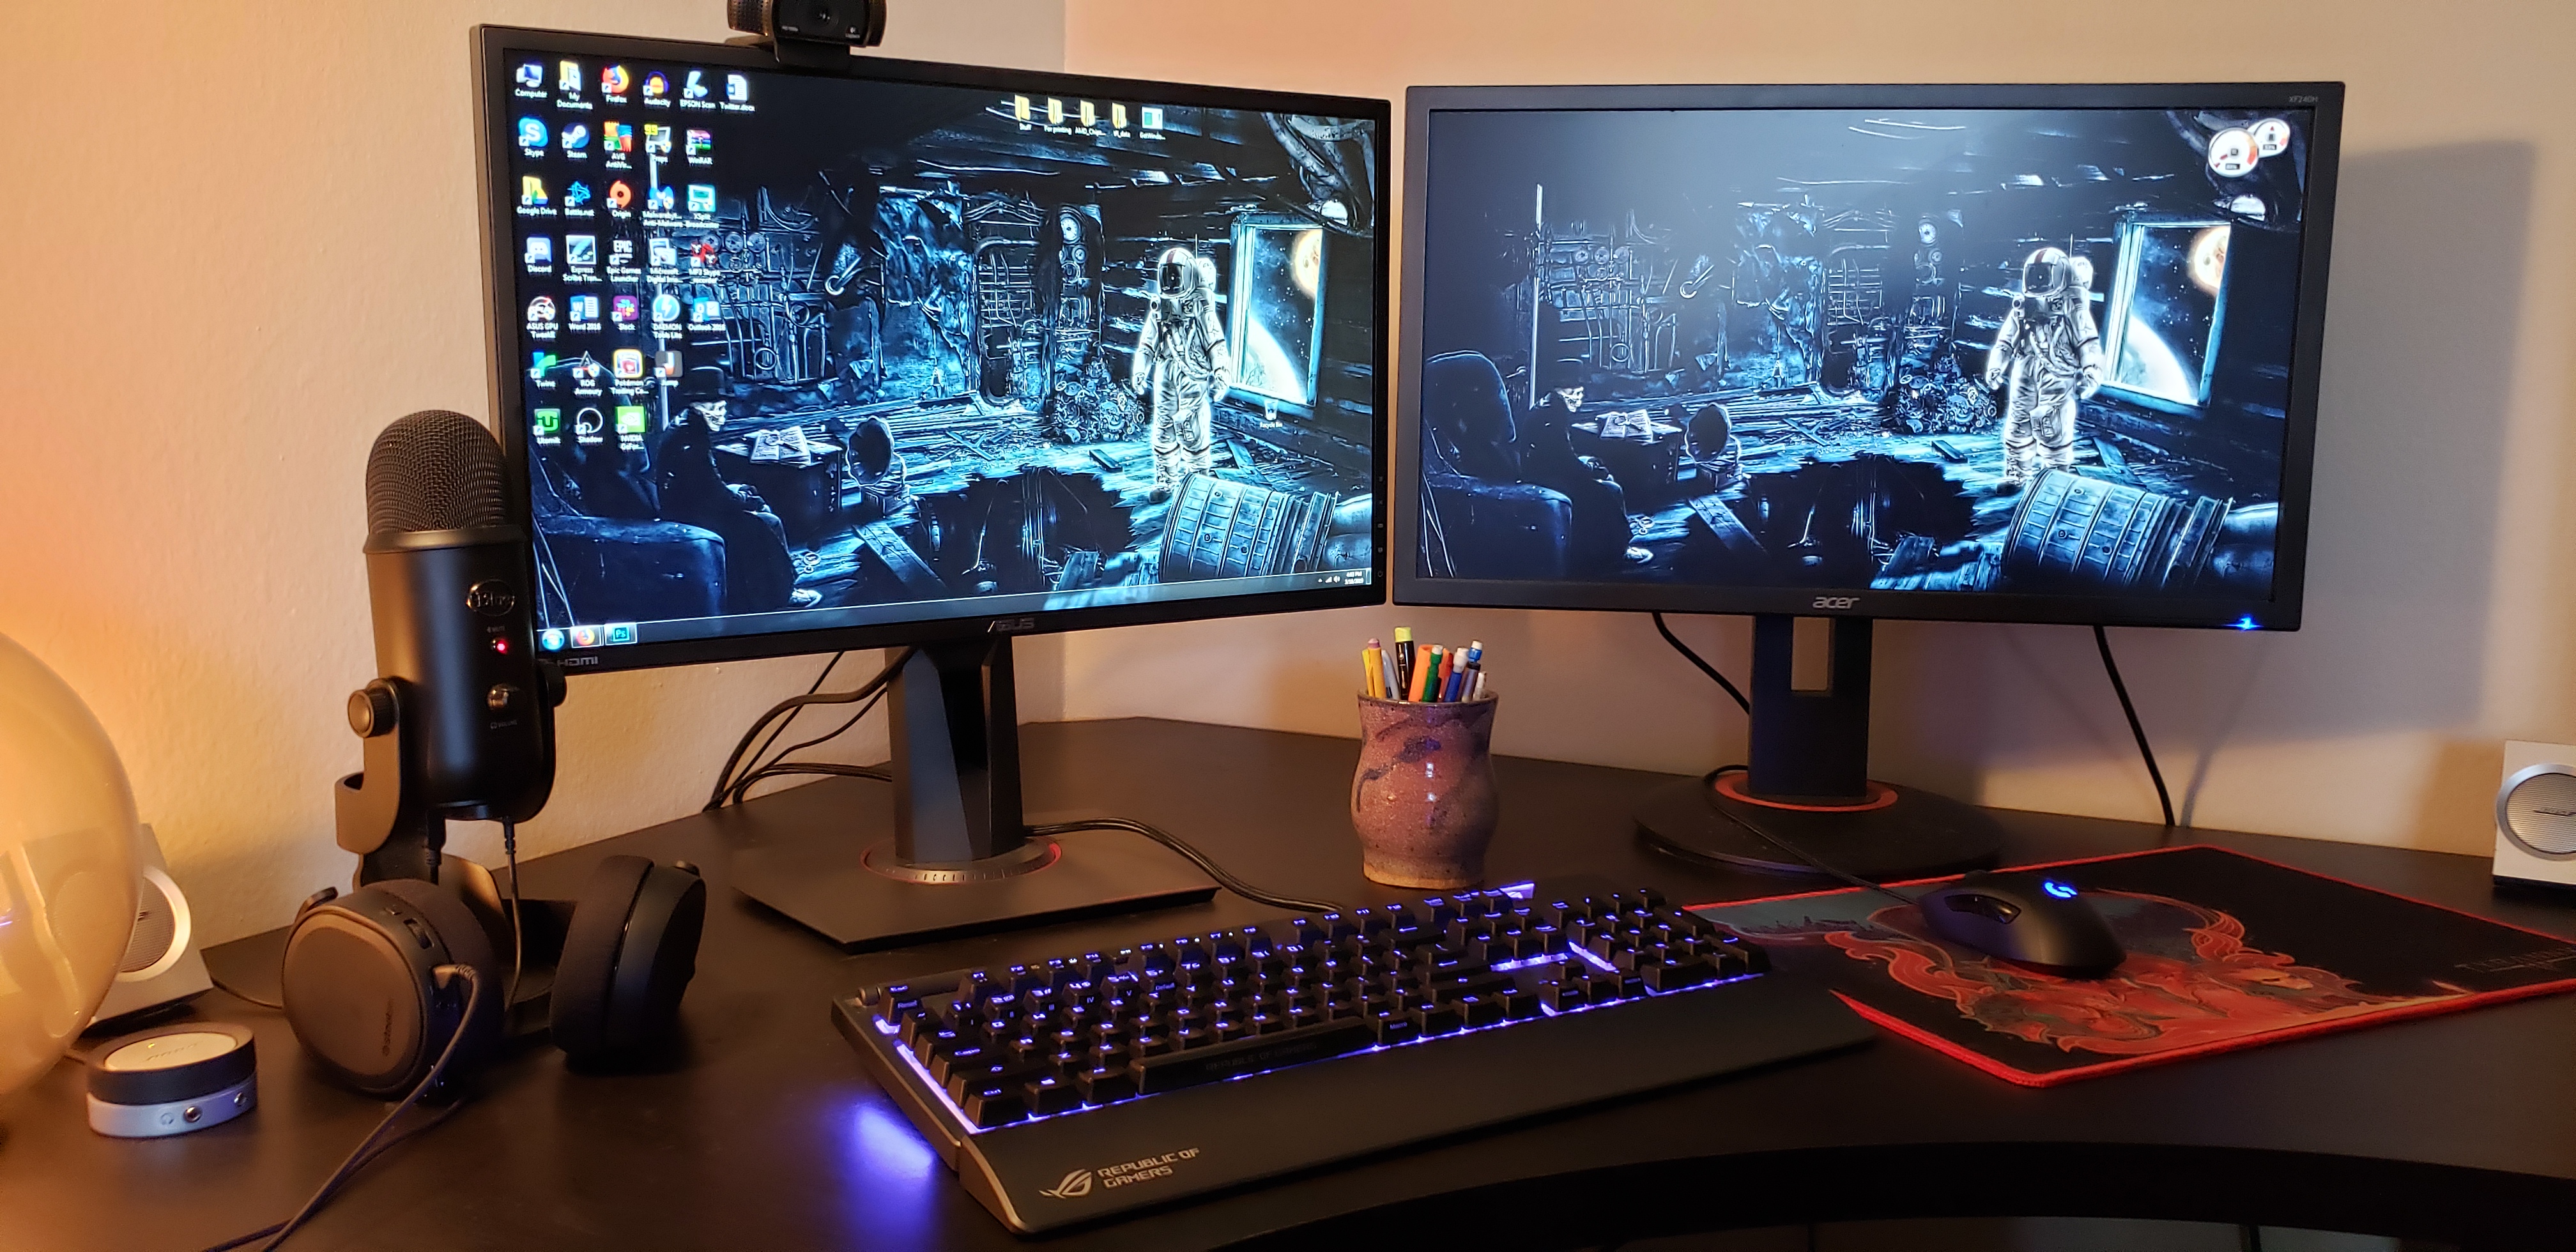
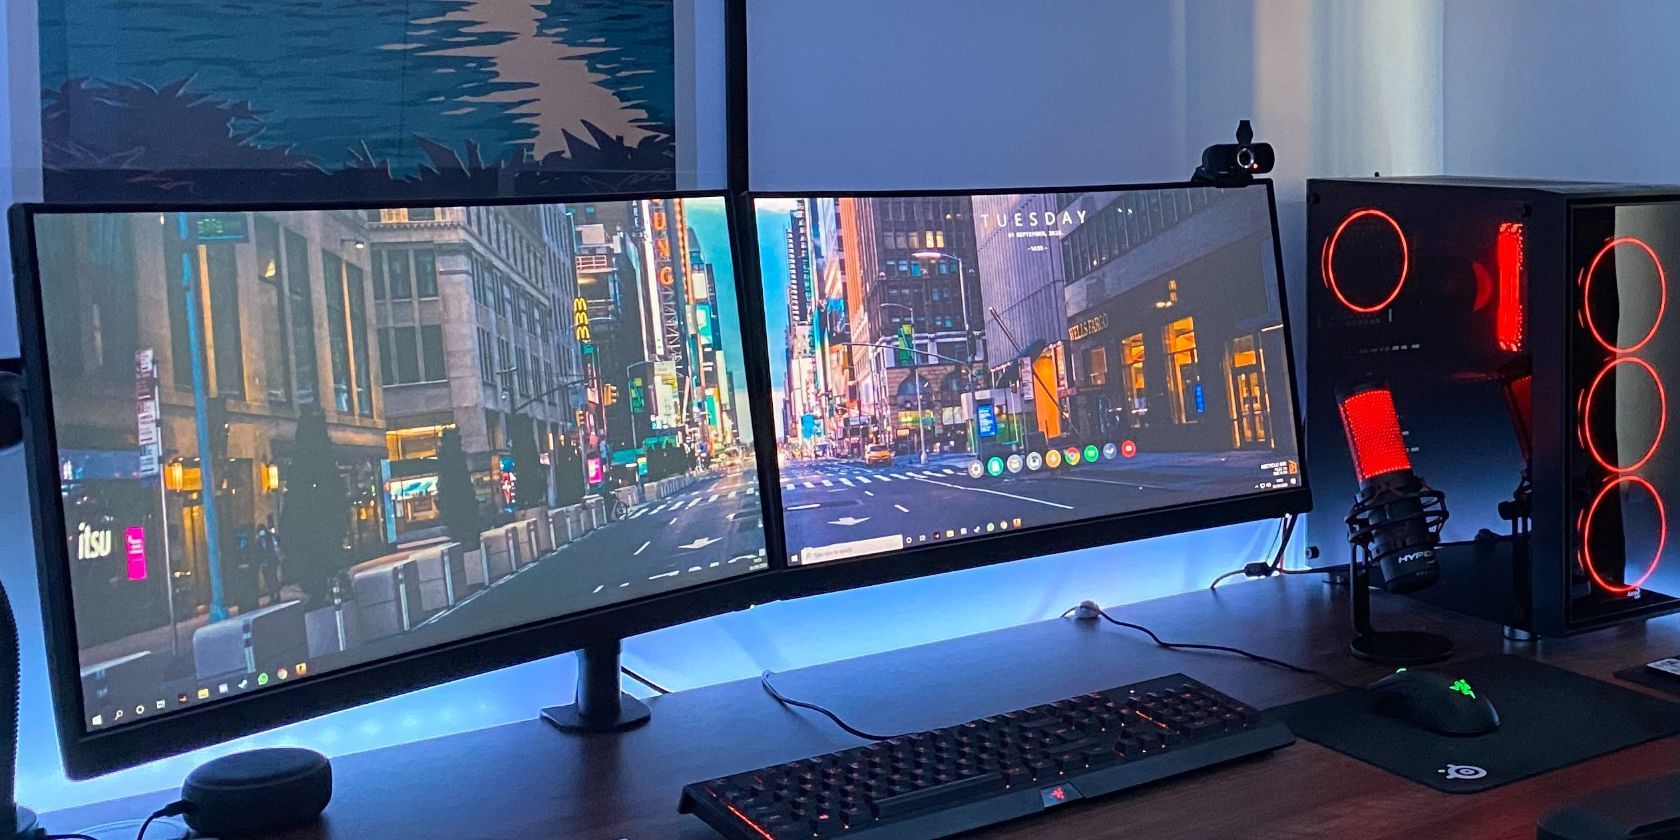
The most immediate and apparent benefit of a dual monitor setup is the dramatic increase in screen real estate. Imagine being able to view two full-sized applications side-by-side without constantly minimizing and maximizing windows. For writers, this means having your research open on one screen and your document on the other. For developers, code on one display, documentation or debugger on the second. For content creators, your editing timeline on one and preview on the other. This seamless visibility reduces the time spent switching between tasks, minimizing distractions and allowing for a more continuous flow of thought. Studies have consistently shown that dual monitor users complete tasks faster and make fewer errors than those confined to a single screen. This efficiency directly translates to better output and more time saved, which, for many, equates to money saved or earned – a clear link to the “Money” topic on our website, highlighting how tech investments can yield financial returns.
Enhanced Multitasking Capabilities
Traditional multitasking on a single monitor often involves an endless cycle of Alt+Tab or Command+Tab. While effective, it fragments your attention and can lead to frustration. A dual monitor setup elevates multitasking to a new level. You can actively work on a primary task on one screen while monitoring emails, chat applications, social media feeds, or live dashboards on the second. This is particularly beneficial for professionals in roles requiring constant vigilance, such as project managers, customer support specialists, or day traders. It allows for passive monitoring without disrupting active work, ensuring you stay informed and responsive without losing focus on critical tasks. For brands managing their online presence, this setup allows for simultaneous content creation and real-time engagement monitoring, feeding into effective “Brand Strategy.”
Ideal for Various Professions and Hobbies
The versatility of dual monitors makes them indispensable across a spectrum of professions and personal interests.
- Developers & Programmers: Code on one, documentation/testing on the other.
- Graphic Designers & Video Editors: Tools and timelines on one, full-screen preview on another.
- Writers & Researchers: Research materials on one, manuscript on the other.
- Financial Analysts: Multiple charts and data streams simultaneously.
- Gamers: Game on one, stream chat, maps, or guides on the second.
- Streamers: Gameplay on one, streaming software/chat on the other.
- Students: Textbooks/lectures on one, note-taking app on the other.
No matter your field, a dual monitor setup offers a tailored solution to enhance your digital workspace, making you more effective and comfortable.
Essential Prerequisites: What You’ll Need Before You Start
Before you even think about plugging in a second monitor, it’s crucial to ensure your existing system and chosen hardware are compatible. A little preparation here can save you a lot of headaches later.
Checking Your Computer’s Graphics Card and Ports
The most critical component for a dual monitor setup is your computer’s graphics card. It dictates how many displays your system can support and what types of connections are available.
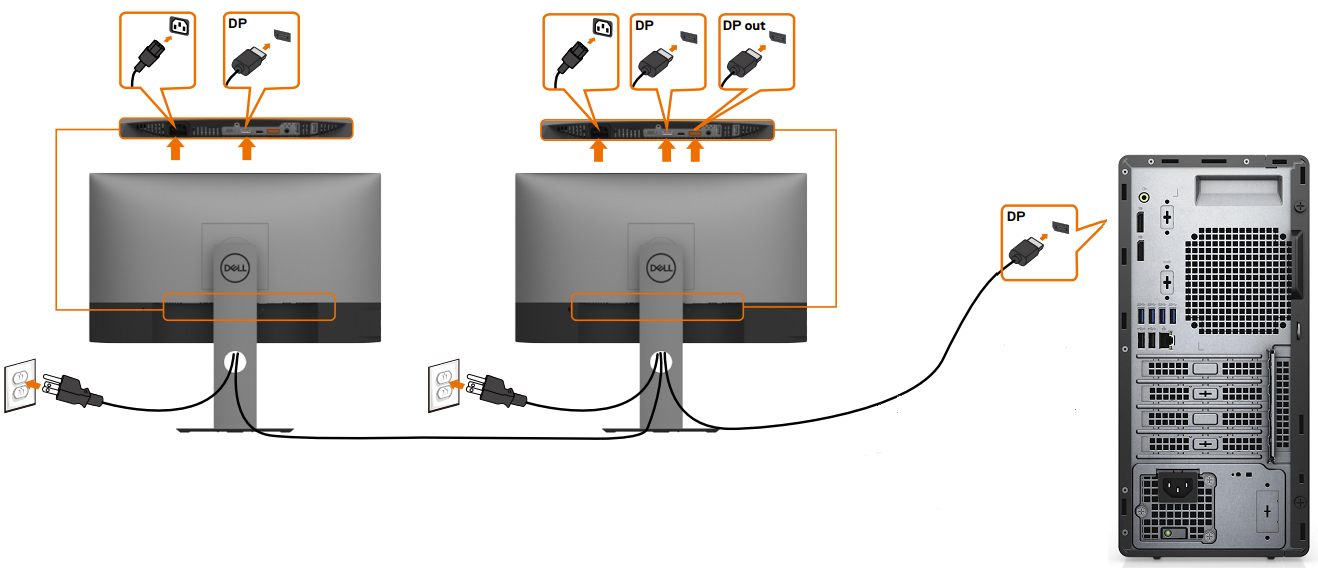
- Identify Available Ports: Look at the back of your computer (or side/rear of your laptop dock). You’ll typically find a variety of display ports. Common types include:
- HDMI: The most common digital audio/video interface.
- DisplayPort (DP): Often found on newer graphics cards and professional monitors, offering high bandwidth and support for multiple displays via daisy-chaining.
- DVI (Digital Visual Interface): Older digital interface, still common on many systems.
- VGA (Video Graphics Array): An analog interface, generally found on very old systems or monitors. Avoid if possible due to lower quality.
- USB-C (Thunderbolt 3/4): Increasingly popular on modern laptops, capable of carrying display signals, power, and data through a single cable.
- Verify Graphics Card Capability: Most modern dedicated graphics cards (NVIDIA GeForce, AMD Radeon) support at least two or three displays. Integrated graphics (Intel UHD/Iris Xe, AMD Radeon Graphics built into CPUs) also generally support multiple displays, though their performance for demanding tasks with multiple high-resolution monitors might be limited. You can check your graphics card’s specifications online or through your operating system’s device manager. Ensure you have at least two distinct video output ports available and that your graphics card can drive both simultaneously.
Selecting Your Second Monitor
Choosing the right second monitor is vital for a harmonious setup. While it doesn’t necessarily have to be identical to your primary monitor, considering a few factors will improve your experience.
- Matching Resolution and Size: For the best visual consistency, aim for a second monitor that matches the resolution of your primary display. This prevents scaling issues and makes moving windows between screens seamless. Matching the physical screen size also contributes to a more ergonomic and aesthetically pleasing setup. However, it’s not strictly necessary; many users successfully employ monitors of different sizes and resolutions.
- Panel Type Considerations:
- IPS (In-Plane Switching): Offers excellent color accuracy and wide viewing angles, ideal for graphic design and media consumption.
- VA (Vertical Alignment): Good contrast ratios and deeper blacks, suitable for movies and general use.
- TN (Twisted Nematic): Fastest response times, often found in gaming monitors, but with poorer color accuracy and viewing angles.
- Refresh Rate and Response Time: If your primary use involves fast-paced gaming or video editing, consider a monitor with a higher refresh rate (e.g., 144Hz) and low response time (e.g., 1ms). For general productivity, standard 60Hz is perfectly adequate.
Necessary Cables and Adapters
Once you know your computer’s ports and your monitor’s inputs, you’ll need the correct cables.
- Direct Cables: Ideally, use direct cables (e.g., HDMI to HDMI, DisplayPort to DisplayPort) whenever possible.
- Adapters: If your computer has a DisplayPort and your monitor has an HDMI input, you’ll need a DisplayPort to HDMI adapter or cable. Be mindful of active vs. passive adapters. For resolutions above 1080p or when converting from DisplayPort to HDMI/DVI, an active adapter is often required for reliable signal conversion, especially if you plan to connect more than two displays or need specific refresh rates. For USB-C, you might need a USB-C to HDMI/DP adapter or a full-fledged USB-C docking station.
Mounting Solutions (Optional but Recommended)
While many monitors come with their own stands, investing in a monitor arm can significantly enhance ergonomics and free up desk space.
- VESA Compatibility: Most modern monitors have a VESA mounting pattern (typically 75x75mm or 100x100mm) on the back, allowing them to be attached to universal monitor mounts. Check your monitor’s specifications.
- Desk Stands: A simple stand that sits on your desk, often with height adjustment.
- Monitor Arms (Single or Dual): Clamp onto your desk or mount through a grommet hole, offering greater flexibility in positioning, height, tilt, swivel, and rotation. Dual monitor arms are excellent for keeping both screens aligned and optimizing viewing angles, making your workstation more versatile and visually appealing – a small but impactful detail for “Personal Branding” or “Corporate Identity” within a workspace.
The Step-by-Step Installation Process
With your hardware prepared and understanding the “why,” it’s time for the practical steps of connecting and configuring your dual monitor setup.
Physical Connection
This is usually the easiest part.
- Power Down Your Computer: Always turn off and unplug your computer before making any hardware changes to prevent static discharge or damage.
- Connect the Cables:
- Connect the power cable to your second monitor and plug it into a power outlet.
- Connect the appropriate video cable (HDMI, DisplayPort, DVI, etc.) from an available port on your computer’s graphics card to the corresponding input port on your second monitor. If you’re using a laptop with a dock, connect the monitor to the dock.
- If your primary monitor is also new or you’re repositioning it, ensure its video and power cables are also securely connected.
- Power Up: Once all cables are secure, plug your computer back in and turn it on. Then, power on both monitors.
Configuring Display Settings in Windows
Windows operating systems (Windows 10 and 11) offer robust tools for managing multiple displays.
- Access Display Settings: Right-click anywhere on your desktop and select “Display settings.” Alternatively, go to “Start > Settings > System > Display.”
- Detect and Identify Monitors: Windows should automatically detect both monitors. If it doesn’t, click the “Detect” button. You’ll see numbered boxes representing your monitors. Click “Identify” to briefly display a large number on each physical screen, helping you match them to their digital representations.
- Arrange Displays: This is crucial for seamless mouse movement between screens. Drag and drop the numbered monitor boxes in the settings window to match their physical arrangement on your desk. For example, if your second monitor is to the right of your primary, drag box “2” to the right of box “1.”
- Multiple Displays Setting: Under the “Multiple displays” dropdown, you have several options:
- Extend these displays (Recommended): This creates one large desktop area across both monitors, allowing you to drag windows from one screen to the other. This is the most common and productive setup.
- Duplicate these displays: Both monitors will show the exact same content. Useful for presentations but not for extended productivity.
- Show only 1 / Show only 2: Disables one of the monitors.
- Set Primary Display: Click on the monitor you want to be your primary (the one with the Start Menu and default application launches). Scroll down and check the box “Make this my main display.”
- Adjust Resolution and Orientation: For each monitor, you can adjust its “Display resolution” (aim for the native resolution for sharpness) and “Display orientation” (e.g., “Landscape” or “Portrait” if using a monitor vertically).
Configuring Display Settings in macOS
macOS also provides intuitive controls for multiple displays.
- Access System Settings: Go to “Apple menu > System Settings” (or “System Preferences” on older macOS versions).
- Go to Displays: Select “Displays” from the sidebar.
- Arranging Displays: Click on “Arrange…” (or “Arrangement” tab on older versions). You’ll see a white bar on one of the blue boxes representing your monitors – this indicates your primary display. Drag the blue boxes to match the physical arrangement of your monitors.
- Mirror Displays (Duplicate): To duplicate screens, check the “Mirror Displays” box. For productivity, leave it unchecked to extend your desktop.
- Set Primary Display: The monitor with the white bar in the arrangement window is the primary display, where the menu bar and dock will appear by default. To change it, drag the white bar to the desired monitor.
- Resolution and Refresh Rate: For each monitor, you can adjust its resolution and refresh rate directly in the “Displays” main window.
Optimizing Your Dual Monitor Experience
Once physically connected and configured, a few tweaks can enhance your dual monitor setup.
- Taskbar Settings (Windows): Right-click on your taskbar and go to “Taskbar settings.” You can choose whether to show the taskbar on all displays, on the primary display only, or hide it on secondary displays. You can also control how taskbar buttons appear on all displays.
- Window Snapping and Management Tools: Windows has built-in Snap Assist (Windows Key + Arrow keys) to quickly arrange windows. Third-party tools like FancyZones (part of Microsoft PowerToys) or DisplayFusion offer even more advanced window management capabilities, allowing you to create custom snap zones and profiles.
- Backgrounds and Wallpapers: You can extend a single panoramic wallpaper across both screens or set different backgrounds for each monitor to personalize your workspace.
- Color Calibration: For tasks requiring precise color accuracy (e.g., graphic design, photography), consider using a colorimeter to calibrate both monitors to ensure consistent color representation.
Troubleshooting Common Dual Monitor Issues
Even with careful planning, you might encounter a few hiccups. Here are solutions to common dual monitor problems.
Monitor Not Detected
- Check Cables: Ensure all video and power cables are securely connected to both the monitor and the computer. Try reseating them.
- Verify Input Source: On the monitor’s OSD (On-Screen Display) menu, ensure the correct input source (HDMI, DisplayPort, etc.) is selected.
- Restart Computer: A simple reboot can sometimes resolve detection issues.
- Update Graphics Drivers: Outdated or corrupt graphics drivers are a frequent culprit. Visit the NVIDIA, AMD, or Intel website (depending on your graphics card) to download and install the latest drivers.
- Test Monitors Individually: Connect each monitor individually to confirm they are working.
- Test Different Ports/Cables: If possible, try different video ports on your graphics card and different cables to rule out a faulty port or cable.
Incorrect Resolution or Refresh Rate
- Native Resolution: Always try to set the monitor to its native resolution for the sharpest image. In display settings, select the recommended resolution.
- Driver Update: Again, ensuring your graphics drivers are up to date can often fix resolution and refresh rate limitations.
- Cable Bandwidth: Ensure your cable (especially HDMI or DisplayPort) supports the desired resolution and refresh rate. Older or lower-quality cables might not have sufficient bandwidth.
- Graphics Card Limitations: Confirm your graphics card actually supports the desired resolution/refresh rate combo for both monitors simultaneously.
Screen Flickering or Tearing
- Refresh Rate Mismatch: Ensure both monitors are set to compatible refresh rates, especially if one is higher (e.g., 144Hz) and the other is standard (60Hz).
- Cable Quality: A low-quality or damaged video cable can cause flickering.
- Driver Issues: Update your graphics drivers.
- Interference: Ensure power cables aren’t too close to video cables, which can cause electromagnetic interference.
Driver-Related Problems
If you experience unexplained crashes, performance issues, or erratic display behavior, a clean installation of your graphics drivers is often the best solution. Use a tool like Display Driver Uninstaller (DDU) in Safe Mode to completely remove old drivers before installing the latest version.
Physical Setup Challenges (Ergonomics)
While not a technical issue, poor ergonomics can lead to strain.
- Monitor Height: The top of your monitors should be roughly at eye level, allowing you to look slightly down.
- Distance: Position monitors about an arm’s length away.
- Angle: Angle your monitors slightly towards you to form a gentle arc, reducing head movement.
- Lighting: Minimize glare by positioning monitors away from direct light sources.
Beyond the Basics: Advanced Dual Monitor Tips
Once you’ve mastered the fundamentals, consider these advanced tips to further optimize your dual monitor workstation, linking back to “Tech” trends and “Productivity.”
Utilizing Monitor Management Software
While operating systems offer basic control, third-party software can significantly enhance the dual monitor experience. Tools like DisplayFusion, Actual Multiple Monitors, or the aforementioned Microsoft PowerToys offer features such as:
- Advanced taskbar customization for each monitor.
- Multi-monitor wallpapers and screen savers.
- Window snapping and movement shortcuts.
- Monitor profiles for different use cases (e.g., work vs. gaming).
- Automatic window management when monitors are disconnected/reconnected.
These tools are invaluable for professionals who need fine-grained control over their digital workspace.
Ergonomic Considerations for Long-Term Use
A dual monitor setup, while productive, can introduce ergonomic challenges if not set up correctly.
- Center Your Primary Monitor: For optimal comfort, position your primary working monitor directly in front of you. The secondary monitor can be slightly to the side, angled in. If both monitors are equally important, center the divide between them directly in front of you.
- Monitor Arms: As mentioned earlier, monitor arms provide unparalleled flexibility for adjusting height, depth, and angle, crucial for maintaining good posture during long work sessions.
- Regular Breaks: Regardless of your setup, remember to take regular breaks, stand up, stretch, and give your eyes a rest from the screens.
Expanding to Three or More Monitors
For power users, expanding beyond two monitors is often the next logical step. Most modern dedicated graphics cards can support three or even four displays. The principles remain similar: ensure you have enough video output ports, compatible cables, and a graphics card capable of driving all displays simultaneously. For extremely complex setups, you might consider professional-grade graphics cards or specific multi-display hubs.
Integrating Dual Monitors with Branding and Productivity Workflows
For businesses or individuals focusing on “Brand Strategy” or “Personal Branding,” a well-optimized dual monitor setup can be a powerful asset. Imagine presenting a unified brand aesthetic across all your digital touchpoints, including your physical workspace. Using consistent wallpapers, branded themes, and efficiently managed applications demonstrates professionalism and attention to detail. Furthermore, the productivity gains from dual monitors free up time that can be reinvested into strategic planning, marketing efforts, or developing new “Money”-generating ventures.
In conclusion, installing two monitors is a relatively straightforward process with profound benefits for productivity and efficiency. By understanding the prerequisites, following the installation steps carefully, and utilizing the configuration and optimization tips, you can transform your workspace into a powerful command center, ready to enhance your digital life whether for tech-intensive tasks, brand building, or financial management.
aViewFromTheCave is a participant in the Amazon Services LLC Associates Program, an affiliate advertising program designed to provide a means for sites to earn advertising fees by advertising and linking to Amazon.com. Amazon, the Amazon logo, AmazonSupply, and the AmazonSupply logo are trademarks of Amazon.com, Inc. or its affiliates. As an Amazon Associate we earn affiliate commissions from qualifying purchases.