The integration of dash cams into our daily commutes and road trips is no longer a niche trend; it’s rapidly becoming a standard for safety, security, and even evidence gathering. Whether you’re a seasoned driver or just getting behind the wheel, understanding how to properly install a dash cam is crucial. This guide will walk you through the entire process, from choosing the right dash cam to neatly tucking away wires and ensuring optimal performance. We’ll explore the technical aspects, consider the branding implications for your vehicle’s interior, and touch upon the financial wisdom of investing in such a device.

Understanding Your Dash Cam and Its Components
Before you begin the installation, it’s essential to familiarize yourself with your chosen dash cam and its various components. This foundational knowledge will make the installation process smoother and help you troubleshoot any issues that might arise.
Key Components of a Dash Cam
- The Camera Unit: This is the core of your dash cam, housing the lens, sensor, and processing unit. Dash cams vary in size and shape, from discreet, compact designs that blend into your rearview mirror to more prominent units with integrated screens.
- Mounting Mechanism: This is how your dash cam attaches to your vehicle. Common options include:
- Suction Cup Mounts: These are popular for their ease of use and adjustability. They typically attach to the windshield.
- Adhesive Mounts: These use strong adhesive tape to secure the dash cam to the windshield or dashboard. They offer a more permanent and discreet solution but can be challenging to reposition.
- Mirror Mounts: These types of mounts clamp onto your existing rearview mirror, offering a very integrated and often hidden installation.
- Power Cable: This cable connects your dash cam to a power source in your car. Most dash cams come with a cable that plugs into your car’s 12V accessory socket (cigarette lighter port). Some higher-end models may offer hardwiring kits for a more permanent and cleaner installation.
- Memory Card: This is where your dash cam stores the recorded video footage. Dash cams typically use microSD cards. It’s crucial to use a high-quality, high-endurance card, as dash cams write data continuously.
- Optional Accessories: Depending on your dash cam model, you might have other accessories like a rear camera, GPS module, or a CPL filter to reduce glare.
Types of Dash Cams and Their Features
The market offers a wide array of dash cams, each with its own set of features and benefits. Understanding these differences will help you select a unit that best suits your needs and budget.
- Single-Channel Dash Cams: These are the most common and record footage from the front of your vehicle only. They are generally the most affordable option.
- Dual-Channel Dash Cams: These record from both the front and rear of your vehicle simultaneously, providing comprehensive coverage. This is highly recommended for maximum security.
- Multi-Channel Dash Cams: Some advanced systems can record from three or even four channels (e.g., front, rear, and interior).
- Smart Dash Cams: These often connect to your smartphone via Wi-Fi, allowing for easy video review, transfer, and configuration through an app. They may also offer advanced features like cloud storage and driver assistance systems.
- Dash Cams with Integrated Screens: These units have a built-in display, making it easy to view recordings and adjust settings directly on the device.
- Stealth Dash Cams: Designed for discretion, these often resemble other car accessories or are very compact, minimizing their visual impact.
Choosing the Right Location for Installation
The placement of your dash cam is critical for optimal performance and to ensure it captures a clear and unobstructed view of the road.
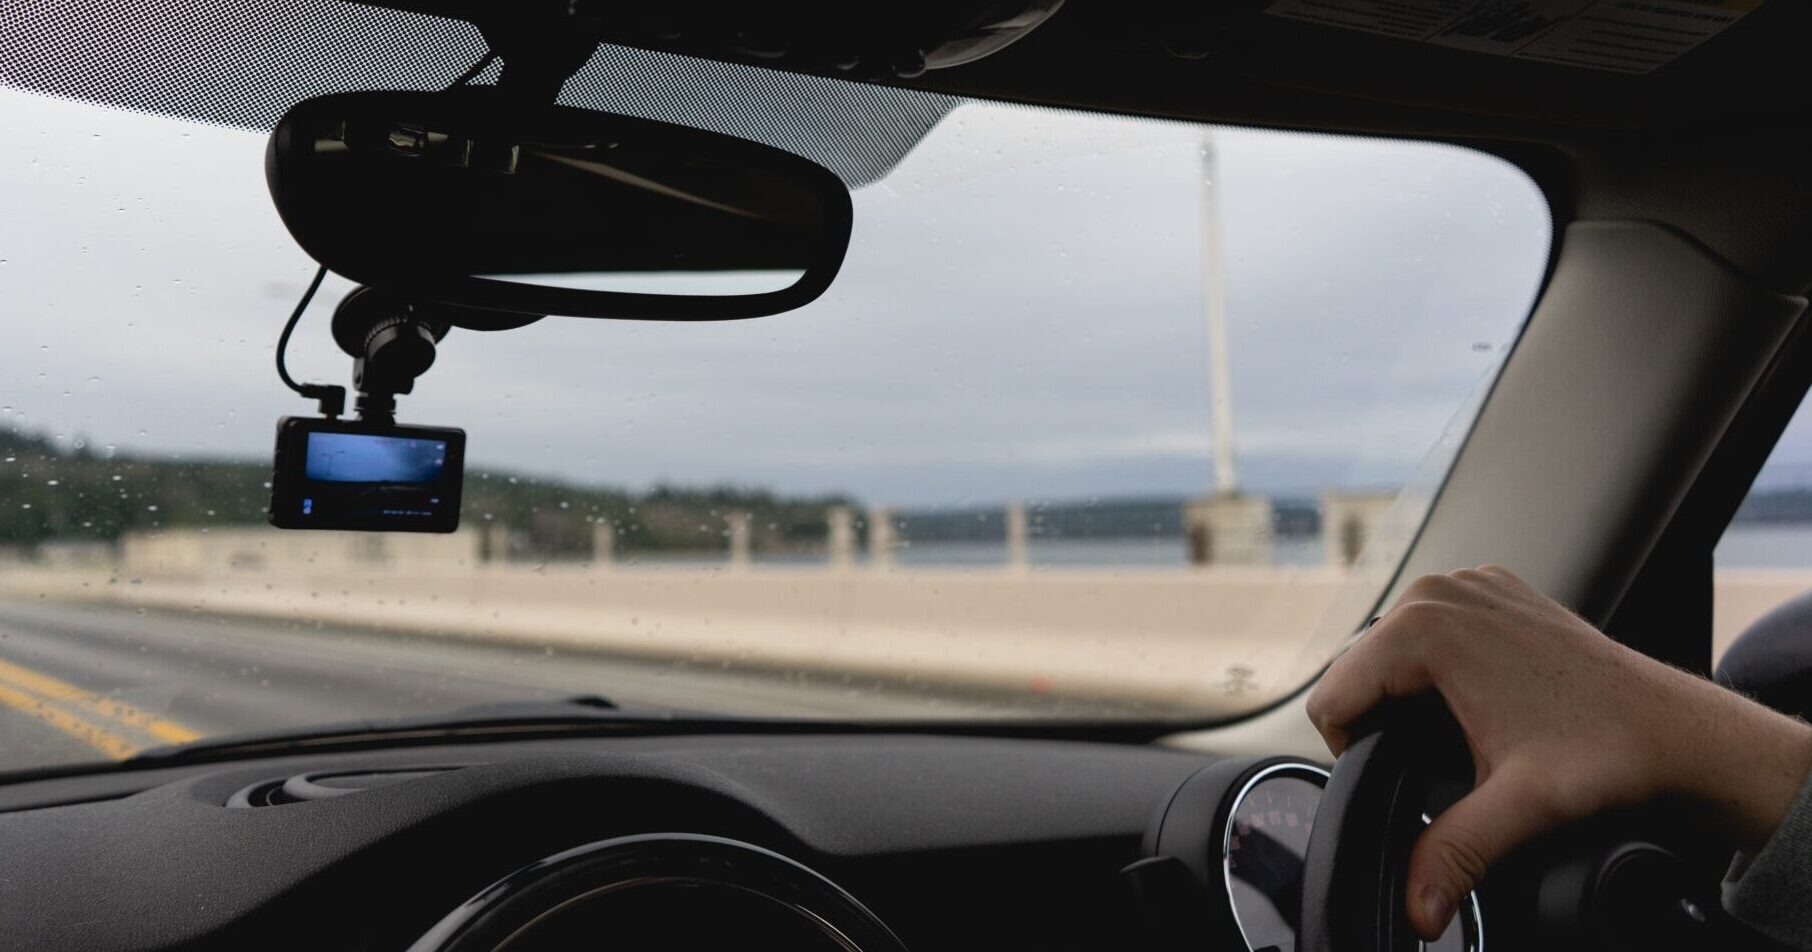
- Windshield Placement: This is the most common location. Aim for a spot near the center of your windshield, ideally behind the rearview mirror. This placement offers:
- Unobstructed View: It minimizes the chances of your view being blocked by the dashboard, steering wheel, or wipers.
- Discretion: Mounting it behind the rearview mirror makes it less visible from outside the car, deterring potential theft.
- Power Source Accessibility: It’s often easier to route power cables from the windshield area to the 12V socket.
- Dashboard Placement: Some dash cams can be mounted on the dashboard using adhesive mounts. This is an option if windshield mounting is not feasible due to your vehicle’s design or tinting. However, ensure the camera has a clear line of sight and isn’t obstructed by glare.
- Rear Camera Placement (for Dual-Channel Systems): The rear camera is typically mounted on the inside of your rear windshield. Ensure it has a clear view of the traffic behind you and isn’t obstructed by the headrests or any aftermarket tinting.
The Installation Process: Step-by-Step
Now that you understand your dash cam and have chosen the ideal location, let’s dive into the actual installation. We’ll cover both the simple plug-and-play method and the more involved hardwiring for a cleaner look.
Method 1: The Simple Plug-and-Play Installation
This is the easiest and quickest way to get your dash cam up and running. It’s perfect for those who prefer a non-permanent solution or are less comfortable with car electronics.
- Prepare Your Workspace: Ensure your car is parked in a safe, well-lit area. Clean the area of the windshield or dashboard where you’ll be mounting the camera.
- Attach the Mount: If using a suction cup mount, moisten the cup slightly and press it firmly onto the chosen spot on the windshield. If using an adhesive mount, peel off the backing and press it firmly into place, holding it for about 30 seconds to ensure good adhesion. Allow adhesive mounts to cure for at least 24 hours before driving, if possible, for maximum strength.
- Connect the Dash Cam to the Mount: Most mounts have a quick-release mechanism or screw to secure the camera unit. Follow your dash cam’s specific instructions.
- Insert the Memory Card: Ensure the dash cam is powered off. Open the memory card slot and insert your microSD card. It should click into place.
- Connect the Power Cable: Plug the smaller end of the power cable into the dash cam and the larger end (typically a USB connector or a cigarette lighter plug) into your car’s 12V accessory socket.
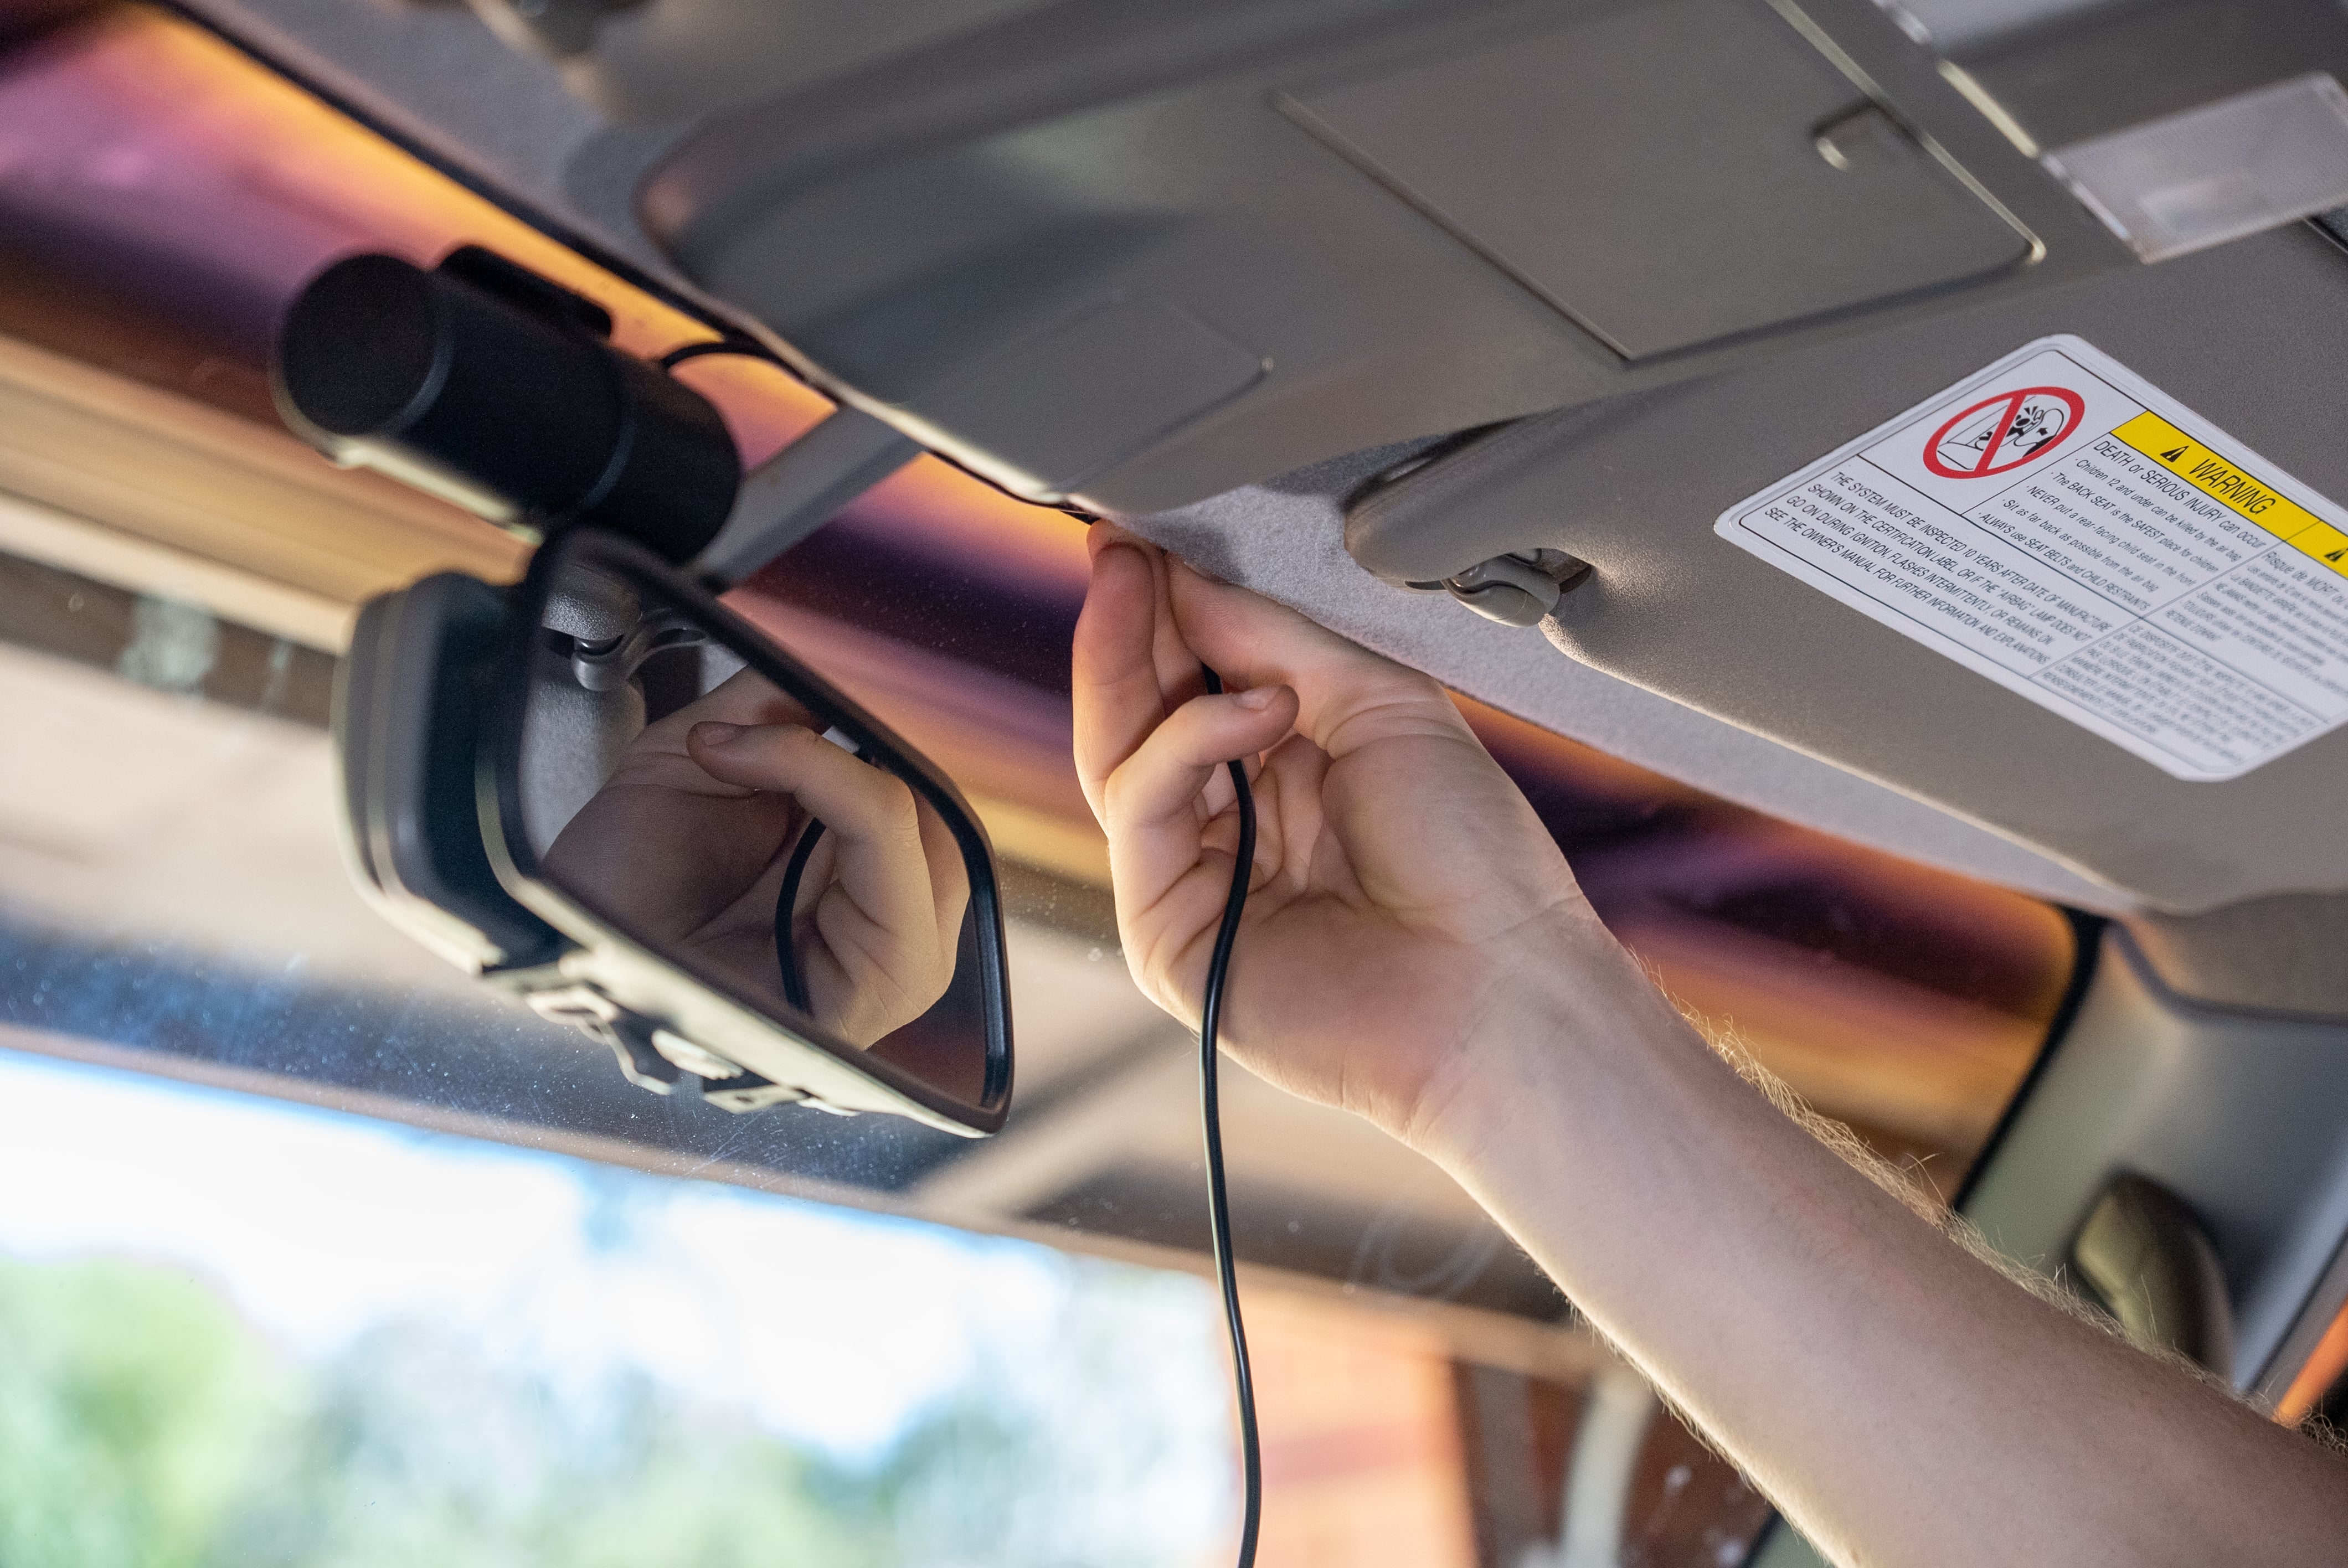
- Route the Power Cable (Neatly): This is where you can elevate your installation from functional to professional.
- Start near the Dash Cam: Tuck the cable along the edge of the headliner, using small clips or the provided adhesive cable management clips to keep it secure and hidden.
- Follow the A-Pillar: Carefully pull down the edge of the A-pillar trim (the trim around your front windshield pillar). Be gentle, as these clips can be fragile. Tuck the cable behind the trim. In some cars, you might be able to fully remove the A-pillar trim for easier routing.
- Across the Dashboard: Continue routing the cable along the dashboard, tucking it into seams and gaps wherever possible. Look for existing channels or conduits within the dashboard.
- To the 12V Socket: Finally, route the cable to your car’s 12V accessory socket.
- Power On and Test: Turn on your car’s ignition. The dash cam should power on automatically. Check the screen to ensure it’s recording. Many dash cams have a simple setup process on their first use. Review a short test recording to confirm image quality and audio.
- Adjust the Camera Angle: Fine-tune the camera’s angle to capture the widest and clearest view of the road ahead. Ensure it’s not pointing too high or too low.
Method 2: Hardwiring Your Dash Cam for a Seamless Installation
Hardwiring your dash cam offers a cleaner, more integrated look by eliminating the visible power cable. It also allows for features like parking mode to function more reliably. This method requires a bit more technical know-how and potentially a hardwiring kit specific to your dash cam model.
Important Note: If you are not comfortable working with your car’s electrical system, it is highly recommended to have a professional automotive electrician or car audio installer perform this part of the installation. Incorrect wiring can damage your vehicle’s electronics or even pose a fire hazard.
What You’ll Need for Hardwiring:
- Dash Cam Hardwiring Kit: These kits typically include a fuse tap, a power adapter with voltage regulation, and often a way to connect to the car’s battery or fuse box.
- Wire Strippers and Crimpers: For preparing and connecting wires.
- Electrical Tape or Heat Shrink Tubing: For insulating connections.
- Trim Removal Tools: Plastic tools designed to safely pry open interior trim panels without causing damage.
- Multimeter (Optional but Recommended): To identify the correct fuses and test for voltage.
The Hardwiring Process:
- Disconnect the Battery: For safety, disconnect the negative terminal of your car’s battery before starting any electrical work.
- Locate Your Car’s Fuse Box: Most vehicles have at least one fuse box, often located under the dashboard or in the engine bay. Consult your car’s owner’s manual for its exact location.
- Identify Suitable Fuses: You’ll need to find two types of fuses:
- Constant Power Fuse: This fuse provides power even when the ignition is off, enabling features like parking mode. Look for a fuse that is always “hot” (has voltage) regardless of the ignition position.
- Switched Power Fuse (Accessory Fuse): This fuse only receives power when the ignition is turned to the accessory (ACC) or ignition (ON) position. This ensures your dash cam only powers on when the car is running, preventing battery drain.
- Using a Fuse Tap: A fuse tap (often included in the hardwiring kit) allows you to safely tap into an existing fuse circuit. You’ll insert your car’s original fuse into the lower slot of the tap and a new fuse (usually provided with the kit) for the dash cam into the upper slot.
- Connect the Power Wires:
- Ground Wire: Connect the ground wire from the hardwiring kit to a clean, unpainted metal surface on your car’s chassis. A bolt or screw attached to the car’s frame is ideal.
- Constant Power Wire: Connect the constant power wire to the constant power fuse using a fuse tap.
- Switched Power Wire: Connect the switched power wire to the switched accessory fuse using another fuse tap.
- Route the Wires: Similar to the plug-and-play method, carefully tuck and hide the wires behind trim panels and along the headliner, ensuring they are not pinched or exposed.
- Connect to the Dash Cam: Plug the power adapter end of the hardwiring kit into your dash cam.
- Reconnect the Battery and Test: Reconnect the negative terminal of your car’s battery. Turn the ignition to ACC and then ON. Your dash cam should power on. Test the parking mode functionality if your kit supports it.
- Secure Trim Panels: Once you’re satisfied that everything is working correctly, reattach any trim panels you may have removed.
Maximizing Your Dash Cam’s Performance and Longevity
Installing your dash cam is just the first step. To ensure it reliably serves its purpose, consider these tips for optimizing its performance and ensuring its longevity.
Maintaining Your Dash Cam
- Regularly Format Your Memory Card: Over time, memory cards can become fragmented or develop errors. Formatting the card within the dash cam’s settings (usually monthly or quarterly) helps maintain its performance and prevents data corruption. Important: This will erase all data on the card, so back up any important footage first.
- Keep the Lens Clean: Just like any camera, a dirty lens will result in blurry footage. Wipe the lens with a microfiber cloth regularly. You can also use a lens cleaning solution if needed.
- Update Firmware: Dash cam manufacturers often release firmware updates to improve performance, fix bugs, and add new features. Check your dash cam’s app or the manufacturer’s website for available updates.
- Protect from Extreme Temperatures: While most dash cams are designed to withstand a range of temperatures, prolonged exposure to extreme heat (especially direct sunlight on the dashboard) can shorten the lifespan of the camera and its components, particularly the battery and memory card. Consider using a sunshade when parked for extended periods on hot days.
Understanding Dash Cam Features and Their Benefits
- Loop Recording: This is a standard feature where the dash cam continuously records in segments (e.g., 1, 3, or 5 minutes). When the memory card is full, the oldest footage is automatically overwritten by new footage. This ensures you always have recent recordings without manual intervention.
- G-Sensor (Impact Sensor): This sensor detects sudden impacts, such as collisions or hard braking. When an impact is detected, the dash cam automatically locks the current recording, preventing it from being overwritten. This is crucial for preserving evidence of an accident.
- Parking Mode: When enabled and properly hardwired, parking mode allows the dash cam to remain active even when the car is parked and the engine is off. It can trigger recording based on motion detection or impacts, providing security footage of any events that occur while your vehicle is unattended.
- GPS Logging: A GPS module records your vehicle’s speed and location along with the video footage. This data can be invaluable for verifying speed in accident scenarios or for personal tracking of routes.
- Wide Dynamic Range (WDR) / High Dynamic Range (HDR): These technologies help the dash cam produce clearer images in challenging lighting conditions, such as driving into bright sunlight or dark tunnels, by balancing the exposure of light and dark areas.
- Night Vision: Essential for clear recordings after dark, night vision features use infrared LEDs or advanced sensors to capture detail in low-light conditions.
The Broader Implications: Brand and Financial Considerations
Beyond the purely technical aspects of installation, integrating a dash cam into your vehicle touches upon broader concepts related to personal branding and financial prudence.
Personal Branding and Vehicle Identity
While a dash cam might seem like a purely utilitarian device, its presence and type can subtly influence how your vehicle is perceived.
- Discretion as a Statement: A discreet, well-installed dash cam that blends seamlessly with your interior can project an image of sophistication and attentiveness. It suggests you’re someone who values safety and security without drawing unnecessary attention.
- Technological Integration: For those who embrace technology, a visible dash cam can be a statement piece, showcasing an interest in modern gadgets and smart solutions for everyday life. This can align with a personal brand that emphasizes forward-thinking and preparedness.
- Brand Reputation (for Businesses): For commercial vehicles, dash cams can be a vital tool for brand reputation management. They provide objective footage in case of accidents involving company vehicles, protecting the business from false claims and demonstrating a commitment to safety and accountability. This builds trust with clients and the public.
Financial Wisdom: An Investment in Peace of Mind and Protection
The cost of a dash cam is a tangible financial outlay, but the benefits often far outweigh the initial investment.
- Insurance Premium Reductions: Some insurance companies offer discounts for drivers who have dash cams installed, recognizing the potential for them to reduce claims or disputes.
- Evidence in Disputes: In the unfortunate event of an accident, dash cam footage can be crucial in determining fault. This can significantly speed up insurance claims, reduce legal fees, and prevent you from being unfairly held liable for damages. The cost of a dash cam is often a fraction of the deductible or the potential cost of a disputed claim.
- Deterrent Against Vandalism and Theft: The visible presence of a dash cam can act as a deterrent to petty crime, vandalism, or even break-ins, offering a layer of passive security.
- Monitoring and Security: For those using dash cams with parking mode, the device becomes a valuable security tool, monitoring your vehicle while you’re away. This peace of mind is a significant, albeit intangible, financial benefit.
- Valuable Side Hustle Tool: For rideshare drivers or delivery personnel, a dash cam is an indispensable tool. It protects them from false accusations from passengers, provides evidence of their driving professionalism, and can even be used to document delivery conditions. This directly impacts their ability to earn income.
In conclusion, installing a dash cam is a straightforward process that can be accomplished with a little patience and the right approach. Whether you opt for the simple plug-and-play method or the more integrated hardwiring solution, the benefits of having a dash cam – from enhanced safety and security to valuable evidence and potential financial savings – make it a worthwhile investment for any vehicle owner. By understanding the components, following the installation steps carefully, and considering the broader implications, you can ensure your dash cam is a reliable companion on every journey.
aViewFromTheCave is a participant in the Amazon Services LLC Associates Program, an affiliate advertising program designed to provide a means for sites to earn advertising fees by advertising and linking to Amazon.com. Amazon, the Amazon logo, AmazonSupply, and the AmazonSupply logo are trademarks of Amazon.com, Inc. or its affiliates. As an Amazon Associate we earn affiliate commissions from qualifying purchases.