
In today’s interconnected digital landscape, a reliable printer remains an indispensable tool for homes and businesses alike. From important documents and creative projects to financial reports and school assignments, the ability to produce physical copies is often crucial. Among the myriad of brands, HP has consistently stood out as a market leader, renowned for its diverse range of printers that blend innovation with reliability. However, even the most advanced HP printer requires a proper installation process to unlock its full potential.
This comprehensive guide is designed to demystify the HP printer installation process, transforming what can sometimes feel like a daunting task into a straightforward, empowering experience. Whether you’ve just unboxed a brand-new HP printer, are setting up a previously used device, or simply need to reinstall drivers, we’ll walk you through every step. By the end of this article, you’ll not only have your HP printer running smoothly but also gain valuable insights into optimizing its performance, ensuring longevity, and leveraging HP’s technological ecosystem to your advantage. We’ll delve into the crucial tech aspects of connectivity and driver management, touch upon how a smooth setup reflects on the HP brand experience, and even highlight how a proper DIY installation can save you money and enhance productivity.
Phase 1: Pre-Installation Essentials and Unboxing Your HP Device
Before diving into the digital setup, a thorough physical preparation is paramount. This initial phase lays the groundwork for a successful installation and helps prevent common issues that can arise from overlooked details. Thinking of this as the “hardware check” before the “software update” can ensure a smooth transition.
Unboxing and Inventory Check: What’s in the Box?
The excitement of a new gadget often leads to rushing through the unboxing process, but taking a moment to verify the contents can save significant hassle later.
- Careful Unpacking: Gently remove your HP printer from its packaging. Retain the box and packing materials for future transport or warranty purposes.
- Accessory Verification: Check the user manual or quick start guide to confirm all expected accessories are present. This typically includes:
- The HP printer itself.
- Power cord.
- USB cable (sometimes included, especially for older models).
- Setup ink cartridges (often smaller capacity than standard cartridges).
- Installation CD/DVD (less common with newer models, but still possible).
- Documentation (user guides, warranty information).
- Any specific cables or adapters for your model (e.g., telephone cable for fax-enabled printers).
Should anything be missing, contact HP customer support immediately. This not only ensures you have all necessary components for installation but also sets a positive tone for your brand interaction with HP.
Strategic Placement and Power Connection: Finding the Right Spot
The physical location of your printer can significantly impact its performance, especially for wireless models.
- Optimal Location:
- Stability: Choose a flat, stable surface that can support the printer’s weight.
- Ventilation: Ensure adequate space around the printer for proper ventilation to prevent overheating.
- Accessibility: Place it where you can easily access paper trays, ink cartridges, and the control panel.
- Wireless Considerations (if applicable): For Wi-Fi printers, position it within a reasonable range of your wireless router, minimizing obstacles like thick walls or large metallic objects that can interfere with signal strength. This tech consideration directly impacts your user experience.
- Powering On Your Printer:
- Connect the power cord securely to the printer and then into a grounded electrical outlet. Avoid using surge protectors or power strips initially, as some printers can draw significant power and may require a direct connection.
- Press the power button. The printer should turn on, and you might hear internal mechanisms whirring as it initializes. Follow any on-screen prompts on the printer’s control panel, such as language selection or initial alignment procedures.
Initial Preparations: Removing Packaging and Loading Paper
The final physical steps ensure your printer is ready to print without jams or damage.
- Remove All Internal Packing Materials: Open all access doors (cartridge access, paper tray, rear access if present) and carefully remove all tape, foam, or cardboard inserts. These are critical for protecting components during shipping but will cause issues if not removed before operation.
- Install Setup Ink Cartridges: Following the instructions on the printer’s control panel or quick start guide, install the setup ink cartridges. Ensure they click firmly into place. This is a common point of error for many users, so pay close attention to the visual cues and instructions.
- Load Paper: Open the paper tray, adjust the guides to fit your paper size, and load a stack of fresh paper. Ensure it’s not overfilled and the paper guides are snug against the edges.
Phase 2: Connecting Your HP Printer – Choosing Your Method
With the physical setup complete, the next crucial step is establishing a connection between your HP printer and your computer or network. HP offers several connectivity options, each with its own advantages, catering to different user needs and environments. Understanding these options is key to a successful and convenient setup.
Direct USB Connection: Simplicity and Reliability
The USB connection remains a timeless and often the simplest method for direct printing, especially if your printer is near your computer or you don’t require network printing capabilities.
- Connecting the USB Cable: With both your computer and printer powered on, connect one end of the USB cable (Type-B connector, often square-shaped) to the corresponding port on your printer. Then, connect the other end (Type-A connector) to an available USB port on your computer.
- Automatic Driver Installation: For most modern operating systems (Windows and macOS), your computer will likely detect the new hardware and attempt to install generic drivers automatically. This process might take a few minutes. You may see a notification indicating “Device setup in progress” or “New hardware found.”
- Verification in Device Manager (Windows) / System Information (macOS):
- Windows: Right-click the Start button, select “Device Manager.” Expand “Printers” or “Universal Serial Bus controllers.” Your HP printer should be listed without any error icons.
- macOS: Click the Apple menu, select “About This Mac,” then “System Report.” Under “Hardware,” select “USB.” Your HP printer should appear in the USB Device Tree.
While the basic print function might work with generic drivers, for full functionality (scanning, advanced settings, ink monitoring), you will still need to proceed with the software installation outlined in Phase 3. The simplicity of USB connection is a key tech feature for quick, single-user setups, offering a direct link that bypasses network complexities.
Wireless Network Setup: Freedom and Flexibility
Wireless connectivity offers unparalleled convenience, allowing you to print from multiple devices (computers, smartphones, tablets) from anywhere within your network’s range. HP printers support various wireless setup methods.
- Utilizing Wi-Fi Protected Setup (WPS):
- WPS is the easiest method if your router supports it. Look for a button on your router labeled “WPS” or with the WPS symbol (two arrows chasing each other).
- On your HP printer’s control panel, navigate to the wireless settings or network setup menu. Look for an option like “WPS Push Button” or “Wi-Fi Protected Setup.”
- Initiate WPS mode on your printer, then immediately press the WPS button on your router. The printer and router will communicate and establish a connection automatically. This process typically takes under two minutes.
- Manual Wireless Setup via Printer Control Panel:
- If WPS isn’t an option, you can manually connect your printer. On the printer’s control panel, go to “Wireless Settings,” “Network Setup,” or “Setup.”
- Select “Wireless Setup Wizard” or “Join a Network.”
- The printer will scan for available Wi-Fi networks. Select your home or office network from the list.
- Enter your Wi-Fi network password (WPA/WPA2 passphrase) using the printer’s on-screen keyboard. Pay close attention to capitalization and special characters.
- Once connected, the printer will usually display a confirmation message, and the wireless indicator light will become solid.
- Connecting via the HP Smart App (for newer models):
- The HP Smart app (discussed in detail in Phase 3) simplifies wireless setup for many modern HP printers. Install the app on your computer, smartphone, or tablet.
- Ensure your device is connected to the Wi-Fi network you want your printer to join.
- Open the HP Smart app and follow the on-screen instructions to “Add Printer.” The app will guide you through connecting your printer to the Wi-Fi network. This method enhances the brand experience by streamlining setup and offering integrated functionality.
Ethernet Connection: Stability for Wired Networks
For environments requiring maximum stability and speed, such as small offices or network-heavy setups, an Ethernet connection provides a robust alternative to wireless.
- Connecting the Ethernet Cable: Connect one end of a standard Ethernet cable to the Ethernet port on the back of your HP printer and the other end to an available LAN port on your router or network switch.
- Automatic Network Configuration: Most HP printers with Ethernet capabilities are designed to automatically obtain an IP address from your network (via DHCP).
- Verification: Check the printer’s control panel for network status or print a network configuration report to confirm it has an IP address and is connected to the network.
Phase 3: Driver and Software Installation – The Digital Heartbeat
While physical connection is the body, drivers and software are the brain of your printer setup. These digital components enable your computer to communicate effectively with your HP printer, unlocking all its features, from high-quality printing to scanning, faxing, and ink management. Relying on official HP software is crucial for performance, security, and access to support.
The HP Smart App: Your Go-To for Modern HP Printers
HP Smart is a powerful, user-friendly application designed to streamline the setup, management, and use of most modern HP printers. It represents HP’s commitment to a seamless, integrated digital experience.
- Download and Installation:
- For Windows 10/11, download HP Smart from the Microsoft Store.
- For macOS, download it from the Mac App Store.
- For iOS/Android, download it from the Apple App Store or Google Play Store.
- Printer Discovery and Setup:
- Once installed, open the HP Smart app. It will guide you through creating an HP account (if you don’t have one) and then automatically detect nearby network-connected HP printers.
- If your printer is new or not yet connected to the network, the app will provide step-by-step instructions to connect it via Wi-Fi (as discussed in Phase 2).
- The app will then download and install the necessary drivers for your printer, ensuring full functionality.
- Benefits of HP Smart:
- Unified Interface: Print, scan, copy, and manage your printer from one intuitive app.
- Mobile Printing: Print documents and photos directly from your smartphone or tablet.
- Ink Monitoring: Keep track of ink levels and order new cartridges seamlessly (a convenience that saves time and money).
- Troubleshooting Tools: Access diagnostic tools and support resources directly within the app.
- Smart Tasks: Automate repetitive tasks like scanning to email or cloud storage, boosting productivity.
The HP Smart app is a prime example of HP’s ongoing technological innovation, enhancing the user experience and solidifying the brand’s position in smart home and office solutions.
Official HP Support Website: Manual Driver Downloads
Sometimes, the HP Smart app isn’t suitable, or you prefer a more traditional installation. This is where the official HP Support website becomes invaluable. Using drivers directly from HP is critical for security and optimal performance, ensuring compatibility and avoiding potential malware from third-party sites.
- Identify Your Specific Printer Model: Look for the model number on a label on your printer (usually on the front, top, or back). It’s often a combination of letters and numbers (e.g., “HP OfficeJet Pro 9025”).
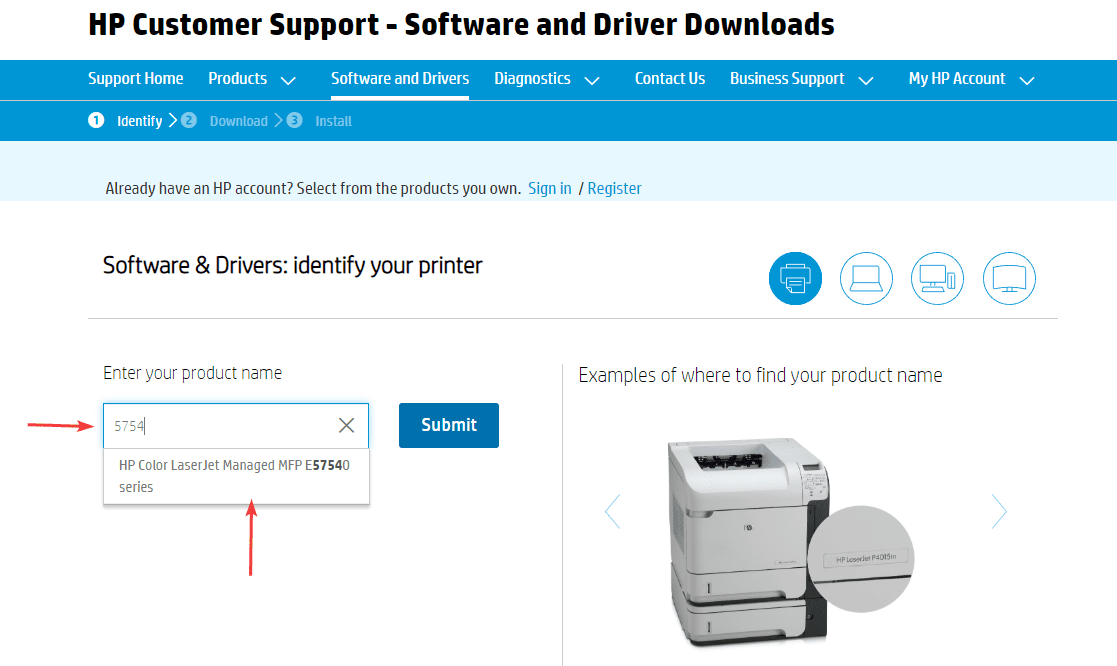
- Navigate to HP Support: Open your web browser and go to support.hp.com.
- Find Your Printer’s Support Page: Enter your printer’s model number into the search bar. This will take you to your specific product support page.
- Download Drivers and Software: On the support page, look for a “Software and Drivers” or “Drivers and Downloads” section. Select your operating system (Windows, macOS) to ensure you get the correct software. HP often offers a “Full Software and Driver Package” which is recommended for complete functionality, as it includes utilities beyond just the basic print driver.
- Run the Installer: Once the download is complete, locate the downloaded file (usually in your “Downloads” folder) and double-click it to run the installer.
- Follow the on-screen prompts. The installer will guide you through connecting your printer (if you haven’t already), selecting connection type (USB, wireless, Ethernet), and installing all necessary software components.
- Restart your computer if prompted to ensure all changes take effect.
This method gives you precise control over which drivers and software components are installed, a key tech consideration for advanced users or those with specific system requirements.
Using the Installation CD/DVD (for older models or specific scenarios)
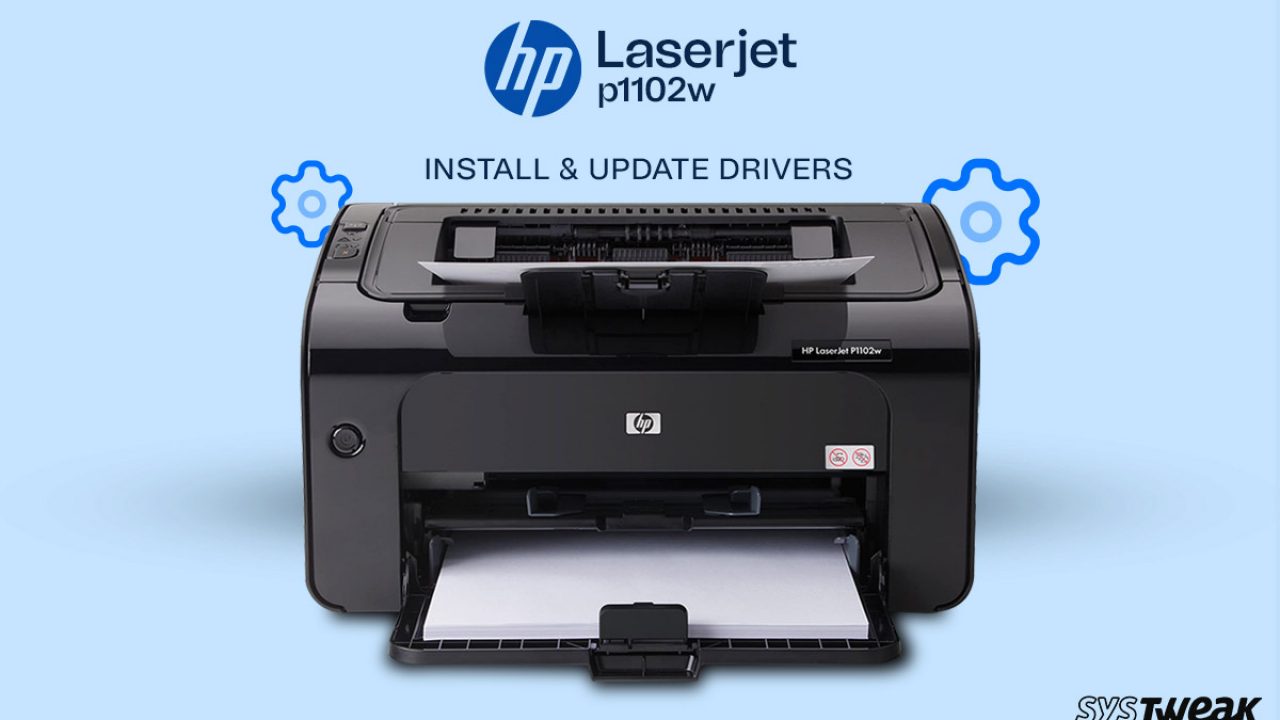
For older HP printers or computers with optical drives, an installation CD/DVD may be included in the box. While increasingly rare, it’s a viable option.
- Insert the CD/DVD: Place the installation disc into your computer’s optical drive.
- Run the Setup Program: The disc should auto-run, presenting you with an installation menu. If not, navigate to “This PC” or “Computer,” find your CD/DVD drive, and double-click the “Setup.exe” or “Install.exe” file.
- Follow On-Screen Instructions: The installation wizard will guide you through the process, similar to the web-downloaded installer, asking you to connect your printer and select connection types.
Phase 4: Post-Installation Checks and Optimizing Performance
Congratulations! Your HP printer is now physically connected and has the necessary drivers. However, a few final steps can ensure everything is working perfectly and that you get the most out of your printing experience. This phase focuses on verification, customization, and long-term maintenance, reflecting a comprehensive approach to both technology and smart financial use.
Performing a Test Print: Verifying Functionality
The simplest and most effective way to confirm successful installation is to print a test page.
- From Your Computer:
- Windows: Go to “Settings” > “Bluetooth & devices” > “Printers & scanners.” Click on your HP printer, then select “Printer properties” > “Print Test Page.”
- macOS: Go to “System Settings” > “Printers & Scanners.” Select your HP printer, click “Open Print Queue,” then “Printer” > “Print Test Page” (or similar option depending on OS version).
- From the Printer’s Control Panel: Many HP printers also have an option to print a test page, network configuration report, or print quality report directly from the control panel menus. This can be useful for diagnosing issues before involving the computer.
A successful test print confirms that your computer can communicate with the printer, and the printer itself is functioning correctly with ink and paper.
Setting as Default Printer and Managing Preferences
To streamline your printing workflow, you’ll want to designate your HP printer as the default and customize its settings.
- Set as Default Printer:
- Windows: In “Settings” > “Bluetooth & devices” > “Printers & scanners,” select your HP printer and click “Set as default.” You can also untick “Let Windows manage my default printer” if you want full control.
- macOS: In “System Settings” > “Printers & Scanners,” use the “Default printer” dropdown menu to select your HP printer.
- Customize Printing Preferences: Access your printer’s preferences through the “Printers & scanners” settings (Windows) or “Options & Supplies” (macOS). Here you can adjust:
- Print Quality: Draft for speed, Normal for everyday, Best for high-resolution output.
- Paper Type and Size: Crucial for preventing jams and ensuring accurate prints.
- Duplex Printing (Two-sided): Enable this to save paper (a financial and environmental benefit).
- Color vs. Grayscale: Choose wisely to save color ink when not needed.
Optimizing these settings not only enhances your tech experience but also contributes to cost savings by managing ink and paper usage efficiently.
Firmware Updates and Ongoing Maintenance: Keeping Your Printer Current
Just like your computer, your HP printer benefits from regular firmware updates. Firmware updates often include performance improvements, bug fixes, and security enhancements.
- Checking for Updates:
- HP Smart App: The app usually notifies you of available firmware updates and allows you to install them directly.
- Printer Control Panel: Many modern HP printers have an option in their “Settings” or “Tools” menu to check for and install firmware updates directly over the internet (if connected to a network).
- HP Support Website: Periodically visit support.hp.com for your printer model to check for the latest firmware downloads.
Keeping your printer’s firmware updated is a vital tech practice that protects your device from vulnerabilities and ensures compatibility with the latest operating systems and software.
Registering Your Product and Exploring HP Services
Registering your HP printer is a smart move that connects you directly with the HP brand ecosystem.
- Product Registration: Visit HP’s product registration page (usually linked from the HP Smart app or the support website) and provide your printer’s serial number. This typically activates your warranty and makes it easier to access customer support.
- HP Instant Ink Program: Consider enrolling in HP’s Instant Ink service. This subscription-based program monitors your ink levels and automatically ships new cartridges to your door before you run out. It’s designed to save you money on ink by billing based on pages printed, not cartridges, which can be a significant financial benefit for frequent printers.
- HP Support and Resources: Familiarize yourself with HP’s extensive online support resources, including FAQs, troubleshooting guides, and community forums. Knowing where to find help can save you considerable time and frustration if issues arise. This direct engagement with the brand ensures you’re leveraging all available support.
Common Troubleshooting Tips for a Smooth HP Printer Setup
Even with the most careful installation, hiccups can occur. Knowing how to diagnose and resolve common issues can be a valuable skill, saving you the cost and time of professional service.
Network Connectivity Issues: Diagnosing Wi-Fi Problems
Wireless problems are among the most frequent culprits for installation woes.
- Check Wi-Fi Signal Strength: On the printer’s control panel, look for a Wi-Fi icon or network status. If it’s weak or showing an error, try moving the printer closer to the router or repositioning the router.
- Verify Wi-Fi Password: Re-enter your Wi-Fi password carefully. A single incorrect character can prevent connection. Ensure you’re selecting the correct network (SSID).
- Router Reboot: Sometimes, a simple reboot of your wireless router can resolve network communication issues. Unplug it for 30 seconds, then plug it back in.
- IP Address Conflict: If your printer gets an “IP address conflict” error, consider assigning a static IP address to your printer or configuring your router’s DHCP settings. This is a more advanced tech solution but highly effective.
- Firewall Settings: Ensure your computer’s firewall or router’s firewall isn’t blocking communication with the printer. Temporarily disabling them for troubleshooting can help identify if this is the cause.
Driver Conflicts and Installation Errors: Clean Reinstallation Strategies
Driver issues can lead to printers not being detected, printing errors, or missing functionalities.
- Restart Computer and Printer: A classic troubleshooting step, often surprisingly effective.
- Uninstall Existing Drivers: If you’re having trouble with a new installation or reinstalling, it’s often best to completely remove any previously installed HP printer drivers.
- Windows: Go to “Settings” > “Apps” > “Apps & features.” Find any HP printer-related software and uninstall it. Then, go to “Device Manager,” expand “Print queues,” right-click your HP printer, and select “Uninstall device.” Tick the box to “Delete the driver software for this device” if available.
- macOS: Go to “System Settings” > “Printers & Scanners.” Select your printer and click the “-” button to remove it. You may also need to reset the printing system by right-clicking (or Ctrl+clicking) on an empty area of the “Printers & Scanners” list and selecting “Reset printing system.”
- Re-download and Reinstall: After a clean uninstall, re-download the latest full software package from the official HP support website and try the installation again.
Power and Physical Connection Checks
Don’t overlook the basics; many problems stem from simple physical oversights.
- Power Cord: Ensure the power cord is securely plugged into both the printer and a functioning wall outlet. Try a different outlet.
- USB Cable: If using USB, check that the cable is firmly seated at both ends. Try a different USB port on your computer or a different USB cable if you have one. Faulty cables are a common, inexpensive fix.
- Internal Packaging: Double-check that all internal packing materials (tape, foam, plastic tabs) have been removed from the printer’s interior, particularly around the print head and ink cartridge area.
Printer Not Found/Responding: Advanced Diagnostics
If your computer still can’t find the printer after basic checks:
- Run HP Print and Scan Doctor: This free diagnostic tool from HP can automatically detect, diagnose, and resolve many common printer issues. It’s an excellent resource for any HP printer owner, reinforcing the brand’s commitment to user support.
- Check Printer Sharing Settings: If you’re trying to print to a shared printer on a network, ensure the sharing settings on the host computer are correctly configured.
- Test with Another Device: Try installing the printer on a different computer or using the HP Smart app on a mobile device. If it works there, the issue likely lies with your primary computer’s configuration.
Conclusion: Empowering Your Printing Experience
Successfully installing your HP printer is more than just connecting wires and loading software; it’s about gaining control over a vital piece of your digital and physical workflow. By following this comprehensive guide, you’ve not only navigated the technical intricacies of setup but also gained insights into optimizing your printer’s performance for the long haul.
We’ve covered the crucial technical aspects, from selecting the right connectivity method to leveraging advanced driver installations and keeping your device’s firmware updated. We’ve seen how HP’s commitment to user experience, exemplified by tools like the HP Smart app and robust online support, reinforces its brand strength. Crucially, by tackling the installation yourself, you’ve embraced a DIY approach that saves money on professional services and empowers you with the knowledge to troubleshoot common issues, contributing to a more financially savvy and productive setup.
An HP printer, properly installed and maintained, is a powerful asset that can streamline your tasks, fuel your creativity, and ensure your critical documents are always at hand. Embrace the full capabilities of your HP device, knowing that a solid foundation starts with a seamless installation. Happy printing!
aViewFromTheCave is a participant in the Amazon Services LLC Associates Program, an affiliate advertising program designed to provide a means for sites to earn advertising fees by advertising and linking to Amazon.com. Amazon, the Amazon logo, AmazonSupply, and the AmazonSupply logo are trademarks of Amazon.com, Inc. or its affiliates. As an Amazon Associate we earn affiliate commissions from qualifying purchases.