
Cash App has revolutionized the way many individuals manage their personal finances, offering a swift and convenient platform for sending, receiving, and spending money. However, understanding the various methods for extracting funds from your Cash App balance and transferring them into more traditional financial channels or physical cash is crucial for effective personal financial management. This guide explores the secure and efficient ways to access your money from Cash App, along with key considerations for optimizing these transactions.
Understanding Your Options for Fund Withdrawal
Accessing the money stored in your Cash App balance is straightforward, offering flexibility to suit different financial needs and urgency levels. The platform primarily provides two main avenues for withdrawing funds, each with its own advantages and operational nuances. Familiarity with these methods empowers users to make informed decisions about how and when to move their money, aligning with their personal finance strategy.
The Basics of Cash App Balances
When funds are sent to you via Cash App or you receive money from other sources, they typically reside in your Cash App balance. This balance can then be used for various purposes directly within the app, such as making payments, investing in stocks or Bitcoin, or loading it onto your Cash Card. However, for many users, the ultimate goal is to integrate these funds back into their primary banking system or convert them into physical cash.
Primary Methods for Accessing Funds
The two primary methods for withdrawing money from Cash App are:
- Direct Transfer to a Linked Bank Account: This involves initiating a transfer from your Cash App balance directly to a checking or savings account you have connected to your Cash App profile. It’s a fundamental feature for integrating your Cash App activities with your broader personal financial ecosystem.
- Utilizing the Cash Card: The Cash Card is a free, customizable debit card linked to your Cash App balance. It functions like any standard debit card, allowing you to make purchases and withdraw cash from ATMs using your Cash App funds. This method offers immediate access to your money without requiring a separate bank transfer.
Each of these methods comes with specific processing times, potential fees, and limits, which are vital to consider when planning your financial transactions.
Direct Transfer to Your Linked Bank Account
Transferring funds from your Cash App balance to a linked bank account is the most common and often the most financially prudent way to move significant amounts of money. Cash App offers two distinct speeds for these transfers: standard and instant, each with implications for timing and cost.
Standard Transfers: No Cost, Standard Timing
Standard transfers are a cost-effective option for moving money from your Cash App balance to your bank account. These transfers typically take 1-3 business days to complete. The exact timing can vary depending on your bank’s processing times, with some funds arriving faster than others. For individuals not in an immediate rush to access their funds, standard transfers present a no-fee solution, making them an excellent choice for routine financial management and consolidating funds.
How to Initiate a Standard Transfer:
- Open the Cash App on your mobile device.
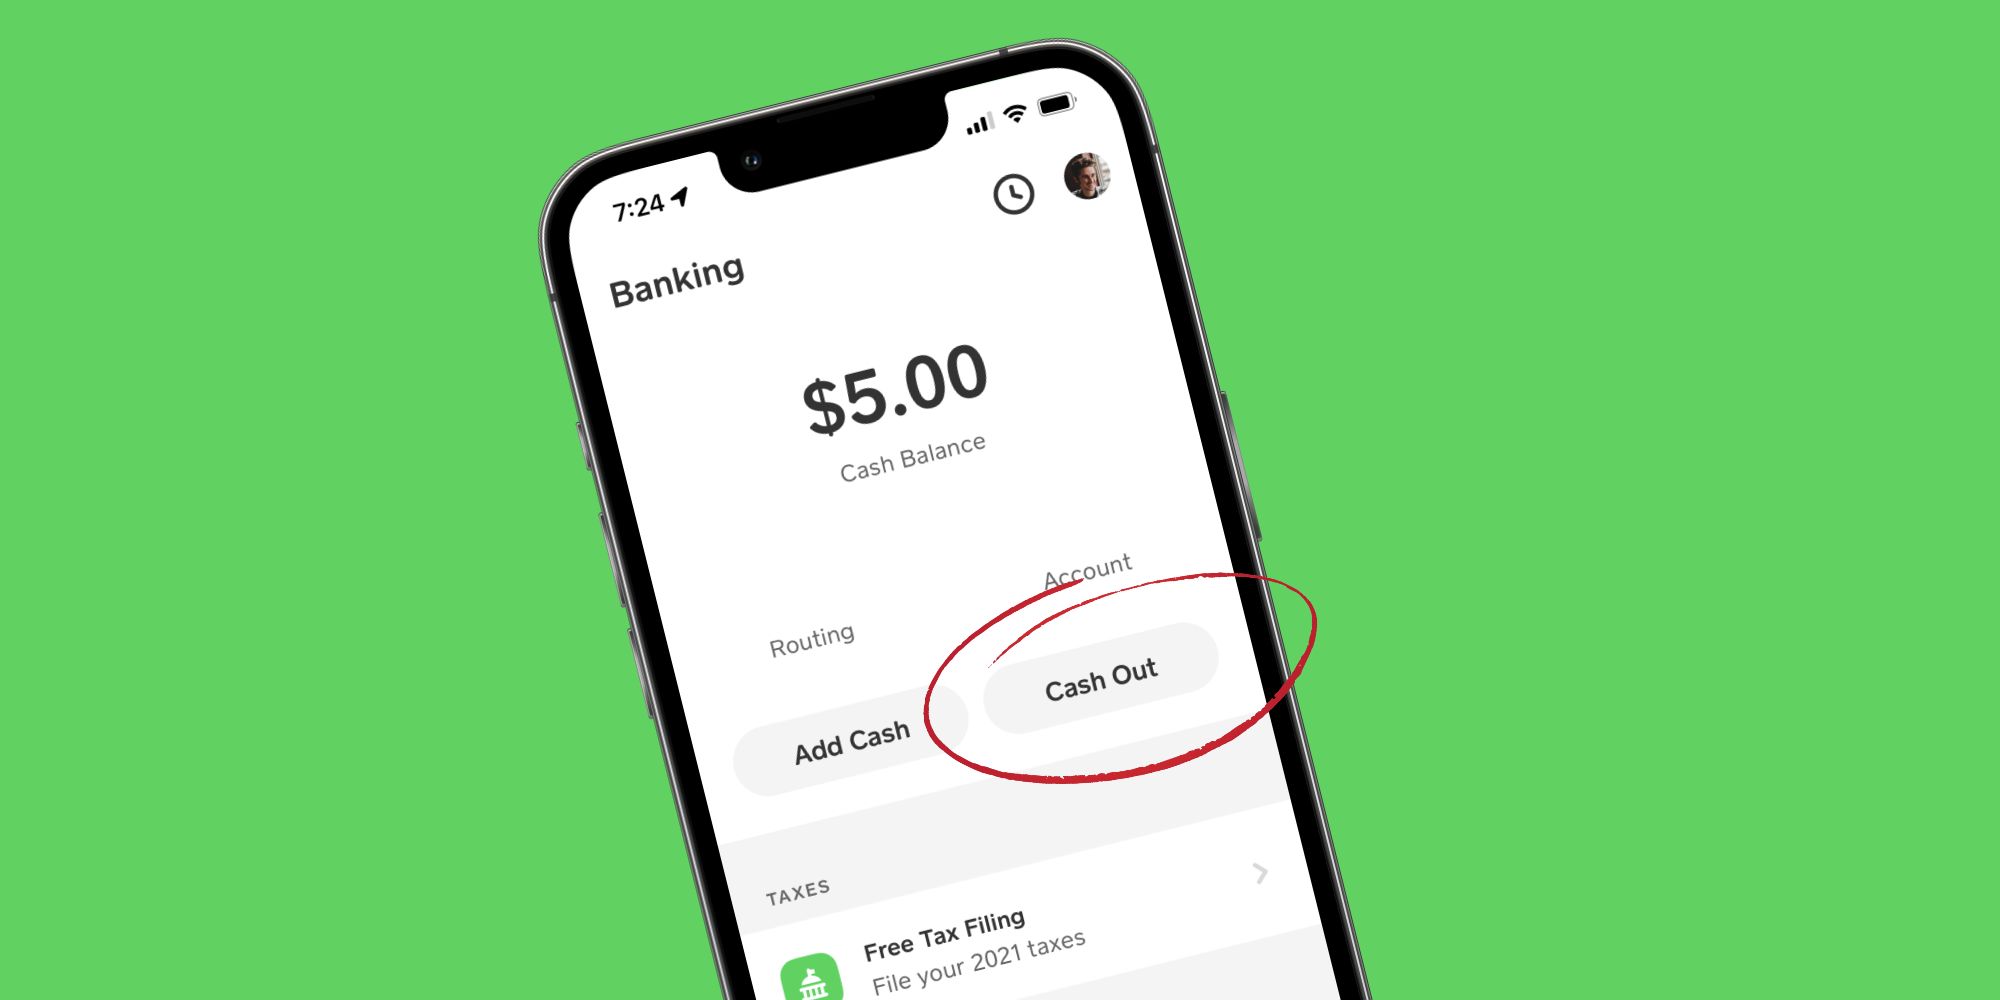
- Tap the “Banking” tab (the house icon) on the home screen.
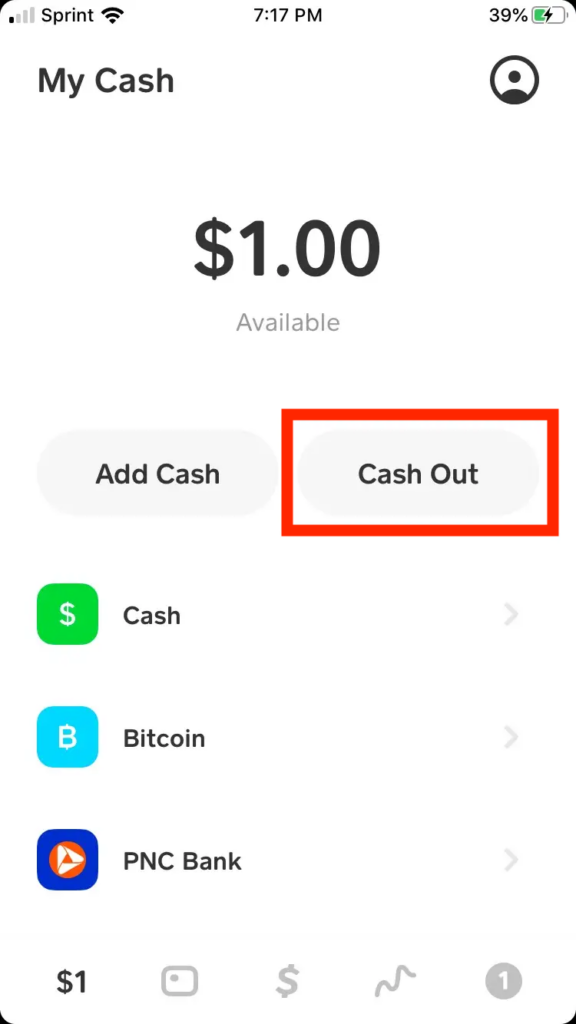
- Tap “Cash Out.”
- Enter the amount you wish to transfer.
- Select “Standard” as the transfer speed.
- Confirm the transfer.
Always double-check the amount and ensure your linked bank account details are correct to avoid any delays or complications.
Instant Transfers: The Expedited Option and Associated Fees
For those who require immediate access to their funds, Cash App provides an instant transfer option. As the name suggests, these transfers typically complete within seconds or minutes, directly depositing the funds into your linked debit card account (not always directly to the bank account if a debit card is linked instead of just the bank account number). While undeniably convenient for urgent financial needs, instant transfers come with a fee, usually 0.5% to 1.75% of the transferred amount, with a minimum fee of $0.25. This fee is automatically deducted from the transfer amount.
How to Initiate an Instant Transfer:
- Follow steps 1-4 for a standard transfer.
- Select “Instant” as the transfer speed.
- Review the fee displayed.
- Confirm the transfer.
Consider the urgency of your need against the cost of the instant transfer. For small amounts, the fee might be negligible, but for larger sums, it could add up, impacting your net withdrawal. Savvy financial planning often involves anticipating cash needs to utilize the free standard transfer option whenever possible.
Step-by-Step Guide to Bank Transfers
Regardless of whether you choose standard or instant, the process for linking your bank account and initiating a transfer remains largely the same:
- Link Your Bank Account: If you haven’t already, you’ll need to link a bank account to your Cash App. This is done through the “Banking” tab, selecting “Linked Banks” or “Add Bank.” You will typically be prompted to sign in to your online banking portal through Cash App’s secure third-party integration (e.g., Plaid) or manually enter your bank’s routing and account numbers. Ensure these details are accurate to prevent failed transfers.
- Access the Cash Out Feature: From the “Banking” tab, the “Cash Out” button is your gateway to initiating a transfer.
- Specify Amount: Enter the exact amount you wish to transfer. You can choose to transfer your full balance or a partial amount.
- Choose Speed: Select either “Standard” (free, 1-3 business days) or “Instant” (fee applies, almost immediate).
- Confirm Details: Review the transfer details, including the amount, chosen speed, and the linked bank account. Once confirmed, the transaction is initiated.
Keeping an eye on your bank account statement after initiating a transfer is a good financial practice to ensure the funds arrive as expected.
Utilizing the Cash Card for Immediate Access
The Cash Card provides a direct and often immediate way to spend or withdraw money from your Cash App balance without needing to transfer it to a separate bank account first. It functions as a standard Visa debit card, making it widely accepted.
Making Purchases with Your Cash Card
Once activated, your Cash Card can be used anywhere Visa debit cards are accepted, both online and in physical stores. Payments are drawn directly from your Cash App balance. This method offers the convenience of a traditional debit card while allowing you to manage your funds entirely within the Cash App ecosystem. It’s particularly useful for day-to-day spending, budgeting, or making purchases directly from your Cash App balance without incurring transfer fees.
ATM Withdrawals: Fees and Limits
For those who need physical cash, the Cash Card allows ATM withdrawals. However, it’s important to be aware of the associated costs and limitations:
- Cash App ATM Fee: Cash App itself charges a fee for ATM withdrawals if you don’t have direct deposits set up. The fee is typically $2.50 per withdrawal.
- ATM Operator Fees: Most ATM operators also charge their own fees, which will be in addition to any Cash App fees. These can vary significantly, so always check the ATM’s displayed fees before proceeding.
- Fee Waivers: Cash App offers a benefit where it will reimburse ATM fees (both Cash App’s fee and the ATM operator’s fee) for users who receive at least $300 in direct deposits into their Cash App account each month. This can be a significant cost-saving for regular ATM users.
- Withdrawal Limits: Cash App imposes daily and weekly limits on ATM withdrawals. Typically, these are around $310 per transaction, $1,000 per day, and $1,000 per week. These limits are in place for security reasons and to comply with financial regulations. Always check the most current limits within the Cash App support section, as they can be subject to change.
Ordering and Activating Your Cash Card
To utilize this method, you first need to order a Cash Card:
- Tap the “Cash Card” tab (the card icon) on your Cash App home screen.
- Tap “Get Free Cash Card.”
- Follow the prompts to customize your card and enter your shipping details. The card typically arrives within 5-10 business days.
Once your physical card arrives, you’ll need to activate it:
- Tap the “Cash Card” tab.
- Tap “Activate Cash Card.”
- Scan the QR code on the card packaging or manually enter the CVV and expiration date.
Activating your card links it directly to your Cash App balance, making your funds immediately accessible for purchases and ATM withdrawals.
Strategic Considerations for Efficient Withdrawals
Effective management of your Cash App funds involves understanding and strategizing around fees, limits, and security protocols. This ensures not only convenience but also financial prudence.
Managing Fees: Instant vs. Standard
The choice between instant and standard transfers is a recurring financial decision for Cash App users. For non-urgent funds, the standard transfer (1-3 business days, no fee) is the superior financial choice, preserving your entire transferred amount. Instant transfers are best reserved for genuine emergencies or situations where the immediate need for funds significantly outweighs the associated fee. Over time, repeatedly paying instant transfer fees can accumulate, eating into your available funds. Budgeting and planning your cash flow can help minimize reliance on instant transfers.
Daily and Weekly Withdrawal Limits
Be mindful of Cash App’s daily and weekly limits for both bank transfers and ATM withdrawals. These limits are dynamic and can sometimes adjust based on your account history and verification status. For large sums, you might need to plan multiple transfers or withdrawals over several days or weeks. Attempting to withdraw beyond these limits will result in a declined transaction, requiring you to adjust your withdrawal strategy. Always verify current limits within the app’s help section to avoid surprises, especially when dealing with significant amounts.
Security Measures for Protecting Your Funds
Ensuring the security of your Cash App account and funds is paramount.
- Strong Passwords and PINs: Always use a strong, unique password for your Cash App account and enable a PIN or Touch ID/Face ID for transactions.
- Two-Factor Authentication (2FA): Enable 2FA for an added layer of security. This requires a second form of verification (e.g., a code sent to your phone) for logins or high-value transactions.
- Beware of Scams: Be vigilant against phishing attempts, fake customer support, or requests for your login information. Cash App will never ask for your PIN or full sign-in code.
- Monitor Account Activity: Regularly review your transaction history to identify any unauthorized activity. Report suspicious transactions immediately to Cash App support.
- Link Verified Accounts: Ensure your linked bank account and debit card are secure and personally owned. Avoid linking accounts belonging to others.
Proactive security measures protect your financial assets and personal data from potential threats.
Troubleshooting Common Withdrawal Hurdles
While Cash App withdrawals are generally smooth, users might occasionally encounter issues. Understanding common problems and their solutions can save time and reduce financial stress.
Delayed Transfers
If a standard transfer takes longer than the expected 1-3 business days, consider the following:
- Bank Processing Times: Weekends and public holidays do not count as business days and can extend transfer times. Your bank might also have its own internal processing delays.
- Verification Issues: Sometimes, Cash App might flag a large or unusual transfer for security review, which can cause delays. Ensure your account is fully verified.
- Incorrect Bank Information: Double-check that the linked bank account details (routing and account numbers) are correct. Incorrect information is a primary cause of failed or delayed transfers.
If a significant delay occurs without explanation, contact Cash App support. Provide them with transaction details and any relevant information to expedite the investigation.
Incorrect Account Information
If you’ve entered incorrect bank details, a transfer might fail and the funds eventually revert to your Cash App balance. This process can take several business days. It’s crucial to immediately correct any erroneous information in your linked bank accounts to prevent future issues. If funds are sent to an incorrect but valid account, recovery can be much more challenging, often requiring intervention from both your bank and Cash App support, and sometimes directly with the unintended recipient. Accuracy is key in all financial transactions.
Card Issues and Declines
When using your Cash Card, declines can occur for several reasons:
- Insufficient Balance: The most common reason is simply not having enough funds in your Cash App balance to cover the transaction or withdrawal.
- Daily/Weekly Limits: You might have exceeded your ATM withdrawal or spending limits.
- Incorrect PIN: Entering the wrong PIN for an ATM withdrawal or card purchase will lead to a decline.
- Card Not Activated: Ensure your Cash Card is properly activated before use.
- Merchant Issues: Occasionally, a merchant’s payment terminal might have issues processing the card.
If you consistently face declines, check your Cash App balance and transaction history. If issues persist, contact Cash App support for diagnosis. Understanding these common pitfalls and maintaining good financial hygiene will ensure a smoother experience when getting money out of Cash App.
aViewFromTheCave is a participant in the Amazon Services LLC Associates Program, an affiliate advertising program designed to provide a means for sites to earn advertising fees by advertising and linking to Amazon.com. Amazon, the Amazon logo, AmazonSupply, and the AmazonSupply logo are trademarks of Amazon.com, Inc. or its affiliates. As an Amazon Associate we earn affiliate commissions from qualifying purchases.