
In the dynamic world of technology, keeping your operating system running smoothly is paramount. Windows 11, with its sleek interface and enhanced features, offers a compelling experience. However, even the most robust systems can become sluggish, cluttered, or riddled with issues over time. This is where the concept of a “fresh install” comes into play – a powerful method to rejuvenate your PC and reclaim its peak performance. This comprehensive guide will walk you through every step of performing a clean installation of Windows 11, ensuring a smooth transition to a pristine digital environment.
Why Opt for a Fresh Windows 11 Installation?
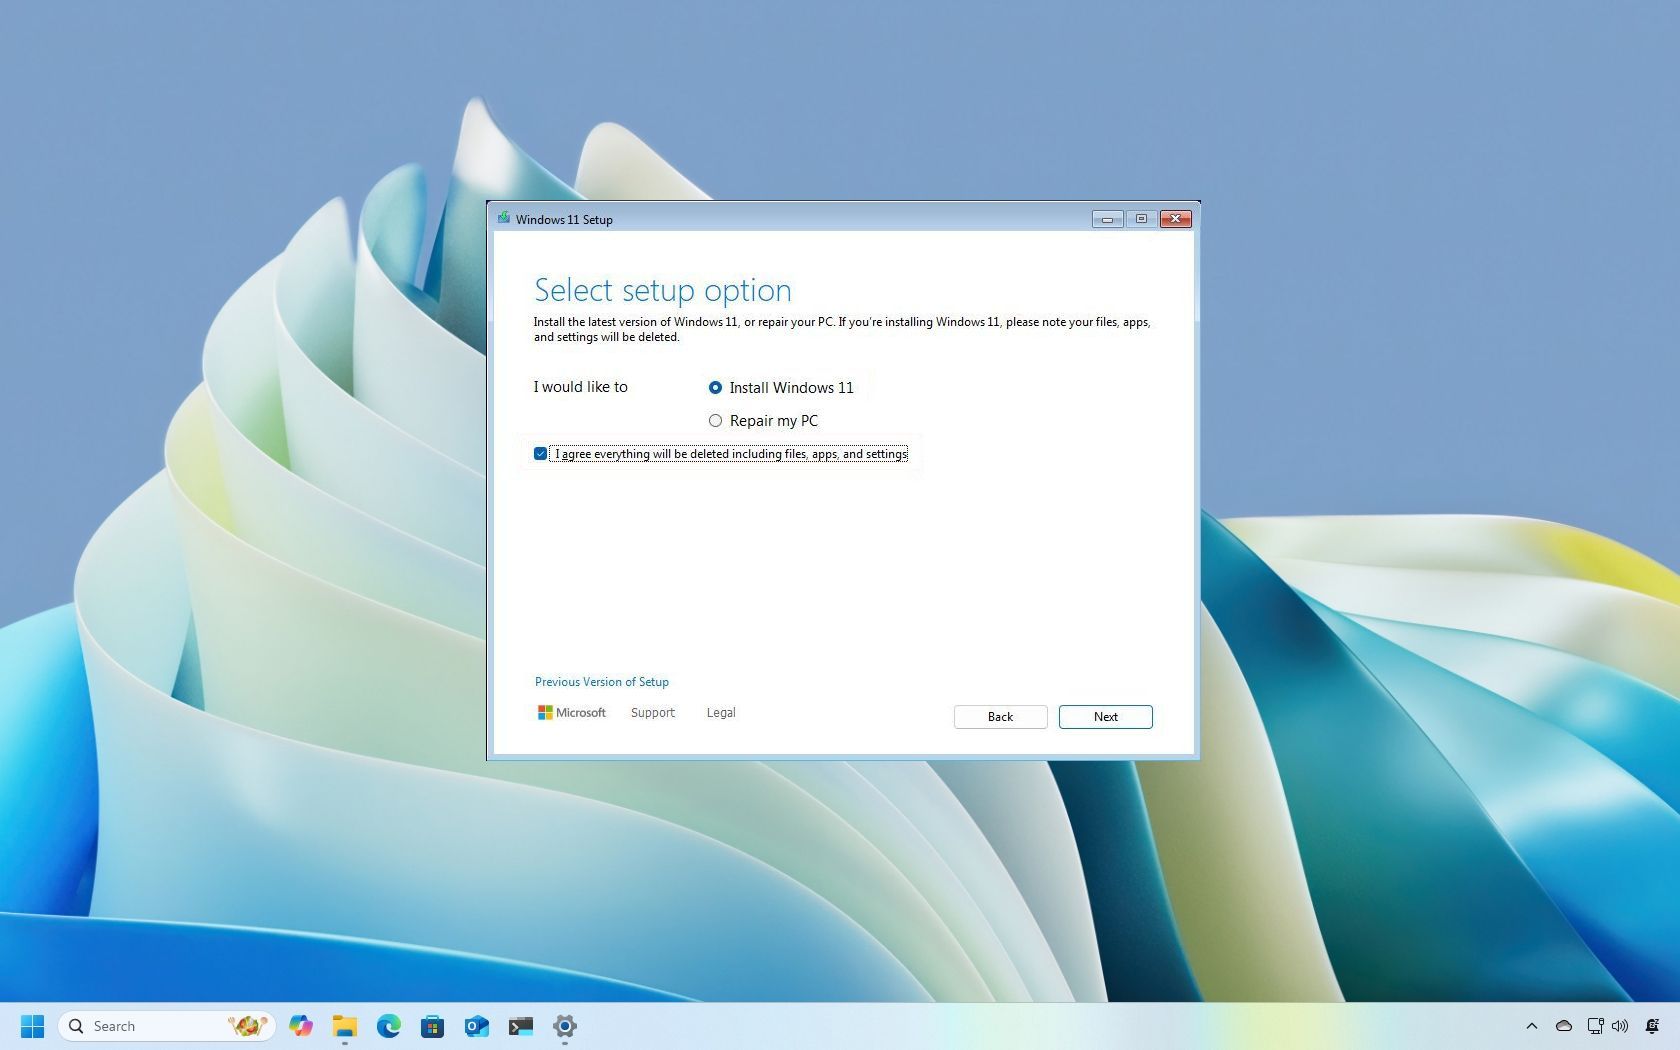
A fresh installation of Windows 11 isn’t just about getting the latest version; it’s about providing your computer with a much-needed clean slate. Unlike an in-place upgrade, which carries over existing files, settings, and potential issues, a fresh install meticulously wipes the designated drive and installs the operating system anew. This approach offers significant advantages that can dramatically improve your computing experience.
The Benefits of a Clean Slate
Imagine moving into a brand-new house versus inheriting one filled with previous tenants’ belongings and years of accumulated dust. A fresh Windows 11 install is akin to the former. It systematically removes all old operating system files, user data, installed programs, and any lingering software conflicts or malware that might be slowing down your system. The immediate benefits are often palpable:
- Enhanced Performance: Without the burden of accumulated junk files, fragmented data, and background processes from old applications, your PC will feel snappier, boot faster, and run applications more efficiently. This is particularly noticeable on older hardware that struggles under the weight of a cluttered OS.
- Improved Stability: Over time, registry errors, corrupted system files, and software conflicts can lead to crashes, freezes, and unpredictable behavior. A fresh install eliminates these underlying issues, providing a stable foundation for your daily tasks.
- Increased Security: While Windows Defender is robust, persistent malware or deeply embedded threats can sometimes evade detection during regular scans. A fresh install ensures that your operating system starts with a clean security posture, free from hidden dangers.
- More Disk Space: Unused programs, temporary files, and system restore points can consume vast amounts of disk space. A clean installation frees up valuable storage, allowing more room for your essential applications and files.
- Resolved Persistent Issues: If you’ve been grappling with inexplicable errors, driver conflicts, or software malfunctions that even extensive troubleshooting couldn’t fix, a fresh install is often the ultimate solution, cutting straight to the root of the problem.
When a Fresh Install Becomes Necessary
While the allure of a pristine system is always present, certain scenarios make a fresh installation particularly advisable or even essential:
- Significant Performance Degradation: If your computer has become noticeably slow, takes ages to boot, or frequently lags even after routine maintenance (like disk cleanup and defragmentation), it’s a strong indicator that a fresh start is needed.
- Persistent System Errors or Crashes: Frequent Blue Screen of Death (BSOD) errors, application crashes, or system freezes that aren’t resolved by driver updates or software reinstallation point towards deeper OS corruption.
- After Major Hardware Upgrades: Installing a new motherboard, processor, or even a new primary storage drive (like upgrading from an HDD to an SSD) can sometimes cause driver conflicts or instability with the old OS installation. A fresh install ensures optimal compatibility with your new components.
- Removal of Stubborn Malware or Viruses: While antivirus software is effective, some sophisticated malware can embed itself deeply within the system, making complete removal difficult. A fresh install guarantees a clean slate, eradicating any lingering threats.
- Selling or Donating Your PC: To ensure complete privacy and data security, performing a fresh install (and ideally, securely wiping the drive beforehand) is crucial before transferring ownership of your computer.
- Starting Anew: Sometimes, you simply want to declutter your digital life, reorganize your files, and streamline your software collection. A fresh install provides the perfect opportunity for this digital spring cleaning.
Essential Preparations Before You Begin
Embarking on a fresh Windows 11 installation is a significant step, and like any major project, preparation is key. Rushing into the process without adequate safeguards can lead to data loss or unnecessary complications. This section outlines the critical steps you must take before initiating the installation process.
Back Up Your Precious Data
This is, without exaggeration, the single most important step. A fresh install will erase everything on the drive where Windows 11 will be installed. If you have personal documents, photos, videos, music, project files, or any other data you value, you must back it up.
What to Back Up:
- User Folders: Documents, Pictures, Videos, Music, Downloads, Desktop.
- Browser Bookmarks/Favorites: Export them from your browser settings.
- Email Client Data: If you use a desktop email client (like Outlook or Thunderbird), back up its data files (PST, OST, MBOX, etc.).
- Application-Specific Data: Save files from any specialized software you use.
- Drivers: While Windows 11 usually finds most drivers, it’s wise to have copies of critical drivers (especially for network adapters, Wi-Fi, and graphics cards) on hand, especially for older or niche hardware. You can use tools to back up existing drivers or download them directly from the manufacturer’s website.
How to Back Up:
- External Hard Drive: The most common and reliable method. Copy and paste your essential folders.
- Cloud Storage: Services like OneDrive, Google Drive, Dropbox, or iCloud are excellent for syncing important files and providing off-site backups.
- Network Attached Storage (NAS): If you have a home network server, it’s a great place for large backups.
- USB Flash Drives: Suitable for smaller, critical files.
Verification: After backing up, take a moment to verify that your critical files are indeed accessible on your backup medium. There’s nothing worse than discovering an empty backup after wiping your drive.
System Requirements and Product Key
Before proceeding, ensure your system meets the minimum requirements for Windows 11. While the installation process might bypass some checks (especially if you’re using unofficial methods, though it’s recommended to adhere to official guidelines), knowing your system capabilities is crucial for a smooth experience.
Windows 11 Minimum System Requirements:
- Processor: 1 gigahertz (GHz) or faster with 2 or more cores on a compatible 64-bit processor or System on a Chip (SoC).
- RAM: 4 gigabytes (GB).
- Storage: 64 GB or larger storage device.
- System Firmware: UEFI, Secure Boot capable.
- TPM: Trusted Platform Module (TPM) version 2.0.
- Graphics Card: Compatible with DirectX 12 or later with WDDM 2.0 driver.
- Display: High definition (720p) display that is greater than 9” diagonally, 8 bits per color channel.
- Internet Connection: Microsoft account and internet connectivity required for setup of Windows 11 Home edition and for S mode.
Product Key:
Locate your Windows 11 or Windows 10 product key. If you previously upgraded from Windows 10, your license is digital and tied to your Microsoft account. In such cases, you can often skip the product key entry during installation, and Windows will activate automatically once connected to the internet and logged into your Microsoft account. If you bought a retail copy, the key will be on a sticker or in your purchase confirmation email. For OEM systems (pre-built PCs), the key is typically embedded in the BIOS/UEFI firmware, and Windows will detect it automatically. Write it down just in case.
Creating Your Windows 11 Installation Media
To perform a fresh install, you’ll need bootable installation media. A USB flash drive is the most common and convenient method, though a DVD can also be used.
What you’ll need:
- USB Flash Drive: At least 8 GB of storage. Ensure it’s empty or contains data you’re willing to erase, as the creation process will format it.
- Internet Connection: To download the Windows 11 Media Creation Tool and the ISO file.
- Another Working PC: Ideally, you’d perform this step on a different computer, especially if the one you’re reinstalling Windows on is experiencing issues.
Steps to Create Installation Media:
- Download the Media Creation Tool: Go to the official Microsoft Windows 11 download page (search “Download Windows 11” on Microsoft’s website). Under the “Create Windows 11 Installation Media” section, click “Download Now” to get the Media Creation Tool.
- Run the Tool: Execute the downloaded
MediaCreationToolW11.exe. - Accept Terms: Agree to the license terms.
- Select Language and Edition: The tool will usually recommend options based on your current PC. Confirm or change them as needed. Click “Next.”
- Choose Media Type: Select “USB flash drive” as the media to use. If you want an ISO file to burn to a DVD later or use with a virtual machine, select “ISO file.” Click “Next.”
- Select USB Drive: Choose the correct USB flash drive from the list. Double-check this step to ensure you don’t accidentally select another drive and erase its contents. Click “Next.”
- Download and Create: The tool will download the Windows 11 ISO and then create the bootable USB drive. This process can take some time, depending on your internet speed.
- Finish: Once completed, you’ll see a confirmation message. Safely eject the USB drive.
Step-by-Step Guide to a Flawless Installation
With your backups secured and installation media ready, you’re now equipped to begin the actual fresh installation of Windows 11. This section will guide you through the process, from booting your computer to setting up your user account.

Booting from the Installation Media
The first hurdle is to instruct your computer to start from the USB drive (or DVD) instead of its internal hard drive.
- Insert the Installation Media: Plug your bootable USB flash drive into an available USB port on your computer.
- Restart Your PC: Power off your computer, then power it back on.
- Access BIOS/UEFI Settings or Boot Menu: As soon as the computer starts, you’ll need to repeatedly press a specific key to enter your BIOS/UEFI settings or a “Boot Menu.” Common keys include:
- Delete (Del)
- F2
- F10
- F12
- Esc
The exact key varies by manufacturer (e.g., Dell, HP, Lenovo, Asus, Acer, MSI, Gigabyte). Look for a message on the screen during startup, like “Press F2 for Setup” or “Press F12 for Boot Menu.”
- Change Boot Order (if necessary):
- Using the Boot Menu (Recommended): If you can access a dedicated Boot Menu, simply select your USB drive (it might be listed as “USB-HDD,” “UEFI USB Device,” or by its brand name) from the list and press Enter.
- Via BIOS/UEFI Settings: Navigate to the “Boot” tab or section within your BIOS/UEFI. Find “Boot Order” or “Boot Priority” and move your USB drive to the top of the list. Save changes and exit (usually F10).
- Start Windows Setup: Your computer should now boot from the USB drive. You’ll likely see a message like “Press any key to boot from CD or DVD…” (even for USB drives) – press a key immediately. If you miss it, the computer might boot to your old OS; just restart and try again.
Navigating the Windows Setup Wizard
Once you successfully boot from the installation media, the Windows Setup wizard will appear.
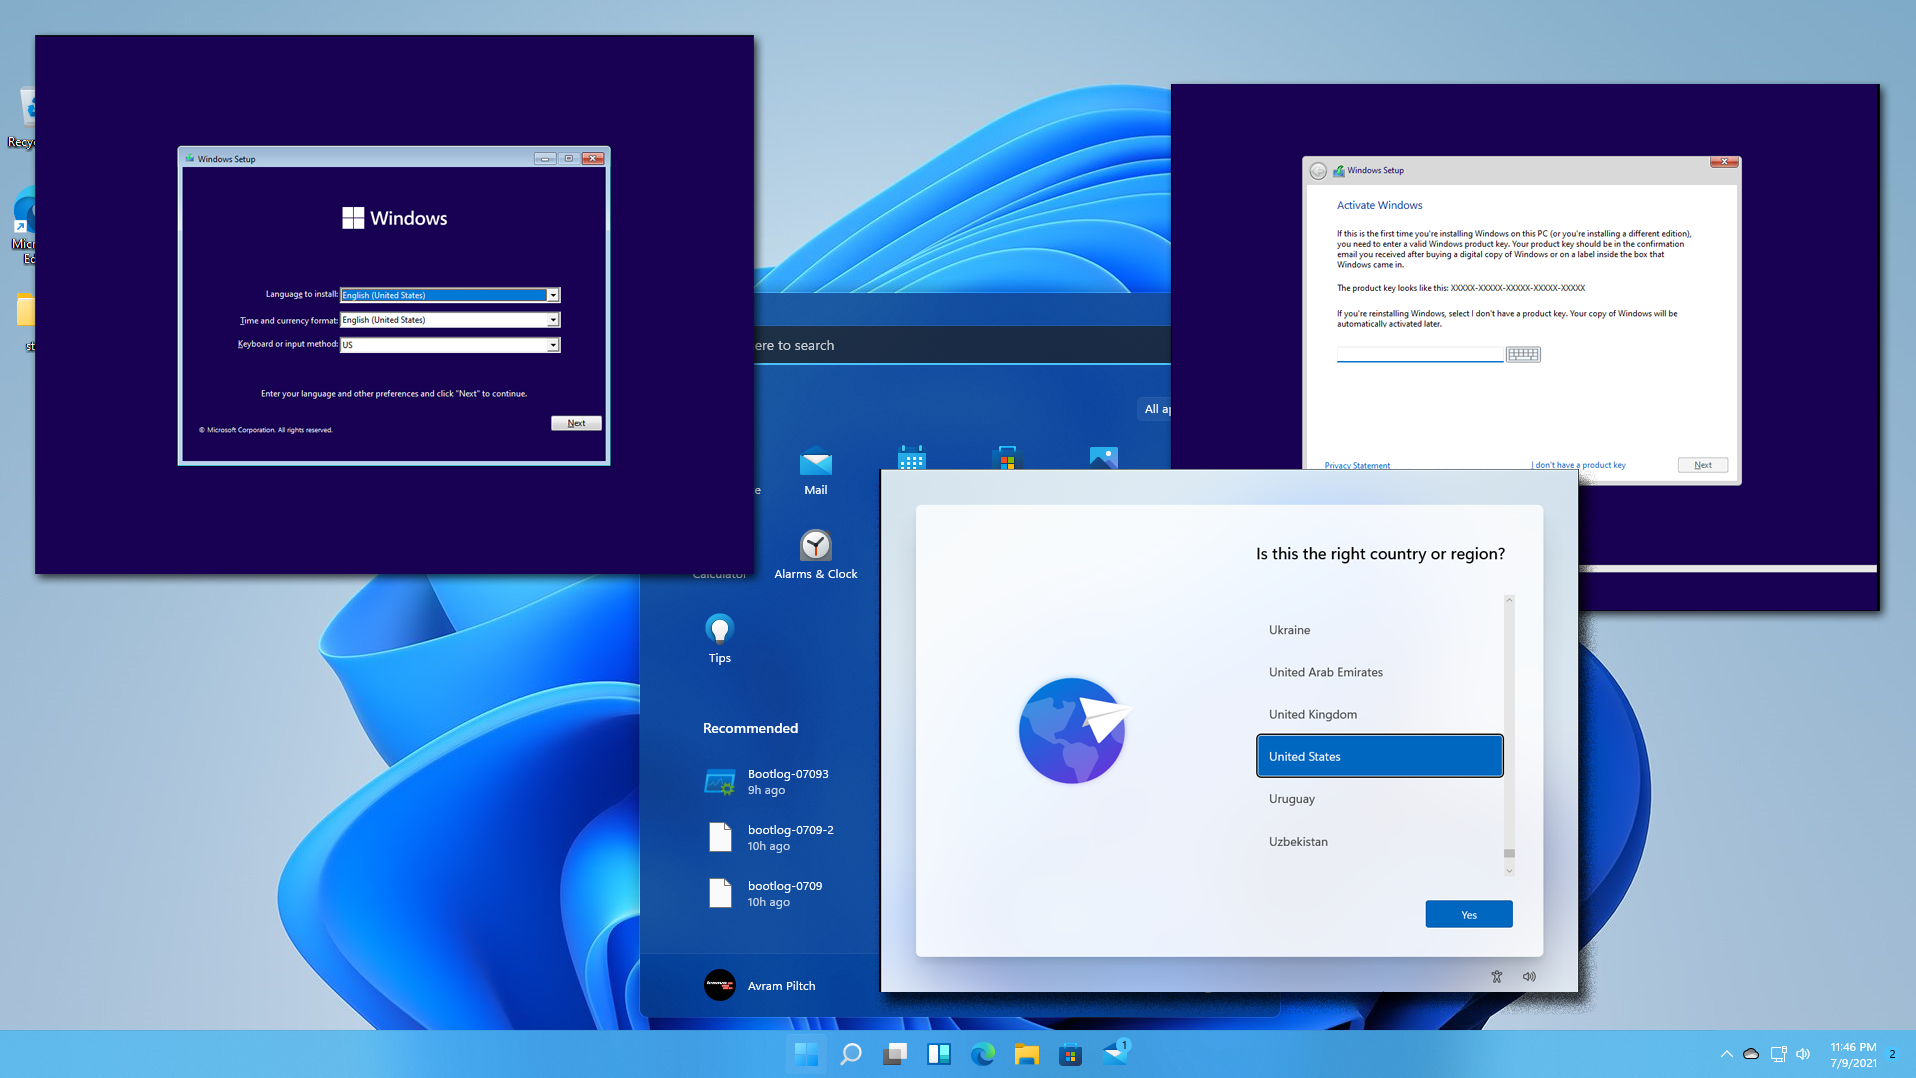
- Language, Time, and Keyboard: The first screen asks for your language, time and currency format, and keyboard or input method. Select your preferences and click “Next.”
- Install Now: Click the “Install now” button.
- Product Key: You’ll be prompted to enter your product key.
- If you have one, enter it here.
- If you’re reinstalling Windows 11 on a machine that previously had an activated copy, or if your license is digital and tied to your Microsoft account, you can click “I don’t have a product key” and Windows will activate automatically later when connected to the internet.
- Operating System Version: If your product key covers multiple editions (e.g., Home, Pro), you might be asked to select which version of Windows 11 you want to install. Choose accordingly and click “Next.”
- License Terms: Read and accept the Microsoft Software License Terms. Check the box and click “Next.”
- Installation Type: This is a crucial step for a fresh install.
- “Upgrade: Install Windows and keep files, settings, and applications” is for in-place upgrades and not what we want for a fresh install.
- “Custom: Install Windows only (advanced)” – Select this option. This allows you to choose where to install Windows and manage partitions.
Partitioning Your Drive and Installation
The “Custom” installation option takes you to the drive partitioning screen. This is where you’ll delete existing partitions and create new ones for a truly clean installation.
- Identify the Target Drive: You’ll see a list of drives (Disk 0, Disk 1, etc.) and their partitions. It’s essential to identify the correct drive where you want to install Windows. If you have multiple drives, use their size to distinguish them. Proceed with extreme caution here; selecting the wrong drive will erase its contents.
- Delete Existing Partitions:
- Select each partition associated with your old Windows installation (e.g., System Reserved, Primary, Recovery, EFI System Partition) on your target drive and click “Delete.”
- You might receive warnings about losing data; confirm to proceed.
- Repeat until the entire target drive appears as “Unallocated Space.”
- Create New Partition:
- Select the “Unallocated Space” on your target drive.
- Click “New.” Windows will usually suggest using the maximum available space for a new partition.
- Click “Apply.” Windows will then inform you that it needs to create additional partitions for system files (EFI, Recovery, etc.). Click “OK.”
- You should now see a “Primary” partition (this is where Windows will be installed) and possibly a few smaller system partitions.
- Select Installation Partition: Ensure the newly created “Primary” partition (often the largest one) is selected. This is the partition where Windows 11 will be installed.
- Start Installation: Click “Next.” Windows will now begin copying files and installing. Your computer will restart multiple times during this phase. Do not remove the USB drive until the initial setup (OOBE) begins.
Initial Setup and User Account Creation
After the installation files are copied and the system restarts, you’ll enter the Out-of-Box Experience (OOBE) to configure basic settings and create your user account.
- Region and Keyboard Layout: Select your country/region and confirm your keyboard layout. You might be asked to add a second keyboard layout.
- Name Your Device: Give your computer a name. You can skip this for now if you prefer and do it later.
- How will you set up this device?: Choose “Set up for personal use” or “Set up for work or school” based on your needs.
- Microsoft Account Sign-in: Windows 11 strongly encourages using a Microsoft account.
- Enter your Microsoft account email, phone, or Skype name and click “Next.” Enter your password.
- If you want to create a local account (without a Microsoft account), you typically need to disconnect from the internet at this stage (either physically unplugging the Ethernet cable or disconnecting Wi-Fi). Then, options like “Offline account” or “Sign-in options” might appear, allowing you to create a local user. However, Windows 11 Home heavily restricts this.
- PIN Creation: For security and convenience, Windows will prompt you to create a PIN for faster login.
- Privacy Settings: Review the various privacy settings (location, diagnostic data, tailored experiences, etc.). Turn off any you’re uncomfortable with, then click “Accept.”
- Customize Your Experience: Windows might ask you about your intended usage (gaming, creativity, business, etc.) to tailor recommendations. You can skip this.
- Sync Your Files with OneDrive (Optional): You might be prompted to back up your files to OneDrive. Choose to proceed or select “Only save files to this PC” if you prefer not to use OneDrive for desktop backups.
- Wait for Final Preparations: Windows will take a few more minutes to finalize everything, displaying messages like “Hi,” “We’re getting things ready for you,” and “This might take a few minutes.”
- Welcome to Your New Desktop: Eventually, you’ll be presented with the Windows 11 desktop – a fresh, clean slate ready for you to personalize.
Post-Installation Essentials: Optimizing Your New System
Congratulations! You’ve successfully performed a fresh installation of Windows 11. However, the journey isn’t quite over. To ensure your new system runs optimally and is fully functional, there are several crucial steps to take immediately after installation.
Installing Drivers and Running Windows Update
Drivers are essential software components that allow your operating system to communicate with your hardware (graphics card, sound card, network adapter, printer, etc.). Windows 11 often includes many generic drivers, but installing manufacturer-specific drivers is crucial for optimal performance and functionality.
- Connect to the Internet: This is your first priority. If your Wi-Fi or Ethernet isn’t working, you’ll need to install the network adapter driver manually. You might need to download it onto another computer and transfer it via USB.
- Run Windows Update:
- Go to Settings (Windows Key + I) > Windows Update.
- Click “Check for updates.”
- Windows Update will download and install critical security patches, feature updates, and often, many missing hardware drivers. Let it run multiple times until no more updates are found. Restart your PC as prompted.
- Also check “Advanced options” > “Optional updates” as it might contain specific drivers for your hardware that are not critical but improve performance.
- Install Manufacturer-Specific Drivers:
- Visit the support website of your computer manufacturer (e.g., Dell, HP, Lenovo) or the manufacturers of individual components (e.g., NVIDIA, AMD, Intel for graphics, chipset, sound).
- Enter your computer’s model number or component serial number.
- Download and install the latest drivers for your chipset, graphics card, audio, network adapters (Wi-Fi and Ethernet), and any specific peripherals. Prioritize the chipset and graphics drivers for stability and performance.
- Restart your PC after installing major drivers.
- Verify Device Manager: Open Device Manager (right-click Start button > Device Manager). Look for any devices with yellow exclamation marks. These indicate missing or problematic drivers. Right-click and choose “Update driver” or manually install the drivers you downloaded.
Restoring Your Data and Essential Software
With your system updated and drivers installed, it’s time to bring back your personal touch.
- Restore Your Backed-Up Data:
- Connect your external hard drive or access your cloud storage.
- Copy your personal files (Documents, Pictures, Videos, etc.) back to their respective folders on your new Windows 11 installation.
- Organize your files as you see fit.
- Install Essential Software:
- Start by installing your web browser of choice (Chrome, Firefox, Edge is pre-installed).
- Then, install productivity suites (Microsoft Office, LibreOffice), security software (if you prefer a third-party antivirus), communication apps (Discord, Zoom), media players, and any specialized software you regularly use.
- Consider using a package manager like winget (built into Windows 11 via PowerShell) or Ninite to streamline the installation of multiple common applications.
- Download applications only from official sources to avoid malware.
- Configure Settings and Personalization:
- Go to Settings > Personalization to set your desktop background, themes, colors, and lock screen.
- Adjust power settings, display settings, sound preferences, and notifications according to your workflow.
- Set up your preferred default applications for file types (e.g., which browser opens links, which program opens images).
- Re-activate Software (if needed): Some applications might require re-activation with their license keys after a fresh install.
Troubleshooting Common Issues and Pro Tips
While a fresh installation of Windows 11 is designed to be straightforward, minor hitches can sometimes occur. Knowing how to address common issues and implementing a few pro tips can further enhance your experience.
Addressing Installation Glitches
- “We couldn’t create a new partition or locate an existing one”: This error often points to issues with the drive itself or incorrect boot mode (UEFI vs. Legacy BIOS).
- Ensure your drive is properly connected.
- If using an older drive, try disconnecting all other drives except the target drive during installation.
- In BIOS/UEFI, ensure your boot mode matches your drive (UEFI for GPT drives, Legacy for MBR drives – modern systems almost exclusively use UEFI/GPT).
- Try cleaning the drive using
diskpart(accessible by pressingShift + F10during setup to open Command Prompt):diskpartlist disk(Identify your target drive number, e.g.,disk 0)select disk X(Replace X with your drive number)clean(This will wipe the entire drive, so be absolutely certain you selected the correct one).convert gpt(For UEFI systems) orconvert mbr(For Legacy BIOS).exit- Then try creating partitions again in the setup wizard.
- Installation Freezes or Gets Stuck:
- Restart the computer and try again.
- Re-download the Media Creation Tool and recreate your bootable USB drive, as the existing one might be corrupted.
- Ensure your RAM is seated correctly.
- Driver Issues Post-Install: If a specific component isn’t working after installing drivers, double-check that you downloaded the correct driver for your exact hardware model and Windows 11 (64-bit). Sometimes, an older, stable driver version from the manufacturer is better than the newest beta.
Maximizing Performance After Installation
- Keep Windows Updated: Regularly check for and install Windows Updates to benefit from performance improvements, security patches, and new features.
- Regular Software Updates: Keep all your installed applications updated. Developers often release performance optimizations and bug fixes.
- Manage Startup Programs: Prevent unnecessary applications from launching with Windows.
- Go to Task Manager (Ctrl+Shift+Esc) > Startup tab.
- Disable programs that don’t need to run immediately when you boot.
- Use Storage Sense: Windows 11 has a built-in tool that automatically frees up space by deleting temporary files and managing your Downloads folder.
- Settings > System > Storage > Storage Sense.
- Uninstall Unused Apps: Regularly review your installed applications and uninstall anything you no longer use.
- Consider a Good Antivirus: While Windows Defender is capable, some users prefer a third-party antivirus solution for added peace of mind. Ensure it’s reputable and doesn’t consume excessive system resources.
- Optimize Visual Effects: For lower-end PCs, reducing some visual flair can improve responsiveness.
- Search for “Adjust the appearance and performance of Windows” in the Start menu.
- In the Performance Options dialog, select “Adjust for best performance” or customize individual options.
- Monitor Disk Health: Use tools like CrystalDiskInfo to monitor the health of your SSD or HDD. A failing drive can significantly impact performance.
- Practice Good Digital Hygiene: Regularly delete temporary files, empty your recycle bin, and keep your desktop clutter-free.
A fresh installation of Windows 11 is an empowering experience, giving you full control over your system’s foundation. By following this comprehensive guide, you not only ensure a successful installation but also set the stage for an optimized, secure, and highly responsive computing environment. Enjoy the renewed speed and stability of your Windows 11 PC!
aViewFromTheCave is a participant in the Amazon Services LLC Associates Program, an affiliate advertising program designed to provide a means for sites to earn advertising fees by advertising and linking to Amazon.com. Amazon, the Amazon logo, AmazonSupply, and the AmazonSupply logo are trademarks of Amazon.com, Inc. or its affiliates. As an Amazon Associate we earn affiliate commissions from qualifying purchases.