
In the intricate world of computing, the graphics processing unit (GPU) stands as a cornerstone for everything from high-fidelity gaming and professional content creation to everyday desktop operations. For users wielding NVIDIA GPUs, maintaining peak performance and ensuring system stability critically hinges on one often-overlooked yet fundamental component: the NVIDIA drivers. These pieces of software act as the vital communication bridge between your operating system and your graphics hardware, translating commands and optimizing performance. An outdated or improperly installed driver can lead to a litany of issues, ranging from minor graphical glitches and performance dips to frustrating system crashes and software incompatibilities.

This guide delves into the essential process of downloading and installing NVIDIA drivers, offering a professional, insightful, and engaging walkthrough designed to empower users with the knowledge needed to keep their systems running smoothly. We’ll explore why these drivers are so important, how to navigate NVIDIA’s various download platforms, provide step-by-step instructions for both manual and automated updates, and discuss advanced management techniques to ensure your NVIDIA-powered system always operates at its best. Mastering driver management is not merely a task; it’s a critical aspect of digital hygiene that safeguards your computing experience, enhances security, and unlocks the full potential of your hardware investment.
The Indispensable Role of NVIDIA Drivers in Modern Computing
Drivers are often the unsung heroes of computing, toiling in the background to ensure your hardware communicates effectively with your software. For NVIDIA GPUs, this role is amplified due to the complex tasks these powerful components undertake. Understanding their function and impact is the first step towards appreciating the importance of diligent driver management.
Understanding Driver Functionality
At its core, a driver is a specific type of software that enables other software—typically an operating system—to interact with a hardware device. Think of it as a translator. Your operating system speaks one language, and your NVIDIA GPU speaks another. The driver facilitates this conversation, allowing the OS to send instructions to the GPU (e.g., “render this frame,” “process this calculation”) and for the GPU to report back its status. Without the correct driver, your operating system would be unable to recognize or effectively utilize the graphics card, rendering it little more than an inert piece of silicon. This is particularly crucial for GPUs given their specialized architecture, designed for parallel processing tasks that differ significantly from a CPU’s serial operations.
The Impact of Outdated vs. Updated Drivers
The difference between an outdated and an updated driver can be night and day for your system’s performance and stability. Outdated drivers are a common culprit behind a host of problems:
- Performance Bottlenecks: Older drivers may not fully optimize the GPU’s capabilities with newer games or applications, leading to lower frame rates, stuttering, and overall sluggishness. They might lack the latest performance profiles for new titles or software versions.
- Graphical Glitches and Artifacts: Visual anomalies, texture errors, or incorrect rendering can often be traced back to a driver that isn’t properly interpreting graphical instructions.
- System Instability and Crashes: An incompatible or buggy old driver can cause the GPU to behave erratically, leading to application crashes, system freezes, or even the dreaded Blue Screen of Death (BSOD) on Windows.
- Security Vulnerabilities: Less common but equally important, older drivers might contain unpatched security flaws that could potentially be exploited, compromising your system’s digital security.
Conversely, regularly updated drivers bring a wealth of benefits:
- Performance Enhancements: NVIDIA consistently releases Game Ready Drivers (GRD) and Studio Drivers (SD) that are specifically optimized for the latest game titles and professional creative applications, often providing significant performance boosts.
- Bug Fixes and Stability Improvements: Updates typically address known issues, enhancing overall system stability and reducing crashes.
- New Features and Technologies: Driver updates often introduce support for new graphical features, APIs (like DirectX or Vulkan), and display technologies (such as G-Sync, DLSS, or Ray Tracing advancements), unlocking capabilities that were previously unavailable.
- Broader Compatibility: Ensuring your driver is current helps maintain compatibility with the latest operating system updates and software applications, preventing frustrating conflicts.
Why NVIDIA Drivers are Unique
NVIDIA drivers stand out due to the company’s continuous innovation in graphics technology. Unlike generic drivers that might offer basic functionality, NVIDIA’s drivers are meticulously engineered to extract maximum performance and stability from their specific hardware architectures. This includes specialized optimizations for various GPU series (GeForce, Quadro, Tesla), unique features like CUDA for parallel computing, and their comprehensive ecosystem of software utilities (GeForce Experience, NVIDIA Control Panel). The complexity and specialization of NVIDIA’s hardware necessitate equally sophisticated drivers, making their proper management a cornerstone of a high-performing and secure system.
Navigating NVIDIA’s Driver Download Ecosystem
NVIDIA provides multiple avenues for downloading drivers, each catering to different user preferences and technical proficiencies. Understanding these options is key to selecting the most suitable method for your needs.
The Official NVIDIA Driver Download Page
The most robust and universally applicable method for obtaining NVIDIA drivers is through their official website. This platform offers a comprehensive database of drivers for every NVIDIA product line, from the latest GeForce RTX cards to legacy Quadro workstation GPUs. The primary advantage here is direct access to the latest, verified drivers, free from third-party modifications or potential malware. This method requires a bit more user input but offers complete control over the selection process. It’s the go-to for users who prefer manual control, those experiencing issues with automated tools, or professionals who need specific driver versions (e.g., Studio Drivers for creative applications).
Leveraging GeForce Experience for Seamless Updates
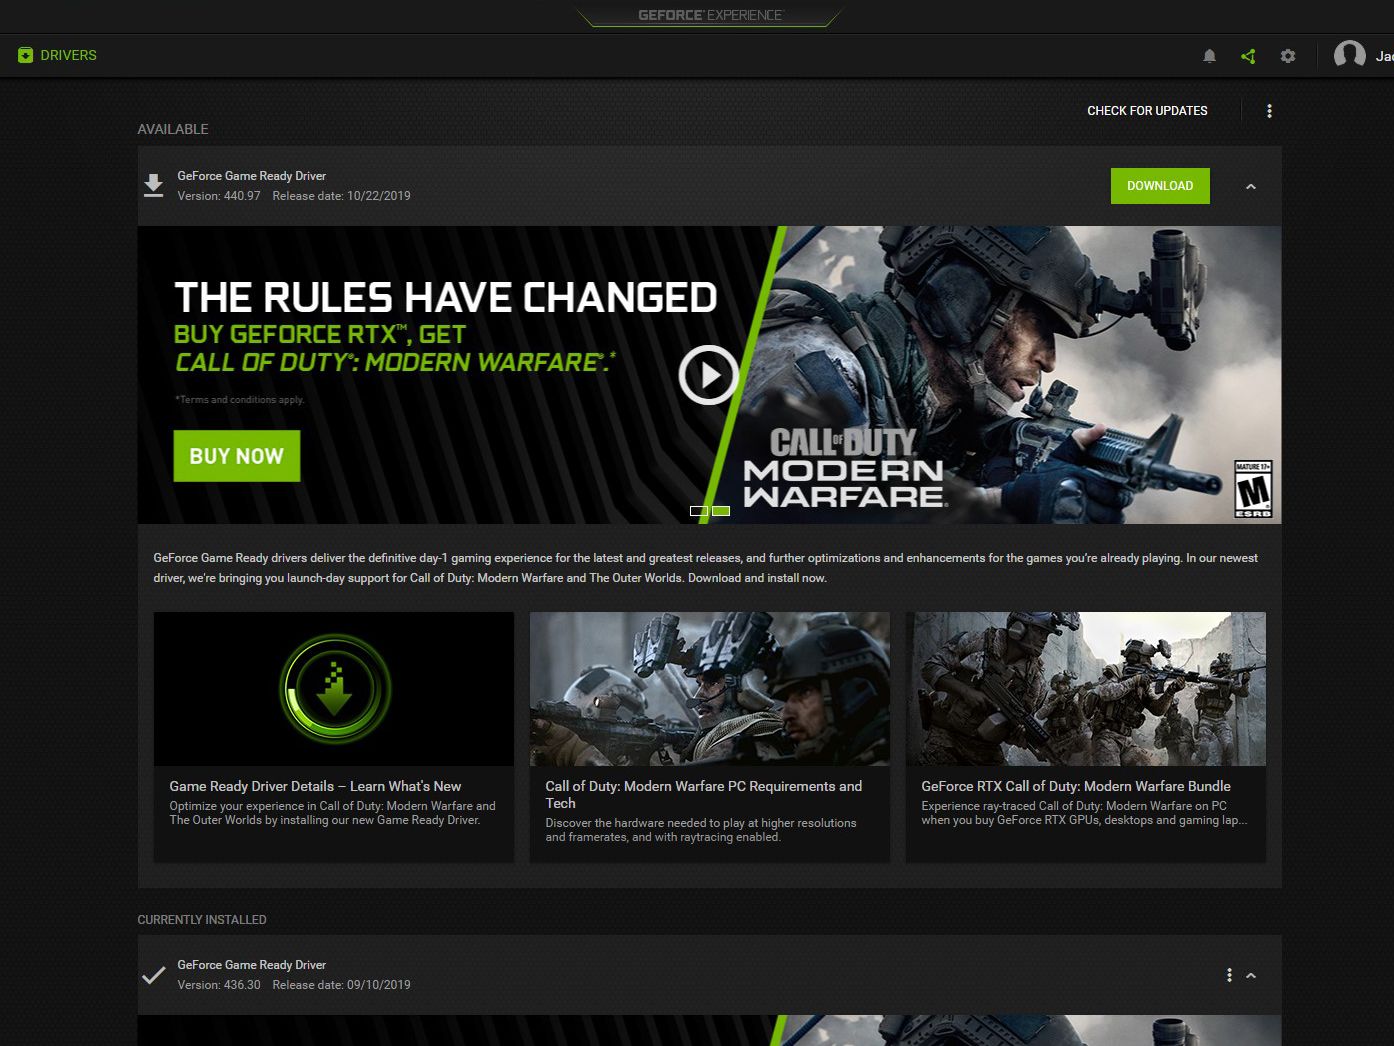
For gamers and many mainstream users, NVIDIA’s GeForce Experience software is an invaluable tool for driver management. This application not only optimizes game settings for your hardware but also provides an incredibly convenient way to download and install Game Ready Drivers automatically. GeForce Experience streamlines the update process, often notifying you when a new driver is available and allowing for a one-click installation. It’s designed for ease of use, eliminating the need to manually identify your GPU model or scour the website. While generally reliable, some advanced users might prefer the direct website download for troubleshooting purposes or if they wish to avoid the additional software overhead of GeForce Experience.
Identifying Your Specific GPU Model
Before you can download the correct driver, whether manually or through GeForce Experience (which usually auto-detects), you must accurately identify your NVIDIA GPU model. This is a critical step because installing a driver for the wrong GPU can lead to installation failures, system instability, or even permanent damage in rare cases.
- Using NVIDIA Control Panel: Right-click on your desktop and select “NVIDIA Control Panel.” In the bottom-left corner, click “System Information.” Your GPU model will be listed under the “Display” tab.
- Using Device Manager (Windows): Press
Win + Xand select “Device Manager.” Expand “Display adapters” to see your NVIDIA GPU’s name. - Using System Information Tools: Third-party tools like GPU-Z or Speccy can provide detailed hardware information, including your exact GPU model.
- Physical Inspection: If your computer is a desktop, you might be able to physically inspect the graphics card itself, where the model name is often printed.
Once you know your exact GPU model, you can proceed with confidence to download the appropriate driver.
Step-by-Step Manual Driver Download and Installation
For those who prefer a hands-on approach or need to bypass issues with automated tools, the manual method of downloading and installing NVIDIA drivers offers granular control and reliability.
Utilizing the NVIDIA Driver Search Tool
- Navigate to the Official NVIDIA Driver Download Page: Open your web browser and go to
www.nvidia.com/drivers. - Use the Manual Driver Search: You’ll typically find a section titled “Manual Driver Search” or similar. Here, you will input details about your system:
- Product Type: Select your NVIDIA product line (e.g., GeForce, Quadro, NVS, ION).
- Product Series: Choose the series corresponding to your GPU (e.g., GeForce RTX 40 Series, GeForce GTX 10 Series).
- Product: Select your exact GPU model (e.g., RTX 4080, GTX 1080 Ti).
- Operating System: Choose your current Windows version (e.g., Windows 11 64-bit). Ensure you select the correct architecture (64-bit or 32-bit).
- Download Type: Select “Game Ready Driver (GRD)” for gaming and general use, or “Studio Driver (SD)” for content creation and professional applications requiring maximum stability and compatibility with creative suites.
- Search and Verify: Click “Search.” The website will present the latest recommended driver. Review the driver version, release date, and supported products to ensure it matches your requirements.
- Download: Click “Download” and then “Download” again on the next page to start the download of the executable file. Save it to an easily accessible location on your computer.
Pre-Installation Preparations and Best Practices
Before initiating the installation, a few preparatory steps can prevent potential issues:
- Close All Applications: Ensure all running applications, especially games or graphic-intensive software, are closed to prevent conflicts during the driver update.
- Disable Antivirus (Temporarily): While not always necessary, some antivirus programs can interfere with driver installations. Temporarily disabling it during the process can resolve unexpected errors. Remember to re-enable it immediately afterward.
- Create a Restore Point: This is a crucial digital security measure. In Windows, search for “Create a restore point” and follow the prompts. If the new driver causes unforeseen issues, you can roll back your system to this stable state.
- Uninstall Previous Drivers (Optional but Recommended for Clean Installs): While the NVIDIA installer often handles this, for a truly “clean” installation, you might consider using a utility like Display Driver Uninstaller (DDU) in Safe Mode. This thoroughly removes all remnants of previous drivers, preventing conflicts. We’ll elaborate on clean installations later.
The Installation Process: Custom vs. Express
Once the driver executable is downloaded:
- Run the Installer: Double-click the downloaded
.exefile. The installer will first extract the necessary files to a temporary location. - User Account Control (UAC): If prompted, click “Yes” to allow the installer to make changes to your device.
- License Agreement: Read and accept the NVIDIA Software License Agreement.
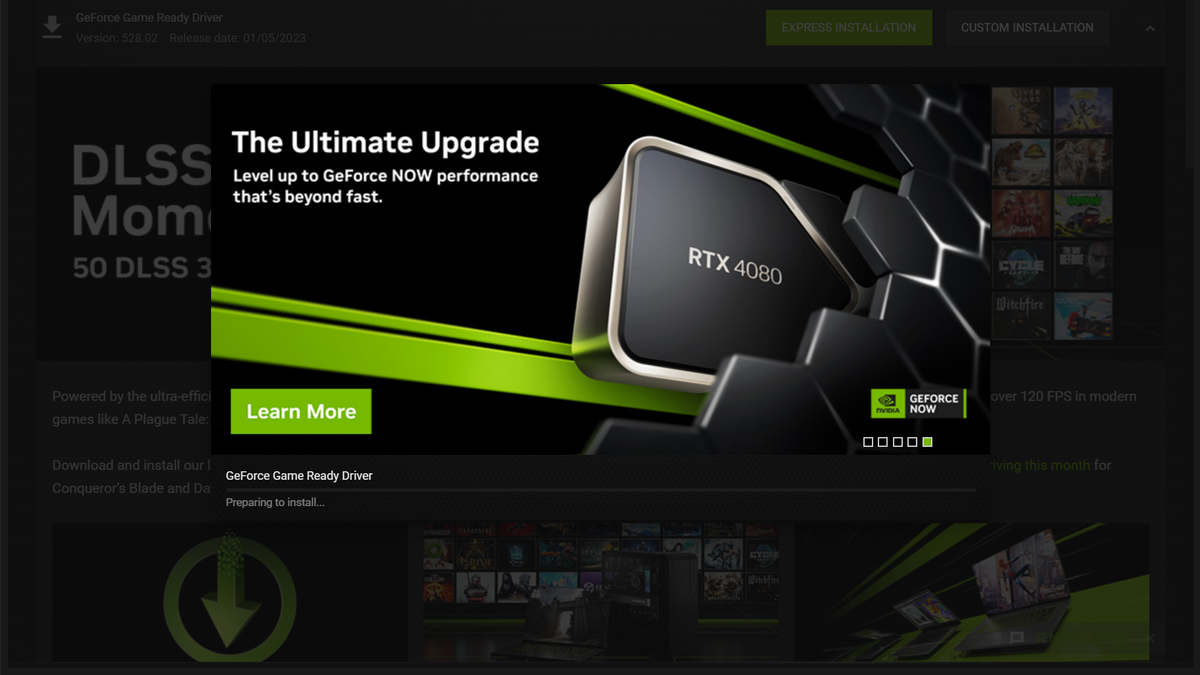
- Installation Options: This is where you choose between “Express” and “Custom” installation.
- Express Installation (Recommended for Most Users): This is the easiest option. It automatically installs the recommended driver components and typically updates your existing driver. It’s suitable for most users who just want to update without fuss.
- Custom (Advanced) Installation: This option gives you more control. Click this if you want to:
- Choose specific components to install (e.g., NVIDIA PhysX, HD Audio Driver, GeForce Experience).
- Perform a “Clean Installation.” This option is highly recommended, especially if you’ve been experiencing driver-related issues or are upgrading from a very old driver. A clean installation removes all previous NVIDIA driver components before installing the new ones, ensuring a fresh start. Tick the “Perform a clean installation” checkbox.
- Complete Installation: Follow the on-screen prompts. Your screen may flicker or temporarily go blank multiple times during the installation, which is normal as the graphics drivers are being updated.
- Restart Your System: Once the installation is complete, it is highly recommended to restart your computer, even if not explicitly prompted. This ensures all changes take effect properly.
Verifying Driver Installation
After restarting, it’s good practice to verify that the new driver has been successfully installed:
- NVIDIA Control Panel: Right-click on your desktop and select “NVIDIA Control Panel.” The installed driver version will be displayed in the bottom-left corner or under “Help” -> “System Information.”
- Device Manager: Open Device Manager (as described earlier), right-click on your NVIDIA GPU under “Display adapters,” select “Properties,” and then go to the “Driver” tab. The driver version and date should match the one you just installed.
Advanced Driver Management and Troubleshooting
While the standard download and installation process is usually straightforward, understanding advanced techniques and common troubleshooting steps can be invaluable for maintaining a robust system.
Clean Installation for Resolving Persistent Issues
A “clean installation” is more than just updating; it’s a complete refresh of your graphics drivers. As mentioned, the NVIDIA installer offers a “Perform a clean installation” option under the Custom installation path, which is usually sufficient. However, for deeply ingrained issues, some users opt for an even more thorough clean install using third-party tools like Display Driver Uninstaller (DDU).
Steps for a DDU-Assisted Clean Install:
- Download New Drivers: Download the latest NVIDIA drivers as described in the manual section, but do not install them yet.
- Download DDU: Obtain DDU from a reputable source (e.g., Wagnardsoft’s official page).
- Disconnect from Internet: This prevents Windows from automatically installing generic drivers while you’re in the process.
- Boot into Safe Mode: Restart your computer and repeatedly press the key to enter Safe Mode (often F8, F7, F12, or Shift + Restart).
- Run DDU: In Safe Mode, run DDU. Select “GPU” for device type and “NVIDIA” for the device. Choose “Clean and restart.” DDU will aggressively remove all NVIDIA driver components.
- Normal Boot and Install: After the restart, your system will be running on basic display drivers. Install the NVIDIA drivers you downloaded earlier.
- Reconnect Internet: After installation and another recommended restart, reconnect to the internet.
This rigorous method is particularly effective for resolving persistent performance problems, display issues, or error messages that standard updates couldn’t fix.
Rolling Back Drivers to Previous Versions
Sometimes, a newly installed driver might introduce unforeseen bugs or performance regressions with specific applications or games. In such scenarios, knowing how to roll back to a previous, stable driver version is a critical troubleshooting skill.
- Via Device Manager:
- Open Device Manager.
- Expand “Display adapters” and right-click on your NVIDIA GPU.
- Select “Properties,” then navigate to the “Driver” tab.
- If the “Roll Back Driver” button is active, click it and follow the prompts. This will revert to the driver that was installed prior to the current one.
- Manual Downgrade: If the roll-back option is unavailable or you need to revert to a specific older version, you’ll need to manually download that older driver from NVIDIA’s website (they usually keep archives of previous versions) and perform a clean installation as described above.
Common Download and Installation Hurdles
Users may encounter various issues during the driver download and installation process:
- “Installation Cannot Continue” Error: This often occurs if the installer detects an incompatible operating system, a different GPU, or if previous driver components are conflicting. Ensure your OS and GPU selection are correct, and consider a clean installation.
- Download Corruption: Incomplete or corrupted downloads can lead to installation failures. Delete the downloaded file and re-download it.
- Antivirus Interference: As mentioned, temporarily disabling antivirus can sometimes resolve installation blocks.
- Windows Update Overriding: Windows Update can sometimes automatically download and install older or generic drivers, overriding your desired NVIDIA driver. Disconnecting from the internet during a clean install or pausing Windows Updates can help.
- “No NVIDIA Hardware Detected”: This points to a deeper issue, possibly with the GPU itself, its seating in the PCIe slot, or power connections. Ensure your GPU is properly installed and powered.
Ensuring Driver Authenticity and Digital Security
Downloading drivers from unofficial sources poses significant digital security risks. Modified drivers can contain malware, spyware, or introduce critical system vulnerabilities. Always download drivers directly from NVIDIA’s official website or through their GeForce Experience software. These sources provide digitally signed drivers, guaranteeing their authenticity and integrity. Regularly updating drivers also contributes to digital security by patching known vulnerabilities that might exist in older software versions.
Best Practices for Ongoing Driver Maintenance
Maintaining your NVIDIA drivers isn’t a one-time task; it’s an ongoing commitment that pays dividends in performance, stability, and security.
Establishing a Regular Update Schedule
While it might be tempting to “set it and forget it,” NVIDIA frequently releases driver updates. For gamers, staying current with Game Ready Drivers is crucial for optimal performance in new titles. For creative professionals, Studio Drivers provide enhanced stability and compatibility with demanding applications. A sensible approach is to:
- Check monthly: Make it a habit to check for new drivers via GeForce Experience or the NVIDIA website at least once a month.
- Prioritize critical updates: Pay attention to release notes that mention significant performance improvements, bug fixes for issues you’re experiencing, or security patches.
- Avoid “day one” updates (for professionals): While gamers often jump on new Game Ready Drivers, creative professionals might wait a few days or weeks to ensure stability before updating, as new drivers can sometimes introduce unforeseen issues with niche software.
Monitoring System Performance After Updates
After every driver update, take a moment to monitor your system’s behavior.
- Run benchmarks: If you’re a gamer, test your favorite titles to confirm performance improvements or detect any regressions.
- Test core applications: For professionals, open your primary creative software (e.g., Adobe Premiere, Blender) and perform typical tasks to ensure stability and functionality.
- Observe general system responsiveness: Pay attention to boot times, application loading, and overall system fluidity. Report any significant issues to NVIDIA’s support forums, as your feedback can contribute to future driver improvements.
The Synergy of Drivers and System Stability
Ultimately, a well-managed NVIDIA driver ecosystem contributes significantly to overall system stability and a seamless computing experience. It’s a key component in a holistic approach to system maintenance, working in synergy with regular operating system updates, hardware health checks, and a robust cybersecurity posture. By understanding the “how-to” of downloading NVIDIA drivers and adopting these best practices, users empower themselves to unlock the full potential of their NVIDIA graphics hardware, ensuring their digital endeavors, whether for work or play, are always powered by optimal performance and unwavering reliability.
aViewFromTheCave is a participant in the Amazon Services LLC Associates Program, an affiliate advertising program designed to provide a means for sites to earn advertising fees by advertising and linking to Amazon.com. Amazon, the Amazon logo, AmazonSupply, and the AmazonSupply logo are trademarks of Amazon.com, Inc. or its affiliates. As an Amazon Associate we earn affiliate commissions from qualifying purchases.