In the dynamic world of technology, where every click counts and system performance is paramount, a slow, sluggish, or glitch-prone computer can quickly become a significant source of frustration, hindering both productivity and enjoyment. Whether your PC has been a trusty companion for years, gradually accumulating digital clutter, or you’re encountering persistent software issues that defy conventional troubleshooting, the solution often lies in a powerful, yet frequently overlooked, procedure: a fresh installation of Windows 10.
This comprehensive guide is designed to empower you with the knowledge and confidence to perform a clean install of Windows 10. Far more than just a quick fix, a fresh installation is akin to giving your computer a complete overhaul, wiping the slate clean to restore it to its pristine, out-of-the-box performance. For many, this process dramatically improves speed, stability, and security, effectively transforming an aging machine into a responsive powerhouse once more.
We’ll walk you through every critical step, from the essential pre-installation preparations—like backing up your invaluable data and gathering necessary tools—to the detailed, click-by-click instructions for the installation itself, and finally, the crucial post-installation optimizations. Whether you’re a tech-savvy enthusiast looking to streamline your system or a beginner seeking a reliable fix for a problematic PC, this article will equip you with all you need to breathe new life into your Windows 10 device, ensuring it runs smoothly, securely, and efficiently. Prepare to reclaim your computer’s full potential and enhance your digital experience.
Why a Fresh Windows 10 Install is a Game Changer for Your PC
Over time, even the most robust operating systems can succumb to the digital equivalent of wear and tear. A fresh Windows 10 install isn’t merely about reinstalling software; it’s a strategic move that delivers a multitude of benefits, fundamentally altering your computing experience for the better. Understanding these advantages can help you appreciate why this procedure, while seemingly daunting, is often the most effective solution for various PC woes.
Reclaiming Performance and Speed
One of the most immediate and noticeable benefits of a fresh Windows 10 installation is the dramatic improvement in system performance and speed. As you use your computer, it accumulates temporary files, fragmented data, leftover registry entries from uninstalled programs, and various other forms of digital detritus. This accumulation, often referred to as “digital cruft,” can significantly slow down boot times, application launches, and overall system responsiveness. By wiping your primary drive clean and reinstalling the OS, you eliminate all this accumulated baggage, allowing Windows to operate on a pristine foundation. This results in snappier performance, faster load times, and a smoother user experience, making your PC feel brand new again.
Eliminating Bloatware and Unnecessary Programs
Many commercially purchased computers come pre-loaded with an array of manufacturer-installed software, often referred to as “bloatware.” While some of these programs might be useful, many are trial versions, redundant utilities, or applications you simply don’t need or want. This bloatware consumes valuable system resources, clogs up your startup processes, and can even compromise performance. A fresh Windows 10 install allows you to sidestep this issue entirely. You get a clean slate, installing only the essential operating system components and then selectively adding the software you truly need. This gives you complete control over your system, ensuring that every installed application serves a purpose and doesn’t needlessly drain resources.
Resolving Persistent Software Glitches and Errors
If your Windows 10 system is plagued by recurring crashes, freezing, inexplicable error messages, or driver conflicts that seem impossible to resolve, a fresh install can be the ultimate troubleshooting tool. These persistent issues often stem from corrupted system files, deeply embedded malware that conventional antivirus might miss, or conflicts between various software components. Rather than spending countless hours trying to diagnose and fix these elusive problems, a clean installation offers a comprehensive reset. It replaces all core system files, drivers, and settings with fresh, uncorrupted versions, effectively eradicating the root causes of many frustrating software glitches and restoring stability to your system.
Enhanced Security and Stability
A clean install fortifies your system’s digital security posture. Over time, malicious software, even after removal, can leave remnants behind, potentially creating vulnerabilities. Obsolete drivers and unpatched applications can also expose your system to risks. By starting fresh, you ensure that your operating system is built on the most current and secure foundation. You’ll then immediately apply the latest Windows updates, which include critical security patches, and install only trusted, up-to-date software. This proactive approach significantly reduces your exposure to malware, viruses, and other cyber threats, contributing to a more stable and secure computing environment from day one.
Preparing for a Major Upgrade (e.g., Windows 11 Consideration)
While this guide focuses on Windows 10, performing a clean install can also be an excellent preparatory step if you’re considering a future upgrade to Windows 11 or another major OS version. Starting with a clean, optimized Windows 10 system ensures that your hardware and software environment is in the best possible state for a smooth transition. It eliminates any underlying issues that might complicate an in-place upgrade, providing a more reliable foundation for the next iteration of your operating system. Even if you plan to stick with Windows 10, a clean install ensures your current OS is running at its peak, ready for any future demands.
Essential Preparations Before You Begin
Embarking on a fresh Windows 10 installation is a significant undertaking that, while highly beneficial, involves deleting everything on your system drive. Therefore, meticulous preparation is not just recommended, it’s absolutely critical. Skipping these preparatory steps can lead to permanent data loss, frustration, and delays. Think of this as laying a solid foundation before building a house—it ensures the entire process is smooth, secure, and successful.
Back Up Your Important Data
This is arguably the single most important step in the entire process. A fresh install will erase everything on the drive where Windows 10 is installed. This includes documents, photos, videos, music, applications, browser bookmarks, and any other personal files. Do not proceed until you are absolutely certain that all your critical data is safely backed up.
- External Hard Drive: The most common and reliable method. Copy all essential folders (Documents, Pictures, Videos, Music, Desktop, Downloads) to an external drive.
- Cloud Storage: Services like Google Drive, OneDrive, Dropbox, or iCloud offer convenient ways to back up files, especially if they’re already synchronized.
- File History/Backup & Restore: Windows 10’s built-in tools can create a system image or back up specific folders to another drive.
- Application-Specific Data: Don’t forget data from specific applications, such as game saves, email archives (PST files for Outlook), or project files from creative software. Locate these folders and back them up manually.
- Browser Bookmarks: Export your browser bookmarks to an HTML file.
Double-check your backup. It’s better to be overly cautious than to regret lost memories or crucial work later.
Gather Your Product Key (If Applicable)
For a fresh install, you might need your Windows 10 product key. However, this depends on how you acquired your copy of Windows:
- Digital License: If your Windows 10 was an upgrade from Windows 7/8/8.1, or activated via an OEM, you likely have a digital license tied to your Microsoft account or hardware. In this case, you typically won’t need to enter a product key during installation; Windows will activate automatically once you connect to the internet and sign in with your Microsoft account.
- Retail Purchase: If you bought a retail copy of Windows 10, your product key will be on a sticker, in the email confirmation, or on the packaging.
- OEM (Pre-installed): For most pre-built PCs, the product key is embedded in the motherboard’s firmware and Windows will automatically detect it during installation.
- Finding Your Key: You can sometimes retrieve your existing product key using third-party tools (like ProduKey) if needed, but it’s often not required for modern installations with digital licenses.
Note down your product key and keep it safe, just in case.
Download Windows 10 Installation Media
You’ll need a bootable USB flash drive (at least 8GB) or a DVD containing the Windows 10 installation files. The easiest way to create this is using Microsoft’s official Media Creation Tool.
- Download the Tool: Go to the official Microsoft Windows 10 download page and download the “Media Creation Tool.”
- Run the Tool: Execute the downloaded file.
- Accept Terms: Agree to the license terms.
- Select Option: Choose “Create installation media (USB flash drive, DVD, or ISO file) for another PC.”
- Choose Language, Edition, and Architecture: Select your preferred options. It’s generally best to use the recommended options for your current PC.
- Select Media: Choose “USB flash drive” and select your connected USB drive from the list. Make sure it’s empty or contains no important data, as it will be formatted.
- Download and Create: The tool will download the necessary files and create the bootable USB drive. This process can take some time depending on your internet speed.
Check System Requirements and Drivers
Ensure your PC meets the minimum system requirements for Windows 10 (1 GHz processor, 1 GB RAM for 32-bit or 2 GB for 64-bit, 16 GB storage for 32-bit or 32 GB for 64-bit, DirectX 9 graphics card). While most modern PCs will easily surpass these, it’s a good check.
More importantly, identify and download essential drivers for your specific hardware before you start the installation.
- Network Drivers: This is crucial. If your Wi-Fi or Ethernet drivers aren’t automatically recognized by Windows 10, you won’t be able to connect to the internet to download other drivers or updates. Download these from your motherboard manufacturer’s website (for custom builds) or your PC manufacturer’s support page (for pre-built systems) and save them to your backup drive or a separate USB stick.
- Graphics Card Drivers: For optimal display performance, have your dedicated graphics card drivers (NVIDIA, AMD) ready.
- Chipset Drivers: Important for overall system stability and performance.
Having these drivers pre-downloaded saves you a lot of hassle post-installation.
Power Supply and Internet Connection
Ensure your laptop is fully charged or your desktop is connected to a stable power source. An unexpected power outage during installation can corrupt your drive and necessitate restarting the entire process, potentially causing further complications. While a stable internet connection isn’t strictly necessary during the initial installation phase, it will be vital shortly after for updates and driver downloads. If possible, use an Ethernet connection for reliability during post-installation setup.
By diligently completing these preparatory steps, you’ll set yourself up for a smooth, stress-free, and ultimately successful fresh Windows 10 installation, paving the way for a revitalized computing experience.
Step-by-Step Guide to Your Fresh Windows 10 Installation
With your preparations complete, it’s time to dive into the core process of installing Windows 10. This section will guide you through each stage, from booting your computer to the initial setup, ensuring you navigate the installer with confidence and precision. Remember, patience is key, and following these steps carefully will lead to a successful refresh of your system.
Creating the Bootable USB Drive (Using Media Creation Tool)
As covered in the preparation section, this is your primary tool. If you haven’t done so already:
- Download the Media Creation Tool from Microsoft’s official website.
- Insert a USB flash drive (at least 8GB) into your computer. Ensure it contains no data you wish to keep, as it will be formatted.
- Run the Media Creation Tool. Accept the license terms.
- Select the option “Create installation media (USB flash drive, DVD, or ISO file) for another PC.”
- Choose your language, edition, and architecture (64-bit is most common for modern PCs). You can often just leave “Use the recommended options for this PC” checked.
- On the next screen, select “USB flash drive” and then choose your specific USB drive from the list.
- Click “Next” and wait for the tool to download Windows 10 and write it to your USB drive. This can take some time. Once complete, you’ll have your bootable installation media.
Booting from Your Installation Media
This step tells your computer to start from the USB drive instead of your hard drive.
- Insert the bootable USB drive into your computer.
- Restart your computer.
- Access your BIOS/UEFI firmware settings. As your computer starts up, you’ll need to press a specific key repeatedly (e.g., F2, F10, F12, DEL, ESC). The key varies by manufacturer and model; look for a message on the screen during startup, like “Press DEL to enter Setup” or “Press F12 for Boot Menu.”
- Change the boot order:
- Option A (Boot Menu): If you can access a “Boot Menu” (often F12), select your USB drive directly from the list. This is usually the easiest method as it’s a one-time boot override.
- Option B (BIOS/UEFI Settings): Navigate to the “Boot” tab or section within the BIOS/UEFI settings. Reorder the boot devices so that your USB drive (often listed as “USB HDD” or the drive’s brand name) is prioritized above your main hard drive. Save changes and exit (usually F10).
- Secure Boot/CSM: On some newer UEFI systems, you might need to temporarily disable “Secure Boot” or enable “CSM” (Compatibility Support Module) if you encounter issues booting from the USB. Remember to re-enable Secure Boot after installation for enhanced security.
Your computer should now boot from the USB drive, and you’ll see the Windows setup loading screen.

The Windows Setup Wizard: Initial Steps
Once booted, the Windows 10 setup wizard will begin.
- Language, Time, and Keyboard: On the first screen, select your preferred language, time and currency format, and keyboard input method. Click “Next.”
- Install Now: Click the prominent “Install now” button.
Entering Your Product Key and Choosing Edition
- Product Key: The setup might ask for your product key.
- If you have one, enter it now.
- If your system has a digital license tied to your Microsoft account or embedded in the hardware (common for upgraded or OEM systems), you can click “I don’t have a product key.” Windows will typically activate automatically once you connect to the internet after installation.
- Choose Operating System (if applicable): If your product key covers multiple editions (e.g., Home and Pro) or you skipped the key, you might be asked to select the edition of Windows 10 you want to install. Choose the version you are licensed for. Click “Next.”
Accepting License Terms
Read through the Microsoft Software License Terms. If you agree, check the box “I accept the license terms” and click “Next.” This is a mandatory step to proceed.
Choosing Installation Type: “Custom: Install Windows only (advanced)”
This is a critical juncture for a fresh install.
- You will be presented with two options: “Upgrade: Install Windows and keep files, settings, and applications” or “Custom: Install Windows only (advanced).”
- Select “Custom: Install Windows only (advanced).” This option allows you to manage partitions and perform a clean installation by formatting your drive. Choosing “Upgrade” would try to keep your old system intact, which defeats the purpose of a fresh install.
Partitioning Your Hard Drive
This is where you’ll wipe your old operating system.
- You will see a list of drives and partitions on your computer. Identify your main system drive (usually “Drive 0”). This is where your old Windows installation resides.
- Delete Existing Partitions: For a truly clean install, you should delete all partitions related to your old Windows installation. This typically includes:
- “Recovery” partitions
- “System” partitions
- The primary “Windows” partition (e.g., “Drive 0 Partition 2: Primary”)
- Be extremely careful here. Ensure you are deleting partitions only from the drive you intend to install Windows on. Do NOT delete partitions on external drives or other internal drives where you have important data.
- Result: After deleting, you should see “Drive 0 Unallocated Space.”
- Create New Partition: Select the “Unallocated Space” and click “Next.” Windows will automatically create the necessary primary, system, and recovery partitions and begin the installation. Alternatively, you can click “New” to manually create a primary partition of your desired size, then select it and click “Next.” For most users, simply selecting the unallocated space and clicking “Next” is sufficient.
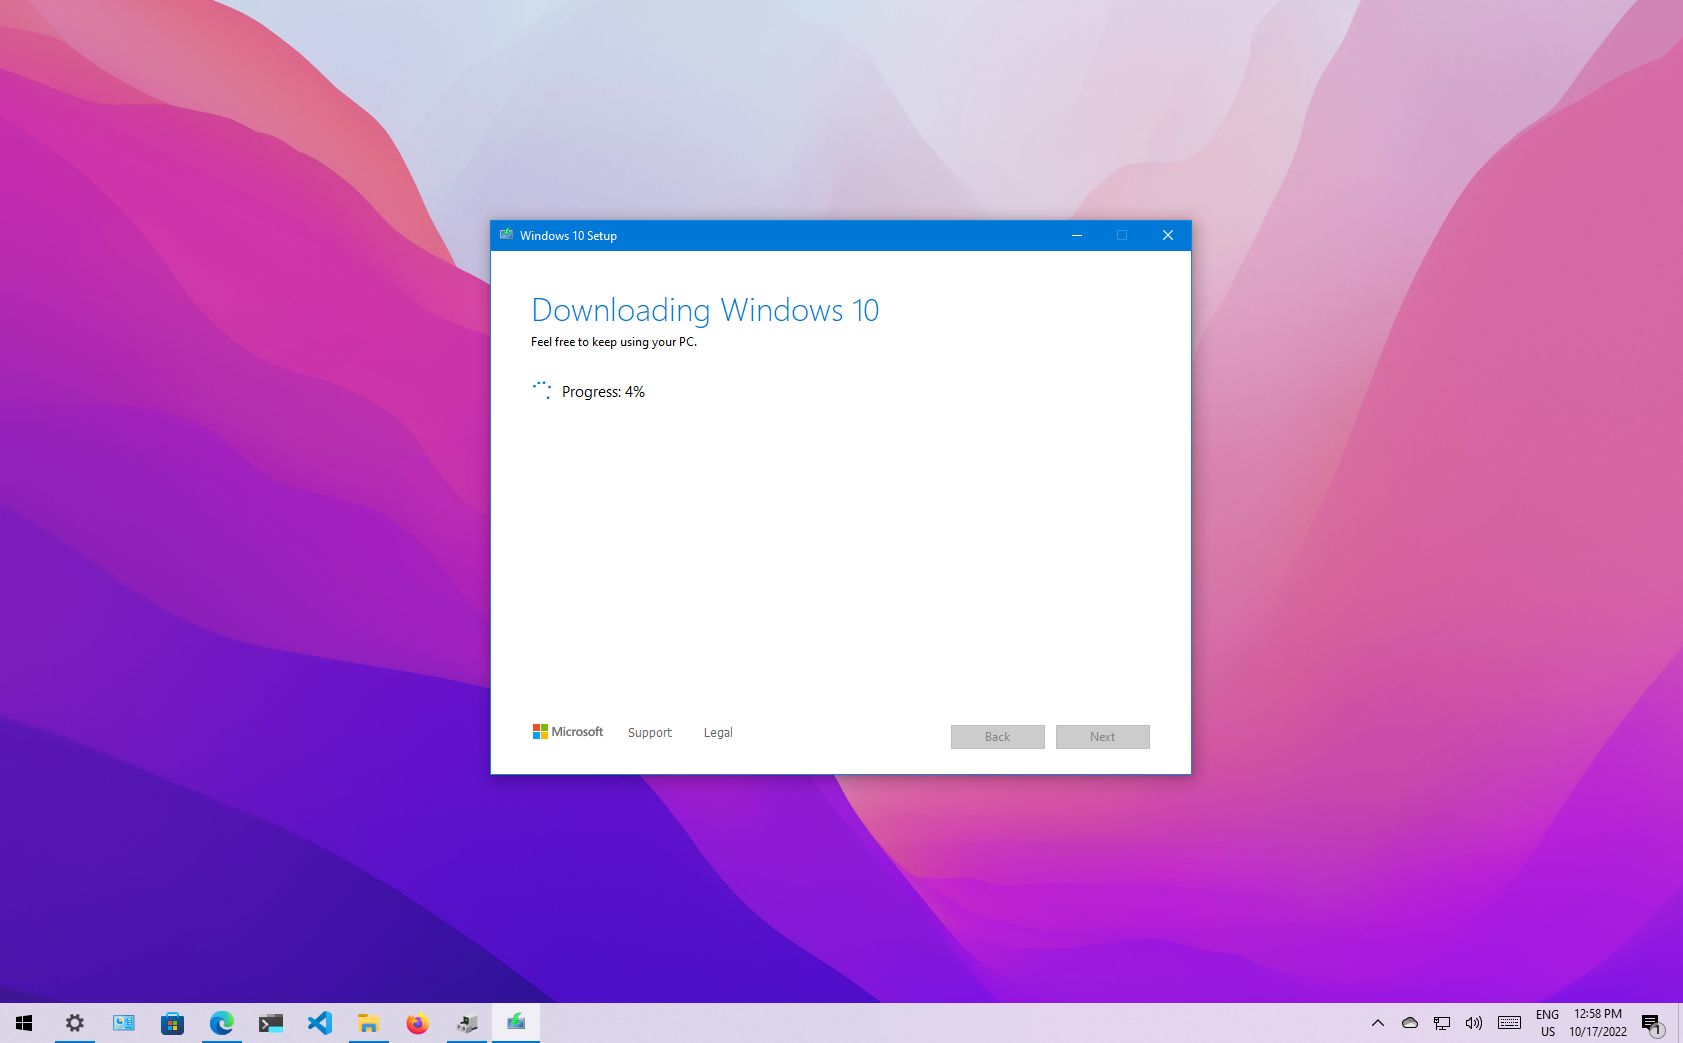
The Installation Process
Once you’ve chosen or created your partition, Windows will begin the core installation:
- Copying Windows files
- Getting files ready for installation
- Installing features
- Installing updates
- Finishing up
Your computer will restart several times during this process. Do NOT remove the USB drive until after the first major restart, when Windows begins its initial setup screens. It’s usually safe to remove it when you see the “Let’s start with region” screen.
Initial Setup and Personalization
After the installation files are copied and the system reboots, you’ll go through the Out-of-Box Experience (OOBE):
- Region: Select your country/region.
- Keyboard Layout: Choose your keyboard layout.
- Second Keyboard Layout: You can add a second layout or skip.
- Connect to a Network: Connect to your Wi-Fi or Ethernet. This is crucial for activation if you have a digital license and for downloading updates.
- Sign in with Microsoft Account: You’ll be prompted to sign in with your Microsoft account. This links your digital license for activation and syncs settings. You can often choose to create a local account instead by clicking “Offline account” or “Domain join instead” if available.
- PIN Setup: Create a PIN for faster sign-ins.
- Privacy Settings: Review and adjust your privacy settings (location, diagnostic data, tailored experiences, etc.).
- Customize Your Experience: Windows might ask about your intended use (gaming, creativity, business).
- Link Phone to PC, OneDrive, Office 365: You’ll see prompts for various Microsoft services. Accept or decline as desired.
- Cortana Setup: Choose whether to enable Cortana.
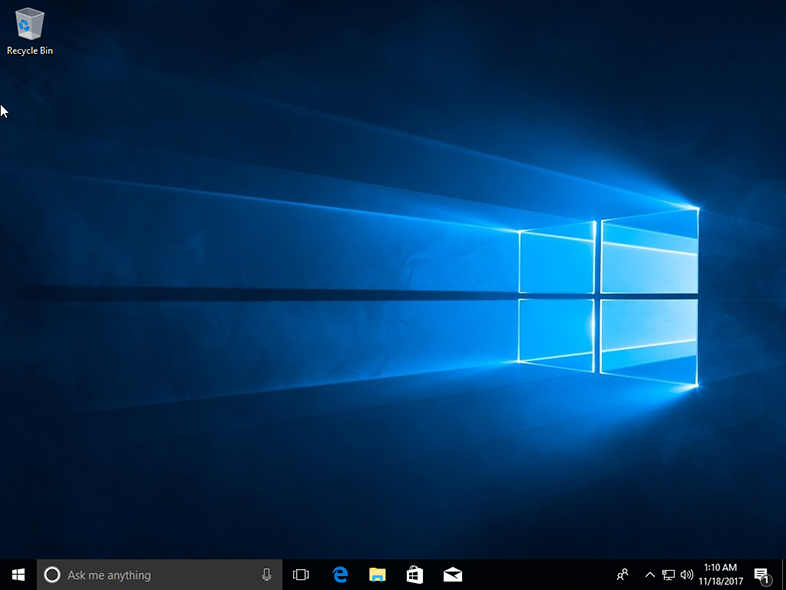
Once these steps are complete, Windows will finalize the setup, and you’ll arrive at your fresh, clean desktop. Congratulations, you’ve successfully performed a fresh Windows 10 installation! Now, proceed to the post-installation steps to get your system fully optimized.
Post-Installation Checklist: Optimizing Your Fresh System
Congratulations! You’ve successfully installed a fresh copy of Windows 10. While the core operating system is now running cleanly, your journey isn’t quite over. To ensure your PC performs optimally, is secure, and feels truly your own, there are several crucial steps to take. This post-installation checklist will guide you through getting your system fully equipped and personalized, making the most of your revitalized computing experience.
Install Essential Drivers
A fresh Windows installation often includes generic drivers that allow your hardware to function, but not necessarily at its best. Installing the latest, manufacturer-specific drivers is critical for optimal performance and stability.
- Start with Network Drivers: If you didn’t have internet connectivity immediately after installation, use the pre-downloaded network drivers (Ethernet or Wi-Fi) you saved during preparation. Install them first.
- Run Windows Update: Once connected to the internet, run Windows Update (Settings > Update & Security > Windows Update > Check for updates). Windows Update is surprisingly good at finding and installing many necessary drivers.
- Manual Driver Installation: For critical components like your graphics card (NVIDIA, AMD, Intel), motherboard chipset, and specialized peripherals, visit the manufacturer’s official website. Download and install the latest drivers specific to your hardware model and Windows 10 (64-bit or 32-bit). Always prefer drivers directly from the component manufacturer rather than generic ones.
- Device Manager Check: Open Device Manager (search for it in the Start Menu) and look for any devices with yellow exclamation marks. These indicate missing or problematic drivers. Right-click on them to attempt an automatic update or manually install the drivers you downloaded.
Run Windows Update
This is paramount for security and stability. A freshly installed Windows 10 might be several versions behind the latest build, especially if your installation media is older.
- Go to Settings > Update & Security > Windows Update.
- Click “Check for updates.”
- Download and install all available updates. Be prepared for several restarts.
- Repeat this process until no more updates are found. This ensures your system has the latest security patches, bug fixes, and feature enhancements.
Install Your Essential Software
Now that your system is stable and up-to-date, it’s time to reinstall the applications you use daily.
- Web Browser: Install your preferred web browser (Chrome, Firefox, Edge, Brave, etc.).
- Antivirus/Security Software: While Windows Defender provides robust built-in protection, if you prefer a third-party antivirus, install it now.
- Office Suite: Install Microsoft Office, LibreOffice, or your chosen productivity suite.
- Communication Tools: Zoom, Slack, Discord, Skype, etc.
- Creative/Professional Software: Photoshop, CAD software, video editors, IDEs, etc.
- Utilities: Archivers (7-Zip, WinRAR), media players (VLC), PDF readers, etc.
Consider using a tool like Ninite.com, which allows you to select multiple popular applications and install them all at once, silently and efficiently.
Restore Your Backed-Up Data
This is the step where all your meticulous backup efforts pay off.
- Connect your external hard drive or access your cloud storage.
- Copy your personal files (documents, pictures, videos, music, etc.) back to their respective folders on your new Windows 10 installation.
- Ensure you place them in the correct locations (e.g., Pictures go into the “Pictures” folder, not directly on the Desktop).
- Re-import any specific data like browser bookmarks or application-specific settings you backed up.
Customize and Personalize
Make your new Windows 10 system feel like home.
- Desktop Background and Theme: Change your desktop background, accent colors, and choose a theme (Settings > Personalization).
- Start Menu and Taskbar: Pin frequently used applications to the Start Menu and Taskbar. Adjust notifications and quick settings.
- Privacy Settings: Revisit Settings > Privacy and fine-tune your preferences for app permissions, location services, diagnostic data, and advertising ID. This is especially important for digital security and personal data control.
- Power Settings: Adjust power plans to optimize for performance or battery life (Settings > System > Power & sleep > Additional power settings).
Create a System Restore Point
As a final proactive measure, create a system restore point once your system is fully set up and running smoothly. This will allow you to revert to this stable state if future updates or software installations cause problems.
- Search for “Create a restore point” in the Start Menu and open it.
- In the System Protection tab, ensure system protection is “On” for your main drive.
- Click “Create…”
- Give the restore point a meaningful name (e.g., “Post-Clean Install Optimized”).
- Click “Create.”
By meticulously following these post-installation steps, you’ll not only have a fresh Windows 10 system but one that is also fully optimized, secure, and tailored to your specific needs. Enjoy the enhanced performance, stability, and productivity that a clean slate brings!
Performing a fresh Windows 10 install might seem like a significant undertaking, but as this guide illustrates, it’s a methodical process that offers immense rewards. By meticulously backing up your data, preparing your installation media, and following each step of the setup and post-installation optimization, you transform a potentially sluggish, glitch-ridden machine into a responsive, secure, and efficient personal computer.
This revitalization directly contributes to better productivity, minimizes digital security risks, and ensures your technology serves you, rather than hindering you. Embracing this procedure empowers you with a deeper understanding of your system and the confidence to maintain its peak performance. Your freshly installed Windows 10 is now ready to tackle your daily tasks with renewed vigor, proving that sometimes, the best upgrade is a clean start.
aViewFromTheCave is a participant in the Amazon Services LLC Associates Program, an affiliate advertising program designed to provide a means for sites to earn advertising fees by advertising and linking to Amazon.com. Amazon, the Amazon logo, AmazonSupply, and the AmazonSupply logo are trademarks of Amazon.com, Inc. or its affiliates. As an Amazon Associate we earn affiliate commissions from qualifying purchases.