The landscape of financial technology (FinTech) has undergone a radical transformation over the last decade. At the forefront of this revolution is the peer-to-peer (P2P) payment application. Among the various software solutions available to modern consumers, Venmo has emerged as a dominant force in the mobile payment sector. This application does more than just move money; it integrates social networking elements with robust financial encryption to create a seamless user experience. Understanding how to create a Venmo account is the first step in leveraging this sophisticated piece of software to streamline your digital transactions.
In this guide, we will delve into the technical nuances of the Venmo ecosystem, providing a detailed walkthrough of the installation, configuration, and security optimization required to master this digital tool.
1. Getting Started with the Venmo Ecosystem: Software and System Requirements
Before diving into the registration process, it is essential to understand the technical environment required for Venmo to operate efficiently. Venmo is not just a website; it is a mobile-first application designed for the high-velocity world of smartphone interactions.
Device Compatibility and OS Requirements
Venmo is engineered to run on both iOS and Android platforms, but it requires relatively modern operating systems to ensure that security patches and UI components function correctly. For iPhone users, the application generally requires iOS 13.0 or later. Android users should ideally be running version 5.0 (Lollipop) or higher.
The software architecture relies heavily on real-time data synchronization. If you are using an older device with limited RAM, you may experience latency during the “Handshake” process between the app and the server. Ensuring your device has at least 2GB of available RAM and sufficient storage space for cached data will result in a smoother interface transition.
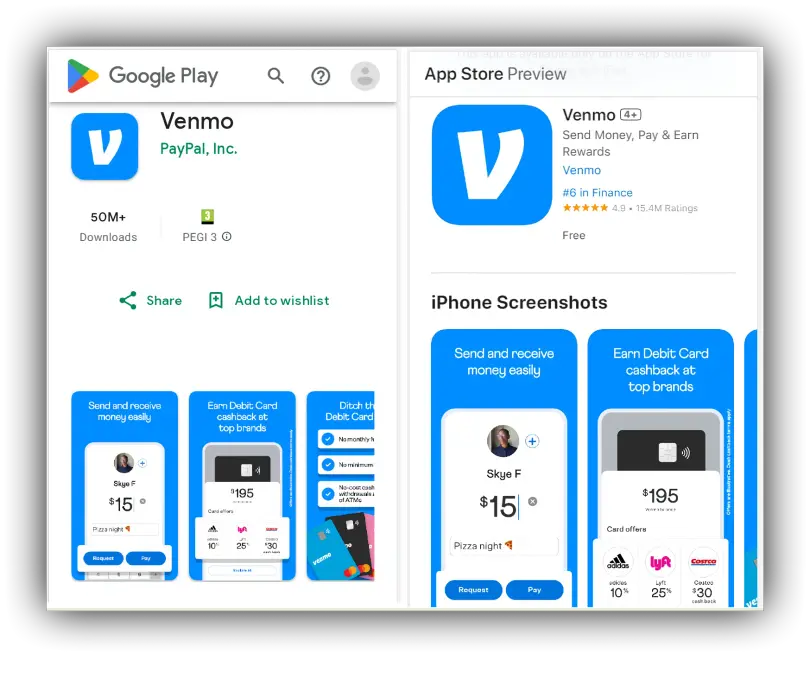
Initial Download and App Permissions
The first technical step is downloading the software from the Apple App Store or Google Play Store. During the installation phase, the OS will prompt you for several permissions. From a technical standpoint, these permissions are critical for the app’s functionality:
- Location Services: Used to detect and prevent fraudulent logins from unauthorized geographic regions.
- Contacts Access: Allows the app’s algorithm to map your social graph, making it easier to find “Nodes” (other users) within the network.
- Camera Access: Essential for scanning QR codes, a feature that utilizes image recognition technology to facilitate touchless payments.
2. The Step-by-Step Configuration Process: Technical Walkthrough
Once the software is installed, the configuration phase begins. This is where the user creates their digital identity within the Venmo database.
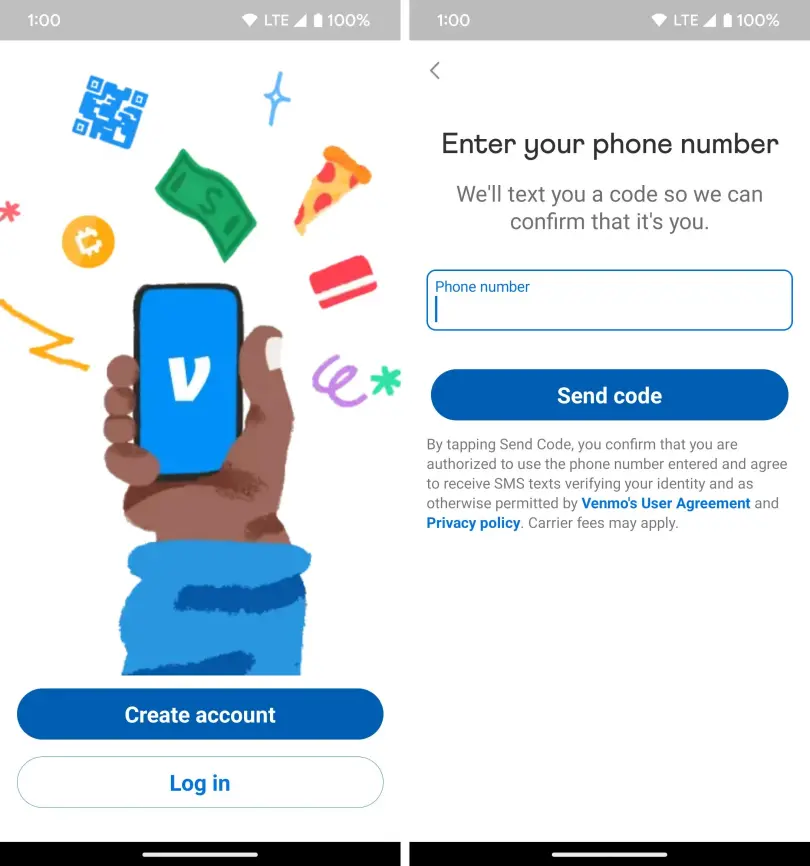
Registering Your Credentials
When you launch the app, you are met with the “Sign Up” interface. You have the choice between a Personal account and a Business account. For most users, the Personal software suite is sufficient.
The technical registration requires a valid email address and a US-based mobile phone number. Venmo utilizes a “Phone-as-Identity” model. This means your mobile number serves as a primary key in their database. You must provide a number that can receive SMS, as the system will trigger a short-code verification process. This “One-Time Password” (OTP) is a foundational layer of digital security, ensuring that the person creating the account actually possesses the hardware associated with the phone number.
Multi-Factor Authentication (MFA) Setup
In the modern tech landscape, a simple password is no longer an adequate defense. Venmo mandates Multi-Factor Authentication (MFA). During the setup, you will be asked to verify your identity via a code sent to your phone.
Technically, this creates a cryptographic bond between your account and your device. When you log in from a new IP address or a different device ID, the software’s security protocol will trigger a “Challenge-Response” mechanism. It is highly recommended to use a complex alphanumeric password that has not been recycled from other platforms to prevent “Credential Stuffing” attacks.
3. Bridging the Digital and Physical: Financial Integration
A digital wallet is only useful if it is integrated with the traditional banking infrastructure. This section explores how Venmo bridges the gap between software and legacy financial systems.
Linking Banks via Plaid and Instant Verification
Venmo utilizes third-party APIs (Application Programming Interfaces) like Plaid to connect to your bank account securely. When you opt to link a bank, you are not giving Venmo your bank password; instead, you are using an “OAuth” (Open Authorization) process.
Plaid acts as a secure tunnel. You log into your bank through the Plaid interface, which then provides Venmo with a “Token.” This token allows Venmo to request funds without ever seeing or storing your actual banking credentials. If your bank is not supported by the Plaid API, you can use the manual “Micro-Deposit” method. This involves Venmo sending two small transactions (under $1.00) to your account. You then enter these values into the app to prove ownership—a classic technical verification method for legacy banking.
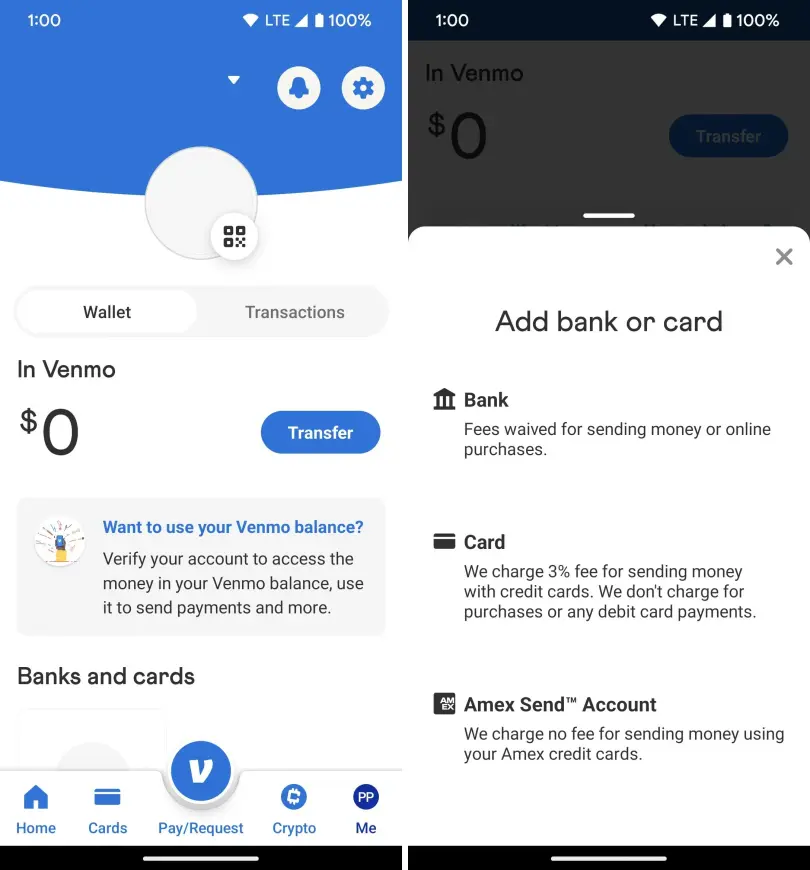
Managing Card Protocols: Credit vs. Debit
From a software processing perspective, there is a significant difference between linking a debit card and a credit card. Debit cards are processed via the “ACH” (Automated Clearing House) network or real-time debit rails, usually resulting in no fees for the user.
Credit cards, however, incur a 3% processing fee. This is because credit card transactions involve a more complex chain of intermediaries, including the issuing bank, the acquiring bank, and the card network (Visa/Mastercard). The Venmo software UI clearly distinguishes these, and users should be aware that the “Tech Stack” for credit processing is more costly to maintain, which is why the fee is passed to the user.
4. Enhancing User Privacy and Digital Security
One of the unique aspects of Venmo’s software design is its social feed. However, for the security-conscious tech user, configuring privacy settings is the most important part of account creation.
Configuring Transaction Privacy Levels
Venmo’s default setting is often “Public,” which displays transaction memos (though not amounts) to a global feed. From a data privacy standpoint, this can lead to “Social Engineering” risks where malicious actors gather information about your habits.
To optimize your account’s privacy, navigate to the Settings > Privacy menu. Here, you can toggle your default privacy setting to “Private.” In the backend, this changes the permissions of your transaction data, ensuring that only you and the recipient can see the record in the ledger.
Biometric Locks and Security Tokens
To prevent unauthorized physical access to the app, Venmo supports biometric authentication. Whether your device uses “FaceID” (3D facial mapping) or “TouchID” (capacitive fingerprint sensing), you should enable this in the app’s security settings.
When enabled, the software requires a biometric handshake before the UI unlocks. This adds a layer of “Local Encryption” to the app. Even if your phone is unlocked and stolen, the Venmo application remains a secure vault. Furthermore, you can enable “Security Alerts,” which push real-time notifications to your device whenever a “Write” operation (like a password change or a large transfer) occurs on your account.
5. Navigating the Social Interface and Advanced App Features
The final stage of setting up your account is familiarizing yourself with the User Interface (UI) and the advanced features that make Venmo a versatile tool.
The Dynamics of the Social Feed
The Venmo UI is divided into several tabs. The “Global Feed” shows public transactions, while the “Friends Feed” shows activities from your synced contacts. The “Personal Feed” is your private ledger.
Understanding the “Memos” feature is part of the Venmo tech culture. Memos allow for the attachment of emojis and text to a transaction. Behind the scenes, these are stored as metadata attached to the transaction ID. While they seem playful, they are actually useful for categorizing your digital spending when you export your data for accounting purposes.
Integrating Venmo with Third-Party E-commerce Apps
As you become more comfortable with the software, you may notice that Venmo can be linked to other apps like Uber, Grubhub, or various Shopify-powered stores. This is made possible through “Deep Linking” and “API Integration.”
When you authorize Venmo as a payment method in a third-party app, you are creating a “Billing Agreement.” This allows the third-party software to ping the Venmo API for a specific amount during checkout. This ecosystem approach is what makes Venmo more than just a P2P app—it is a comprehensive digital payment gateway.
Conclusion
Creating a Venmo account is a straightforward process, but doing it with a “Tech-First” mindset ensures that your data is secure and your user experience is optimized. By understanding the underlying software requirements, the importance of MFA, the security of API-based bank linking, and the nuances of privacy settings, you transform from a passive user into a master of the digital wallet.
As the FinTech world continues to evolve, staying updated on app versions and security protocols will ensure that your Venmo account remains a reliable and efficient tool for the digital age. Whether you are splitting a dinner bill or paying a freelance contractor, you now possess the technical foundation to navigate the Venmo interface with confidence and precision.
aViewFromTheCave is a participant in the Amazon Services LLC Associates Program, an affiliate advertising program designed to provide a means for sites to earn advertising fees by advertising and linking to Amazon.com. Amazon, the Amazon logo, AmazonSupply, and the AmazonSupply logo are trademarks of Amazon.com, Inc. or its affiliates. As an Amazon Associate we earn affiliate commissions from qualifying purchases.