In the ever-evolving landscape of technology, maintaining an optimal computing environment is paramount for productivity, security, and overall user experience. Over time, even the most robust operating systems can accumulate digital clutter, experience performance degradation, or fall prey to persistent issues that defy conventional troubleshooting. This is where the practice of a “clean install” of Windows 10 becomes an invaluable tool. Far from a mere reinstallation, a clean install is akin to giving your computer a complete overhaul, wiping the slate clean to build a fresh, optimized foundation.
This comprehensive guide will walk you through every step of performing a clean installation of Windows 10. We’ll delve into why you might choose this path, the critical preparations needed, the precise method for creating your installation media, the nuances of navigating your system’s firmware, the step-by-step installation process itself, and finally, the essential post-installation tasks to get your system running flawlessly. By the end of this article, you’ll be equipped with the knowledge to rejuvenate your Windows 10 PC, ensuring a snappier, more secure, and thoroughly optimized digital workspace.

The Unrivaled Benefits of a Fresh Start
A clean installation of Windows 10 is more than just a software reset; it’s a strategic move that can dramatically enhance your computer’s performance and longevity. Unlike an upgrade or an in-place repair, a clean install erases everything on your primary drive, reinstalling the operating system from scratch. This radical approach yields a multitude of benefits that are often unattainable through simpler troubleshooting methods.
Why Opt for a Clean Install?
The primary allure of a clean install lies in its ability to strip away layers of accumulated digital debris, addressing issues at their root cause.
- Eliminates Bloatware and Unnecessary Software: Many new computers come pre-loaded with trial software, manufacturer utilities, and third-party applications that consume system resources and often go unused. A clean install allows you to start with a pristine Windows environment, installing only the software you genuinely need, thereby freeing up valuable RAM and CPU cycles.
- Resolves Persistent Performance Issues: Over months or years of use, Windows can become sluggish due to fragmented files, corrupted system entries, conflicting software, or poorly uninstalled applications leaving remnants behind. A clean install wipes away these cumulative issues, restoring your system to its original, out-of-the-box responsiveness and speed.
- Eradicates Stubborn Malware and Viruses: While antivirus software is essential, some deeply embedded malware or rootkits can be incredibly difficult to remove entirely, even with advanced tools. A clean install offers the ultimate solution, ensuring that no malicious code survives the complete reformatting of your drive.
- Provides an Optimized Operating Environment: Starting fresh ensures that Windows 10 is installed on a properly formatted and defragmented drive, with all system files in their ideal locations. This foundational integrity contributes to greater system stability and efficiency.
- Ideal for New Hardware and Major Upgrades: If you’re installing a new Solid State Drive (SSD) or Hard Disk Drive (HDD), a clean install is the only way to get Windows onto it. Similarly, after significant hardware changes like a new motherboard or CPU, a clean install often resolves potential driver conflicts or compatibility issues that might arise from an older OS installation.
- Ensures Maximum System Responsiveness and Efficiency: With no background processes hogging resources and a minimal number of startup items, your system will boot faster, launch applications quicker, and generally feel more agile.
When is a Clean Install Necessary?
While the benefits are clear, a clean install isn’t an everyday task. It’s typically reserved for specific scenarios where other solutions have fallen short or a complete refresh is desired.
- Unresolved System Instability: If your computer frequently crashes, freezes, displays Blue Screens of Death (BSODs), or exhibits inexplicable errors that conventional troubleshooting, updates, and driver reinstallations fail to fix.
- Significant Hardware Changes: After upgrading your motherboard, processor, or even your primary storage drive, a clean installation is often recommended to ensure full compatibility and driver optimization for the new components.
- Accumulated Digital Clutter: If your system has slowed down considerably over years of use, with numerous programs installed and uninstalled, leaving behind traces that impact performance.
- Preparing for Resale or Donation: Before selling or giving away your computer, a clean install ensures that all your personal data is securely erased, protecting your privacy.
- Persistent Software or Driver Conflicts: When specific applications consistently crash or drivers cause system-wide issues that cannot be isolated or resolved otherwise.
- Suspected Deep-Rooted Malware: If you suspect a serious, persistent malware infection that your antivirus software cannot completely remove.
Pre-Installation Essentials: Gathering Your Digital Toolkit
Embarking on a clean installation requires meticulous preparation. Skipping these crucial preliminary steps can lead to data loss, frustrating delays, or an incomplete setup. Think of this phase as gathering all your necessary tools before beginning a complex project.
I. Back Up Your Precious Data
This is the most critical step. A clean install will erase everything on the drive where Windows is installed. If you don’t back up your data, it will be irrecoverably lost.
- Emphasize the Critical Importance: Every document, picture, video, music file, download, and desktop item on your C: drive will be gone.
- Recommended Backup Methods:
- External Hard Drive: The most common and reliable method. Simply copy and paste your important folders (Documents, Pictures, Videos, Music, Downloads, Desktop) to an external drive.
- Cloud Storage: Services like OneDrive, Google Drive, Dropbox, or Apple iCloud offer convenient off-site backups. Ensure you have enough storage space and a stable internet connection for uploads.
- Network Attached Storage (NAS): If you have a home server or NAS, this can be an excellent way to store large amounts of data.
- Specific Items to Backup: Don’t forget browser bookmarks (export them), email archives (e.g., PST files for Outlook), game saves, custom application settings, and any specific drivers you may have downloaded previously.
- Pro Tip: If you have applications with complex configurations or licenses, consider noting them down or researching how to migrate them before proceeding.
II. Secure Your Windows 10 Product Key (If Applicable)
While many modern Windows 10 installations rely on digital licenses tied to your Microsoft account or hardware, it’s always prudent to know your product key.
- Understanding Licensing Scenarios:
- Digital License Tied to Microsoft Account: If you upgraded from Windows 7/8.1 or purchased Windows 10 directly from Microsoft, your license is likely linked to your Microsoft account. You usually won’t need a key during installation; Windows will activate automatically once you sign in.
- Digital License Tied to Hardware (OEM): If Windows 10 came pre-installed on your computer, the license is embedded in the hardware (UEFI firmware). Again, you typically won’t need to enter a key; Windows will activate itself.
- Retail Key: If you purchased a physical copy of Windows 10, the key will be on a sticker, card, or in your email receipt.
- How to Find Your Product Key:
- Command Prompt: Open Command Prompt as administrator and type:
wmic path SoftwareLicensingService get OA3xOriginalProductKey. Press Enter. - Third-Party Tools: Utilities like NirSoft ProduKey can often extract the key from your current installation.
- Check Records: Review your email confirmations, Microsoft account purchase history, or the physical sticker on your PC or product packaging.
- Command Prompt: Open Command Prompt as administrator and type:
- Reassurance: Even if you can’t find it, Windows 10 often allows you to skip the product key entry during installation, activating automatically if a digital license is detected.
III. Download Necessary Drivers
After a clean install, Windows 10 might not have all the specific drivers for your hardware, especially for network adapters (Wi-Fi/Ethernet), graphics cards, or chipsets.
- Why This is Crucial: Without network drivers, you won’t be able to connect to the internet to download other drivers or Windows updates.
- Where to Find Them: Visit your computer manufacturer’s website (for laptops/pre-built desktops) or the motherboard, graphics card, and other component manufacturers’ websites (for custom-built PCs). Download the latest drivers for your specific model.
- How to Store Them: Save these drivers onto a separate USB drive or, if there’s enough space, on the same USB drive you’ll use for the Windows 10 installation media.
IV. Prepare Your Installation Media: The Windows 10 Bootable Drive
You’ll need a bootable USB drive containing the Windows 10 installation files.
-
Requirements:
- An empty USB flash drive with at least 8GB of storage space.
- A stable internet connection to download the Windows 10 ISO.
- Another working computer if your primary PC is currently unbootable.
-
Using the Media Creation Tool (Recommended for most users): This is Microsoft’s official, easiest method.
- Go to the official Microsoft Windows 10 download page.
- Click “Download tool now” to get the Media Creation Tool.
- Run the tool, accept the license terms.
- Select “Create installation media (USB flash drive, DVD, or ISO file) for another PC” and click Next.
- Choose your language, edition (Windows 10), and architecture (64-bit or 32-bit). Most modern PCs are 64-bit.
- Select “USB flash drive” as the media to use and click Next.
- Choose your USB drive from the list. Ensure you select the correct drive, as its contents will be erased.
- Click Next and wait for the tool to download Windows 10 and create the bootable media. This can take some time depending on your internet speed.
-
Alternative: Using Rufus (For advanced users/specific needs): Rufus is a powerful utility for creating bootable USB drives, offering more control over partition schemes (MBR/GPT) and target systems (BIOS/UEFI).
- Download Rufus from its official website.
- Download the Windows 10 ISO file directly from Microsoft (you might need to use a browser that isn’t Edge/Chrome or spoof your user agent to access the ISO download directly, or use the Media Creation Tool to download just the ISO).
- Launch Rufus. Select your USB drive under “Device.”
- Click “SELECT” and browse to your downloaded Windows 10 ISO file.
- Choose the “Partition scheme” (GPT for modern UEFI systems, MBR for older BIOS systems) and “Target system” (UEFI (non-CSM) or BIOS (or UEFI-CSM)). Most modern systems use GPT/UEFI. If unsure, GPT is generally recommended for Windows 10.
- Keep other settings largely default unless you know what you’re doing.
- Click “START” and acknowledge the warning that the USB drive will be formatted. Wait for the process to complete.
Initiating the Clean Install: BIOS/UEFI & Setup Wizard
With your bootable USB drive ready, the next step is to instruct your computer to start from this drive instead of its internal hard drive. This involves entering your system’s firmware settings, commonly known as BIOS or UEFI.
I. Accessing Your System’s BIOS/UEFI Settings
The BIOS (Basic Input/Output System) or its modern successor, UEFI (Unified Extensible Firmware Interface), is the firmware that initializes your computer’s hardware before the operating system loads. You need to access it to change the boot order.
- Common Access Keys: Turn on your computer and immediately and repeatedly tap a specific key. This key varies by manufacturer:
- Dell: F2, F12
- HP: F10, Esc
- Lenovo: F1, F2, Fn+F2 (laptops)
- ASUS: Del, F2
- Acer: F2, Del
- Microsoft Surface: Volume Up button
- MSI/Gigabyte: Del
- Modern Windows 10 Method (if your PC is still bootable):
- Go to
Settings > Update & Security > Recovery. - Under “Advanced startup,” click “Restart now.”
- After the PC restarts, select
Troubleshoot > Advanced options > UEFI Firmware Settings. Then click “Restart.”
- Go to
II. Configuring Boot Order
Once in the BIOS/UEFI interface, you’ll need to find the boot options.
- Locate Boot Options: Look for tabs or menus labeled “Boot,” “Boot Order,” “Boot Priority,” or “Startup.”
- Change Boot Order: Move your USB drive (it might appear as “USB HDD,” “Removable Devices,” or by its brand name) to the top of the boot order list. This tells your computer to try booting from the USB drive first.
- Disable Secure Boot (If Necessary): Some systems, particularly older ones or those designed to boot specific OS versions, might require disabling “Secure Boot” temporarily to allow booting from non-Microsoft signed media. Re-enable it after installation.
- Save and Exit: Be sure to save your changes (usually F10 or an “Exit Saving Changes” option) and exit the BIOS/UEFI. Your computer will then restart.
III. Starting the Windows Setup
If you’ve configured the boot order correctly, your system will restart and prompt you to boot from the USB drive.
- “Press any key to boot from USB…” Prompt: You might see a message like this. Press any key quickly to proceed. If you miss it, the PC might try to boot from the internal drive; just restart and try again.
- Initial Setup Screen:
- The Windows Setup wizard will launch. Select your “Language to install,” “Time and currency format,” and “Keyboard or input method.”
- Click “Next,” then click the large “Install now” button in the center.
IV. Product Key and Edition Selection
- “Enter product key”:
- If you have a physical product key, enter it here.
- If your system has a digital license tied to your Microsoft account or hardware, click “I don’t have a product key.” Windows will typically activate automatically once it connects to the internet after installation.
- “Choose the operating system you want to install”: If your installation media contains multiple editions (e.g., Windows 10 Home and Pro), select the one you are licensed for.
V. Accepting License Terms
- Carefully read (or at least scroll through) the Microsoft Software License Terms. Check the “I accept the license terms” box and click “Next.”
The Core Installation: Partitioning Your Drive
This is the most critical stage of a clean install, where you manage your storage drives and erase previous data. Proceed with extreme caution here.
I. Choosing the Installation Type
- You will be presented with two options: “Upgrade: Install Windows and keep files, settings, and applications” or “Custom: Install Windows only (advanced).”
- Crucial Step: Select “Custom: Install Windows only (advanced).” Choosing “Upgrade” would perform an in-place upgrade, which isn’t a clean install and won’t resolve the underlying issues you’re trying to fix.
II. Deleting and Formatting Partitions
This is where the “clean” aspect of the installation truly happens. You will see a list of partitions on your hard drive(s).
- Identify Your Primary Drive: Be absolutely certain you are selecting the correct drive, especially if you have multiple drives installed. The drive where Windows was previously installed is usually the largest partition on “Drive 0.” If you’re installing on a brand-new drive, it will likely show as “Drive 0 Unallocated Space.”
- Process for Erasing Data:
- Select each existing partition on the target drive (e.g., “System Reserved,” “Primary,” “Recovery,” “OEM”) one by one.
- Click “Delete” for each partition. You’ll be warned that the partition might contain recovery files or other important data. Confirm by clicking “OK.”
- Repeat this process until the entire drive is shown as “Drive X Unallocated Space” (e.g., “Drive 0 Unallocated Space”).
- Creating a New Partition (Recommended):
- Select the “Unallocated Space” on your target drive.
- Click “New.” You can adjust the size if you want to create multiple partitions (e.g., one for Windows and one for data), but for most users, simply click “Apply” to use the maximum available space.
- Windows will automatically create additional small partitions for system reserved files.
- Formatting: Select the largest newly created primary partition (e.g., “Drive 0 Partition 2” or whatever the system automatically created for the main OS drive). Click “Format.” This finalizes the process of preparing the drive.
- Click “Next”: With the primary partition selected and formatted, click “Next” to begin the actual installation of Windows 10.
III. Windows Installation Progress
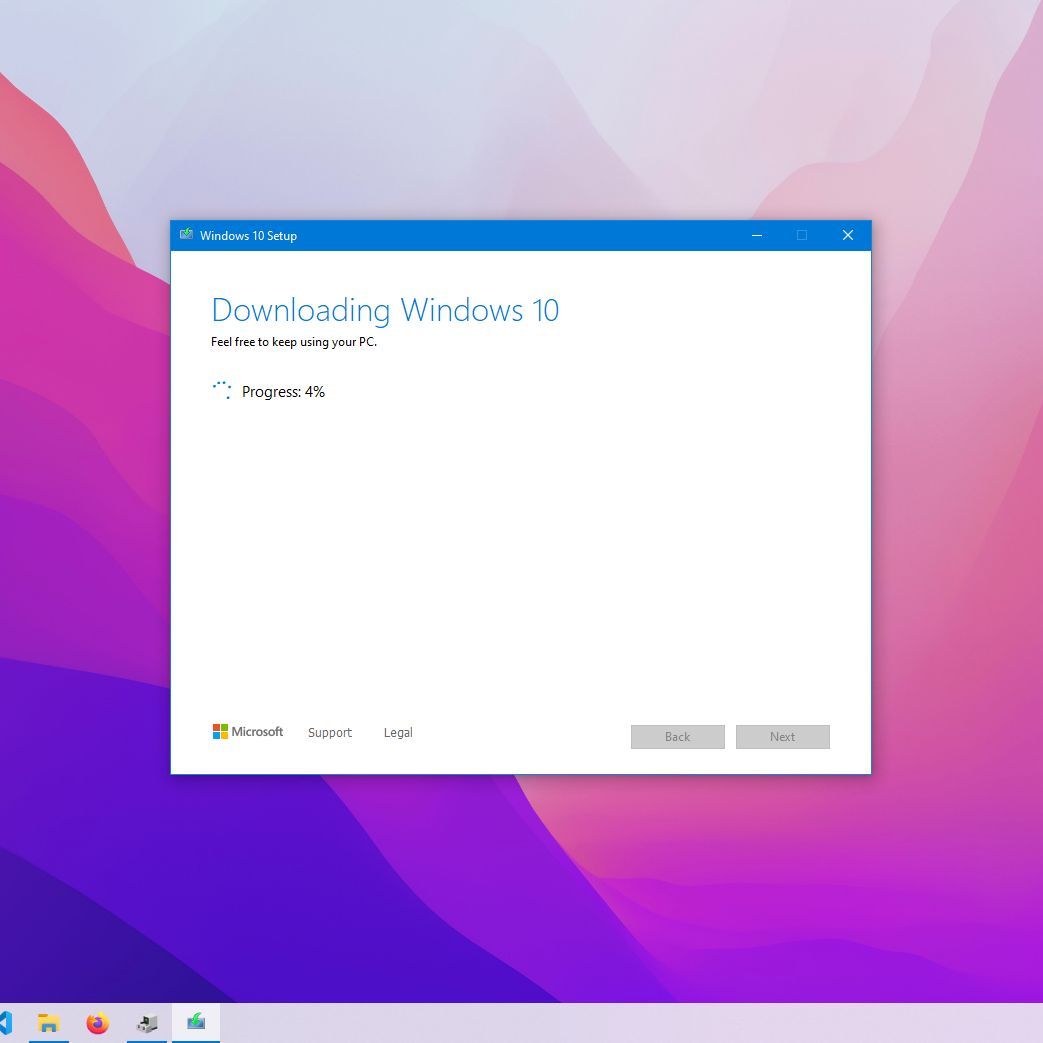
The setup wizard will now copy files, install features, and download updates.
- Wait Patiently: This phase will take some time, and your computer will restart multiple times.
- When to Remove USB: It is generally safe to remove the USB installation drive after the first major restart, when the system reboots and the Windows 10 setup process resumes (often with a “Getting things ready” screen). Leaving it in for too long might cause the PC to boot back into the installer instead of the new Windows installation.
Post-Installation Protocol: Optimizing Your New System
Congratulations! Windows 10 is now installed. However, the process isn’t complete. There are several vital steps to take to ensure your system is fully functional, secure, and personalized.
I. Initial Setup: Personalization and Privacy
After the final restarts, you’ll be greeted by the Out-of-Box Experience (OOBE), where you configure basic settings.
- Region and Keyboard Layout: Confirm your country/region and keyboard layout.
- Network Connection: Connect to your Wi-Fi network or plug in an Ethernet cable. This is essential for activation and updates.
- Microsoft Account vs. Local Account:
- Microsoft Account: Recommended for seamless integration with OneDrive, Microsoft Store, and settings synchronization across devices.
- Local Account: If you prefer not to link your PC to a Microsoft account, look for an “Offline account” or “Skip for now” option during this step. You can always link one later.
- Privacy Settings: Windows will present a series of privacy settings. Carefully review each option (e.g., location, diagnostic data, tailored experiences, advertising ID) and enable or disable them according to your preferences. For privacy-conscious users, it’s often wise to disable most of these by default.
- Cortana: Choose whether to enable or use Cortana as your digital assistant.
II. System Updates: The First Priority
As soon as you reach the desktop, connecting to the internet and updating Windows is paramount for security and stability.
- Check for Updates: Go to
Settings > Update & Security > Windows Update. Click “Check for updates.” - Install All Updates: Install all pending updates, including cumulative updates and definition updates for Windows Defender.
- Restart as Prompted: Your system will likely need to restart multiple times during this process. Continue checking for updates and restarting until no more updates are found. This ensures you have the latest security patches and often, initial drivers.
III. Driver Installation and Verification
Even after Windows updates, you may need to install specific drivers for optimal performance.
- Install Downloaded Drivers: Install the chipset, graphics card, audio, and any specialized network drivers you downloaded earlier from your manufacturer’s website.
- Check Device Manager: Right-click the Start button and select “Device Manager.” Look for any yellow exclamation marks, which indicate missing or problematic drivers. If you see any, you’ll need to locate and install the correct drivers for those devices.
- Manufacturer Utilities: Graphics card manufacturers (NVIDIA GeForce Experience, AMD Radeon Software) and some PC manufacturers offer utilities that can automatically detect and install missing drivers.
IV. Essential Software Installation
Now that your system is stable and up-to-date, start installing your must-have applications.
- Web Browser: Install your preferred browser (Chrome, Firefox, Brave, etc.).
- Antivirus/Security Suite: While Windows Defender is capable, you might prefer a third-party antivirus solution.
- Productivity Suite: Microsoft Office, LibreOffice, Google Workspace desktop apps.
- Media Player: VLC Media Player, PotPlayer, etc.
- Cloud Storage Clients: OneDrive, Google Drive, Dropbox.
- Utilities: A file archiver (7-Zip, WinRAR), a PDF reader (Adobe Acrobat Reader, Foxit Reader), etc.
V. Restore Your Backed-Up Data
Once your applications are installed, it’s time to bring back your personal files.
- Copy Files Back: Connect your external hard drive or access your cloud storage and copy your documents, photos, videos, music, and other personal files back to their respective folders on your C: drive.
- Verify Data Integrity: Briefly open a few files from each category to ensure they are accessible and not corrupted.
VI. Optimize and Personalize
Finally, tailor your new Windows 10 experience to your liking.
- Personalization: Adjust your display settings, resolution, theme, desktop wallpaper, and lock screen.
- Start Menu and Taskbar: Pin your most used applications to the Start Menu and Taskbar.
- Power Options: Configure power plans for performance or battery life, depending on your needs.
- Disk Cleanup: Run the built-in Disk Cleanup tool to remove temporary files and old Windows installation files that are no longer needed.
- Create a System Restore Point: Once your system is fully configured and stable, consider creating a system restore point. This can be a valuable fallback if you encounter issues down the line.
Troubleshooting Common Installation Hurdles
Even with careful preparation, unforeseen issues can sometimes arise during or after a clean install. Here are a few common problems and their potential solutions:
- “Boot Device Not Found” / “No Operating System Found”:
- Cause: Incorrect boot order in BIOS/UEFI, corrupted installation media, or a faulty drive.
- Solution: Recheck your BIOS/UEFI boot order. Recreate the USB installation media. Check drive connections.
- “Windows Cannot Be Installed to This Disk”:
- Cause: MBR/GPT partition scheme mismatch for your BIOS/UEFI mode, or missing storage controller drivers.
- Solution: In the disk partitioning screen, delete all partitions to get “Unallocated Space.” If still stuck, try converting the drive to GPT (for UEFI) or MBR (for legacy BIOS) using Diskpart commands (advanced) or Rufus settings during media creation. Ensure SATA controller mode (AHCI/RAID) in BIOS is compatible.
- Installation Freezes:
- Cause: Faulty RAM, overheating, corrupted installation media, or a problem with the hard drive.
- Solution: Try recreating the installation media. Test your RAM using a tool like MemTest86. Check system temperatures.
- Activation Issues After Installation:
- Cause: Incorrect product key, no digital license detected, or no internet connection.
- Solution: Ensure you’re connected to the internet. If you used a Microsoft account, sign in. If you have a product key, go to
Settings > Update & Security > Activationand enter it.
- Missing Drivers After Installation (e.g., no sound, Wi-Fi not working):
- Cause: Windows Update didn’t install all necessary drivers, or specific manufacturer drivers are required.
- Solution: Re-run Windows Update multiple times. Manually install drivers downloaded from your PC or component manufacturer’s website. Check Device Manager for unresolved issues.

Conclusion
Performing a clean installation of Windows 10 is undeniably a more involved process than a simple restart or update, but the rewards are substantial. By meticulously following the steps outlined in this guide, you can eliminate lingering performance issues, eradicate stubborn malware, and clear out years of digital clutter. The result is a computer that feels brand new, boasting enhanced speed, stability, and security.
While the prospect of erasing your entire primary drive might seem daunting, the preparation steps ensure your data remains safe, and the detailed installation process makes it manageable for anyone willing to take the time. Embrace this powerful maintenance technique, and you’ll not only gain a pristine operating environment but also a deeper understanding of your system’s foundation. Enjoy the renewed performance and efficiency of your freshly installed Windows 10!
aViewFromTheCave is a participant in the Amazon Services LLC Associates Program, an affiliate advertising program designed to provide a means for sites to earn advertising fees by advertising and linking to Amazon.com. Amazon, the Amazon logo, AmazonSupply, and the AmazonSupply logo are trademarks of Amazon.com, Inc. or its affiliates. As an Amazon Associate we earn affiliate commissions from qualifying purchases.