
In the rapidly evolving landscape of personal finance, digital payment platforms have become indispensable tools for managing money with unprecedented ease and speed. Among these, Venmo stands out as a pioneering force, transforming how millions of users send, receive, and spend money daily. More than just a simple payment app, Venmo has cultivated a unique social dimension around financial transactions, making it a ubiquitous presence in casual peer-to-peer exchanges and increasingly, in retail payments.
This comprehensive guide delves into the mechanics of transferring money on Venmo, addressing the essential questions from setting up your account to executing various types of transfers and understanding the underlying financial implications. Whether you’re splitting a dinner bill, sending funds to a friend, or moving money between your Venmo balance and your bank account, mastering Venmo’s functionalities is a vital skill for modern financial management. We’ll explore the step-by-step processes, highlight crucial considerations like fees and security, and equip you with the knowledge to navigate Venmo with confidence and efficiency, ensuring your financial interactions are always seamless and secure.

Understanding Venmo’s Core Functionality
Venmo’s appeal lies in its simplicity and accessibility, allowing users to conduct financial transactions with just a few taps. Before diving into the specifics of transferring money, it’s crucial to grasp what Venmo is and how its ecosystem operates.
What is Venmo and How Does it Work?
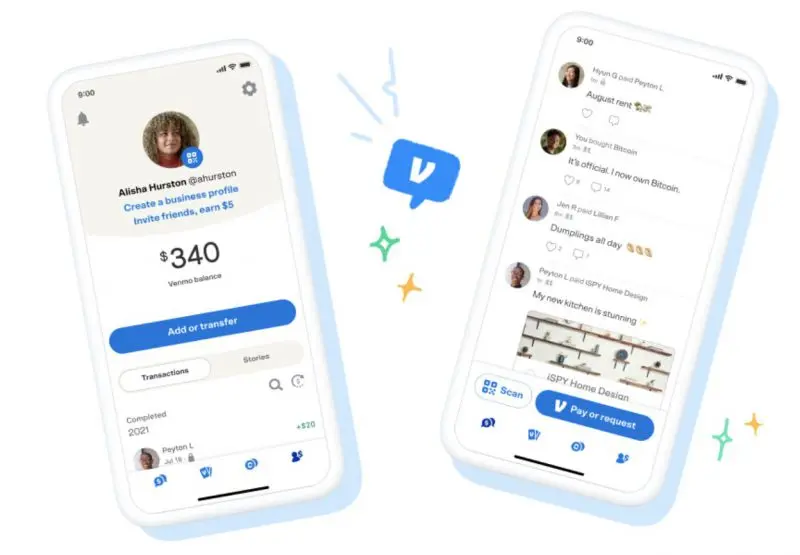
Venmo is a mobile payment service owned by PayPal, designed primarily for peer-to-peer (P2P) transactions. Its core purpose is to facilitate easy money transfers between friends, family, and even small businesses. The platform functions as a digital wallet, allowing users to hold a balance, link bank accounts or debit/credit cards, and initiate payments or requests for money. Unlike traditional bank transfers that can take days, Venmo transactions between users are typically instant, making it ideal for immediate financial settlements.
The social feed aspect of Venmo, where users can share transaction details (with privacy settings), adds a unique dimension, making financial interactions feel more integrated into daily life. At its heart, Venmo streamlines the process of paying and getting paid, removing the friction often associated with cash or traditional banking methods.
Setting Up Your Venmo Account
The journey to transferring money on Venmo begins with setting up and verifying your account. This foundational step ensures both the security and functionality of your future transactions.
- Download the App: Venmo is primarily a mobile application, available for free on iOS and Android devices. Search for “Venmo” in your device’s app store and download it.
- Sign Up: Upon opening the app, you’ll be prompted to sign up using your email address, phone number, or Facebook account. You’ll need to create a secure password and agree to Venmo’s user agreement and privacy policy.
- Verify Your Identity: For security and to unlock higher transaction limits, Venmo requires identity verification. This typically involves providing your legal name, date of birth, the last four digits of your Social Security Number (SSN), and potentially a physical address. This process helps Venmo comply with financial regulations and protect users from fraud.
- Link a Funding Source: To send money, you must link a funding source. This can be:
- Bank Account: This is the most common and recommended method for sending larger sums and transferring money out of Venmo. You’ll typically link your bank account by logging into your bank’s online portal through Venmo’s secure interface or by manually entering your bank’s routing and account numbers.
- Debit Card: Linking a debit card allows for quick transfers, and typically, these transfers are free.
- Credit Card: While credit cards can be linked, Venmo charges a 3% fee for sending money using a credit card. It’s generally advised to use a bank account or debit card to avoid this fee.
- Venmo Balance: If you have funds already in your Venmo balance (from receiving payments), you can use this directly.
Once these steps are completed, your Venmo account is ready to facilitate seamless money transfers.
Sending Money to Another Venmo User
The primary function of Venmo is peer-to-peer payments. This process is designed to be intuitive and swift, making it perfect for splitting costs or repaying friends.
Step-by-Step Guide to Peer-to-Peer Transfers
Sending money to another Venmo user is remarkably straightforward:
- Open the Venmo App: Launch the application on your smartphone.
- Tap the “Pay & Request” Button: This button, usually represented by a pen-and-paper or similar icon, is prominently displayed on the app’s home screen.
- Select or Search for Recipient:
- You can choose from recent contacts or friends who are already on Venmo.
- Alternatively, search for the recipient by their Venmo username, phone number, or email address. Ensure you select the correct person to avoid sending money to the wrong individual.
- Enter the Amount: Input the exact dollar amount you wish to send.
- Add a Note (Optional but Recommended): Write a brief description of the payment. This note is public by default (visible to your Venmo friends) but can be changed to private or visible only to sender and recipient. A clear note helps both parties remember the purpose of the transaction.
- Choose Your Funding Source: If you have a Venmo balance, it will be used first. Otherwise, select your linked bank account, debit card, or credit card. Remember the 3% fee for credit card payments.
- Tap “Pay”: Review all the details – recipient, amount, note, and funding source – then tap the “Pay” button to complete the transaction.
The money is typically transferred to the recipient’s Venmo balance instantly. They can then choose to keep it in their Venmo balance for future payments or transfer it to their linked bank account.
Essential Tips for Sending Money Safely
While Venmo is convenient, exercising caution is paramount to protect your funds.
- Double-Check Recipient Details: Always verify the recipient’s username, phone number, or email address before hitting “Pay.” A small typo can send your money to an unintended party, and Venmo usually cannot reverse payments sent to the wrong person.
- Understand Privacy Settings: Be mindful of who sees your transactions. Venmo’s default is often “Friends” or “Public.” You can change the privacy setting for each transaction to “Private” if you prefer.
- Avoid Sending Money to Strangers for Goods/Services: Venmo is primarily designed for transactions between people who know and trust each other. It lacks the robust buyer/seller protection mechanisms found in platforms like PayPal’s Goods and Services. If you’re buying something from an unknown seller, consider using alternative payment methods that offer greater protection.
- Beware of Scams: Be vigilant against phishing attempts, requests for money from unknown individuals, or offers that seem too good to be true. Venmo will never ask for your password via email or text.
- Keep Your App and Device Secure: Use a strong password or biometric authentication (fingerprint/Face ID) for your Venmo app. Ensure your phone is protected with a passcode, and avoid using Venmo on unsecured Wi-Fi networks.
Transferring Funds from Venmo to Your Bank Account
Once you’ve received money on Venmo, you might want to move it to your traditional bank account for broader use. Venmo offers two primary options for this: standard and instant transfers.
Standard vs. Instant Transfers: Choosing Your Speed
The choice between standard and instant transfers depends on how quickly you need access to your funds.
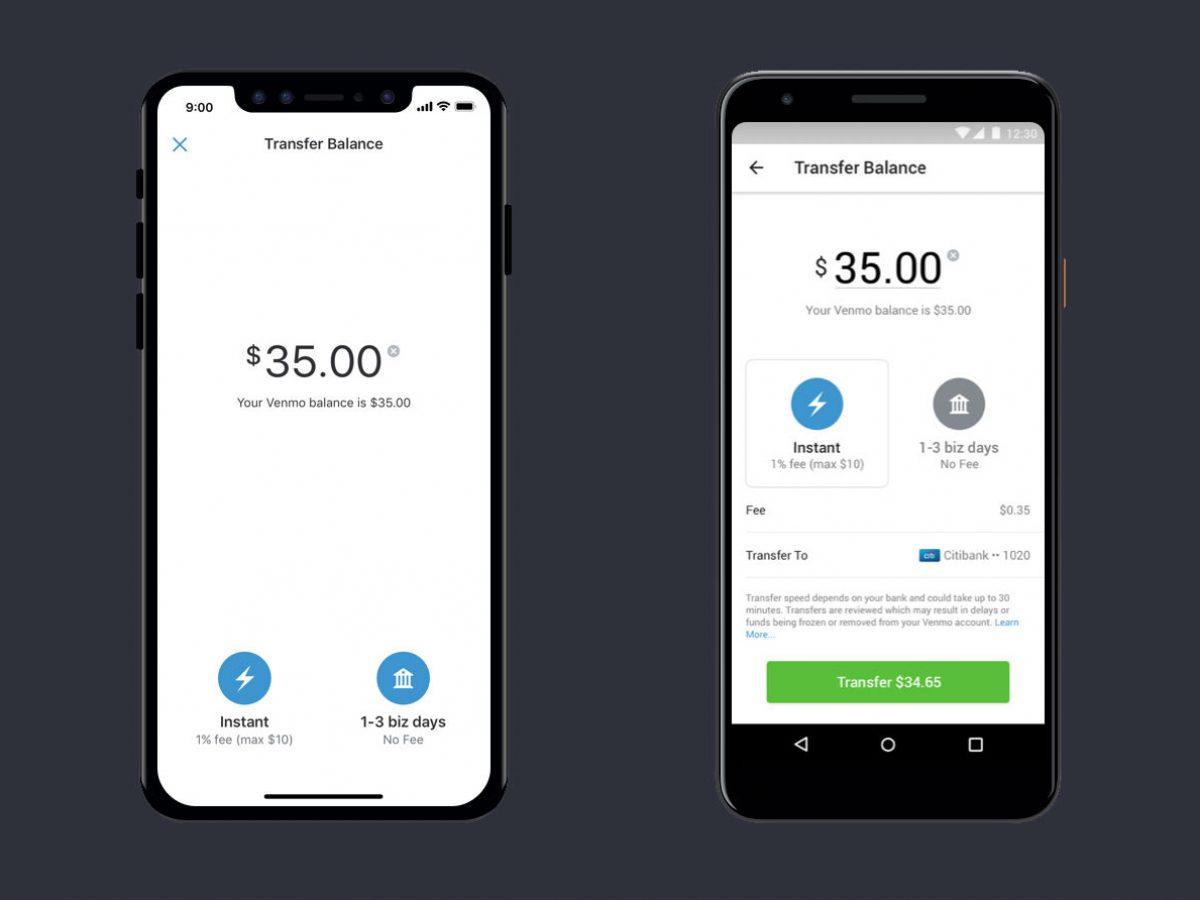
- Standard Transfer: This is Venmo’s free option. Funds typically arrive in your linked bank account within 1 to 3 business days. This timeframe excludes weekends and bank holidays. It’s the most economical choice if you’re not in a hurry to access your money.
- Instant Transfer: For immediate access to your funds, Venmo offers an instant transfer option. For this service, Venmo charges a fee, typically 1.75% of the transferred amount (with a minimum fee of $0.25 and a maximum fee of $25). Funds sent via instant transfer usually appear in your bank account within minutes, though some banks may take up to 30 minutes. This is ideal for urgent financial needs.
To initiate a transfer from Venmo to your bank:
- Go to the “Me” Tab: This tab shows your Venmo balance.
- Tap “Transfer Money”: Below your Venmo balance, you’ll see an option to transfer funds.
- Enter the Amount: Specify how much you want to transfer.
- Choose Your Transfer Speed: Select either “Instant” or “1-3 Biz Days” (Standard).
- Select Your Bank Account: Confirm the linked bank account where you want the money sent.
- Tap “Transfer”: Confirm the details to initiate the transfer.
Linking and Managing Your Financial Institutions
For both sending and receiving money, accurately linking and managing your bank accounts and debit cards is fundamental.
- Adding a Bank Account: As mentioned, you can link a bank account via instant verification (logging into your bank) or manual entry (providing routing and account numbers). Ensure the name on your bank account matches the name on your Venmo profile to prevent issues.
- Adding a Debit Card: Debit cards are linked by entering the card number, expiration date, and CVV. They are often used for instant payments and free transfers, making them a popular choice.
- Managing Multiple Accounts: Venmo allows you to link multiple bank accounts and cards. You can designate a primary funding source for payments and a primary bank account for withdrawals. Regularly review your linked accounts to ensure they are up-to-date and secure.
- Troubleshooting Linkage Issues: If you experience problems linking an account, double-check your credentials, ensure your bank supports Venmo, and contact Venmo support if the issue persists. Unlinking and re-linking an account can sometimes resolve minor glitches.
Venmo’s Financial Ecosystem: Fees, Limits, and Security
Beyond the mechanics of transfers, understanding Venmo’s operational framework—including its fee structure, transaction limits, and robust security measures—is crucial for responsible financial management.
Navigating Transaction Fees and Transfer Limits
While Venmo prides itself on free peer-to-peer transfers, certain actions incur fees, and all accounts are subject to transfer limits.
- Sending Money with a Credit Card: As noted, a 3% fee is applied when you use a credit card as the funding source for sending money. This fee is levied by Venmo to cover the processing costs associated with credit card transactions. Using your Venmo balance, linked bank account, or debit card for peer-to-peer payments is always free.
- Instant Transfers to Your Bank: A 1.75% fee (minimum $0.25, maximum $25) is charged for instantly transferring funds from your Venmo balance to a linked bank account or eligible debit card. Standard transfers remain free.
- Cash a Check Feature: Venmo offers a service to cash checks digitally, which often involves a fee (usually 1% for payroll and government checks, and 5% for all other checks, with minimums).
- Cryptocurrency Transactions: Buying and selling cryptocurrency on Venmo involves fees that are disclosed at the time of transaction.
- Transaction Limits: Venmo implements limits on how much money you can send, receive, and transfer out of your account. These limits typically increase once your identity is verified.
- Unverified Accounts: Have lower weekly sending and transfer limits.
- Verified Accounts: Enjoy significantly higher weekly limits, often up to several thousand dollars for peer-to-peer payments and bank transfers. Check Venmo’s official support pages for the most current and specific limits, as they can change. These limits are designed to protect users and prevent fraudulent activities.
Prioritizing Your Financial Security on Venmo
Venmo employs several security features to protect your account and transactions, but user diligence is equally important.
- Encryption and Fraud Protection: Venmo uses data encryption and fraud detection technologies to secure your financial information and monitor for suspicious activities.
- PIN/Biometric Security: Enable a PIN or fingerprint/Face ID requirement for opening the app or making payments. This adds an extra layer of security, especially if your phone falls into the wrong hands.
- Two-Factor Authentication (2FA): Activate 2FA for your Venmo account. This requires a code sent to your phone number in addition to your password when logging in from a new device, significantly reducing the risk of unauthorized access.
- Privacy Settings: Regularly review and adjust your transaction privacy settings. While the social feed is a feature, some users prefer to keep their financial activities private.
- Alerts and Notifications: Opt-in for transaction alerts to be immediately notified of any activity on your account. This helps you quickly identify and report unauthorized transactions.
- Strong, Unique Passwords: Use a complex, unique password for your Venmo account and avoid reusing passwords from other online services.
- Be Skeptical of Unsolicited Requests: Never share your Venmo password or personal financial information with anyone, especially if prompted by unsolicited emails, texts, or calls claiming to be from Venmo support. Always go directly to the official Venmo app or website for support.
Maximizing Your Venmo Experience
Venmo is more than just a tool for splitting bills; it’s a versatile financial platform that continues to expand its offerings, allowing users to integrate it deeper into their daily financial lives.
Beyond Peer-to-Peer: Business Profiles and In-App Purchases
While its P2P functionality is foundational, Venmo has evolved to support broader commercial transactions.
- Business Profiles: Small businesses and freelancers can create Venmo Business Profiles, allowing them to accept payments from customers with separate tracking and potentially enhanced features. This blurs the lines between personal and professional transactions, offering convenience for micro-businesses. Note that Venmo typically charges a small fee for receiving payments through a business profile.
- Paying with Venmo in Apps and Online: Many online retailers and apps now accept Venmo as a payment option at checkout. This integration allows users to leverage their Venmo balance or linked funding sources for purchases, extending the app’s utility beyond friend-to-friend payments.
- Venmo Debit Card and Credit Card: For a more integrated experience, Venmo offers a physical debit card and a credit card. The Venmo Debit Card allows users to spend their Venmo balance anywhere Mastercard is accepted, and earn cashback. The Venmo Credit Card offers rewards on eligible purchases and seamlessly integrates with the Venmo app for tracking and managing spending. These products further bridge the gap between your digital Venmo balance and real-world spending.
Troubleshooting Common Transfer Issues
Even with an intuitive platform like Venmo, occasional issues can arise. Knowing how to troubleshoot them can save you time and stress.
- Payment Stuck/Pending: A payment might be pending if there’s a problem with the recipient’s account, a funding source issue, or if Venmo’s fraud detection system has flagged the transaction for review. Check your email for notifications from Venmo.
- Transfer to Bank Account Delayed: While instant transfers are usually immediate, bank processing times can vary. Standard transfers take 1-3 business days. If it’s outside this window, verify your bank account details are correct in Venmo and contact your bank or Venmo support.
- Insufficient Funds: If your linked bank account or debit card doesn’t have enough money, your payment will fail. Ensure your funding source has adequate funds before initiating a transfer.
- Incorrect Recipient: If you accidentally sent money to the wrong person, act immediately. Contact the recipient and politely request they send the money back. If they refuse or you can’t reach them, contact Venmo Support, but be aware that Venmo generally cannot reverse payments to unintended recipients unless there was an error on their part.
- Account Blocked/Restricted: Venmo may temporarily restrict or block an account if they detect suspicious activity, if verification documents are incomplete, or if you violate their terms of service. Follow Venmo’s instructions to resolve any restrictions, which usually involves providing additional verification or clarifying recent transactions.
- Contacting Support: For issues that cannot be resolved through self-help, Venmo’s support team is available via the app’s help section, email, or sometimes phone. Provide clear details of your issue, including transaction IDs and dates, to facilitate a quicker resolution.
Conclusion
Venmo has undeniably revolutionized the way we handle casual financial transactions, making the process of transferring money remarkably simple and efficient. From splitting restaurant bills with friends to quickly reimbursing a family member, its peer-to-peer payment system has become an integral part of modern personal finance. However, maximizing its utility and ensuring the security of your funds hinges on a thorough understanding of its features, policies, and best practices.
By diligently setting up your account, exercising caution during peer-to-peer transfers, understanding the nuances of standard versus instant bank transfers, and staying informed about fees and security protocols, you can harness Venmo’s power effectively. Moreover, exploring its expanded functionalities, such as business profiles and integrated payment options, reveals Venmo as a versatile tool that extends far beyond simple money sharing. As digital payment platforms continue to evolve, staying abreast of these developments will empower you to manage your money with greater confidence, convenience, and financial acumen.
aViewFromTheCave is a participant in the Amazon Services LLC Associates Program, an affiliate advertising program designed to provide a means for sites to earn advertising fees by advertising and linking to Amazon.com. Amazon, the Amazon logo, AmazonSupply, and the AmazonSupply logo are trademarks of Amazon.com, Inc. or its affiliates. As an Amazon Associate we earn affiliate commissions from qualifying purchases.