In today’s interconnected digital landscape, virtual machines (VMs) have become indispensable tools for developers, IT professionals, businesses, and even advanced home users. They offer unparalleled flexibility, allowing users to run multiple operating systems on a single physical machine, isolate environments, test software, and enhance security. However, merely creating a VM is just the first step. To unlock its full potential, ensure seamless performance, and integrate it deeply with your host system, installing VMware Tools is absolutely paramount.
This comprehensive guide will demystify VMware Tools, explain why they are critical for any efficient virtual environment, and provide detailed, step-by-step instructions for their installation across various guest operating systems. By understanding and correctly implementing these tools, you’ll transform your virtual experience from merely functional to exceptionally powerful and productive, directly impacting your tech efficiency and potentially even your bottom line.

Understanding VMware Tools: More Than Just a Driver Package
Before diving into the “how-to,” it’s crucial to grasp the “what” and “why” behind VMware Tools. Often perceived as just a collection of drivers, they are, in fact, a sophisticated suite of utilities designed to enhance the performance, management, and user experience of your virtual machines.
What Are VMware Tools and Why Are They Crucial?
VMware Tools is a set of utilities that improve the performance of the virtual machine’s guest operating system and enhance the manageability of the VM. Without them, a guest operating system runs as a generic entity, often struggling with basic functionalities that are taken for granted on physical hardware.
Think of it this way: when you install a fresh operating system on a new physical computer, you typically need to install drivers for the graphics card, network adapter, sound card, and various other peripherals to ensure everything works correctly and efficiently. VMware Tools serves a similar purpose for your virtual machine, but it goes much further. It provides optimized drivers for virtual hardware components such as the network adapter, display adapter, SCSI controller, and other devices, effectively bridging the gap between the virtualized hardware and the guest operating system.
Their crucial nature stems from several key areas:
- Performance Enhancement: Without optimized drivers, a VM can feel sluggish, with slow graphics, choppy mouse movements, and suboptimal network speeds. VMware Tools addresses these performance bottlenecks.
- Improved User Experience: Features like seamless mouse integration, drag-and-drop functionality, and shared folders dramatically improve the usability of a VM, making it feel more like a native application rather than an isolated environment.
- Enhanced VM Management: Tools provide mechanisms for better communication between the host and guest, facilitating operations like graceful shutdowns, reboots, and time synchronization.
- Virtual Machine Lifecycling: For businesses and professional users, reliable VM performance and management translate directly into reduced downtime and increased productivity—factors that significantly impact operational efficiency and, ultimately, financial performance.
Key Benefits: Performance, Usability, and Management
The installation of VMware Tools unlocks a multitude of benefits that are essential for any productive virtual environment:
- Optimized Graphics Performance: VMware Tools includes a highly optimized video driver, dramatically improving screen resolution, color depth, and overall graphical responsiveness within the VM. This is particularly vital for applications requiring visual clarity or for users working with design software or complex dashboards.
- Seamless Mouse Integration: One of the most noticeable improvements is the ability to move your mouse pointer seamlessly between the host operating system and the guest operating system without needing to press Ctrl+Alt or similar keys to release the cursor. This seemingly small detail significantly enhances workflow efficiency.
- Enhanced Network Performance: Optimized network drivers reduce latency and increase throughput, ensuring faster file transfers, smoother browsing, and more reliable connectivity for network-intensive applications within the VM.
- Shared Folders and Drag-and-Drop: These features enable effortless data exchange between the host and guest. You can drag and drop files directly between your host desktop and your VM, or set up shared folders that are accessible from both environments. This is a game-changer for productivity, eliminating cumbersome network shares or USB passthrough for simple file transfers.
- Clipboard Sharing: Copy and paste text, images, and other data between the host and guest operating systems, further streamlining your workflow and reducing manual data entry.
- Time Synchronization: VMware Tools ensures that the guest operating system’s clock is synchronized with the host’s clock, preventing time drift issues that can affect applications, logs, and authentication processes. This is critical for maintaining data integrity and system reliability, especially in enterprise environments where accurate timestamps are paramount for auditing and security.
- Guest Operating System Shutdown/Restart: Through VMware Tools, you can initiate a graceful shutdown or restart of the guest operating system directly from the VMware hypervisor interface (e.g., vSphere Client, VMware Workstation). This allows the guest OS to properly close applications and save data, preventing potential data corruption that can occur with a forced power off.
- Automated Updates (for some versions): Newer versions of VMware Tools can be configured to automatically update, ensuring your VM always benefits from the latest performance enhancements and security patches without manual intervention.
From a “Brand” perspective, a well-performing and seamlessly integrated VM reflects professionalism and efficiency. For individuals building their personal brand or companies managing corporate identities, using tech optimally contributes to a perception of competence and reliability. From a “Money” standpoint, these benefits translate directly into time saved, reduced IT support overheads, and increased operational efficiency, all contributing to a healthier bottom line.
Preparing for Installation: A Smooth Start
Before you initiate the installation of VMware Tools, a few preparatory steps can save you significant headaches and ensure a smooth, successful process. Neglecting these can lead to complications, wasted time, and potential data loss, ultimately impacting your productivity and incurring “money” in terms of lost work hours.
Prerequisites and Best Practices
To ensure a successful VMware Tools installation, consider the following prerequisites and best practices:
- Guest Operating System Requirements: Ensure your guest OS is fully installed and functional. For Windows, make sure all critical Windows Updates are applied. For Linux, ensure your kernel headers and build tools are installed, as these are often required for compiling some VMware Tools modules.
- For Linux guests (especially headless or server editions): You’ll typically need
build-essential(Debian/Ubuntu) orkernel-devel(CentOS/RHEL), andperlinstalled. Example commands:sudo apt update && sudo apt install build-essential linux-headers-$(uname -r) perl -y(Debian/Ubuntu)sudo yum update && sudo yum install kernel-devel perl gcc -y(CentOS/RHEL)
- For Linux guests (especially headless or server editions): You’ll typically need
- Sufficient Disk Space: While VMware Tools itself isn’t massive, ensure your VM has adequate free disk space (a few hundred MBs) for the installation process and temporary files.
- Administrative Privileges: You must be logged into the guest operating system with administrative or root privileges to install VMware Tools.
- Network Connectivity (Optional but Recommended): For Linux guests, having network connectivity allows easy installation of prerequisites. For Windows, it ensures any necessary dependencies can be downloaded.
- Familiarity with VM Controls: Know how to access your VM’s menu options within your VMware hypervisor (e.g., VMware Workstation, Fusion, ESXi web client, vSphere Client).
Before You Begin: Snapshotting and VM State
This is perhaps the most critical preparatory step, especially in production environments or when dealing with valuable data.
- Create a Snapshot: Always create a snapshot of your virtual machine before installing or upgrading VMware Tools. A snapshot acts as a rollback point, allowing you to revert the VM to its exact state prior to the installation if anything goes wrong. This is a fundamental “Tech” best practice for disaster recovery and an excellent way to safeguard against unforeseen issues, preventing costly downtime and data loss.
- To create a snapshot:
- Ensure the VM is powered on or off (the state when the snapshot is taken).
- Right-click the VM in your VMware management interface.
- Select “Snapshot” -> “Take Snapshot…”.
- Provide a meaningful name (e.g., “Before VMware Tools Install YYYY-MM-DD”) and an optional description.
- Click “OK.”
- To create a snapshot:
- Power On the VM: VMware Tools can only be installed when the guest operating system is running. Power on your virtual machine and log in to the guest OS.
- Close Non-Essential Applications: While not strictly necessary, closing any open applications within the guest OS can prevent conflicts during the installation process and ensure all necessary files can be updated or replaced without interruption.
By adhering to these preparatory steps, you establish a stable foundation for the VMware Tools installation, minimizing risks and ensuring a smooth, efficient process that supports robust virtual machine management.
Step-by-Step Installation Guides
The installation process for VMware Tools varies slightly depending on the guest operating system. Below, we’ll cover the most common scenarios: Windows and Linux.
Installing VMware Tools on Windows Guest OS

Installing VMware Tools on a Windows VM is typically a straightforward, wizard-driven process.
- Power On and Log In: Start your Windows virtual machine and log in as an administrator.
- Mount the VMware Tools ISO:
- From your VMware application’s menu (e.g., VMware Workstation, Fusion, vSphere Client), navigate to the VM menu.
- Select “VM” > “Install VMware Tools…” (or “VM” > “Guest” > “Install/Upgrade VMware Tools” in some versions).
- This action virtually mounts an ISO image containing the VMware Tools installer to your VM’s CD/DVD drive.
- Start the Installer:
- If AutoPlay is enabled in your Windows guest, the VMware Tools installer might launch automatically. Click “Run setup.exe” if prompted.
- If the installer doesn’t launch automatically, open “File Explorer,” navigate to “This PC,” and double-click the CD/DVD drive icon (it will typically be labeled “VMware Tools”). This will launch the setup wizard.
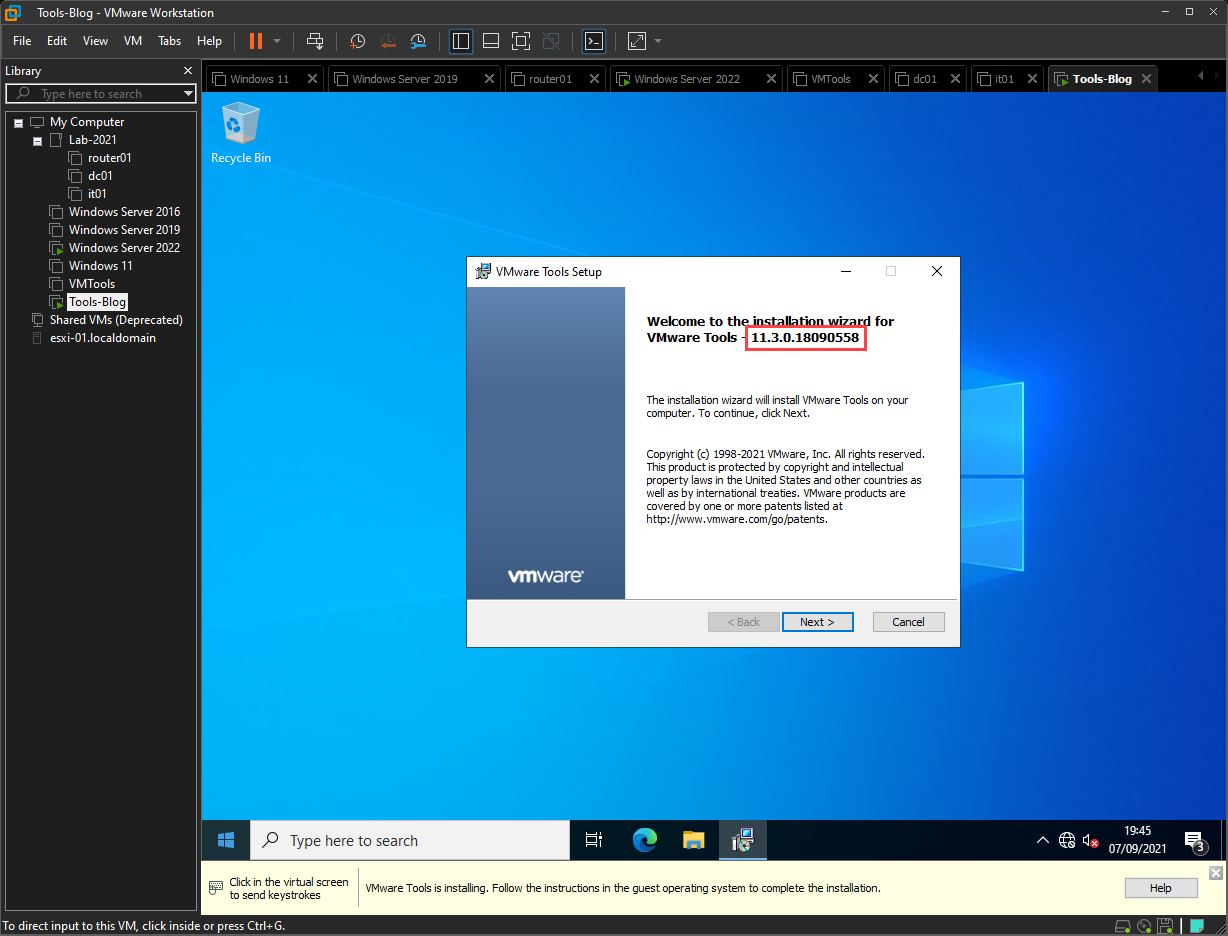
- Follow the Setup Wizard:
- The VMware Tools Setup Wizard will appear. Click “Next.”
- Choose Setup Type: For most users, “Typical” is sufficient and recommended. This installs the common components. If you require specific features or custom paths, choose “Custom.” “Complete” installs all features, which might be overkill for basic usage. Click “Next.”
- Ready to Install: Review the settings and click “Install.”
- The installation process will begin. This may take a few minutes. You might see the screen flash or resolution change as new display drivers are installed.
- Finish and Restart:
- Once the installation completes, click “Finish.”
- The wizard will prompt you to restart the virtual machine. It’s crucial to restart to fully apply all changes and load the new drivers. Click “Yes” to restart immediately.
- Verification: After the VM restarts, log back in. Your mouse should move seamlessly, screen resolution should be optimal, and you should be able to drag and drop files. To verify installation, check the VMware status (e.g., in VMware Workstation, the status bar will no longer show “Install VMware Tools”). You can also go to “Control Panel” > “Programs and Features” and look for “VMware Tools.”
Installing VMware Tools on Linux Guest OS
Installing VMware Tools on Linux guests can be slightly more involved than Windows due to the command-line interface and package dependencies, but it’s a standard process for any “Tech” professional. There are two primary methods: open-vm-tools (recommended for many distributions) and the traditional tarball installation.
Method 1: Using Open-VM-Tools (Recommended for Modern Linux Distributions)
Most modern Linux distributions include open-vm-tools in their official repositories. This is the preferred method as it integrates better with the OS’s package management system, simplifying updates and maintenance.
- Power On and Log In: Start your Linux VM and log in as root or a user with
sudoprivileges. - Update Package Lists:
- For Debian/Ubuntu-based systems:
sudo apt update - For RHEL/CentOS/Fedora-based systems:
sudo yum updateorsudo dnf update
- For Debian/Ubuntu-based systems:
- Install Open-VM-Tools:
- For desktop environments (provides GUI integration):
- Debian/Ubuntu:
sudo apt install open-vm-tools open-vm-tools-desktop -y - RHEL/CentOS/Fedora:
sudo yum install open-vm-tools open-vm-tools-desktop -y(orsudo dnf install open-vm-tools open-vm-tools-desktop -y)
- Debian/Ubuntu:
- For server environments (no GUI):
- Debian/Ubuntu:
sudo apt install open-vm-tools -y - RHEL/CentOS/Fedora:
sudo yum install open-vm-tools -y(orsudo dnf install open-vm-tools -y)
- Debian/Ubuntu:
- For desktop environments (provides GUI integration):
- Start and Enable Service: The service usually starts automatically, but you can verify:
sudo systemctl start vmtoolsdsudo systemctl enable vmtoolsd
- Reboot:
sudo reboot - Verification: After reboot, check the status:
systemctl status vmtoolsd. You should also notice improved performance, mouse integration, and potentially shared folder access if configured.
Method 2: Traditional Tarball Installation (for Older/Unsupported Distributions or Specific Needs)
This method involves mounting the VMware Tools ISO provided by your hypervisor and running a script.
- Power On and Log In: Start your Linux VM and log in as root or a user with
sudoprivileges. - Install Prerequisites: Ensure you have the necessary build tools and kernel headers.
- Debian/Ubuntu:
sudo apt update && sudo apt install build-essential linux-headers-$(uname -r) perl -y - RHEL/CentOS/Fedora:
sudo yum update && sudo yum install kernel-devel perl gcc -y(orsudo dnf install kernel-devel perl gcc -y)
- Debian/Ubuntu:
- Mount the VMware Tools ISO:
- From your VMware application’s menu, select “VM” > “Install VMware Tools…” (or “VM” > “Guest” > “Install/Upgrade VMware Tools”).
- This mounts the ISO to the VM’s virtual CD-ROM drive.
- Create a Mount Point and Mount the ISO:
sudo mkdir /mnt/cdrom(if it doesn’t exist)sudo mount /dev/cdrom /mnt/cdrom(or/dev/sr0in some cases:sudo mount /dev/sr0 /mnt/cdrom)
- Extract the Installer:
cd /tmpsudo tar xzvf /mnt/cdrom/VMwareTools-*.tar.gz
- Run the Installer Script:
cd vmware-tools-distrib(the extracted directory)sudo ./vmware-install.pl- Follow the prompts. For most questions, pressing Enter to accept the default values is sufficient.
- Unmount and Clean Up:
cd ~sudo umount /mnt/cdromsudo rm -rf /tmp/vmware-tools-distrib
- Reboot:
sudo reboot - Verification: After reboot, check for improved performance. You can also run
vmware-toolbox-cmd -v(orvmware-tools-cli -v) to confirm the version of VMware Tools installed.
Installing VMware Tools on macOS Guest OS (Briefly)
While less common, it is possible to run macOS as a guest OS in VMware Fusion or Workstation (under specific circumstances and licensing). The process is similar to Windows:
- Power On and Log In: Start your macOS VM.
- Mount the VMware Tools ISO: From the VMware menu, select “Virtual Machine” > “Install VMware Tools…” (Fusion) or “VM” > “Install VMware Tools…” (Workstation).
- Run the Installer: An installer disk image will appear on the macOS desktop. Double-click it, then double-click “Install VMware Tools.pkg.”
- Follow the Installer: Go through the standard macOS installer prompts. You may need to grant permissions in “System Settings” > “Privacy & Security” if blocked.
- Restart: Restart your macOS VM when prompted.
Due to the complexities and specific hardware/licensing requirements for running macOS in a VM, this is generally less straightforward than Windows or Linux and often requires specific VMware products like Fusion that are optimized for macOS hosts.
Post-Installation and Maintenance
Installing VMware Tools is a significant step, but maintaining them and knowing how to troubleshoot potential issues ensures long-term optimal performance and stability for your virtual machines. This commitment to maintenance is key to maximizing your “Tech” investments and protecting your “Money” through sustained productivity.
Verifying VMware Tools Installation
After installation and a reboot, you can verify that VMware Tools is running and properly installed:
- VMware Hypervisor Interface:
- VMware Workstation/Fusion: Look at the bottom status bar of the VM window. It should indicate “VMware Tools: Running” (or similar), and the “Install VMware Tools” option in the VM menu should change to “Reinstall VMware Tools” or “Upgrade VMware Tools.”
- vSphere Client/ESXi Web Client: Select your VM, go to the “Summary” tab. Under “VMware Tools,” it should show “Running (Current)” or “Running (Not Current)” if an update is available.
- Within the Guest Operating System:
- Windows: Open “Control Panel” > “Programs and Features” and look for “VMware Tools.” You can also open “Task Manager” and look for
vmtoolsd.exeandVMwareUser.exeprocesses. The display resolution should also be optimal, and mouse movement should be seamless. - Linux: Open a terminal and run
vmware-toolbox-cmd -vorvmware-tools-cli -v. It should output the version number. You can also check the service status withsystemctl status vmtoolsd. - macOS: Look for “VMware Tools” in “Applications” or “System Settings” to verify its presence.
- Windows: Open “Control Panel” > “Programs and Features” and look for “VMware Tools.” You can also open “Task Manager” and look for
Troubleshooting Common Installation Issues
Even with careful preparation, you might encounter issues. Here are some common problems and their solutions:
- “VMware Tools installation cannot be started. The virtual machine is not ready…”:
- Cause: The guest OS might not be fully booted, or the virtual CD/DVD drive might be busy.
- Solution: Ensure the guest OS is fully loaded and you are logged in. Try again after a minute. If the CD/DVD drive is configured to auto-mount another ISO, temporarily remove it.
- Installer doesn’t auto-run (Windows):
- Cause: AutoPlay is disabled or the virtual CD-ROM isn’t recognized.
- Solution: Manually browse to “This PC” > CD/DVD drive in File Explorer and run
setup.exe.
- “Failed to load kernel modules” (Linux tarball install):
- Cause: Missing kernel headers or build tools.
- Solution: Re-run the prerequisite installation commands:
sudo apt install build-essential linux-headers-$(uname-r) perl -y(Ubuntu/Debian) orsudo yum install kernel-devel perl gcc -y(RHEL/CentOS). Then restart the VMware Tools installation.
- Graphical issues or slow performance persist:
- Cause: VMware Tools might not be fully installed or requires a reboot, or there’s a conflict with existing display drivers.
- Solution: Ensure you’ve rebooted the VM after installation. If issues persist, try reinstalling VMware Tools, or remove old display drivers if they were manually installed before.
- Shared Folders / Drag-and-Drop not working:
- Cause: Services might not be running, or features are not enabled.
- Solution: Ensure VMware Tools is fully installed and running. For shared folders, enable them in the VM settings (
VM>Settings>Options>Shared Folders), and make sure thevmhgfskernel module is loaded (Linux) or the shared folder client is enabled (Windows).
- Installation stuck or unresponsive:
- Cause: Resource contention, corrupted download, or other system issues.
- Solution: Power off and restart the VM. If it still fails, revert to your pre-installation snapshot (if you took one!). You may need to try downloading a fresh copy of the VMware Tools ISO if you’re using an older hypervisor version or a local repository.
Updating and Managing VMware Tools
Just like any other software, VMware Tools receives updates. Keeping them current is vital for security, performance, and compatibility with new VMware hypervisor versions and guest operating systems.
- Checking for Updates: Your VMware hypervisor (Workstation, Fusion, vSphere Client) will typically notify you if an update is available for VMware Tools in a specific VM. The status in the VM summary or status bar will often change from “Running (Current)” to “Running (Not Current)” or “Upgrade VMware Tools Available.”
- Upgrading VMware Tools (Windows/macOS): The process is almost identical to the initial installation. Simply select “VM” > “Upgrade VMware Tools…” (or “Reinstall VMware Tools…”) from the hypervisor menu and follow the wizard. A reboot will usually be required.
- Upgrading VMware Tools (Linux):
- Open-VM-Tools: Simply run your distribution’s update command:
sudo apt update && sudo apt upgrade -y(Debian/Ubuntu) orsudo yum update -y(RHEL/CentOS/Fedora). - Tarball Installation: You’ll typically perform a “Reinstall” by running the
vmware-install.plscript again from the newly mounted ISO, which will detect the existing installation and prompt you for an upgrade.
- Open-VM-Tools: Simply run your distribution’s update command:
- Uninstallation: If necessary, VMware Tools can be uninstalled like any other program:
- Windows: Go to “Control Panel” > “Programs and Features,” select “VMware Tools,” and click “Uninstall.”
- Linux (Open-VM-Tools):
sudo apt remove open-vm-tools open-vm-tools-desktop -y(Debian/Ubuntu) orsudo yum remove open-vm-tools open-vm-tools-desktop -y(RHEL/CentOS). - Linux (Tarball): Navigate to the installation directory (usually
/usr/local/binor/etc/vmware-tools) and look for anuninstall.plscript, or simply remove the associated files if you know what you’re doing. A more robust method involves trying to re-run thevmware-install.plscript and looking for an uninstall option.
Properly installing and maintaining VMware Tools is a cornerstone of effective virtual machine management. It not only boosts the performance and usability of your VMs but also streamlines your workflow, contributing to greater productivity and efficiency across your “Tech” infrastructure. For individuals and businesses alike, this translates into tangible benefits, safeguarding your “Brand” reputation through reliable operations and positively impacting your “Money” by optimizing resource utilization and minimizing costly disruptions. By following this guide, you equip yourself with the knowledge to master this essential aspect of virtualization.
aViewFromTheCave is a participant in the Amazon Services LLC Associates Program, an affiliate advertising program designed to provide a means for sites to earn advertising fees by advertising and linking to Amazon.com. Amazon, the Amazon logo, AmazonSupply, and the AmazonSupply logo are trademarks of Amazon.com, Inc. or its affiliates. As an Amazon Associate we earn affiliate commissions from qualifying purchases.