
In the ever-evolving landscape of technology, the desire for faster, smoother, and more responsive computing experiences is a constant. Whether you’re a gamer battling epic foes, a creative professional pushing the boundaries of your software, or simply someone tired of your computer’s sluggish performance, upgrading your Random Access Memory (RAM) is often the most impactful and cost-effective solution. This guide will walk you through the entire process of installing RAM, from understanding its importance to performing the physical installation and verifying your upgrade.
Understanding RAM: The Computer’s Short-Term Memory
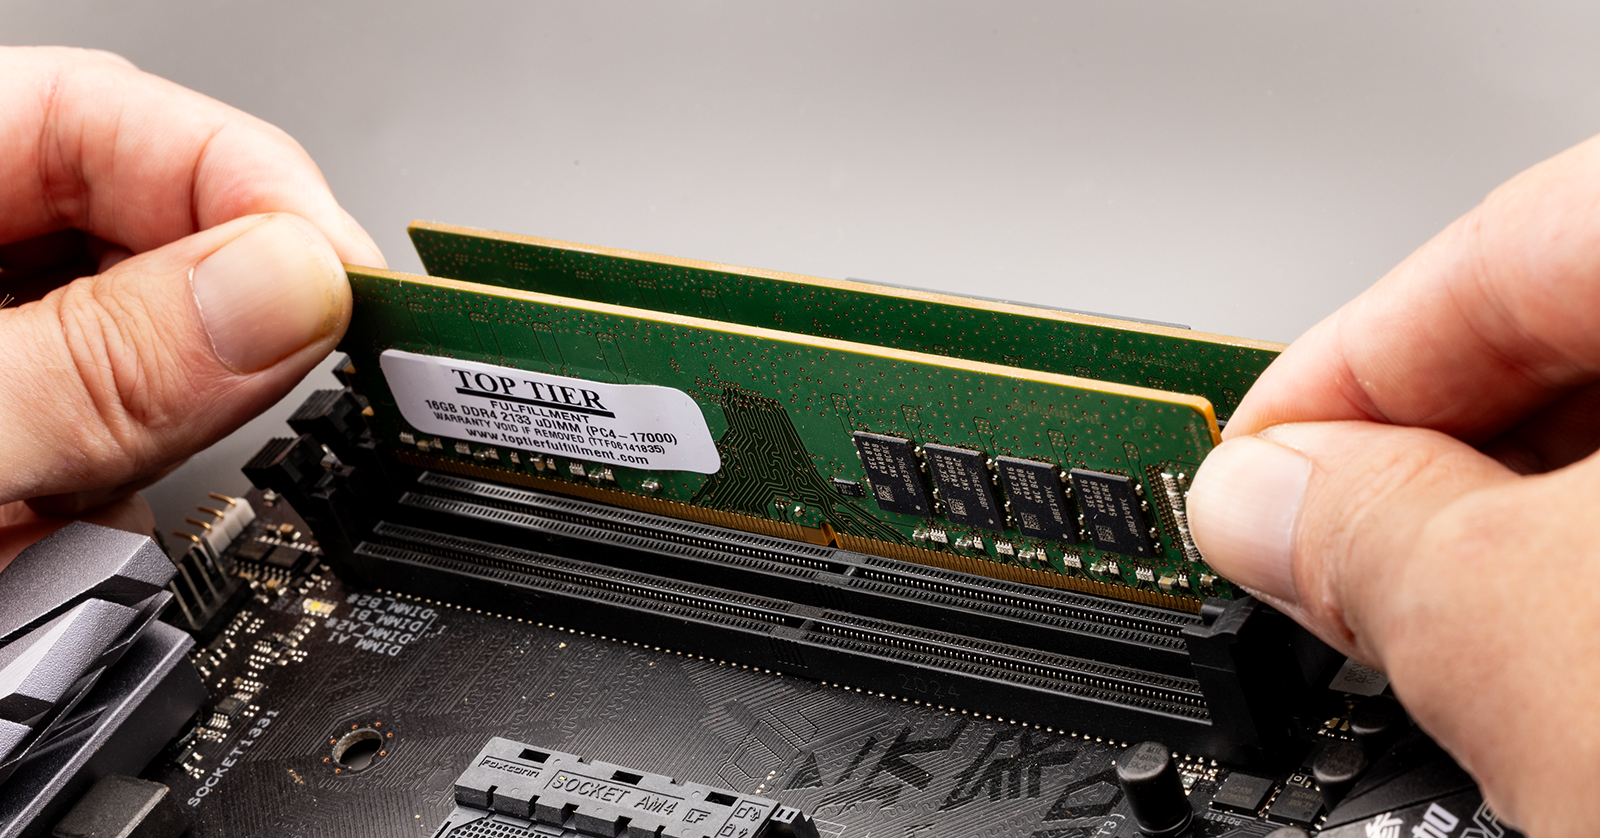
Before we dive into the installation process, it’s crucial to understand what RAM is and why it’s so vital to your computer’s performance. Think of RAM as your computer’s short-term memory or its workspace. When you open an application, load a document, or browse the web, your computer loads the necessary data into RAM. The more RAM you have, the more data your computer can access quickly, leading to faster load times, smoother multitasking, and a generally more fluid user experience.
Why Upgrade Your RAM? The Performance Boost You’ve Been Missing
As software becomes more complex and demanding, the default RAM configurations in many computers can quickly become a bottleneck. This is particularly true for modern operating systems, which consume a significant portion of your available memory. Here are some common signs that indicate you might benefit from a RAM upgrade:
- Slow application loading times: If your programs take an eternity to open, your RAM might be struggling to keep up.
- Lagging and stuttering during use: Experiencing noticeable delays when switching between applications or performing actions can be a strong indicator of insufficient RAM.
- System freezes or crashes: While not solely indicative of RAM issues, frequent crashes can sometimes be attributed to the system running out of memory and becoming unstable.
- Limited multitasking capabilities: If you find yourself closing applications just to open another one, your RAM capacity is likely the culprit.
- Demanding software or games: Professional creative software (like video editing suites or 3D rendering programs) and modern video games are notoriously RAM-intensive.
RAM Types and Compatibility: Ensuring a Seamless Upgrade
This is arguably the most critical step, as installing incompatible RAM can lead to your computer not booting, performance issues, or even damage. Modern computers utilize different types of RAM, with DDR4 and DDR5 being the most prevalent for desktops and laptops today.
- DDR (Double Data Rate): This refers to the generation of RAM. Each new generation (DDR2, DDR3, DDR4, DDR5) offers increased speeds, lower power consumption, and higher capacities. Crucially, DDR generations are not backward or forward compatible. A DDR4 module will not fit or function in a DDR5 slot, and vice-versa.
- Form Factor: RAM modules come in different physical sizes. DIMM (Dual In-line Memory Module) is the standard for desktop computers, while SO-DIMM (Small Outline Dual In-line Memory Module) is used in laptops and some smaller form-factor desktops.
- Speed (MHz): RAM speed, measured in megahertz (MHz), indicates how quickly data can be transferred. Higher MHz generally means better performance.
- Capacity (GB): This refers to the amount of data the RAM stick can store. More GB means more capacity for your computer’s workspace.
- Timings (Latency): RAM timings, often represented by a series of numbers (e.g., 16-18-18-36), refer to the delay between data requests and their fulfillment. Lower timings are generally better.
How to Determine Your Current RAM and Compatibility:
- Consult Your Motherboard Manual: If you have a desktop, the motherboard manual is your most definitive source for compatible RAM types, maximum capacity, and supported speeds.
- Check System Information (Windows):
- Press
Windows Key + R, typemsinfo32, and press Enter. Look for “Installed Physical Memory (RAM)” and “Total Physical Memory.” You can also find the “BaseBoard Product” and “BaseBoard Manufacturer” to research your motherboard online. - Alternatively, open Task Manager (
Ctrl + Shift + Esc), go to the “Performance” tab, and click on “Memory.” This will show you the number of slots used and the speed of your current RAM.
- Press
- Use Third-Party Tools: Software like CPU-Z (free) can provide detailed information about your existing RAM modules, including their type, speed, and timings.
- Check Your Laptop Manufacturer’s Website: For laptops, visit the manufacturer’s support page and enter your model number. They usually provide a list of upgradeable components, including RAM specifications.
- Online RAM Configurators: Many reputable RAM manufacturers and online retailers offer tools where you can enter your computer’s model or motherboard name, and they will suggest compatible RAM modules.
Crucial Compatibility Note: Always prioritize RAM that matches your motherboard’s supported DDR generation. While you can often mix RAM sticks of different speeds and timings, it’s best to match them as closely as possible for optimal stability. If you are mixing, your system will default to the slowest speed and loosest timings of the installed modules.
The Physical Installation: A Step-by-Step Guide
Once you’ve identified and purchased the correct RAM modules, it’s time for the physical installation. While this process can seem daunting, it’s remarkably straightforward if you follow these steps carefully.
Safety First: Grounding Yourself and Preparing Your Workspace
Before you even touch your computer’s internal components, it’s essential to take precautions to prevent electrostatic discharge (ESD), which can damage sensitive electronics.
- Power Down Completely: Shut down your computer properly through the operating system. Then, unplug the power cord from the back of the computer. For laptops, remove the battery if it’s user-removable.
- Ground Yourself: ESD is the enemy. To discharge any static electricity built up in your body, touch a grounded metal object before touching any internal components. The metal casing of your computer tower (while unplugged) is a good option. A more reliable method is to wear an anti-static wrist strap, which clips onto your wrist and attaches to a grounded object.
- Prepare Your Workspace: Work on a clean, well-lit, and non-carpeted surface. Avoid working on carpet as it’s a significant source of static electricity. Keep children and pets away from your workspace to prevent accidental interference.
- Gather Your Tools: You’ll likely only need a Phillips head screwdriver for most desktop installations. For laptops, you might need a smaller set of precision screwdrivers.
Accessing Your Computer’s RAM Slots
The method for accessing RAM slots varies between desktops and laptops.
For Desktop Computers: Opening the Case

- Locate the Side Panel: Most desktop towers have a removable side panel. Typically, this is the left panel when viewed from the front.
- Remove Screws: You’ll usually find two or more screws securing the panel at the back of the case. Unscrew these and gently pull the panel away. Some cases use tool-less thumbscrews, making it even easier.
- Handle with Care: Once the panel is removed, you’ll have access to the internal components.
For Laptop Computers: Accessing the RAM Compartment
Laptops are more varied in their design.
- Check the Underside: Most laptops have a dedicated access panel for RAM, often marked with a small RAM icon or simply indicated by screws.
- Consult Your Manual: If you’re unsure, refer to your laptop’s user manual or the manufacturer’s website for specific instructions on how to access the RAM slots. It might involve removing the entire bottom panel or just a smaller section.
- Be Gentle with Connectors: Laptops often have ribbon cables connecting various components. Be extremely careful not to pull or damage these.
Locating and Removing Existing RAM (If Necessary)
Once you have access, you need to locate the RAM slots. They are typically long, narrow slots found on the motherboard, usually near the CPU.
- Identify the Slots: RAM modules are installed in pairs or groups. You’ll see retaining clips on either end of each RAM slot.
- Release Existing Modules: To remove existing RAM, gently push down on the retaining clips at both ends of the module. The RAM stick should then pop up slightly, allowing you to gently pull it straight out of the slot. Do not force it.
Installing the New RAM Modules
Now comes the exciting part – installing your new RAM!
- Align the Notch: Each RAM module has a notch along its bottom edge. This notch is crucial for proper alignment. Look at the RAM slot on the motherboard; it will have a corresponding key or raised section that matches this notch. You can only insert the RAM module in one direction.
- Insert Gently: Carefully align the notch on the RAM module with the key in the slot.
- Apply Even Pressure: Once aligned, gently but firmly push down on both ends of the RAM module simultaneously. You should feel a distinct “click” as the retaining clips snap into place, securing the module.
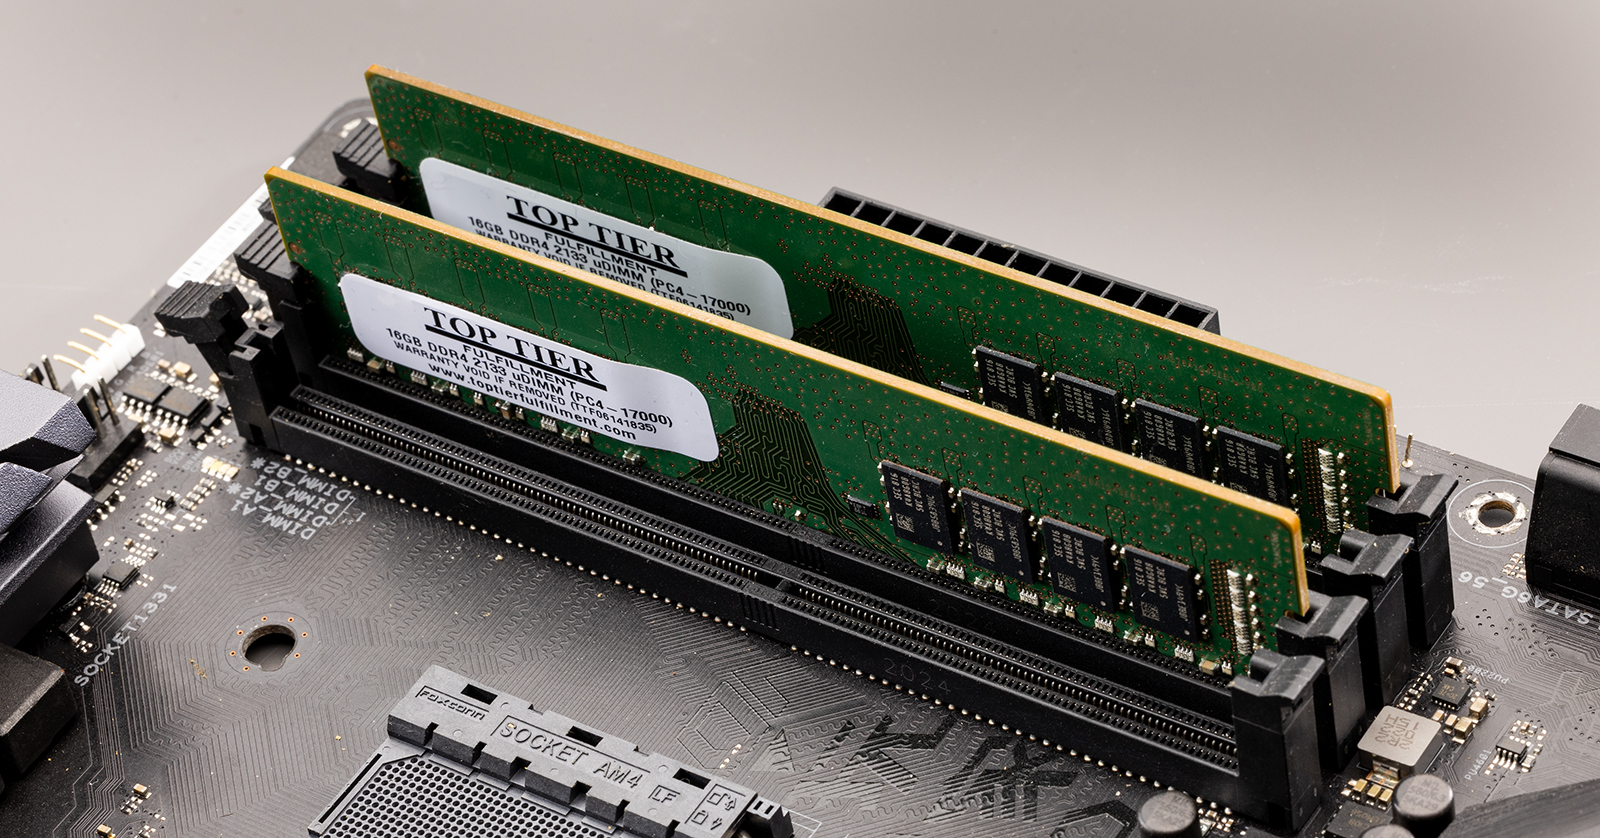
- Verify Seating: Ensure the module is fully seated and the clips are securely holding it in place. There should be no visible gap between the module and the slot.
- Install Additional Modules: If you’re installing multiple RAM sticks, follow the same procedure. Refer to your motherboard manual for the recommended slot order for optimal performance, especially when using dual-channel or quad-channel configurations.
Reassembling Your Computer
Once the RAM is installed, it’s time to put everything back together.
- For Desktops: Carefully slide the side panel back into place and re-secure it with the screws.
- For Laptops: Reattach any panels or the bottom cover you removed, ensuring all screws are tightened correctly. Reinsert the battery if you removed it.
Verifying Your RAM Upgrade: Confirming Success
After reassembling your computer and before powering it back on, it’s a good practice to double-check that everything is connected correctly, especially power cables.
- Power On: Connect the power cord and boot up your computer.
- Check BIOS/UEFI (Optional but Recommended): As your computer starts, you might see a prompt to press a key (often
DEL,F2,F10, orF12) to enter the BIOS or UEFI settings. This is a good place to verify that your system recognizes the new RAM. Look for a section that displays memory information. - Check System Information (Windows): Once your operating system has loaded, repeat the steps from earlier to check your system’s RAM information. You should now see the total amount of RAM you installed.
- Run a Memory Diagnostic Tool (Optional): For added peace of mind, you can run a memory diagnostic tool. Windows has a built-in tool accessible by searching for “Windows Memory Diagnostic” in the Start menu. This tool will test your RAM for errors.
Troubleshooting Common Issues
While RAM installation is usually straightforward, occasional issues can arise.
- Computer won’t boot: This is often due to improperly seated RAM modules. Power down, unplug, ground yourself, and reseat all RAM sticks, ensuring they click into place. If you’re mixing RAM, try installing one stick at a time to isolate a faulty module. Also, double-check that you’re using compatible RAM types.
- System instability or crashes: This could indicate a faulty RAM module or incompatibility. Try running a memory diagnostic tool. If it reports errors, you may have a defective stick. If you’ve mixed RAM, try using identical modules.
- RAM not fully recognized: Ensure the RAM is fully seated in the slots. Also, check your motherboard’s maximum RAM capacity and ensure your installed RAM doesn’t exceed it.
Conclusion: A Smoother Computing Experience Awaits
Upgrading your RAM is one of the most rewarding and accessible hardware upgrades you can perform. By understanding your system’s requirements, taking the necessary safety precautions, and following these steps diligently, you can significantly enhance your computer’s performance and enjoy a more fluid and responsive digital life. Whether you’re a tech enthusiast looking for an edge or simply seeking to breathe new life into an aging machine, installing RAM is a skill worth having.
aViewFromTheCave is a participant in the Amazon Services LLC Associates Program, an affiliate advertising program designed to provide a means for sites to earn advertising fees by advertising and linking to Amazon.com. Amazon, the Amazon logo, AmazonSupply, and the AmazonSupply logo are trademarks of Amazon.com, Inc. or its affiliates. As an Amazon Associate we earn affiliate commissions from qualifying purchases.