
Chromebooks have carved out a significant niche in the computing world, celebrated for their simplicity, security, affordability, and seamless integration with Google’s ecosystem. Running on ChromeOS, a lightweight, cloud-centric operating system, they excel at web browsing, email, and basic productivity tasks. However, for a segment of users – developers, power users, or those simply craving more software freedom – ChromeOS’s inherent limitations can feel restrictive. This is where Linux steps in.
Installing Linux on a Chromebook transforms it from a specialized web device into a versatile, full-fledged computing machine capable of running a vast array of desktop applications, development tools, and custom environments. This guide will walk you through the various methods of bringing the power of Linux to your Chromebook, turning a seemingly modest device into a powerhouse of productivity and innovation.
Unlocking Your Chromebook’s Potential: Why Linux?
The appeal of integrating Linux with a Chromebook is multifaceted, touching upon aspects of technology, personal productivity, and even financial shrewdness. For many, a Chromebook represents an excellent value proposition – an accessible entry point into computing. However, relying solely on web apps and the Google Play Store can feel confining. Introducing Linux fundamentally alters this dynamic, providing a gateway to a richer software ecosystem and deeper system control.
The Power of Choice: Expanding Beyond ChromeOS
At its core, installing Linux is about expanding choice. While ChromeOS offers a streamlined experience, it doesn’t support traditional desktop applications like GIMP for advanced photo editing, Audacity for audio production, popular IDEs like VS Code or PyCharm for serious development, or a plethora of open-source utilities. Linux, with its rich repository of free and open-source software (FOSS), instantly bridges this gap.
Developers find immense value in this transformation. With Linux, a Chromebook becomes a portable development workstation, capable of running Docker containers, Node.js, Python, Ruby, Java environments, and all the command-line tools crucial for modern software engineering. This capability is not just about convenience; it’s about enabling professional-grade work on a budget-friendly and highly portable device. Students, too, can benefit greatly, gaining access to specialized software often required for academic courses that aren’t available as web apps or Android alternatives.
Cost-Effectiveness and Productivity Boost
From a financial perspective, integrating Linux extends the longevity and utility of a Chromebook. Instead of investing in a more expensive laptop to gain access to a desktop OS, you can leverage your existing Chromebook, enhancing its capabilities significantly. This makes Chromebooks an even more attractive option for budget-conscious individuals or organizations looking to provide capable computing resources without breaking the bank. It also aligns with the “Money” aspect of our website’s themes, showing how smart tech choices can lead to financial savings and greater utility.
Beyond mere cost savings, the ability to run native desktop applications often translates to a tangible productivity boost. While web applications have come a long way, dedicated desktop software frequently offers better performance, more robust features, and offline functionality, which can be critical for uninterrupted work. Imagine having a full-featured office suite, a powerful video editor, or a comprehensive graphic design tool available on your lightweight Chromebook – the possibilities for creative work and efficient task management multiply exponentially.
Furthermore, exploring Linux can be an educational journey in itself. It introduces users to new operating system paradigms, command-line interfaces, and the vibrant open-source community, fostering technical skills that are increasingly valuable in today’s tech-driven world. This aligns perfectly with the “Tech” focus, encouraging exploration and mastery of diverse software environments.
Method 1: The Official Path with Crostini (Linux on ChromeOS)
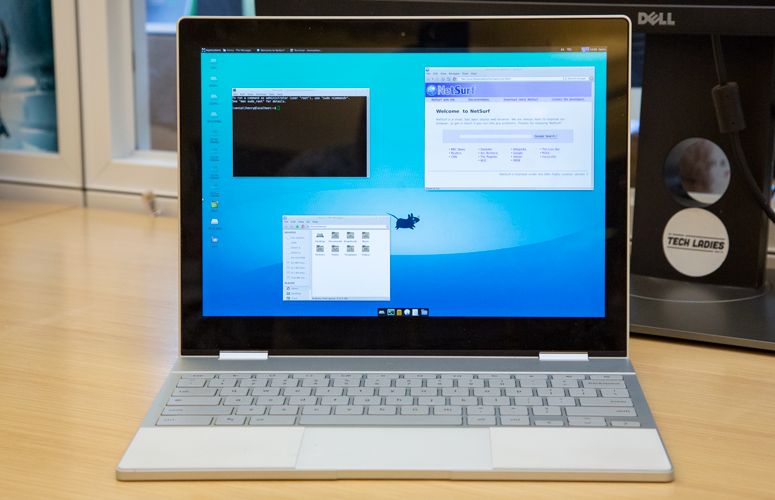
For most modern Chromebooks, the simplest and most recommended way to get Linux is through “Crostini,” Google’s official implementation of a Linux container within ChromeOS. Introduced as “Linux (Beta),” Crostini provides a full Debian-based Linux environment that runs securely alongside ChromeOS, offering a seamless and integrated experience without requiring developer mode or compromising your device’s security or warranty.
Activating Linux (Beta) on Your Chromebook
Before you begin, ensure your Chromebook is up to date and compatible with Crostini. Most Chromebooks released since 2019 support it, but a quick check in your settings or a search for your model’s specifications is always wise.
- Update ChromeOS: Go to
Settings > About ChromeOS > Check for updates. Ensure your system is running the latest stable version. - Enable Linux (Beta):
- Open your Chromebook’s
Settings. - In the left-hand navigation pane, scroll down and click on
Linux (Beta). - Click
Turn on. - A setup window will appear. Click
Next. - You’ll be prompted to choose a username and disk size. The default disk size is usually sufficient to start, but you can adjust it if you plan to install many large applications. Click
Install. - The installation process will begin, downloading and setting up the Linux container. This can take several minutes, depending on your internet speed.
- Open your Chromebook’s
- Access the Terminal: Once the installation is complete, a Linux terminal window will automatically open. This is your gateway into the Linux environment. You can also find “Terminal” in your ChromeOS app launcher.
Essential Commands and Software Installation
With the terminal open, you’re ready to start using Linux. The default Crostini environment uses Debian, which means you’ll use the apt package manager for installing software.
-
Update Package Lists: The first thing you should always do after setting up a new Linux environment is to update its package lists:
sudo apt updateThis command fetches the latest information about available packages from the repositories.
-
Upgrade Installed Packages: After updating the lists, it’s good practice to upgrade any pre-installed packages to their latest versions:
sudo apt upgrade -yThe
-yflag automatically confirms any prompts, saving you from typing ‘yes’ repeatedly. -
Install Software: Now you can install a vast array of Linux applications. For example, to install the popular GIMP image editor:
sudo apt install gimpOnce installed, GIMP (or any other GUI application) will appear in your ChromeOS app launcher alongside your native ChromeOS and Android apps. This seamless integration is one of Crostini’s greatest strengths.
-
Common Applications to Consider:
- Development Tools:
code(VS Code – requires additional steps to install),git,python3,nodejs,docker(requires specific setup for Crostini). - Productivity:
libreoffice(full office suite),vlc(media player). - Utilities:
htop(system monitor),neofetch(system info).
- Development Tools:
Crostini provides excellent security, as the Linux environment is sandboxed and isolated from the core ChromeOS. It leverages virtio for efficient communication between the container and the host, ensuring good performance for most desktop applications. Files can be easily shared between ChromeOS and Linux via the “Linux files” folder in the ChromeOS Files app. This method is highly recommended for its balance of power, security, and ease of use, making it ideal for the vast majority of users looking to expand their Chromebook’s capabilities.
Method 2: Crouton – A Dual-Boot Approach for More Flexibility
While Crostini is Google’s preferred method, older Chromebooks or users who require more direct access to hardware or a specific Linux distribution might turn to Crouton. Crouton (Chromium OS Universal Chroot Environment) is not a virtualization solution like Crostini. Instead, it allows you to run a Linux distribution (like Ubuntu, Debian, or Kali) in a chroot environment, effectively creating a dual-boot-like experience where you can switch between ChromeOS and Linux with a simple keyboard shortcut.
Understanding Developer Mode and Chroot Environments
Crouton requires putting your Chromebook into Developer Mode. This is a critical step with significant implications:
-
Developer Mode: Enabling Developer Mode removes some of ChromeOS’s security features. Specifically, it disables Verified Boot, which normally checks the integrity of ChromeOS on startup. Each time you boot, you’ll see a warning screen (the “OS verification is OFF” screen), which you can bypass by pressing
Ctrl + Dor waiting 30 seconds.- Warning: Entering Developer Mode wipes all local data from your Chromebook. Ensure you back up anything important before proceeding.
- Reverting: Exiting Developer Mode will also wipe your data again and re-enable Verified Boot.
-
Chroot Environment: A chroot (change root) environment allows a program or a user to run with a different root directory. In the context of Crouton, it means a complete Linux distribution runs within the ChromeOS kernel, but with its own isolated file system and user space. This setup offers near-native performance for Linux applications because it’s not a full virtual machine, yet it keeps the Linux installation separate from the core ChromeOS system.
The Installation Process and Considerations
The installation process for Crouton is more involved than Crostini and requires comfort with the command line.
-
Enable Developer Mode:
- Power off your Chromebook.
- Hold
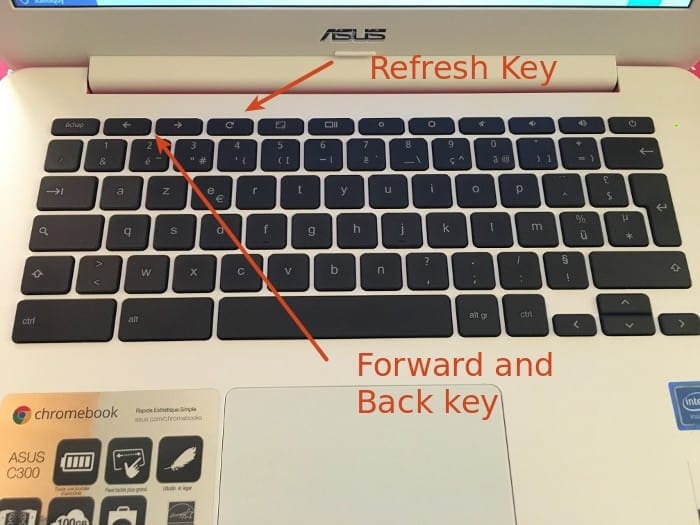
Esc + Refresh(F3 key) and press thePowerbutton. This will put your device into Recovery Mode. - At the recovery screen, press
Ctrl + D. You’ll be asked to confirm turning OS verification off. PressEnter. - Your Chromebook will restart and go through a setup process, which will wipe your data. This can take 10-15 minutes.
- Once setup is complete, you’ll see the “OS verification is OFF” screen on subsequent boots.
-
Download Crouton:
- Once in ChromeOS (after setting up Developer Mode), open your Chrome browser.
- Download the Crouton script from the official GitHub page:
github.com/dnschneid/crouton(click the “crouton” link to download the file). Save it to yourDownloadsfolder.
-
Open a Shell and Install:
- Press
Ctrl + Alt + Tto open a ChromeOS terminal window (also known as “crosh”). - Type
shelland pressEnterto enter a full bash shell. - Now, execute the Crouton script with your desired Linux distribution and desktop environment. For example, to install Ubuntu with the XFCE desktop environment:
bash

sudo sh ~/Downloads/crouton -t xfce
Or for a full Unity desktop:
bash

sudo sh ~/Downloads/crouton -t unity
You can also specify a release (e.g.,-r bionicfor Ubuntu 18.04 LTS).
bash

sudo sh ~/Downloads/crouton -r bionic -t xfce
- The installation will take a significant amount of time (30 minutes to several hours) as it downloads and configures the entire Linux system. You’ll be prompted to create a username and password for your Linux environment.
- Press
-
Switching Between ChromeOS and Linux:
- Once installed, you can launch your Linux desktop from the shell:
bash

sudo startxfce
(Replacexfcewith your chosen desktop environment). - To switch between ChromeOS and Linux:
- For most Chromebooks:
Ctrl + Alt + Shift + Back(left arrow) to go to ChromeOS,Ctrl + Alt + Shift + Forward(right arrow) to go back to Linux. - For ARM-based Chromebooks:
Ctrl + Alt + Backto ChromeOS,Ctrl + Alt + Forwardto Linux.
- For most Chromebooks:
- Once installed, you can launch your Linux desktop from the shell:
Crouton Considerations:
- Security: Running in Developer Mode is inherently less secure than standard ChromeOS or Crostini. You lose Verified Boot, making your system more vulnerable to tampering.
- Maintenance: Crouton requires manual updates within the chroot (
sudo apt update && sudo apt upgrade) and occasional updates to the Crouton script itself (sudo sh ~/Downloads/crouton -u -n). - Hardware Access: Crouton often provides better direct hardware access (e.g., graphics performance) compared to Crostini, making it suitable for older Chromebooks or specific use cases like gaming or more intensive graphic tasks, where the containerization of Crostini might introduce overhead.
- Distributions: Crouton supports a wider range of Linux distributions and desktop environments than Crostini, giving users more control over their preferred setup.
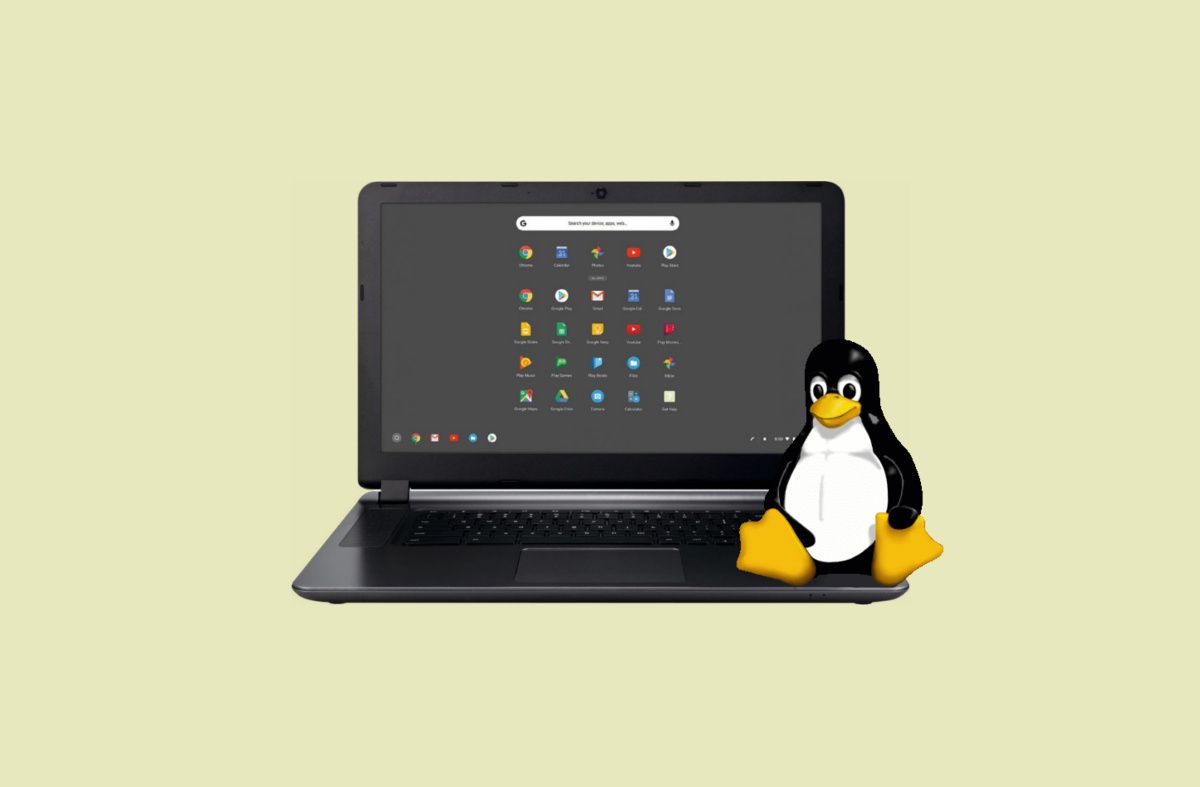
For users who understand the security implications and desire greater control over their Linux environment, Crouton remains a viable and powerful option, particularly for older devices not supporting Crostini, or for those needing specific hardware interactions.
Method 3: Full Linux Replacement (For the Adventurous)
This method involves completely replacing ChromeOS with a standalone Linux distribution. This is the most complex, riskiest, and least recommended approach for most users, as it effectively turns your Chromebook into a standard Linux laptop, losing all ChromeOS functionality.
Weighing the Risks and Rewards
-
Risks:
- Irreversible Changes: This often involves flashing custom firmware (BIOS/UEFI) to your Chromebook, which can brick your device if done incorrectly.
- Hardware Compatibility: Chromebook hardware is designed for ChromeOS. Getting all components (Wi-Fi, Bluetooth, trackpad, keyboard shortcuts, audio) to work perfectly under a standard Linux distribution can be challenging and may require custom kernel modules or drivers.
- Loss of Warranty: This method will almost certainly void your Chromebook’s warranty.
- Complexity: It requires advanced Linux knowledge, familiarity with firmware flashing tools, and extensive troubleshooting skills.
-
Rewards (for a niche audience):
- Full Control: You have a pure Linux system, with complete control over the boot process, kernel, and hardware.
- Resource Efficiency: No ChromeOS running in the background means all system resources are dedicated to Linux.
- Specific Distros: If you absolutely need a niche Linux distribution or a specific kernel configuration that neither Crostini nor Crouton can provide, this is your only path.
Brief Overview of the Process:
Typically, this involves:
- Enabling Developer Mode.
- Removing the firmware write-protect screw (physical modification on some models).
- Flashing a custom UEFI/BIOS firmware (e.g., MrChromebox’s scripts).
- Creating a bootable USB drive with your chosen Linux distribution (e.g., Ubuntu, Fedora, Arch Linux).
- Booting from the USB and installing Linux as you would on any other PC.
This method is strictly for experienced users who are comfortable with the inherent risks and possess the technical acumen to troubleshoot potential issues. For the vast majority, Crostini or Crouton offer a safer, more practical, and equally capable means of experiencing Linux on a Chromebook.
Post-Installation: Maximizing Your Linux Experience
Once Linux is up and running on your Chromebook, the real fun begins. Whether you’ve chosen Crostini or Crouton, there are steps you can take to customize your environment, install essential software, and maintain your system for optimal performance and security. This is where your Chromebook truly becomes a personal computing hub, tailored to your specific needs.
Essential Software and Customization Tips
The beauty of Linux lies in its flexibility and the sheer volume of available open-source software. Here’s how to make your Linux environment truly yours:
-
Update and Upgrade Regularly: As mentioned earlier, this is paramount for security and access to the latest features.
sudo apt update
sudo apt upgrade
For Crostini, you typically won’t need to manually update the kernel, as that’s handled by ChromeOS updates. For Crouton, ensure you occasionally update the chroot environment itself:
sudo sh ~/Downloads/crouton -u -n. -
Install a Text Editor or IDE:
- VS Code: A popular choice for developers. While not directly in
apt, you can download the.debpackage from the official website and install it usingsudo dpkg -i <filename>.deb. - Sublime Text / Atom: Other excellent general-purpose text editors.
- Vim / Nano: Command-line editors are always available and essential for quick edits.
- VS Code: A popular choice for developers. While not directly in
-
Productivity Suite:
- LibreOffice: A free and powerful alternative to Microsoft Office. Install with
sudo apt install libreoffice. - Google Chrome/Firefox: While ChromeOS has Chrome, you might want a native Linux browser for testing or separate profiles.
- LibreOffice: A free and powerful alternative to Microsoft Office. Install with
-
Multimedia and Graphics:
- GIMP: For image manipulation (
sudo apt install gimp). - Inkscape: For vector graphics (
sudo apt install inkscape). - VLC Media Player: For versatile media playback (
sudo apt install vlc). - Audacity: For audio editing (
sudo apt install audacity).
- GIMP: For image manipulation (
-
Development Tools:
- Git: Essential for version control (
sudo apt install git). - Node.js / Python / Ruby: Install language runtimes and package managers as needed.
- Docker: While slightly more complex to set up in Crostini (due to container-within-a-container), it’s highly valuable for isolated development environments. Research specific instructions for your setup.
- Git: Essential for version control (
-
Desktop Environment Customization (Crouton primarily, less so for Crostini’s default XFCE/Gnome Terminal):
- If using Crouton with a full desktop environment like XFCE, GNOME, or KDE, explore themes, icon packs, and widgets to personalize its appearance and workflow. This is where you can truly make Linux feel like “home.”
-
File Sharing:
- Crostini: Your Linux files are accessible from the ChromeOS Files app under “Linux files.” Simply drag and drop to share.
- Crouton: You can access your ChromeOS downloads folder from within Linux, usually found at
/usr/local/chroots/<chrootname>/home/<username>/Downloads.
Security and Maintenance Best Practices
Running Linux, especially with Developer Mode enabled (for Crouton), brings new security considerations. Proactive maintenance is key to a stable and secure system.
-
Regular Backups:
- Crostini: ChromeOS includes a built-in backup and restore feature for your Linux container. Go to
Settings > Linux (Beta) > Backup & restore. Use this regularly, especially before major changes. - Crouton: Backing up your entire chroot is possible using the
edit-chrootcommand, but it can create very large files. Regular backups of yourhomedirectory within Linux are more practical for your personal data.
- Crostini: ChromeOS includes a built-in backup and restore feature for your Linux container. Go to
-
Strong Passwords: Ensure you use a strong, unique password for your Linux user account.
-
Firewall: While ChromeOS handles network security, it’s good practice to configure a basic firewall within your Linux environment, especially if you’re developing network-facing applications.
ufw(Uncomplicated Firewall) is a user-friendly option:sudo apt install ufw sudo ufw enableThen, allow specific ports as needed (e.g.,
sudo ufw allow ssh). -
Limit
sudoUsage: Only usesudowhen absolutely necessary for system-wide changes. Be cautious when executing commands copied from online sources, especially those preceded bysudo. -
Remove Unused Software: Periodically review installed packages and remove those you no longer need. This frees up disk space and reduces potential security vulnerabilities.
sudo apt autoremove sudo apt clean -
Stay Informed: Follow relevant tech blogs or forums for news regarding ChromeOS, Crostini, or Crouton, as updates can sometimes introduce changes or require specific actions. This continuous learning aligns perfectly with staying current in the ever-evolving “Tech” landscape.
By following these post-installation tips, you can ensure your Chromebook’s Linux environment remains robust, secure, and perfectly tailored to enhance your digital productivity, creativity, and development efforts.
Choosing Your Path: Which Method is Right for You?
The decision of how to install Linux on your Chromebook largely depends on your specific needs, technical comfort level, and the capabilities of your device.
-
For Most Users (Beginners to Intermediate Developers): Crostini (Linux on ChromeOS)
- Pros: Official Google support, excellent security (sandboxed), no Developer Mode required, seamless integration with ChromeOS, easy backup/restore, good performance for most applications, actively maintained.
- Cons: Limited to Debian-based distributions, some advanced hardware interactions might be restricted, larger disk footprint than Crouton, requires a relatively modern Chromebook.
- Best for: Web development, coding (Python, Node.js, Ruby, Java), general Linux desktop applications, students, anyone wanting a safe and simple way to get Linux without compromising ChromeOS.
-
For Experienced Users (Specific Needs, Older Devices): Crouton
- Pros: Near-native performance, wider choice of Linux distributions and desktop environments, better hardware access for specific use cases (e.g., some gaming, hardware-intensive tasks), works on older Chromebooks not supporting Crostini.
- Cons: Requires Developer Mode (security risk, data wipes), more complex installation and maintenance, unofficial support (community-driven), potential for more troubleshooting.
- Best for: Users needing specific Linux distributions not offered by Crostini, those requiring better GPU performance for older games or graphic tasks, users with older Chromebooks, and those comfortable with terminal commands and understanding of Developer Mode risks.
-
For the Niche Expert/Adventurer: Full Linux Replacement
- Pros: Total control over the hardware and software stack, pure Linux experience.
- Cons: Extremely high risk (potential to brick device), voids warranty, significant compatibility issues with Chromebook-specific hardware, highly complex, effectively turns your Chromebook into a generic Linux laptop.
- Best for: Highly experienced Linux users who specifically require full bare-metal control, are willing to accept significant risks, and have a deep understanding of their Chromebook’s hardware.
Conclusion: Empowering Your Chromebook
In a world increasingly driven by technological versatility and efficient resource management, transforming your Chromebook with Linux stands out as a smart and empowering move. It transcends the initial perception of a Chromebook as merely a web browser, unveiling a device capable of robust software development, advanced productivity, and extensive customization. This journey isn’t just about installing an operating system; it’s about unlocking potential – both of your hardware and your own capabilities.
Whether you opt for the secure and integrated simplicity of Crostini, the flexible and performant nature of Crouton, or venture down the adventurous path of a full Linux replacement, the decision to install Linux is an investment in versatility. It aligns perfectly with the overarching themes of “Tech,” by pushing the boundaries of what your gadgets can do; “Brand,” by allowing you to craft a personalized and powerful computing identity; and “Money,” by maximizing the value and lifespan of your existing hardware.
Embrace the open-source spirit, extend your Chromebook’s utility, and discover the rich ecosystem of Linux. Your Chromebook is ready for its next evolution – are you?
aViewFromTheCave is a participant in the Amazon Services LLC Associates Program, an affiliate advertising program designed to provide a means for sites to earn advertising fees by advertising and linking to Amazon.com. Amazon, the Amazon logo, AmazonSupply, and the AmazonSupply logo are trademarks of Amazon.com, Inc. or its affiliates. As an Amazon Associate we earn affiliate commissions from qualifying purchases.