
In an era of increasingly fragmented entertainment, YouTube TV stands out as a robust solution for cord-cutters seeking a live TV experience with the flexibility of modern streaming. One of its most compelling features, and often a deciding factor for subscribers, is its Digital Video Recorder (DVR) capability. Gone are the days of clunky hardware DVRs hogging space beneath your television, offering limited storage and frustrating conflicts when two favorite shows aired simultaneously. YouTube TV has revolutionized this with a cloud-based approach that promises unparalleled freedom.

For many, the ability to record, pause, rewind, and fast-forward through live television is non-negotiable. Whether you’re a sports fanatic who can’t miss a game, a movie buff catching the latest premiere, or simply someone whose schedule rarely aligns with broadcast times, a reliable DVR is essential. This comprehensive guide will demystify YouTube TV’s recording features, walking you through the process step-by-step, helping you manage your library, and offering insights to optimize your viewing experience. By the end, you’ll be a YouTube TV DVR master, confidently navigating its powerful recording tools to ensure you never miss a moment of your favorite content.
Understanding YouTube TV’s Cloud DVR Feature
YouTube TV’s DVR system isn’t just a basic recording function; it’s a sophisticated cloud-based service designed to offer maximum convenience and flexibility. Unlike traditional DVRs that store recordings locally on a hard drive, YouTube TV leverages the power of the cloud, fundamentally changing how users interact with recorded content.
What is Cloud DVR?
Cloud DVR, or “network DVR,” stores your recordings on remote servers rather than on a physical device in your home. This means you don’t need any special equipment beyond your streaming device (smart TV, phone, tablet, computer, etc.) and an internet connection. When you “record” a show on YouTube TV, you’re essentially telling their system to save a copy of that broadcast to your personal cloud library. This digital copy is then accessible from any device where you’re logged into your YouTube TV account, offering seamless continuity whether you’re at home or on the go.
The primary advantages of a cloud-based system are significant. First, it eliminates the hardware cost and maintenance associated with traditional DVRs. Second, it eradicates the common frustration of storage limits; you’ll never have to delete an old recording to make space for a new one. Third, and perhaps most crucially, it provides an unprecedented level of accessibility, freeing your content from the confines of a single living room television.
Unlimited Storage and Retention Policy
One of YouTube TV’s most attractive differentiators in the crowded streaming market is its genuinely unlimited cloud DVR storage. This isn’t a marketing gimmick; it truly means you can add as many shows, movies, sports events, or documentaries to your library as you wish, without ever hitting a ceiling. This feature alone provides immense peace of mind, allowing users to build a vast personal archive of entertainment.
However, while storage is unlimited, there is a retention policy to be aware of. Each recording remains in your library for a period of nine months from the date it was recorded. After this period, the recording will automatically expire and be removed from your library. This policy strikes a balance, offering ample time to watch and re-watch content while ensuring the system remains efficient. For series that air regularly, new episodes will continuously refresh, ensuring you always have the most recent content available. It’s also important to note that if a show is available on-demand, YouTube TV will often prioritize the on-demand version, even if you’ve recorded it, providing an experience free from fast-forward limitations on those specific versions.
How It Differs from Other Services
When comparing YouTube TV’s DVR with competitors like Hulu + Live TV, Sling TV, or FuboTV, its unlimited storage stands out. Many other services offer a base amount of DVR storage (e.g., 50 hours, 200 hours) and charge extra for upgrades to larger capacities or unlimited options. For instance, Hulu + Live TV includes 50 hours and offers an unlimited DVR add-on for an additional monthly fee. Sling TV’s base plans come with 50 hours, with a 200-hour upgrade also available for a fee. FuboTV typically offers 1000 hours of cloud DVR with its standard plan.
This makes YouTube TV’s included unlimited DVR a significant value proposition, especially for heavy users who record many shows or want to keep entire seasons of their favorite series. The nine-month retention period is also quite generous, outperforming some competitors that might delete recordings after a shorter timeframe (e.g., 28 days for some on-demand versions on other platforms). This generous policy, combined with unlimited storage, positions YouTube TV’s DVR as one of the most user-friendly and feature-rich options available in the live TV streaming landscape.
Step-by-Step Guide to Recording a Show
Recording a show on YouTube TV is remarkably straightforward, designed to be intuitive whether you’re adding a single episode or an entire series. The key concept to grasp is “Add to Library,” which is YouTube TV’s equivalent of “recording.”
Adding a Show or Movie to Your Library
The primary method for “recording” content on YouTube TV is by adding it to your personal library. This action tells the service to save all future airings of that specific program, as well as any existing on-demand versions that are available.
- Locate Your Desired Content:
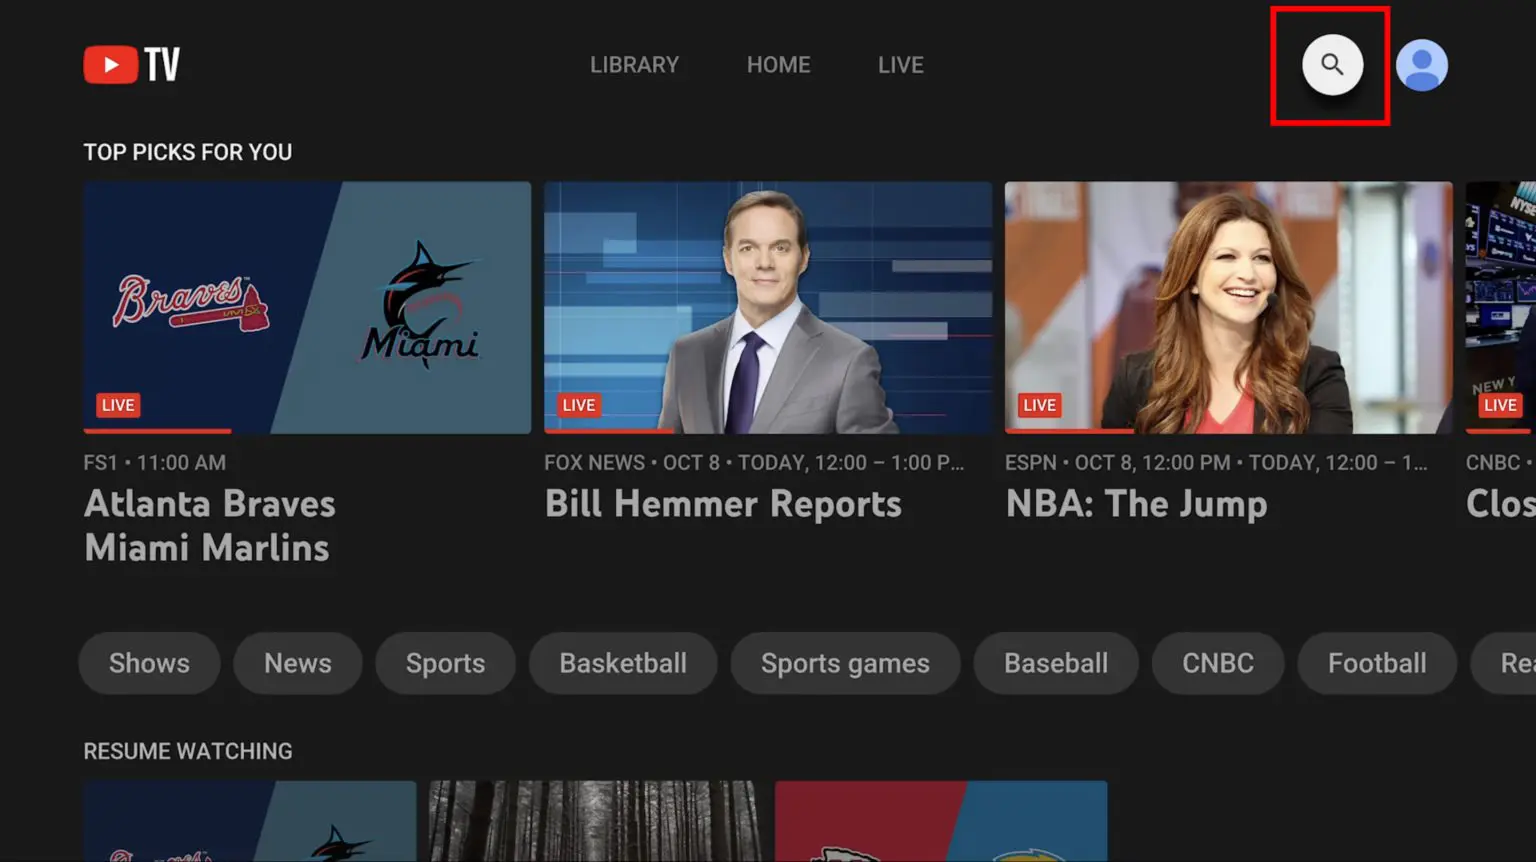
- Search: The easiest way to find a specific show or movie is to use the search bar (magnifying glass icon), typically found at the top of the interface. Type in the title, and search results will appear.
- Home Tab: Browse the “Home” tab, which presents personalized recommendations, trending shows, and recently added content.
- Live Tab: Navigate to the “Live” tab to view the channel guide, much like a traditional TV schedule. You can scroll through channels and future airings.
- Library Tab: Even if a show isn’t currently in your library, you might find recommendations or related content here.
- Access the Program Details Page: Once you find the show or movie you want to record, click or tap on its title or thumbnail. This will take you to its dedicated details page, providing information such as episode descriptions, cast, and upcoming airings.
- Click “Add to Library”: On the program details page, you’ll see a prominent “Add to Library” button (often represented by a plus sign icon). Click this button. A confirmation message will usually appear, letting you know the show has been added.
Once added, YouTube TV will automatically record all future broadcasts of that show across any channel included in your subscription. It also often includes available on-demand versions from networks, though these may have unskippable ads.
Recording Live TV
If you’re watching a show live and decide you want to record the rest of it, the process is equally simple:
- While Watching Live: While a program is airing, bring up the playback controls (by tapping the screen on mobile, or pressing down on a remote).
- Find “Add to Library”: You’ll typically see the “Add to Library” or plus sign icon among the controls. Click this.
YouTube TV will then begin recording the current broadcast from that point forward. Crucially, if you’ve added the show to your library, it will also save the entire episode from the beginning, as long as it has been broadcasting since you initially added it to your library. For any future airings of that program, the full episode will be saved.
Recording an Entire Series
The “Add to Library” function is designed to handle entire series effortlessly. When you add a show, YouTube TV doesn’t just record a single episode; it sets up a recording schedule for all future airings of that series.
- Automatic Series Management: Once you click “Add to Library” on any episode or the series page, YouTube TV will automatically capture all new episodes as they air, add them to your library, and organize them neatly.
- Existing Episodes: If previous episodes or seasons are available on-demand through the networks included in your YouTube TV subscription, they will also often appear in your library, allowing you to catch up. These on-demand versions may have different ad policies than your DVR recordings.
- Unfollowing a Series: If you decide you no longer want to record a series, simply go back to the program details page and click the “Remove from Library” button (which replaces the “Add to Library” button once a show is added). This will stop all future recordings of that show.
This robust series recording capability is a major draw, ensuring continuity for your favorite ongoing sagas without requiring episode-by-episode management.
Managing Your Recorded Content
With unlimited storage, your YouTube TV library can quickly grow into a vast collection of content. Efficient management of this library is key to a smooth and enjoyable viewing experience.
Accessing Your Library
All your “recorded” shows, movies, and sports are housed within the “Library” tab of the YouTube TV interface. This tab is typically found in the main navigation menu alongside “Home,” “Live,” and “Search.”
Upon entering the Library, you’ll find your content organized into categories:
- New in your Library: Highlights recently added episodes or airings.
- Shows: A list of all series you’ve added, often grouped by network.
- Movies: All films you’ve added.
- Sports: Categorizes sports events, often by league or team.
- Scheduled: Shows upcoming recordings and allows you to browse future airings.
Clicking on a show or movie within the library will take you to its specific page, where you can view available episodes, their air dates, and playback options.
Organizing Your Recordings
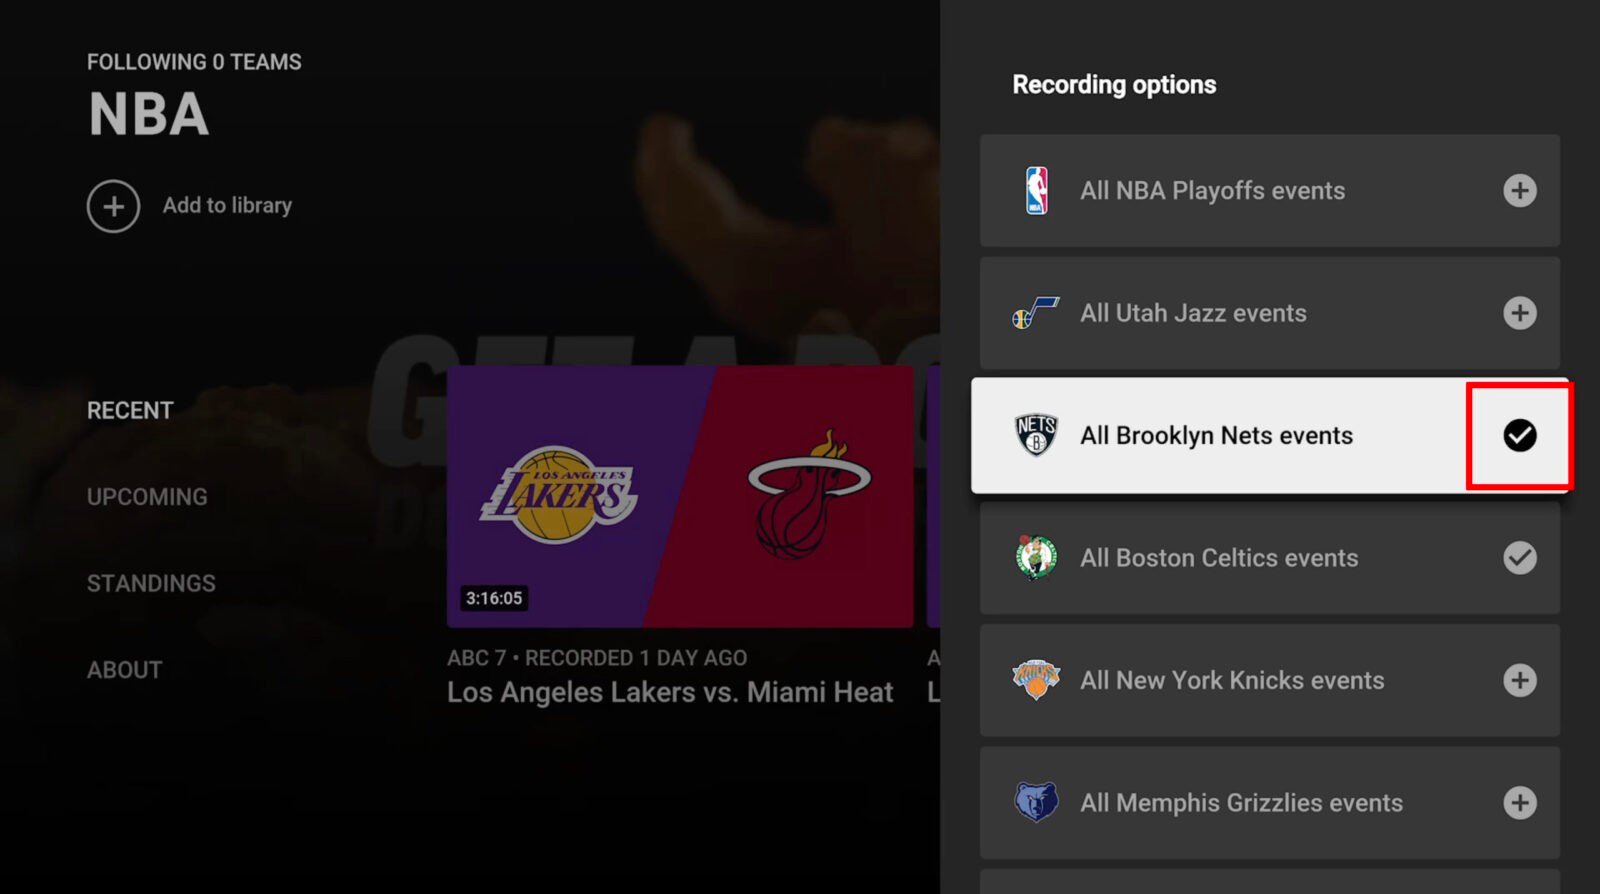
YouTube TV automatically handles the organization of your recordings, which is a major convenience. When you add a series, all its episodes, whether new or old, recorded or on-demand, are grouped together under that series title. Episodes are typically ordered chronologically, making it easy to pick up where you left off or binge-watch from the beginning.
While you can’t manually create custom folders or categories, the built-in system is quite effective. For sports, recordings are often grouped by sport, league, or team, which is especially useful during seasons with multiple simultaneous games. The “New in your Library” section acts as a dynamic “recently added” filter, ensuring you can quickly spot the latest content.
Deleting from Library (and why you might not need to)
Given YouTube TV’s unlimited storage, the need to delete recordings to free up space is largely eliminated. You can maintain an extensive library without ever worrying about hitting a capacity limit.
However, there might still be reasons to remove content from your library:
- Decluttering: If you’ve finished a series or decided you’re no longer interested in a particular show, removing it can help keep your library tidy and focused on content you actively want to watch.
- Privacy: While your library is private to your profile, you might prefer to remove certain content from your list.
To delete a show or movie:
- Navigate to the show’s or movie’s details page within your Library.
- Click on the “Remove from Library” button (which replaces “Add to Library” once the content is added).
A confirmation may appear, and once confirmed, the show will be removed from your recorded content. Remember, this only removes it from your library; it doesn’t affect other profiles on the same account.
Playback Options
YouTube TV provides robust playback controls for your recorded content:
- Pause/Play: Standard controls for stopping and resuming playback.
- Rewind/Fast-Forward: You can typically rewind and fast-forward through your recorded content without restrictions. This is a significant advantage over on-demand versions, which often have unskippable ads.
- Skip Ads: On true DVR recordings (those saved from a live broadcast), you can usually skip through commercial breaks entirely using the fast-forward function. Be aware that on-demand versions, even if listed in your library, often have unskippable ads mandated by the content providers. YouTube TV will often prioritize the DVR version if available to give you the ad-skipping benefit.
- Chapter/Segment Markers: For some sports or news programs, YouTube TV may automatically generate “key plays” or “chapter” markers, allowing you to jump to significant moments.
These playback functionalities provide a highly flexible viewing experience, allowing you to consume content on your terms.
Optimizing Your YouTube TV Recording Experience
While YouTube TV’s DVR is intuitive, understanding some nuances can significantly enhance your experience and avoid common pitfalls.
Understanding Program Availability
Not all content on YouTube TV is created equal when it comes to recording and playback.
- Live Broadcasts: Almost all live broadcasts on the channels included in your subscription can be recorded using the “Add to Library” feature.
- On-Demand Content: Many networks make their shows available on-demand shortly after they air. While YouTube TV often integrates these into your library, these versions are distinct from your DVR recordings. They often come with unskippable ads and may expire sooner or have different viewing windows.
- Blackout Restrictions: For live sports, particularly local games, geographic blackout restrictions imposed by leagues and broadcasters can apply. This means a game might not be available for live viewing or DVR recording in certain areas. YouTube TV adheres to these restrictions.
- Temporary Content: Some special events or limited-run programming might have specific recording or playback rules that differ from standard series.
Always check the program details page for specific information regarding availability and any viewing restrictions.
Dealing with On-Demand vs. DVR Versions
One of the most frequent points of confusion for YouTube TV users is the interplay between DVR recordings and on-demand versions. When you “Add to Library,” YouTube TV essentially collects all available versions of that content for you.
- Prioritization: YouTube TV’s system is designed to provide you with the “best” available version. For content you’ve specifically recorded, it will generally prioritize your DVR recording, allowing you to fast-forward through ads. However, if a DVR recording has expired (after 9 months) or isn’t yet available, it will default to an on-demand version if one exists.
- Ad Experience: The key distinction is the ad experience. Your personal DVR recordings allow ad-skipping. On-demand versions typically do not. Be mindful if you encounter unskippable ads; it likely means you’re watching an on-demand version.
- Recognizing the Version: Sometimes, the interface will subtly indicate if you’re watching an on-demand version (e.g., a small “On Demand” label). For series, you might find a mix of both in your library, with newer episodes being DVR versions and older ones defaulting to on-demand.
Understanding this dynamic helps manage expectations regarding ad-skipping and content availability within your library.
Troubleshooting Common Issues
While YouTube TV’s DVR is highly reliable, occasional issues can arise:
- Missing a Recording:
- Check “Scheduled” Tab: Ensure the show was actually scheduled to record.
- Verify Library Status: Did you actually “Add to Library”?
- Check Air Dates: Sometimes, shows change their air times or go on hiatus. Verify the broadcast schedule.
- Blackouts: For sports, confirm there were no local blackouts preventing the recording.
- Expired Content: Remember the 9-month retention policy.
- Playback Problems:
- Internet Connection: Ensure your internet connection is stable and fast enough for streaming.
- Device Issues: Try restarting your streaming device or app.
- App Updates: Make sure your YouTube TV app is up to date.
- Ad-Skipping Not Working: This is almost always due to watching an on-demand version rather than your personal DVR recording. Check the program information to confirm which version you’re accessing.
If persistent problems occur, YouTube TV’s support resources (their help center or customer service) are excellent for further assistance.
Beyond Basic Recording: Tips and Tricks
Leveraging YouTube TV’s full potential involves more than just hitting the “record” button. A few additional tips can truly elevate your streaming experience.
Setting Up Reminders
While “Add to Library” handles recording, sometimes you just want a reminder to catch a live show. YouTube TV allows you to set reminders for upcoming programs. When browsing the Live Guide or a show’s details page for a future airing, you might see an option to “Set Reminder.” This will send a notification to your devices (if notifications are enabled for the YouTube TV app) just before the show begins, serving as a helpful nudge.
Utilizing Profiles for Personalized Libraries
YouTube TV supports up to six individual accounts within a single family plan, each with its own personalized library. This is incredibly useful:
- No Conflicts: Each profile has its own independent “Add to Library” selections and viewing history, preventing conflicts over what to record or “Mark as Watched.”
- Tailored Recommendations: Recommendations are personalized based on individual viewing habits.
- Organized Content: Each family member can maintain their own clean, relevant library without seeing content added by others.
Ensure everyone in your household uses their designated profile to maximize the benefits of personalized DVR and content management.
Best Practices for Sports Fans
YouTube TV is a favorite among sports fans, and its DVR offers unique advantages:
- Record All Games: Add your favorite teams or leagues to your library, and YouTube TV will record all available games.
- Spoiler-Free Viewing: If you can’t watch a game live, avoid spoilers by going directly to your Library to start the recording. YouTube TV often has a “Hide Spoilers” feature that prevents scores from being shown until you start playback.
- Key Plays/Highlights: For many major sports, YouTube TV will automatically generate “key plays” or highlights that you can jump to, allowing you to quickly catch up on important moments if you start watching late.
- Post-Game Analysis: Don’t forget to record pre-game shows, post-game analysis, and sports news shows to get the full picture.
Mastering these features ensures sports enthusiasts never miss a crucial play or broadcast.
Conclusion
YouTube TV has undoubtedly set a high bar for cloud DVR services in the live TV streaming market. Its commitment to unlimited storage, a generous nine-month retention period, and an intuitive “Add to Library” system makes recording shows not just easy, but truly worry-free. From instantly capturing live broadcasts to managing entire series with a single click, the platform empowers users to build a vast, personalized content library accessible from virtually anywhere.
By understanding the subtle differences between DVR recordings and on-demand versions, effectively navigating your library, and leveraging advanced features like individual profiles and sports-specific tools, you can transform your YouTube TV experience. Gone are the days of scheduling conflicts and frantic storage management. Embrace the freedom and flexibility that YouTube TV’s cloud DVR offers, and immerse yourself in an entertainment world tailored precisely to your schedule and preferences. Now that you know exactly “how do I record a show on YouTube TV,” you’re ready to unlock the full potential of your subscription and never miss another moment of your favorite content.
aViewFromTheCave is a participant in the Amazon Services LLC Associates Program, an affiliate advertising program designed to provide a means for sites to earn advertising fees by advertising and linking to Amazon.com. Amazon, the Amazon logo, AmazonSupply, and the AmazonSupply logo are trademarks of Amazon.com, Inc. or its affiliates. As an Amazon Associate we earn affiliate commissions from qualifying purchases.