
In the digital age, the ability to quickly and efficiently capture what’s on your screen is no longer a luxury but a fundamental necessity. Whether you’re a tech enthusiast troubleshooting an issue, a student compiling research, a professional building a presentation, or a content creator showcasing your work, screenshots are an indispensable tool. For Windows users, the go-to solution for years has been the Snipping Tool. However, many users often wonder, “how do I install Snipping Tool?” The answer, surprisingly, is often that it’s already there, waiting to be unleashed.
This comprehensive guide will demystify the Snipping Tool, walking you through its core functionalities, explaining how to access it, and even introducing its modern successor, Snip & Sketch. By the end of this article, you’ll not only understand the nuances of screen capture on Windows but also be able to wield these tools like a seasoned professional, significantly boosting your digital productivity and communication efficiency. Let’s dive in and unlock the full potential of your Windows screenshot capabilities.
Understanding the Snipping Tool: Your Built-in Screenshot Powerhouse
Before we delve into “installation” and usage, it’s crucial to understand what the Snipping Tool truly is and why it’s so fundamental to the Windows experience. It’s more than just a simple screenshot utility; it’s a versatile capture tool designed to streamline a wide array of tasks.
What is the Snipping Tool?
The Snipping Tool is a native Microsoft Windows utility that allows users to take screenshots (called “snips”) of an open window, rectangular areas, free-form areas, or the entire screen. Unlike the basic Print Screen function, which captures the entire display and often requires pasting into another application for editing, the Snipping Tool offers immediate flexibility and a suite of annotation features. Introduced in Windows Vista, it quickly became a beloved feature for its simplicity and effectiveness. It’s a cornerstone for anyone needing to visually communicate information, whether it’s for technical support, educational purposes, or creating content for personal branding. Its inclusion directly addresses the need for quick, targeted visual information, saving users invaluable time and effort compared to manual cropping or using third-party software for basic tasks.
Is the Snipping Tool Truly “Installed”? Addressing the User’s Premise
The common question, “how do I install Snipping Tool,” stems from a natural assumption: if you want a piece of software, you usually have to download and install it. However, the Snipping Tool typically breaks this mold for Windows users.
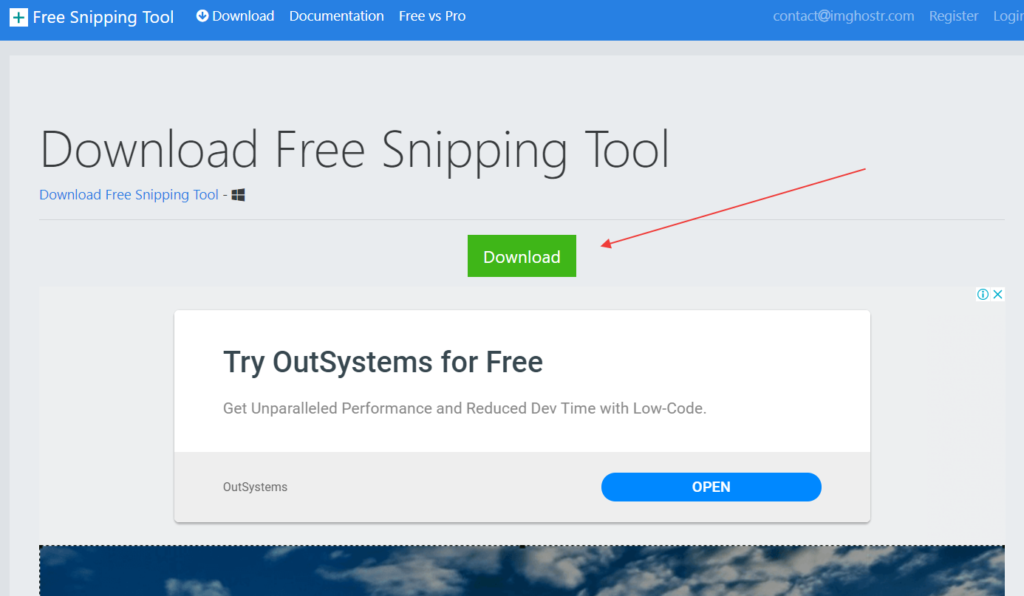
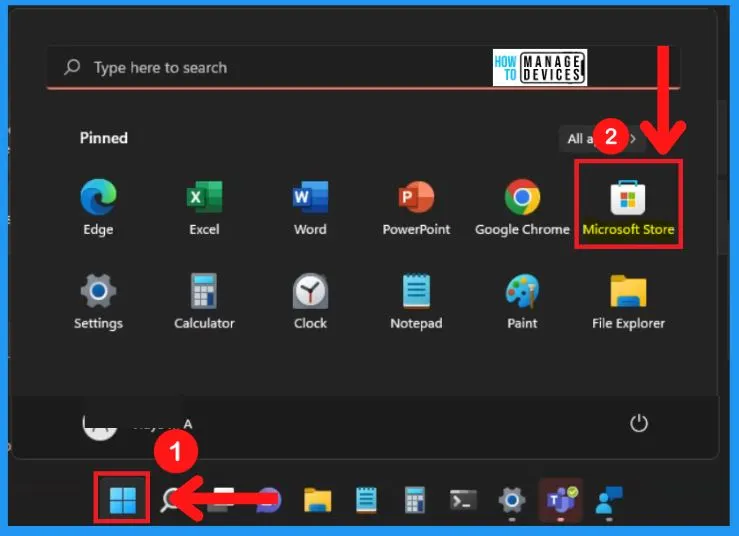
For almost all modern versions of Windows (Windows Vista, 7, 8, 10, and 11), the Snipping Tool is pre-installed as an integral part of the operating system. This means you don’t need to go to the Microsoft Store, download an executable, or run an installer package. It’s already nestled deep within your system files, ready to be called upon. The “installation” isn’t about adding new files; it’s about knowing how to locate and launch the existing application. This native integration highlights Microsoft’s understanding of common user needs, bundling essential productivity tools directly into the OS. This approach not only ensures widespread accessibility but also maintains system integrity and reduces potential compatibility issues often associated with third-party installations. Therefore, your task isn’t to install it, but to discover its presence and learn how to summon it for your daily tasks.
Accessing and Launching the Snipping Tool on Windows
Since the Snipping Tool is already part of your Windows operating system, the real challenge is knowing how to find and launch it efficiently. There are several methods, ranging from quick keyboard shortcuts to more traditional navigation, each suitable for different workflows and user preferences. Mastering these access points is key to making screen capture a seamless part of your productivity routine.
The Quickest Route: Search Bar
The search bar is arguably the fastest and most universal way to launch almost any application on Windows. This method relies on the powerful indexing capabilities of the operating system.
- Click on the Start button (the Windows icon in the bottom-left corner of your screen) or press the Windows key on your keyboard.
- Start typing “Snipping Tool” into the search bar that appears. As you type, Windows Search will present matching results.
- Click on “Snipping Tool” once it appears in the search results.
This method is incredibly efficient, especially if you don’t use the tool frequently enough to pin it or memorize shortcuts. It’s also consistent across various Windows versions, making it a reliable first step for new and experienced users alike. For those focused on online income or running a business, every second saved through efficient navigation contributes to overall productivity and potentially, profitability.
Traditional Access: Start Menu Navigation
For users who prefer a more structured approach or are simply browsing for applications, navigating through the Start Menu is another viable option.
- Click on the Start button (the Windows icon).
- Scroll through the alphabetical list of applications.
- Look for “Windows Accessories” (on Windows 10/7/8) or “All apps” and then a folder like “Windows Accessories” or “Snipping Tool” directly (on Windows 11, it might be listed directly under S).
- Click on “Windows Accessories” to expand the folder.
- Click on “Snipping Tool” within the list.
While slightly slower than the search bar, this method helps users familiarize themselves with where applications are stored within the Windows ecosystem. It reinforces the idea that the Snipping Tool is a core accessory, not an add-on.
Keyboard Shortcut for Instant Capture: Windows + Shift + S
For power users and those who value speed above all, the ultimate method for launching a screen capture is through a dedicated keyboard shortcut. This shortcut doesn’t just launch the Snipping Tool; it immediately activates the capture overlay, saving you an extra click.
- Press the
Windows key+Shift+Ssimultaneously. - Your screen will dim, and a small toolbar will appear at the top of your screen, offering different snip modes.
- Select your desired snip mode (rectangular, free-form, window, or full-screen) and then drag your mouse to select the area you want to capture.
This shortcut actually invokes the “Snip & Sketch” tool (now often referred to as “Screenshot Tool” in Windows 11), which is the modern evolution of the Snipping Tool. The captured snip is automatically copied to your clipboard and also appears as a notification, allowing you to click on it to open the Snip & Sketch editor for further annotation and saving. This method is a game-changer for productivity, allowing for near-instant screen captures without interrupting your workflow significantly. It’s particularly useful for those involved in digital security documentation or creating quick tutorials.
Pinning for Permanent Accessibility
If you use the Snipping Tool frequently, you’ll want it to be easily accessible without having to search for it every time. Pinning the application to your Taskbar or Start Menu is an excellent way to achieve this.
To Pin to Taskbar:
- Search for “Snipping Tool” using the search bar (as described above).
- Right-click on “Snipping Tool” in the search results.
- Select “Pin to taskbar.”
Now, a Snipping Tool icon will reside permanently on your taskbar, requiring just a single click to launch.
To Pin to Start Menu:
- Search for “Snipping Tool” using the search bar.
- Right-click on “Snipping Tool” in the search results.
- Select “Pin to Start.”
The Snipping Tool icon will now appear as a tile or a shortcut on your Start Menu, offering quick access.
Pinning is a small organizational step that yields significant long-term productivity benefits. It embodies the principle of “working smarter, not harder,” a core tenet for anyone aiming to optimize their daily digital interactions, manage their finances efficiently, or cultivate a strong personal brand through consistent and effective communication.
Mastering the Art of the Snip: A Step-by-Step Guide
Once you’ve launched the Snipping Tool (or its modern equivalent via Windows + Shift + S), you’re ready to capture your screen. The tool offers a surprising amount of flexibility, allowing you to select precisely what you need and even add basic annotations before saving or sharing.
Choosing Your Snip Mode
The Snipping Tool offers four distinct modes, each designed for a specific type of capture:
- Free-form Snip: This mode allows you to draw any shape around an object. The captured area will follow the irregular outline you trace. It’s perfect for capturing odd-shaped elements or specific portions of an image without strict rectangular boundaries.
- Rectangular Snip (Default): This is the most commonly used mode. You click and drag the cursor to form a rectangle around the area you want to capture. Everything within that rectangle will be included in your snip. Ideal for capturing specific windows, sections of a webpage, or parts of a document.
- Window Snip: This mode allows you to capture an entire open window, such as a browser window, a folder, or an application, with a single click. Simply click on the window you wish to capture, and the tool will automatically select its boundaries. This is highly efficient for capturing complete interfaces or entire document views without any manual dragging.
- Full-screen Snip: This mode captures your entire screen, including all open windows, taskbar, and desktop background. It’s equivalent to the traditional Print Screen function but integrates directly into the Snipping Tool’s editing environment. Useful for overview shots or when you need to show the full context of your desktop.
To select a mode in the classic Snipping Tool, click the “Mode” button and choose from the dropdown. If you’re using the Windows + Shift + S shortcut, the mode selection toolbar appears directly at the top of your screen, allowing you to pick your desired capture style instantly.
Utilizing the Delay Feature (Classic Snipping Tool)
The classic Snipping Tool includes a “Delay” feature, which can be incredibly useful for capturing menus, tooltips, or other elements that disappear when you move your mouse or click.
- Launch the Snipping Tool.
- Click the “Delay” button and select a delay time (from 1 to 5 seconds).
- Click “New.”
- During the countdown, arrange your screen to display the element you want to capture (e.g., open a dropdown menu).
- Once the delay finishes, your screen will dim, allowing you to select your snip area (if not in full-screen mode).
This feature, while absent in the immediate Windows + Shift + S shortcut, highlights the thought put into addressing common screen capture challenges. It’s a small but significant detail for those intricate captures, especially when documenting complex software interfaces or tutorials.
Basic Editing and Annotation Tools
Once you’ve captured your snip, the Snipping Tool (or Snip & Sketch) opens it in an editor window, providing basic annotation capabilities.
- Pen Tool: Allows you to draw freehand lines or shapes in various colors and thicknesses. Perfect for circling important elements or underlining text.
- Highlighter Tool: Used to highlight specific text or areas, drawing attention to them without obscuring the content.
- Eraser Tool: Removes any annotations you’ve made.
- Ruler/Protractor (Snip & Sketch): Modern tools in Snip & Sketch that allow for precise measurements and angles.
- Crop Tool (Snip & Sketch): Lets you further refine the captured area by cropping edges, ensuring only the most relevant content is included.
These annotation tools are invaluable for communication. Instead of simply sending an image, you can add context, emphasize key points, and clarify instructions. This directly impacts productivity, especially in collaborative environments, and helps maintain clarity in any digital security documentation or personal branding efforts.
Saving and Sharing Your Screenshots
After capturing and annotating, the final steps are saving and sharing your snip.
- Saving: Click the disk icon (Save Snip) or go to
File > Save As. You can choose from various formats: PNG (default, good for quality and transparency), JPEG (smaller file size, good for photos), GIF (supports animation, fewer colors), or HTML (single file web page). PNG is generally recommended for most screenshots due to its lossless compression and support for transparent backgrounds. - Sharing:
- Copy: The snipped image is automatically copied to your clipboard (especially with
Windows + Shift + S), allowing you to paste it directly into emails, chat applications, word processors, or image editors. - Email: The classic Snipping Tool has an “Email Snip” button that lets you immediately attach the snip to a new email message using your default email client.
- Share Button (Snip & Sketch): In Snip & Sketch, a dedicated “Share” button allows you to send the image directly to contacts, other apps, or cloud services, leveraging Windows’ built-in sharing capabilities.
- Copy: The snipped image is automatically copied to your clipboard (especially with
Efficient saving and sharing are crucial for turning raw captures into actionable information. Whether you’re providing feedback, demonstrating a bug, or creating visual instructions, these features ensure your efforts are easily disseminated and understood. This efficiency directly contributes to streamlined workflows, positively impacting project timelines and overall business finance management.
Snipping Tool vs. Snip & Sketch: The Evolution of Screen Capture
Technology is constantly evolving, and even staple tools like the Snipping Tool are subject to modernization. Microsoft has introduced a successor, Snip & Sketch (now often simply called “Screenshot Tool” in Windows 11), to offer an enhanced screen capturing experience. Understanding their relationship is key for current and future Windows users.
A Glimpse into the Past: The Classic Snipping Tool
The classic Snipping Tool, as discussed, has served Windows users faithfully for years. Its strengths lie in its simplicity and directness: launch, snip, annotate, save. It’s a no-frills tool that gets the job done efficiently for basic needs. It provided the foundational modes (free-form, rectangular, window, full-screen) and fundamental annotation capabilities (pen, highlighter, eraser). For many, it was the first introduction to intelligent screen capturing beyond the basic Print Screen key. Its reliability and ease of use made it a ubiquitous utility, often taken for granted until a user needed a quick visual explanation or proof of concept.
Embracing the Future: Snip & Sketch (Screenshot Tool)
Snip & Sketch was introduced with the Windows 10 October 2018 Update as a more modern, UWP (Universal Windows Platform) application designed to eventually replace the legacy Snipping Tool. It offers several improvements and a more streamlined user interface:
- Modern Interface: A cleaner, more intuitive design that aligns with Windows 10 and 11 aesthetics.
- Easier Access: The
Windows key + Shift + Sshortcut directly activates its capture mode, making it incredibly fast to initiate a snip. - Enhanced Editing Features: Beyond the basic pen and highlighter, Snip & Sketch includes a ruler, protractor, and a dedicated crop tool, offering more precision and flexibility in post-capture editing.
- Integrated Sharing: A more robust sharing menu that leverages Windows’ built-in sharing capabilities, allowing seamless integration with various apps and services.
- Clipboard Integration: Every snip is automatically copied to the clipboard, ready for pasting, and also pops up as a notification, allowing immediate access to the editor.
- Touch and Pen Support: Designed with touchscreens and digital pens in mind, making annotation more natural for tablet users or those with pen-enabled devices.
Snip & Sketch is a direct response to the demand for more advanced yet integrated screenshot functionalities, aligning with modern software trends and user expectations for a more fluid, touch-friendly experience.
What Happens to the Old Snipping Tool? Coexistence and Phasing Out
For a period, both the classic Snipping Tool and Snip & Sketch coexisted in Windows 10. Microsoft encouraged users to transition to Snip & Sketch, even adding a message within the old Snipping Tool window stating its eventual deprecation.
In Windows 11, the Snipping Tool has effectively been rebranded and merged with Snip & Sketch. When you search for “Snipping Tool” in Windows 11, you will launch the updated Snip & Sketch application, which now carries the “Snipping Tool” name in its title bar, effectively completing the transition. The classic Snipping Tool executable (SnippingTool.exe) might still exist in system folders for compatibility, but the user-facing application is the modern one.
This evolution ensures that users have access to a continuously updated and feature-rich screen capture utility that integrates seamlessly with the latest Windows experience. For tech-savvy users and professionals, understanding this transition is vital for staying current with productivity tools and leveraging the most efficient methods for digital documentation and communication.
Advanced Tips and Troubleshooting for the Snipping Tool
Beyond basic usage, there are several ways to optimize your screen capture workflow and address common issues, further enhancing your productivity and ensuring smooth operation.
Boosting Productivity with Screenshots
Screenshots are not just for showing; they are powerful tools for communicating, documenting, and learning. Here’s how to maximize their impact:
- For Tutorials & How-to Guides: Use a sequence of annotated screenshots to illustrate steps clearly. This is invaluable for software documentation, onboarding new employees, or creating online income streams through educational content.
- For Customer Support & Troubleshooting: When encountering an issue, a screenshot can convey information far more accurately than text alone. Highlight error messages or specific UI elements to guide support personnel or clarify problems.
- For Presentations & Reports: Visual aids significantly improve engagement and comprehension. Use targeted snips to illustrate data, processes, or examples in your corporate identity presentations or academic reports.
- For Design & Feedback: Designers can use screenshots to provide visual feedback on web pages or application interfaces, marking up areas for improvement or highlighting specific elements.
- For Personal Branding & Social Media: Quick, clear screenshots can be used to share achievements, showcase creative work, or provide visual context in your social media posts, enhancing your personal brand.
- For Financial Documentation: Capture transaction details, online statements, or specific web pages related to your personal finance or business finance for record-keeping or dispute resolution.
Integrating screenshots intentionally into your workflow can save hours of verbal explanation and significantly reduce miscommunication, leading to more efficient project completion and better overall outcomes.
What if the Snipping Tool is Missing or Not Working?
While rare, you might encounter situations where the Snipping Tool seems to be missing or isn’t functioning correctly.
- Check for Windows Updates: Ensure your Windows operating system is fully updated. Microsoft frequently rolls out updates that fix bugs and ensure proper functioning of built-in tools. Go to
Settings > Update & Security > Windows Updateand check for updates. - Run System File Checker (SFC): Corrupted system files can sometimes affect native applications. Open Command Prompt as an administrator and type
sfc /scannow, then press Enter. This will scan and repair corrupted system files. - Reset or Reinstall via Apps & Features (for Snip & Sketch/Screenshot Tool):
- Go to
Settings > Apps > Apps & features. - Search for “Snipping Tool” (or “Snip & Sketch”).
- Click on the app, then select “Advanced options.”
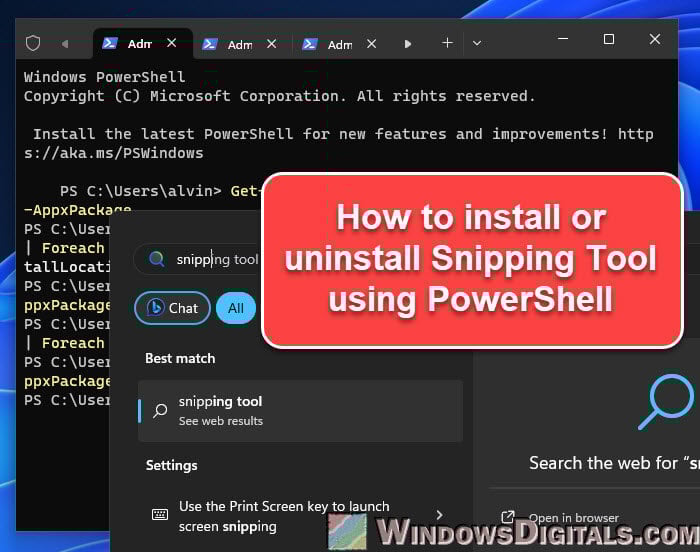
- Here, you’ll find “Reset” or “Repair” options, which can fix issues without full reinstallation. If those don’t work, you might have an “Uninstall” option, after which you can reinstall it from the Microsoft Store (search for “Snipping Tool” or “Screenshot Tool”).
- Go to
- Check for Disk Errors: Sometimes, hard drive issues can lead to file corruption. Run a disk check (
chkdskcommand in Command Prompt) to ensure your drive is healthy. - Create a New User Profile: As a last resort, if only your user profile is affected, creating a new Windows user profile might resolve the issue, as it provides a fresh set of system configurations for applications.
These troubleshooting steps cover the most common reasons for application malfunction and should help restore your Snipping Tool to full working order.
Exploring Third-Party Alternatives
While the Snipping Tool (and Snip & Sketch) are excellent native options, the market offers a plethora of third-party screenshot tools, many with advanced features for specific needs. If you find the built-in tools insufficient for complex tasks, consider these popular alternatives:
- ShareX: A free, open-source tool offering an incredible array of features, including advanced capture modes, scrolling capture, OCR (Optical Character Recognition), annotation tools, various upload destinations, and workflow automation. It’s a favorite among power users.
- Greenshot: Another free and open-source tool known for its lightweight design, quick screenshot capture, and powerful image editor with excellent annotation options, including obfuscation.
- Snagit: A premium tool by TechSmith (makers of Camtasia) that provides professional-grade screenshot and screen recording capabilities. It includes robust editing features, organized libraries, and advanced sharing options. Ideal for creating detailed tutorials and marketing materials.
- Lightshot: A lightweight and simple tool focused on quick selection, annotation, and instant sharing to its own cloud service or social media.
Exploring these alternatives can be beneficial for users with niche requirements, such as web developers needing full-page scrolling captures, or content creators requiring advanced image editing integrated directly into their capture workflow. While they might require an “installation,” they often pay dividends in specialized productivity gains for specific use cases.
Conclusion
The question “how do I install Snipping Tool” often arises from a common misconception: that all software requires a separate download and installation. As we’ve explored, the Snipping Tool and its modern incarnation, Snip & Sketch (now simply referred to as the Snipping Tool in Windows 11), are seamlessly integrated into the Windows operating system. They are powerful, native utilities designed to make screen capturing effortless and efficient, directly contributing to enhanced digital productivity across various domains.
By understanding the different access methods – from the quick Windows + Shift + S shortcut to traditional Start Menu navigation – and mastering the diverse snip modes, annotation tools, and sharing options, you can transform a simple screenshot into a potent communication and documentation asset. These tools are indispensable for everyone, whether you’re managing complex tech projects, building a compelling personal brand, optimizing business finance processes, or simply sharing information with friends and family.
In an increasingly visual world, the ability to clearly convey information through targeted screen captures is a skill that pays continuous dividends. So, put these tips into practice, embrace the power of the Snipping Tool, and elevate your digital interactions to a new level of clarity and efficiency. Your journey to mastering seamless screen captures begins now.
aViewFromTheCave is a participant in the Amazon Services LLC Associates Program, an affiliate advertising program designed to provide a means for sites to earn advertising fees by advertising and linking to Amazon.com. Amazon, the Amazon logo, AmazonSupply, and the AmazonSupply logo are trademarks of Amazon.com, Inc. or its affiliates. As an Amazon Associate we earn affiliate commissions from qualifying purchases.