
In the fast-paced digital world, a sluggish computer can feel like an anchor, dragging down your productivity, creativity, and even your overall digital experience. Whether you’re a seasoned gamer, a professional content creator, or simply someone who juggles multiple browser tabs and applications, you’ve likely encountered moments when your system just can’t keep up. Often, the culprit is insufficient Random Access Memory (RAM). Upgrading your RAM is one of the most impactful and straightforward hardware enhancements you can make, breathing new life into an aging machine or supercharging a newer one.
This comprehensive guide will walk you through everything you need to know about installing more RAM, from understanding its importance and identifying compatibility to the step-by-step installation process and post-upgrade checks. We’ll demystify the technical jargon, offer practical advice, and help you navigate this essential hardware upgrade with confidence, ensuring your system performs at its peak.
Understanding the “Why”: The Performance Boost of More RAM
Before diving into the mechanics of installation, it’s crucial to understand what RAM does and why upgrading it can be so beneficial. RAM acts as your computer’s short-term memory, a super-fast workspace where your CPU stores data it needs to access quickly. Unlike your hard drive or SSD, which stores data long-term, RAM is temporary and volatile, clearing itself every time you power down your computer.
The Core Function of RAM in Your System
Imagine your computer as a chef in a kitchen. The hard drive or SSD is the pantry, holding all the ingredients (programs, files, operating system). The CPU is the chef, actively working. RAM, then, is the kitchen counter space. The more counter space (RAM) you have, the more ingredients (data) the chef can have readily available to work with without constantly running back and forth to the pantry. This immediate access to data is paramount for system responsiveness.
When you open an application, load a game, or even browse the web, your computer pulls the necessary data from long-term storage (SSD/HDD) and places it into RAM. The more complex the task or the more applications you run simultaneously, the more RAM you need. Without sufficient RAM, your system resorts to using a portion of your much slower storage drive as “virtual memory” or a “page file,” leading to noticeable slowdowns, stuttering, and an overall frustrating user experience. This constant swapping between RAM and virtual memory is known as “disk thrashing” and is a clear indicator that your system is starved for memory.
Identifying When a RAM Upgrade is Necessary
Recognizing the signs of insufficient RAM is the first step towards a more responsive system. Here are some common indicators:
- Frequent slowdowns and stuttering: Your computer feels consistently sluggish, even during routine tasks.
- Applications crashing or freezing: Programs might become unresponsive or crash unexpectedly, especially memory-intensive ones like video editors, CAD software, or modern games.
- Excessive loading times: Applications, games, or even new browser tabs take an unusually long time to open or respond.
- Difficulty multitasking: Switching between programs becomes a chore, with noticeable delays and freezing.
- High disk activity light (without obvious tasks): If your storage drive’s activity light is constantly flickering, even when you’re not actively saving or loading files, it could be a sign of the system relying heavily on virtual memory.
- “Out of Memory” errors: While sometimes indicating a specific program issue, frequent “out of memory” warnings across different applications are a strong sign you need more physical RAM.
Tools like Task Manager (Windows, Ctrl+Shift+Esc), Activity Monitor (macOS), or third-party utilities can help you monitor RAM usage in real-time. If your RAM consistently hovers near 80-90% utilization during normal usage, an upgrade is highly recommended.
Performance Gains Across Applications
The benefits of a RAM upgrade are multifaceted, touching almost every aspect of your computer’s operation:
- Enhanced Multitasking: Run more applications simultaneously without performance degradation. For professionals, this means seamless transitions between email, spreadsheets, browser research, and communication tools.
- Faster Application Loading and Responsiveness: Programs launch quicker and respond instantly to commands, significantly boosting productivity.
- Improved Gaming Performance: While GPU is crucial for frames per second, sufficient RAM ensures game assets load quickly, reducing stuttering and improving overall fluidity, especially in open-world or graphically intensive titles.
- Smoother Content Creation: For video editors, graphic designers, and 3D artists, more RAM means larger project files can be handled with ease, fewer crashes, and quicker rendering/preview times. This directly impacts workflow efficiency and the ability to meet deadlines, subtly enhancing one’s professional brand by delivering high-quality work promptly.
- Better Web Browsing: Modern web browsers, especially with numerous tabs open, can be memory hogs. More RAM allows for a smoother, more responsive browsing experience.
In essence, a RAM upgrade is an investment in your digital efficiency and enjoyment, ensuring your computer is a tool that empowers, not hinders.
Preparing for Your RAM Upgrade: Compatibility and Purchase
Successfully installing more RAM hinges on thorough preparation. The most critical aspect is ensuring compatibility with your existing system. Buying the wrong type of RAM is a common mistake and can lead to frustration and wasted money.
Determining Your Current RAM Configuration and Motherboard Limits
Before you even think about buying new RAM, you need to understand what your computer currently has and what its limits are.
-
Identify Current RAM:
- Windows: Open Task Manager (Ctrl+Shift+Esc), go to the “Performance” tab, and click on “Memory.” You’ll see your total RAM, its speed, and its type (e.g., DDR4). For more detail, use the “System Information” app (type
msinfo32in the Run dialog) or a third-party tool like CPU-Z, which provides comprehensive details on each RAM stick, including manufacturer, part number, frequency, and timings. - macOS: Go to Apple Menu > About This Mac. This will show you your total RAM, type, and speed. For specific slot information, click “System Report” and navigate to the “Memory” section.
- Physical Inspection: If all else fails or you need to see how many slots are occupied, you might need to open your computer case (following safety precautions) and physically inspect the RAM sticks.
- Windows: Open Task Manager (Ctrl+Shift+Esc), go to the “Performance” tab, and click on “Memory.” You’ll see your total RAM, its speed, and its type (e.g., DDR4). For more detail, use the “System Information” app (type
-
Determine Motherboard Compatibility: This is the most crucial step. Your motherboard dictates the type of RAM it supports, the maximum capacity, and the number of slots available.
- RAM Type: The most common types are DDR4 and the newer DDR5. These are physically incompatible; you cannot mix them. If your system uses DDR4, you must buy DDR4. If it’s DDR5, you need DDR5.
- Maximum Capacity: Each motherboard has a maximum amount of RAM it can address. Check your motherboard’s manual or the manufacturer’s website. Search for your PC model or motherboard model (e.g., “ASUS Prime Z590-A RAM compatibility”).
- Number of Slots: Most desktop motherboards have 2 or 4 RAM slots. Laptops typically have 1 or 2 SODIMM slots. Knowing how many slots are available is vital for planning your upgrade (e.g., adding to existing RAM vs. replacing all of it).
- RAM Speed (MHz) and Latency (CL): While your motherboard might support a range of speeds, it’s generally best to match the speed of any existing RAM if you’re adding to it. If you’re replacing all RAM, choose a speed supported by your motherboard and CPU. Faster RAM often comes with higher latency, so aim for a good balance (e.g., DDR4-3200 CL16 is a popular sweet spot).
Choosing the Right RAM: Type, Speed, and Capacity
Once you have your compatibility information, you can make an informed decision:
- Form Factor:
- DIMM (Dual In-line Memory Module): For desktop PCs. These are longer sticks.
- SODIMM (Small Outline Dual In-line Memory Module): For laptops and compact PCs. These are shorter than DIMMs.
- Type (DDR generation): Match your existing system (DDR4 or DDR5).
- Capacity: This is where you decide how much total RAM you want.
- 8GB: Minimum for basic computing and light web browsing.
- 16GB: The sweet spot for most users, offering excellent performance for gaming, general productivity, and moderate content creation.
- 32GB: Ideal for heavy multitaskers, serious gamers, professional content creators (video editing, 3D rendering), and engineers working with large datasets.
- 64GB+: For extreme professional workloads, virtual machines, or specific scientific applications.
- Speed (MHz) and Latency (CL):
- Match Existing RAM (if adding): For optimal performance, always try to match the speed and latency of your existing RAM if you’re simply adding more. Mixing different speeds usually results in all RAM operating at the speed of the slowest stick.
- Consider Dual Channel/Quad Channel: Most systems benefit from installing RAM in pairs (e.g., two 8GB sticks instead of one 16GB stick) to enable “dual-channel mode,” which significantly improves memory bandwidth. Consult your motherboard manual for the correct slot configuration for dual-channel (often slots 2 and 4, or 1 and 3). High-end motherboards may support quad-channel.
- ECC vs. Non-ECC: Most consumer systems use non-ECC (Error-Correcting Code) RAM. ECC RAM is typically used in servers and workstations for mission-critical applications where data integrity is paramount. Ensure you buy the correct type for your system.
Where to Buy and Cost Considerations
Where to Buy:
- Online Retailers: Amazon, Newegg, Best Buy, and direct from manufacturers like Crucial, Corsair, G.Skill, Kingston, Samsung are excellent sources with wide selections and competitive pricing.
- Local Computer Stores: Can offer immediate availability and expert advice, though prices might be slightly higher.
Cost Considerations (Linking to the ‘Money’ Topic):
- Budget vs. Performance: RAM prices fluctuate, but generally, higher speeds and lower latencies cost more. Balance your performance needs with your budget. For most users, a mid-range speed (e.g., DDR4-3200) offers the best price-to-performance ratio.
- DIY Savings: Installing RAM yourself is incredibly simple and saves you significant money compared to paying a computer repair shop. This DIY approach aligns perfectly with smart personal finance strategies by maximizing the value of your existing hardware.
- Upgrade vs. New System: A RAM upgrade is often a far more cost-effective solution to improve performance than buying an entirely new computer, especially if your CPU and GPU are still adequate. Evaluate whether a RAM boost can extend the usable life of your current PC, representing a wise financial decision for individuals and businesses alike. Sometimes, a well-placed upgrade can postpone a larger capital expenditure on new hardware, making your money work smarter for longer.
The Installation Process: A Step-by-Step Guide
With your new RAM modules in hand and compatibility confirmed, you’re ready for the physical installation. This process is surprisingly straightforward, even for novice users, but requires attention to detail and adherence to safety protocols.
Essential Safety Precautions and Tools
Before you touch any internal components, prioritize safety to protect both yourself and your hardware.
- Power Down and Unplug: Completely shut down your computer and unplug it from the wall outlet. Press the power button a few times after unplugging to drain any residual charge from the system.
- Ground Yourself (ESD Protection): Static electricity is the silent killer of computer components.
- Anti-static wrist strap: The best option. Attach it to your wrist and clip the other end to an unpainted metal part of your computer case (like the power supply enclosure).
- Touch an unpainted metal surface: Before touching any internal components, repeatedly touch a bare metal part of your computer case to discharge any static electricity from your body. Do this frequently throughout the process.
- Avoid Carpet: Work on a hard, non-static surface.
- Clear Workspace: Ensure you have a clean, well-lit area with enough space to work comfortably.
- Tools:
- Phillips Head Screwdriver: For opening the case.
- Flashlight (Optional but Recommended): To illuminate dark corners inside the case.
- Small container: To hold screws so they don’t get lost.
Opening Your PC Case and Locating RAM Slots
- Remove Side Panel: Most desktop cases have thumb screws or regular screws on the back that secure the side panel. Unscrew them and slide the panel off. If your case has a tempered glass panel, handle it with extreme care. For laptops, consult your specific model’s service manual for instructions on accessing the RAM.
- Identify RAM Slots: Once the case is open, locate the RAM slots on the motherboard. They are typically long, narrow slots situated near the CPU, often in groups of two or four. They usually have small plastic clips on either end.
Inserting New RAM Modules (and Removing Old Ones)
This is the core of the upgrade process. Take your time and be gentle but firm.
-
Remove Old RAM (if replacing):
- Gently push down the plastic retaining clips on both ends of the RAM stick. The stick should slightly pop up.
- Carefully pull the RAM stick straight out of the slot, holding it by the edges to avoid touching the gold contacts.
- Place the old RAM in an anti-static bag (if you have one) for storage or resale.
-
Prepare New RAM Slot:
- Ensure the plastic retaining clips at both ends of the empty RAM slot are pushed open and ready to receive the new module.
-
Align and Insert New RAM:
- Examine your new RAM stick. You’ll notice a notch on the bottom edge (the gold contacts). This notch needs to align perfectly with the raised key in the RAM slot. The notch location ensures you can’t insert DDR4 into a DDR5 slot or vice-versa, and it prevents incorrect orientation.
- Hold the RAM stick by its edges, avoiding touching the gold contacts.
- Gently place the RAM module into the slot, ensuring it’s centered.
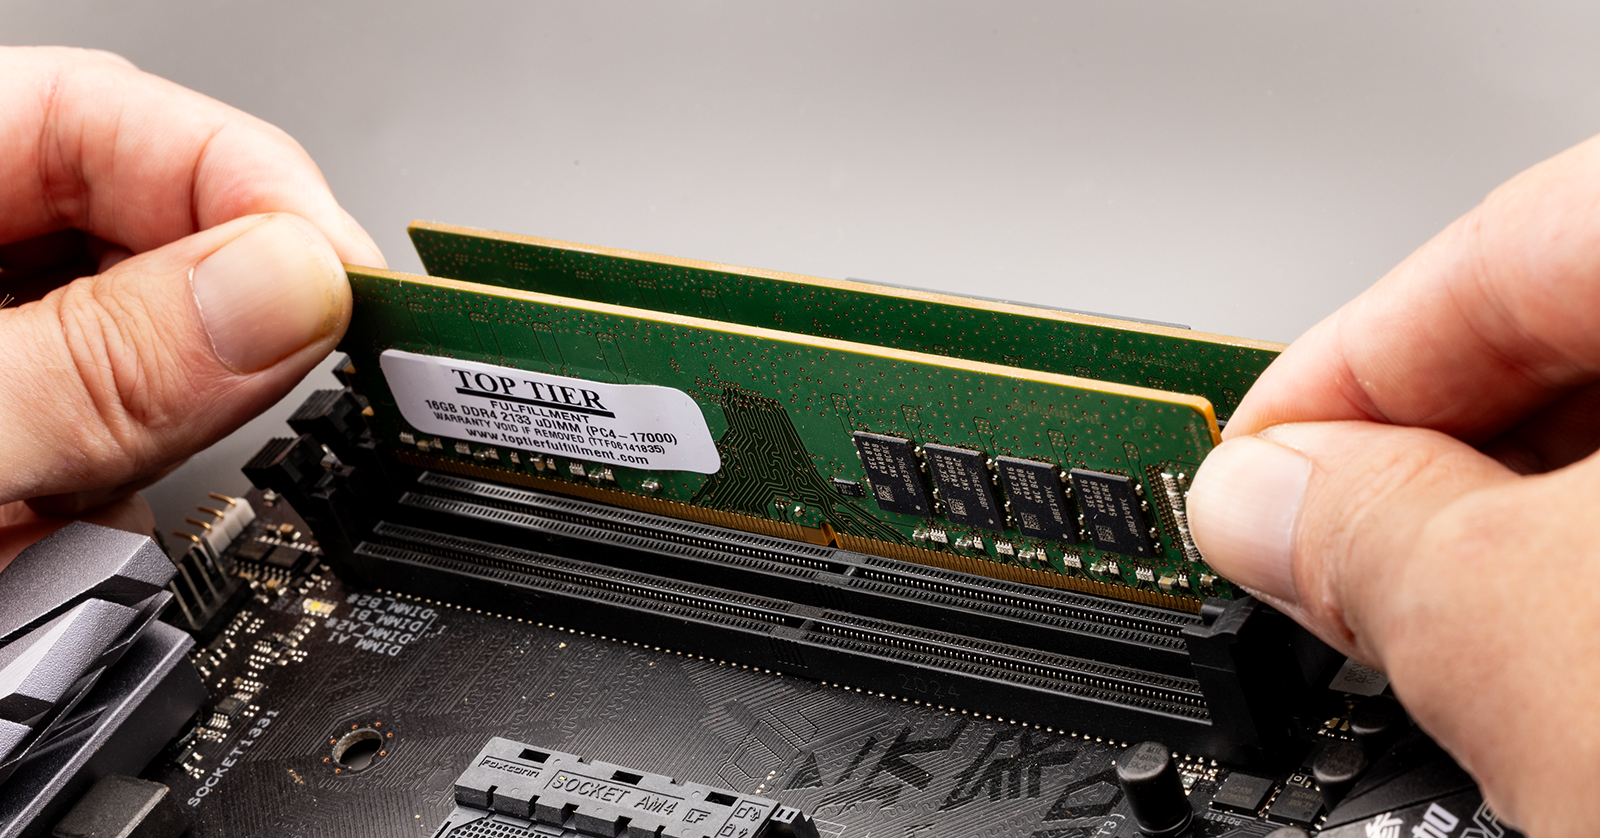
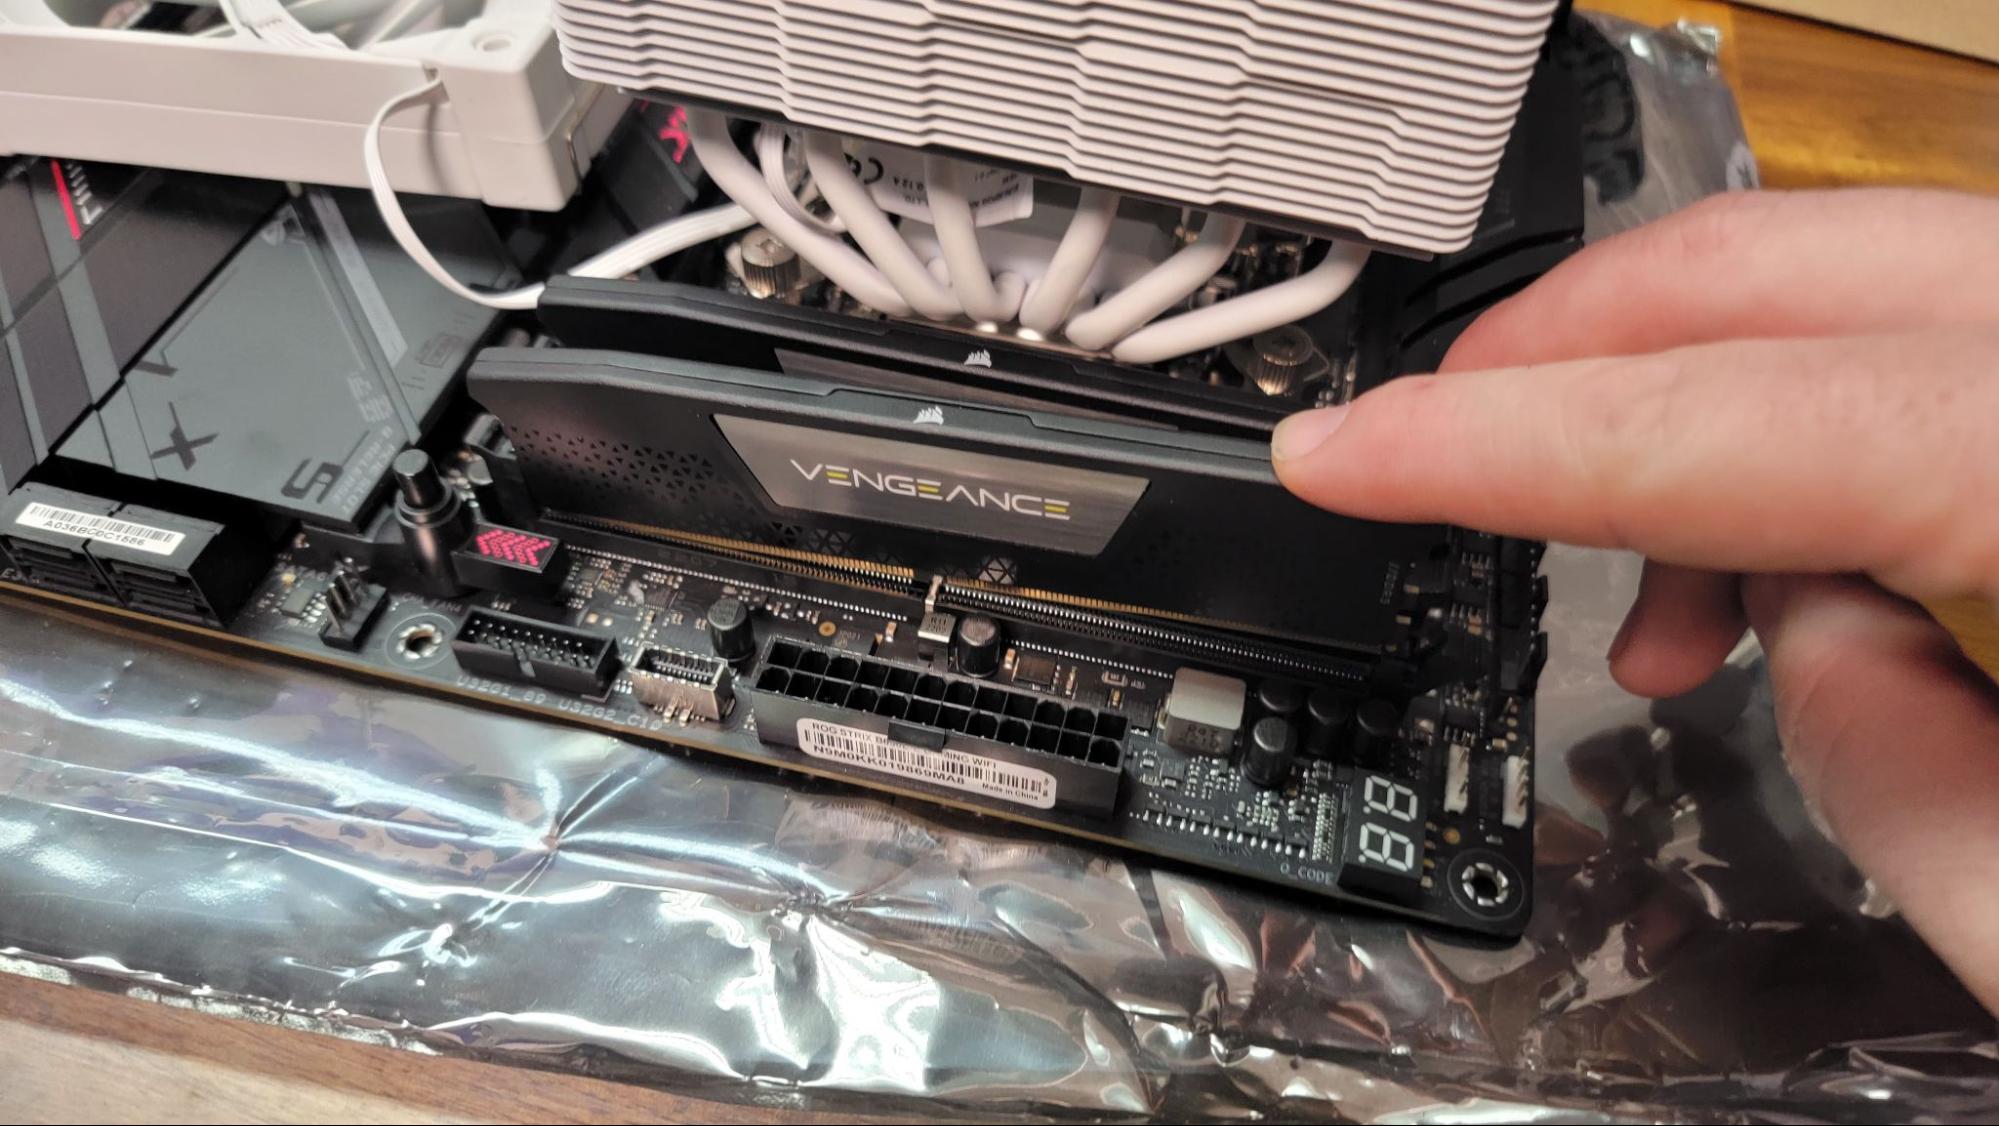
- With even pressure from both thumbs on each end of the RAM stick, push down firmly until the retaining clips on both sides click into place. You should hear a distinct click, and the clips should automatically lock the RAM module securely. Do not force it if it doesn’t align; re-check the notch.
- Visually inspect the module to ensure it’s fully seated and level in the slot. There should be no gap between the module’s gold contacts and the slot.
-
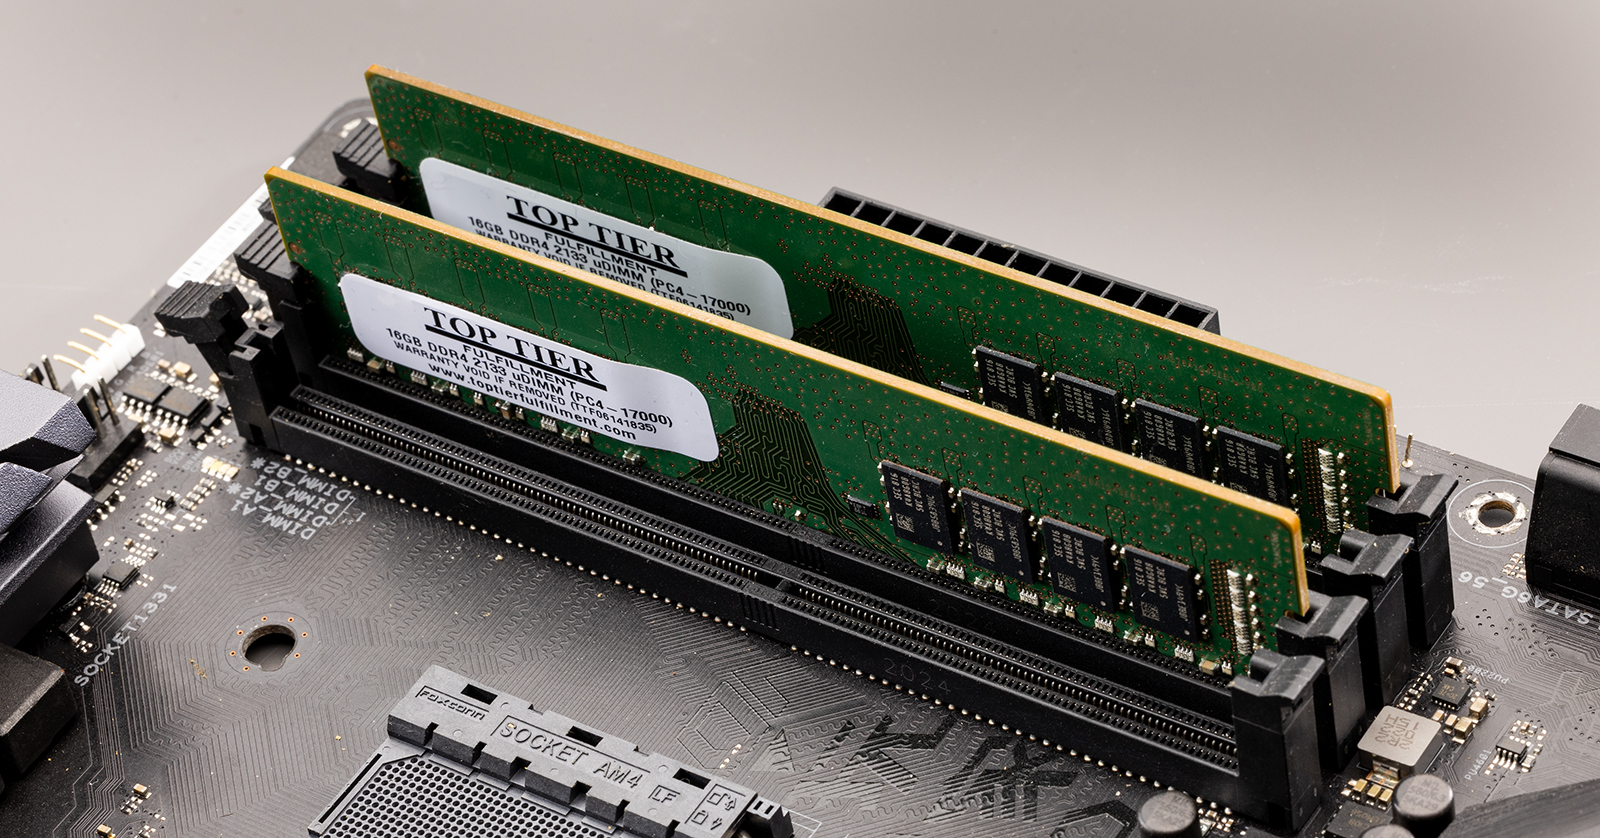
Populate Slots for Dual-Channel (if applicable): If you’re installing two RAM sticks and your motherboard supports dual-channel memory, refer to your motherboard manual to identify the correct slots to use. These are often color-coded or explicitly labeled (e.g., A2 and B2). Typically, you skip a slot between the modules (e.g., slots 2 and 4, or 1 and 3).
Securing and Reassembling Your System
- Close the Case: Carefully slide the side panel back onto your computer case.
- Secure Screws: Reinsert and tighten the screws that hold the side panel in place.
- Reconnect Cables: Plug all peripherals back in (monitor, keyboard, mouse, power cable, etc.).
Your hardware installation is now complete!
Post-Installation Checks and Troubleshooting
After the physical installation, the next crucial step is to verify that your system recognizes and is utilizing the new RAM correctly.
Verifying RAM Recognition in BIOS/UEFI and Operating System
-
Boot Up and Access BIOS/UEFI:
- Power on your computer.
- Immediately start pressing the designated key to enter your system’s BIOS/UEFI settings. Common keys include Del, F2, F10, or F12 (consult your motherboard manual if unsure).
- Once in BIOS/UEFI, look for a section that displays system information or memory details. It should show the total installed RAM. Confirm that the new, higher capacity is recognized.
- Note on XMP/DOCP: If you purchased high-speed RAM (above your CPU’s base clock speed), you might need to enable an XMP (Extreme Memory Profile) or DOCP (DRAM Overclock Profile) profile in your BIOS/UEFI to run the RAM at its advertised speed. Otherwise, it will default to a lower, standard speed. Locate the “Memory” or “Overclocking” section, enable XMP/DOCP, and select the appropriate profile. Save changes and exit.
-
Verify in Operating System:
- Windows: Once logged into Windows, open Task Manager (Ctrl+Shift+Esc), go to the “Performance” tab, and click “Memory.” The displayed “Total memory” should reflect your newly installed RAM. You can also check “System Information” (
msinfo32). - macOS: Go to Apple Menu > About This Mac. The “Memory” section will show the total installed RAM.
- Windows: Once logged into Windows, open Task Manager (Ctrl+Shift+Esc), go to the “Performance” tab, and click “Memory.” The displayed “Total memory” should reflect your newly installed RAM. You can also check “System Information” (
If these checks confirm the correct RAM capacity, congratulations! Your upgrade is complete.
Common Issues and Simple Fixes
Even with careful installation, sometimes issues can arise. Don’s panic; most are easily resolved.
- No Display/Computer Doesn’t Boot (POST Issues):
- Reseat RAM: The most common problem. Power off, unplug, open the case, and firmly push down on each end of the RAM sticks again until the clips click. Sometimes they don’t fully seat on the first try.
- Check Slot Compatibility: Ensure you’ve used the correct slots, especially for dual-channel configurations as per your motherboard manual.
- Single Stick Test: If you installed multiple sticks, try booting with just one stick at a time in the first primary RAM slot (usually A2 or the one closest to the CPU, check manual). This helps identify if a particular stick is faulty.
- Clear CMOS: If your system won’t POST at all, clearing your motherboard’s CMOS (Complementary Metal-Oxide-Semiconductor) settings can sometimes resolve memory-related boot issues. This is usually done by removing a small battery on the motherboard for a few minutes or using a dedicated jumper/button. Consult your motherboard manual for the exact procedure.
- System Recognizes Less RAM Than Installed:
- Check OS Limitations: Ensure your operating system (especially older 32-bit versions) supports the amount of RAM you’ve installed. Most modern OSs are 64-bit and don’t have this limitation.
- Verify Seating: Again, reseating the RAM is the first step.
- Test Individual Sticks: One of the sticks might be faulty or not fully seated.
- BIOS/UEFI Update: In rare cases, an outdated motherboard BIOS/UEFI might not fully support newer, higher-capacity RAM modules. Check your motherboard manufacturer’s website for BIOS updates.
When to Seek Professional Help
While most RAM upgrades are DIY-friendly, there are situations where seeking professional assistance is wise:
- Persistent Boot Issues: If, after trying all troubleshooting steps, your computer still refuses to boot or recognize the RAM.
- Laptop Disassembly Difficulty: Some laptops are notoriously difficult to open, requiring specialized tools or posing risks to other components. If you’re uncomfortable with the process, a professional can handle it.
- Fear of Damaging Components: If you feel genuinely uneasy or fear you might damage your system, a professional can provide peace of mind and ensure the job is done correctly.
Remember, a professional can often diagnose complex issues quickly and safely, saving you potential headaches and further damage.
Maximizing Your System’s Potential: Beyond RAM
While a RAM upgrade is a fantastic way to boost your system’s performance, it’s essential to understand that it’s just one piece of the puzzle. A truly responsive and powerful computer relies on a harmonious balance of its core components.
Understanding Other Performance Bottlenecks (CPU, SSD)
Even with abundant RAM, your system might still feel sluggish if other components are bottlenecks:
- Central Processing Unit (CPU): The “brain” of your computer. If your CPU is old or underpowered, it can struggle to process data fast enough, even if that data is readily available in RAM. For highly CPU-intensive tasks like video rendering, complex simulations, or certain high-end games, a CPU upgrade might be necessary.
- Solid State Drive (SSD): If your operating system and primary applications are still running on an older Hard Disk Drive (HDD), upgrading to an SSD is perhaps the single most impactful upgrade you can make, even more so than RAM in many cases. An SSD dramatically reduces boot times, application loading times, and file transfer speeds, making the entire system feel snappier. This often complements a RAM upgrade perfectly, as the faster storage can feed data to RAM and the CPU more efficiently.
- Graphics Processing Unit (GPU): For gamers, video editors, and 3D artists, the GPU is paramount. If you’re experiencing low frame rates in games or slow rendering in creative applications, a GPU upgrade will likely yield more significant improvements than additional RAM, assuming your current RAM is adequate (e.g., 16GB).
- Power Supply Unit (PSU): Often overlooked, an insufficient or aging PSU can lead to instability, crashes, or prevent new, more powerful components from functioning correctly. Ensure your PSU has enough wattage and stable power delivery for all your components, especially after major upgrades.
By diagnosing the true bottleneck in your system, you can prioritize your upgrades, ensuring that your investment yields the most significant performance benefits. For those managing budgets (our “Money” topic), this diagnostic step is crucial for making financially sound upgrade decisions rather than throwing money at symptoms.
The Future of Your System: RAM Upgrades in the Long Term
As software becomes more demanding and multitasking becomes the norm, the need for ample RAM will only continue to grow. A strategic RAM upgrade can significantly extend the lifespan of your current PC, delaying the need for an expensive full system replacement. This longevity represents a smart financial choice and aligns with a sustainable approach to technology use.
Furthermore, a well-performing computer not only boosts personal efficiency but also subtly reinforces a positive “Brand” image for professionals. A machine that runs smoothly and reliably allows for uninterrupted work, timely delivery of projects, and a more polished overall digital presence. In an era where online interactions define much of our professional lives, a responsive system is a foundational element of effective communication and output.
Ultimately, installing more RAM is more than just a technical tweak; it’s an empowering step towards optimizing your digital environment, enhancing productivity, and ensuring your technology keeps pace with your ambitions. With the knowledge gained from this guide, you are now equipped to confidently perform this essential upgrade and unlock the full potential of your computer.
aViewFromTheCave is a participant in the Amazon Services LLC Associates Program, an affiliate advertising program designed to provide a means for sites to earn advertising fees by advertising and linking to Amazon.com. Amazon, the Amazon logo, AmazonSupply, and the AmazonSupply logo are trademarks of Amazon.com, Inc. or its affiliates. As an Amazon Associate we earn affiliate commissions from qualifying purchases.