
In the dynamic world of digital media, where video and audio content reign supreme, having powerful and versatile tools at your disposal is non-negotiable. Among the pantheon of multimedia utilities, FFmpeg stands out as an open-source powerhouse, a command-line tool that has become indispensable for developers, content creators, and tech enthusiasts alike. From converting video formats and extracting audio to scaling resolutions and streaming live feeds, FFmpeg’s capabilities are vast and foundational to many modern digital workflows.
This guide aims to demystify the installation process for FFmpeg, providing a clear, step-by-step walkthrough for the most popular operating systems: Windows, macOS, and Linux. Whether you’re a seasoned developer looking to integrate FFmpeg into your applications or a budding videographer trying to get more control over your media files, mastering its installation is the first crucial step. We’ll also cover essential verification methods and offer a glimpse into its basic usage, ensuring you’re ready to harness the full potential of this incredible tool.
Understanding FFmpeg: The Swiss Army Knife of Multimedia
Before diving into the installation specifics, it’s beneficial to grasp what FFmpeg is and why it holds such a prominent position in the tech landscape. Understanding its core functionality not only clarifies its necessity but also frames the context for its installation.
What is FFmpeg?
FFmpeg is a leading multimedia framework capable of decoding, encoding, transcoding, muxing, demuxing, streaming, filtering, and playing virtually any human- or machine-generated content. At its heart, FFmpeg is a collection of libraries and programs designed to handle multimedia data. It includes ffmpeg (the command-line tool for converting multimedia file formats), ffplay (a simple media player), and ffprobe (a command-line tool to analyze multimedia streams).
Developed over two decades, FFmpeg supports a staggering array of formats and codecs, making it the de facto standard for many audio and video processing tasks. Its open-source nature means it’s constantly being updated and improved by a global community of developers, ensuring its continued relevance and power in a rapidly evolving digital environment.
Key Features and Use Cases
The versatility of FFmpeg is truly astounding, touching upon various aspects of digital media processing. Its primary functions include:
- Format Conversion: Changing video or audio files from one format to another (e.g., MP4 to WebM, WAV to MP3). This is perhaps its most common use, enabling compatibility across different devices and platforms.
- Audio/Video Extraction: Separating audio tracks from video files or extracting specific frames as images.
- Video Editing Basics: Trimming clips, concatenating multiple videos, resizing, scaling, and rotating footage. While not a full-fledged editor, it’s invaluable for automated or batch processing tasks.
- Streaming: Encoding and decoding live streams, acting as a crucial component in broadcasting and online conferencing solutions.
- Transcoding: Re-encoding media files to different bitrates or qualities, essential for optimizing content for web delivery or archival.
- Filtering and Effects: Applying various filters to video (e.g., deinterlacing, adding watermarks, adjusting color) and audio (e.g., normalization, equalization).
From a “Tech Trends” perspective, FFmpeg is foundational to many AI tools involving video analysis, machine learning model training on visual data, and sophisticated video processing pipelines. For “Apps” and “Software,” it’s often an underlying engine for video converters, media players, and even professional editing suites that leverage its robust codecs. Its command-line interface makes it highly scriptable, fitting perfectly into automated workflows and server-side operations, which is why it’s so beloved by developers.
Prerequisites and Preparation
Before you begin the installation process, a few preliminary steps can ensure a smoother experience. Being prepared helps in avoiding common pitfalls and troubleshooting issues later on.
System Requirements
FFmpeg is remarkably lightweight and doesn’t demand exorbitant system resources for basic operations. However, for complex tasks like 4K video transcoding or real-time streaming, a powerful CPU and ample RAM will significantly improve performance. Generally, if your computer can run your operating system comfortably, it can run FFmpeg. Disk space requirements are minimal for the FFmpeg binaries themselves, typically just a few hundred megabytes.
Choosing Your Installation Method
The method you choose for installation largely depends on your operating system and your comfort level with command-line interfaces.
- Pre-built Binaries (Windows): This is the easiest method for Windows users, involving downloading a ready-to-use executable package.
- Package Managers (macOS, Linux): For macOS and Linux users, package managers like Homebrew (macOS), APT (Debian/Ubuntu), or DNF/YUM (Fedora/CentOS) are the recommended and most straightforward approaches. They handle dependencies and updates seamlessly.
- Compiling from Source (Advanced): This method provides the most control over FFmpeg’s features and optimization, allowing you to include specific codecs or experimental features. However, it’s complex, time-consuming, and generally only recommended for advanced users or specific development scenarios. For the scope of this guide, we will focus on the more accessible pre-built binary and package manager methods.
Regardless of the method, you will need access to your system’s command-line interface:
- Windows: Command Prompt (cmd) or PowerShell.
- macOS: Terminal.
- Linux: Terminal.
Ensuring you have administrative privileges (or sudo access on Linux/macOS) for certain steps is also crucial.
Installing FFmpeg on Different Operating Systems
The installation process varies significantly across operating systems. Follow the instructions relevant to your specific environment.
Installing FFmpeg on Windows
Installing FFmpeg on Windows involves downloading the pre-compiled binaries and then adding FFmpeg’s location to your system’s PATH environment variable. This allows you to run ffmpeg commands from any directory in your command prompt.
1. Using a Pre-built Binary (Recommended)
-
Download FFmpeg:
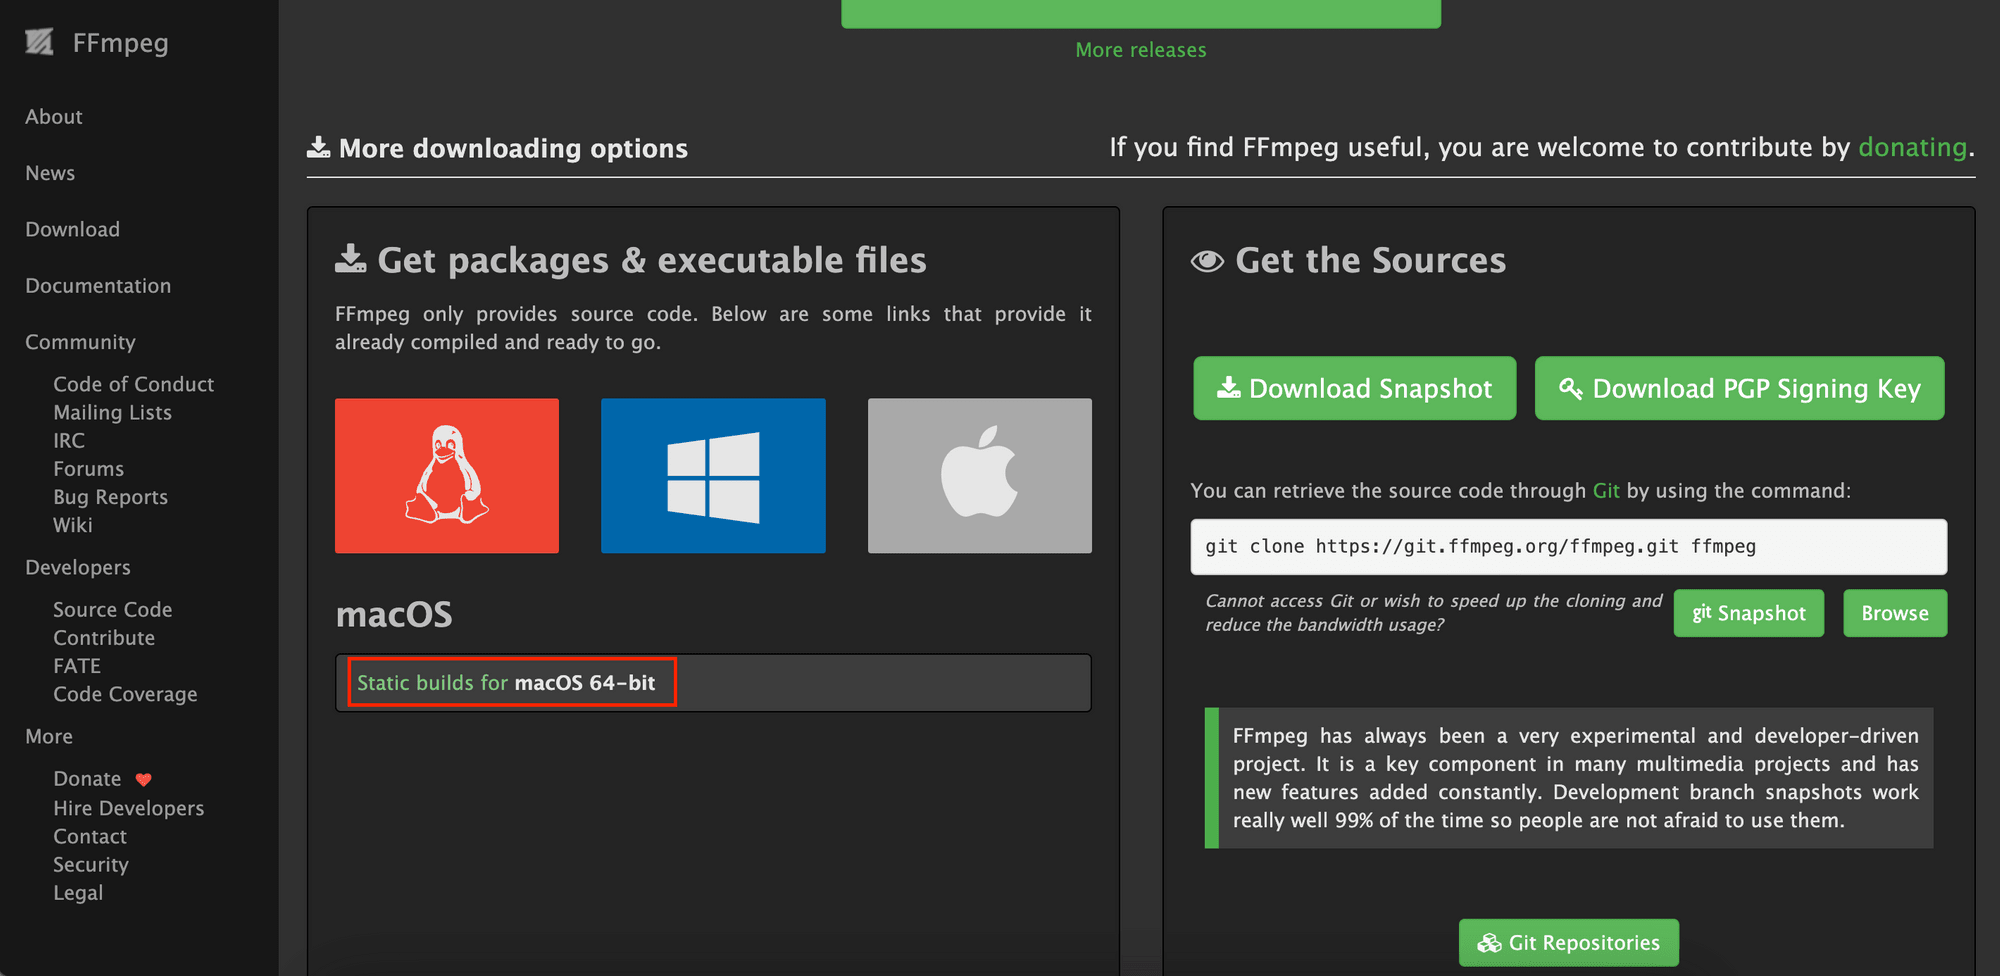
- Navigate to the official FFmpeg downloads page:
https://ffmpeg.org/download.html. - Under the “Windows builds” section, you’ll find links to various third-party build providers.
Gyan.devandBtbNare popular and reliable choices. Click on one of these links. - On the chosen provider’s site, download the “full” version, typically a
.zipfile (e.g.,ffmpeg-N.N-full_build.zip). The “full” version ensures you have a wide array of codecs and features. Choose the 64-bit version if your Windows is 64-bit (which most modern systems are).
- Navigate to the official FFmpeg downloads page:
-
Extract FFmpeg:
- Once downloaded, locate the
.zipfile (usually in yourDownloadsfolder). - Right-click the
.zipfile and select “Extract All…” Choose a convenient, stable location on your drive that won’t be accidentally deleted. A common practice is to create a folder likeC:Program FilesffmpegorC:ffmpeg. - After extraction, you’ll find a folder (e.g.,
ffmpeg-N.N-full_build) containingbin,doc, andpresetsdirectories. Theffmpeg.exeexecutable is located inside thebindirectory.
- Once downloaded, locate the
2. Adding FFmpeg to Your System PATH
This step is critical. Adding FFmpeg to your PATH variable allows you to execute FFmpeg commands from any command prompt window, without needing to navigate to its installation directory every time.
- Open System Properties:
- Search for “Environment Variables” in the Windows search bar and select “Edit the system environment variables.”
- Alternatively, go to
Control Panel > System and Security > System, click on “Advanced system settings” on the left pane, and then click the “Environment Variables…” button.
- Edit PATH Variable:
- In the “Environment Variables” window, under “System variables,” locate and select the
Pathvariable, then click “Edit…”. - Click “New” and paste the full path to the
bindirectory of your extracted FFmpeg folder. For example, if you extracted FFmpeg toC:ffmpeg, the path you add would beC:ffmpegbin. - Click “OK” on all open windows to save the changes.
- In the “Environment Variables” window, under “System variables,” locate and select the
- Verify Installation:
- Close and reopen any existing Command Prompt or PowerShell windows. This is crucial for the changes to the PATH variable to take effect.
- Open a new Command Prompt or PowerShell window.
- Type
ffmpeg -versionand press Enter. - If installed correctly, you should see output displaying FFmpeg’s version, build configuration, and copyright information. If you receive an error like “‘ffmpeg’ is not recognized…”, recheck your PATH variable settings carefully.
Installing FFmpeg on macOS
For macOS users, Homebrew is the preferred and most convenient method for installing FFmpeg. Homebrew is a fantastic package manager that simplifies the installation of command-line tools.
1. Using Homebrew (Recommended)
If you don’t already have Homebrew installed, you’ll need to install it first.
- Install Homebrew (if not already installed):
- Open your Terminal application (you can find it in
Applications/Utilities). - Paste the following command and press Enter:
bash

/bin/bash -c "$(curl -fsSL https://raw.githubusercontent.com/Homebrew/install/HEAD/install.sh)"
- Follow the on-screen prompts, which may include entering your macOS password and installing Xcode Command Line Tools.
- Once Homebrew is installed, run
brew doctorto ensure everything is set up correctly.
- Open your Terminal application (you can find it in

- Install FFmpeg using Homebrew:
- In your Terminal, simply type the following command and press Enter:
bash

brew install ffmpeg
- Homebrew will download FFmpeg and all its necessary dependencies. This process might take a few minutes, depending on your internet connection and system speed.
- In your Terminal, simply type the following command and press Enter:
2. Verifying Installation
- After the installation completes, type the following command in your Terminal:
bash

ffmpeg -version
- You should see output detailing FFmpeg’s version, build configuration, and other relevant information. If you get a “command not found” error, ensure Homebrew’s binary directory is in your system’s PATH. Homebrew usually handles this automatically, but sometimes manual intervention is needed for custom shell setups. You can add
export PATH="/usr/local/bin:$PATH"to your~/.zshrcor~/.bash_profileif needed, then restart your terminal.
Installing FFmpeg on Linux
Linux offers various ways to install FFmpeg, primarily through its native package managers. The commands will differ slightly based on your specific Linux distribution.
1. Using Package Managers
For Debian/Ubuntu-based Distributions:
- Update Package List: It’s always a good practice to update your package list before installing new software.
bash

sudo apt update
- Install FFmpeg:
bash

sudo apt install ffmpeg
Theaptpackage manager will download and install FFmpeg along with its required dependencies.
For Fedora/CentOS/RHEL-based Distributions:
- Enable RPM Fusion Repository (if not already enabled): FFmpeg is typically not included in the default Fedora repositories due to patent concerns in some regions. The RPM Fusion repository provides free and non-free software, including FFmpeg.
- For Fedora:
bash

sudo dnf install https://download1.rpmfusion.org/free/fedora/rpmfusion-free-release-$(rpm -E %fedora).noarch.rpm https://download1.rpmfusion.org/nonfree/fedora/rpmfusion-nonfree-release-$(rpm -E %fedora).noarch.rpm
- For CentOS/RHEL (using EPEL and RPM Fusion):
bash

sudo yum install epel-release

sudo yum localinstall --nogpgcheck https://download1.rpmfusion.org/free/el/rpmfusion-free-release-7.noarch.rpm https://download1.rpmfusion.org/nonfree/el/rpmfusion-nonfree-release-7.noarch.rpm
(Adjust7to your specific CentOS/RHEL version if necessary).
- For Fedora:
- Install FFmpeg:
- For Fedora (using
dnf):
bash

sudo dnf install ffmpeg
- For CentOS/RHEL (using
yum):
bash

sudo yum install ffmpeg
- For Fedora (using
2. Verifying Installation
- After the installation is complete, open your Terminal and execute:
bash

ffmpeg -version
- You should receive detailed output showing FFmpeg’s version and configuration. If you encounter a “command not found” error, ensure your system’s PATH variable includes the directory where FFmpeg binaries are installed (usually
/usr/binor/usr/local/bin, which are typically included by default).
Installing from Source (Advanced Users)
While beyond the scope of this general guide, advanced users might opt to compile FFmpeg from source. This method allows for highly customized builds, including specific codecs, experimental features, or optimized performance for particular hardware. The process involves installing build tools, development libraries, cloning the FFmpeg Git repository, configuring the build with desired options (using ./configure), compiling (using make), and finally installing (using sudo make install). This approach requires a deeper understanding of system compilation and dependency management.
Basic FFmpeg Commands to Get Started
With FFmpeg successfully installed, you can now begin to explore its vast capabilities. Here are a few fundamental commands to help you get started, illustrating its practical power.
1. Converting Video Formats
One of FFmpeg’s most common uses is converting video files from one format to another.
ffmpeg -i input.mp4 output.webm
This command takes input.mp4 and converts it to output.webm. FFmpeg intelligently chooses appropriate codecs for the output format unless specified.
2. Extracting Audio from Video
You can easily strip the audio track from a video file and save it as an audio-only file.
ffmpeg -i input.mp4 -vn output.mp3
Here, -i specifies the input file, and -vn tells FFmpeg to disable video recording (i.e., don’t include video). The output will be an MP3 audio file.
3. Resizing Videos
Resizing videos is straightforward using the -vf (video filter) option.
ffmpeg -i input.mp4 -vf scale=1280:-1 output_720p.mp4
This command resizes input.mp4 to a width of 1280 pixels, with -1 automatically calculating the height to maintain the aspect ratio. This is incredibly useful for optimizing videos for different platforms or screen sizes.
4. Splitting a Video
You can extract a segment of a video using the -ss (start time) and -t (duration) or -to (end time) options.
ffmpeg -ss 00:01:00 -i input.mp4 -to 00:02:00 -c copy output_segment.mp4
This command extracts a one-minute segment from input.mp4, starting at 1 minute, and ending at 2 minutes. The -c copy option ensures that the video and audio streams are copied directly without re-encoding, making the process very fast and lossless.
Basic Troubleshooting
- “ffmpeg: command not found”: This usually means FFmpeg is not in your system’s PATH. Revisit the PATH setup for Windows or ensure Homebrew/package manager directories are correctly configured on macOS/Linux.
- Missing Codecs: If you encounter errors like “Unknown encoder ‘libx264′”, it might mean your FFmpeg build doesn’t include support for that specific codec. On Linux, ensure you’ve enabled the non-free repositories if necessary (like RPM Fusion). On Windows, try downloading a “full” build. On macOS, Homebrew’s FFmpeg typically comes with most popular codecs.
- Permission Denied: Ensure you have read/write permissions for the input/output files and directories. When installing or updating, remember to use
sudoon Linux/macOS when required.
Advanced Usage and Further Learning
The examples above merely scratch the surface of what FFmpeg can do. Its true power lies in its extensive filtering options, codec controls, and ability to handle complex media pipelines.
Exploring FFmpeg Documentation
The official FFmpeg documentation is an invaluable resource for delving deeper. While extensive, it provides comprehensive details on every option, filter, and codec.
- Official FFmpeg Documentation:
https://ffmpeg.org/documentation.html
Integration with Other Tools
FFmpeg often serves as a backend for many graphical user interface (GUI) applications, video editing software, and even web services that require multimedia processing. Understanding its command-line operations can give you a significant advantage when troubleshooting issues or designing custom workflows. It’s frequently integrated with programming languages like Python (via libraries like moviepy or direct subprocess calls) to automate complex video and audio tasks.
For those interested in “Digital Security,” FFmpeg can be used in forensics to analyze video streams, extract metadata, or even repair corrupted files. In “Productivity,” automating tasks like batch conversions for large media libraries can save immense amounts of time.
Conclusion
Installing FFmpeg is a gateway to unparalleled control over your digital media. While the command-line interface might seem intimidating at first, the foundational steps outlined in this guide – whether through pre-built binaries, robust package managers, or even compilation from source for the truly adventurous – are designed to make the process accessible.
By having FFmpeg installed, you equip yourself with a versatile, open-source tool that underpins a vast array of modern multimedia applications and workflows. From simple format conversions for personal projects to complex streaming solutions for professional endeavors, FFmpeg’s capabilities are limited only by your imagination and command-line prowess. Take these first steps, experiment with the basic commands, and prepare to unlock a new level of mastery over your video and audio content. The journey into advanced multimedia processing starts now.
aViewFromTheCave is a participant in the Amazon Services LLC Associates Program, an affiliate advertising program designed to provide a means for sites to earn advertising fees by advertising and linking to Amazon.com. Amazon, the Amazon logo, AmazonSupply, and the AmazonSupply logo are trademarks of Amazon.com, Inc. or its affiliates. As an Amazon Associate we earn affiliate commissions from qualifying purchases.