
In today’s digitally driven world, the ability to seamlessly integrate hardware with your technology ecosystem is paramount. From personal productivity to small business operations, a reliable printer is often a cornerstone. Brother printers have carved out a significant niche in the market, lauded for their durability, cost-effectiveness, and user-friendly design. However, like any piece of technology, the initial setup and installation process can sometimes present a minor hurdle. This comprehensive guide aims to demystify the process of installing a Brother printer, whether you’re a seasoned tech enthusiast or a complete novice. We’ll walk you through each step, ensuring you can get your new Brother printer up and running with minimal fuss, allowing you to focus on what truly matters – your work, your brand, and your financial goals.
Preparing for a Smooth Installation
Before you even unbox your new Brother printer, a little preparation can go a long way in ensuring a smooth and successful installation. This phase is crucial for avoiding common pitfalls and setting yourself up for long-term printer satisfaction.
Choosing the Right Location and Understanding Your Printer Model
The first step is to select an appropriate location for your printer. Consider the following:
- Connectivity: If you’re using a wired connection (USB), ensure the printer can reach your computer without straining the cable. For wireless (Wi-Fi) models, the location should have a strong and stable Wi-Fi signal. Obstructions like thick walls or metal objects can interfere with the signal.
- Power Source: Proximity to a power outlet is essential. Avoid overloading power strips, especially if you plan to connect other devices.
- Ventilation: Printers generate heat during operation. Ensure there’s adequate airflow around the unit to prevent overheating and prolong its lifespan.
- Ergonomics and Accessibility: Place the printer at a height that allows for easy access to the paper tray, toner/ink cartridges, and control panel. If it’s a multifunction printer (MFP) that you’ll be using for scanning or copying, ensure you have enough space above and in front of it.
- Noise Levels: While Brother printers are generally not excessively noisy, consider the environment. If it’s going in a home office, you might want it away from your primary workspace.
Beyond physical placement, it’s vital to understand your specific Brother printer model. Brother offers a vast range of printers, from basic monochrome laser printers to advanced color inkjet all-in-ones and robust business-grade machines. Identifying your model number (usually found on the front or back of the printer) is key, as the exact installation steps might vary slightly. This model number will be your reference for downloading the correct drivers and software from the Brother support website.
Essential Items You’ll Need
While your Brother printer should come with most of what you need, it’s good to have a few items on hand to facilitate the installation:
- The Printer and its Included Accessories: This includes the power cord, USB cable (if applicable, though many newer models are wireless-only), starter ink/toner cartridges, and any setup guides.
- Your Computer or Mobile Device: Ensure your computer is powered on and connected to your network (if installing wirelessly). For mobile device setup, ensure your smartphone or tablet is connected to the same Wi-Fi network as the printer.
- Wi-Fi Network Name (SSID) and Password: If you’re installing a wireless printer, you’ll need this information to connect it to your network.
- Internet Connection: Essential for downloading the latest drivers and software.
- Patience and a Clear Workspace: While the process is straightforward, taking your time and having a clean area to work in will prevent errors and make the experience more enjoyable.
Step-by-Step Installation Guide
Now that you’re prepared, let’s dive into the actual installation process. This guide covers the most common scenarios, including wired, wireless, and mobile installations.
Connecting the Hardware and Initial Power-Up
This is the most straightforward part, often referred to as “getting it out of the box and plugged in.”
- Unbox the Printer: Carefully remove the printer and all accessories from the packaging. Remove any protective tapes, films, or packaging materials. Pay close attention to any internal packing materials that might secure the print head or toner carriage – these must be removed.
- Install Ink or Toner Cartridges: Open the printer’s access panel (refer to your printer’s manual if unsure) and install the provided ink or toner cartridges. Ensure they are properly seated according to the instructions.
- Connect the Power Cord: Plug the power cord into the printer and then into a wall outlet.
- Power On the Printer: Press the power button. The printer will likely go through an initialization sequence. This might involve some noises as it calibrates and prepares the print head or drum.
- Connect to Your Computer/Network:
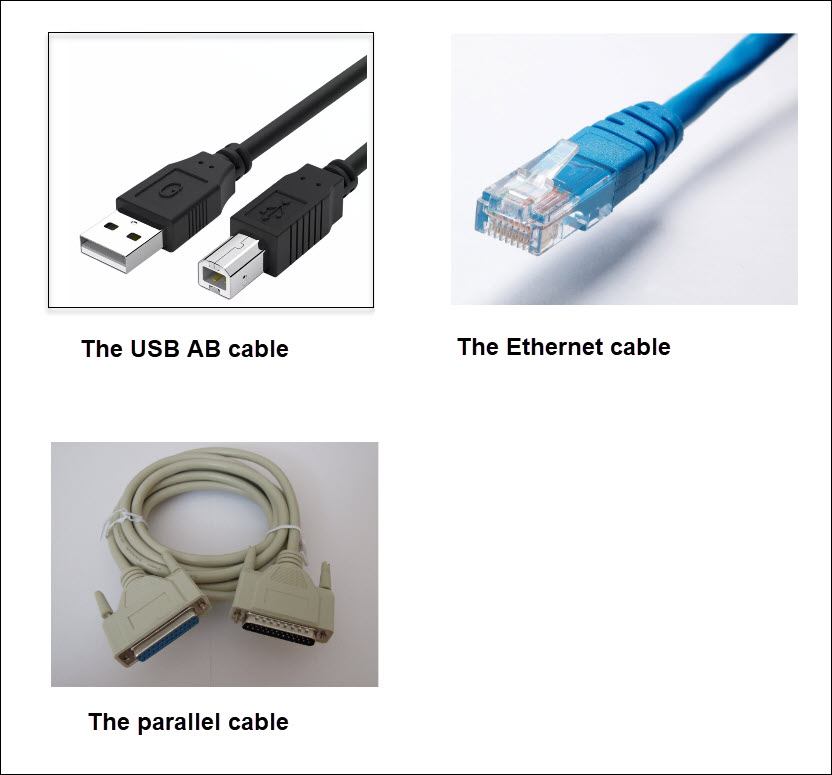
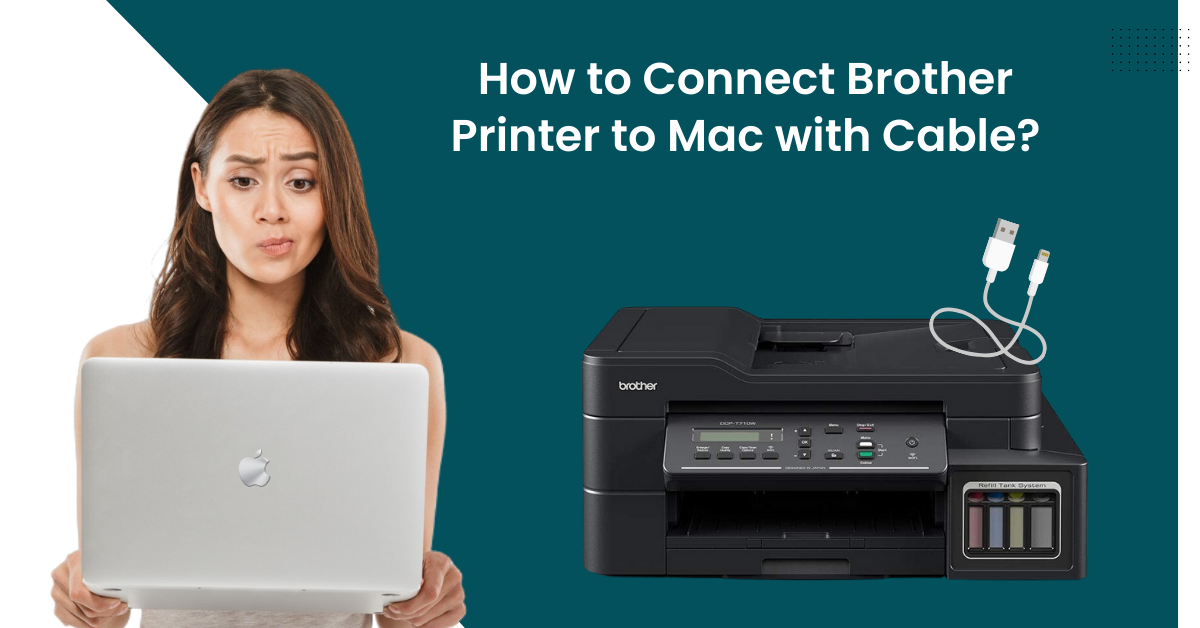
- For Wired (USB) Installation: Connect the USB cable from the printer to an available USB port on your computer.
- For Wireless (Wi-Fi) Installation: This is where Brother offers several methods. You’ll typically find instructions in your quick start guide. Common methods include:
- Using the Printer’s Control Panel: Navigate through the printer’s menu to the Wi-Fi setup wizard and follow the on-screen prompts to select your network and enter your password.
- WPS (Wi-Fi Protected Setup): If your router supports WPS, you can often press the WPS button on both the router and the printer to establish a connection.
- Using Brother’s Mobile App or Software: Some models allow you to connect the printer temporarily to your computer or mobile device via USB or Wi-Fi Direct to transfer your network credentials.
Installing Drivers and Software
Once the hardware is connected and powered on, the next crucial step is installing the necessary software and drivers on your computer. These act as the bridge between your operating system and your printer, enabling it to understand commands and produce prints.
- Visit the Brother Support Website: The most reliable way to get the correct software is to download it directly from Brother’s official support website. Search for your printer model number on their site.
- Select Your Operating System: The website will usually detect your operating system (Windows, macOS, Linux) or prompt you to select it.
- Download the Full Driver & Software Package: Brother typically offers a comprehensive package that includes all necessary drivers, utilities, and applications for your printer. Look for the “Full Driver & Software Package” or similar.
- Run the Installer: Locate the downloaded file (usually in your Downloads folder) and double-click to run it.
- Follow On-Screen Prompts: The installer will guide you through the process. You’ll likely be asked to:
- Accept License Agreements: Read and agree to the terms and conditions.
- Choose Connection Type: Select how your printer is connected (USB, Wi-Fi, Ethernet). If you chose Wi-Fi, the installer might help you discover your printer on the network or prompt you to connect it as described in the previous step.
- Install Software Components: You might have the option to select which additional software you want to install (e.g., scanning utilities, OCR software). It’s generally recommended to install the full package unless you have specific space constraints or preferences.
- Complete the Installation: The installer will copy files and configure your system.
Testing Your Printer
After the software installation is complete, it’s essential to test your printer to ensure everything is working correctly.
- Print a Test Page: Most operating systems have a built-in option to print a test page.
- On Windows: Go to “Printers & Scanners” in your Settings, select your Brother printer, click “Manage,” then “Print a test page.”
- On macOS: Go to “System Preferences” > “Printers & Scanners,” select your Brother printer, and look for an option to print a test page or print a sample document.
- Print a Document from an Application: Open a document in your preferred application (e.g., Microsoft Word, Notepad, a PDF reader) and select your Brother printer from the print dialog. Click “Print.”
- Test Scanning (if applicable): If you have a multifunction printer, open the Brother scanning utility (installed with the driver package) and perform a test scan.
- Troubleshooting Common Issues: If your test print fails, don’t panic. Common issues include:
- Incorrect Printer Selected: Ensure you’ve chosen the correct Brother printer in the print dialog.
- Connection Problems: Double-check your USB cable connection or Wi-Fi settings. For Wi-Fi, ensure the printer and your computer are on the same network.
- Driver Issues: Try uninstalling and then reinstalling the drivers.
- Printer Status: Check the printer’s display panel for any error messages or ink/toner low warnings.
Advanced Setup and Connectivity Options
Brother printers offer a range of advanced features and connectivity options that can enhance your productivity and integrate your printer more deeply into your digital workflow.
Wireless and Network Printing
For most modern homes and offices, wireless printing is the preferred method. Beyond the initial setup, consider optimizing your wireless experience.
- Wi-Fi Direct: Some Brother printers support Wi-Fi Direct, allowing mobile devices or laptops to connect directly to the printer’s Wi-Fi network without an existing Wi-Fi router. This is useful for quick, ad-hoc printing.
- Ethernet Connectivity: For a more stable and secure wired network connection, many Brother printers also offer an Ethernet port. This is ideal for busy office environments where network reliability is paramount.
- Network Configuration: You can often access advanced network settings through the printer’s control panel or a web-based management interface. This allows you to set a static IP address for the printer, which can be helpful in complex network setups.
Mobile Printing and Cloud Integration
In an era where work happens on the go, mobile printing is no longer a luxury but a necessity. Brother provides robust solutions for printing from your smartphones and tablets.
- Brother Mobile Connect App: This free app (available for iOS and Android) is your gateway to mobile printing. It allows you to print documents, photos, and scan directly from your mobile device to your Brother printer. It also enables remote print capabilities, allowing you to print to your home or office printer from anywhere in the world, provided it’s connected to the internet.
- Cloud Services: Many Brother printers integrate with popular cloud storage services like Google Drive, Dropbox, and OneDrive. This allows you to print documents directly from the cloud or scan and save them back to the cloud, streamlining document management.
- AirPrint and Mopria: If you use Apple devices, your Brother printer will likely support AirPrint, enabling effortless printing from iPhones and iPads without needing to install additional apps. For Android and other devices, Mopria certification ensures compatibility and easy printing across various brands.
Utilizing Brother’s Software Suite for Enhanced Productivity
The drivers and software package you installed isn’t just for making the printer work; it’s a suite of tools designed to boost your productivity.
- Brother Control Center: This is often the central hub for managing your printer’s functions. From here, you can typically initiate scans, adjust print settings, check ink/toner levels, and access other printer utilities.
- Optical Character Recognition (OCR): If your Brother printer is an MFP, its scanning software often includes OCR capabilities. This allows you to convert scanned documents (like PDFs or images) into editable text documents, saving you significant time on data entry.
- Document Management and Organization: Explore the bundled software for features that help you organize, edit, and share your scanned documents. Some applications offer features for creating searchable PDFs or merging multiple scans into a single document.
- Troubleshooting and Maintenance: The software suite often includes diagnostic tools and links to online support resources that can help you resolve issues quickly and perform basic maintenance tasks.
By understanding and utilizing these advanced features, you can transform your Brother printer from a simple printing device into a powerful asset for your personal and professional endeavors, supporting your technological needs, strengthening your brand presence through professional documentation, and contributing to your financial efficiency by optimizing workflows.
aViewFromTheCave is a participant in the Amazon Services LLC Associates Program, an affiliate advertising program designed to provide a means for sites to earn advertising fees by advertising and linking to Amazon.com. Amazon, the Amazon logo, AmazonSupply, and the AmazonSupply logo are trademarks of Amazon.com, Inc. or its affiliates. As an Amazon Associate we earn affiliate commissions from qualifying purchases.