The allure of Windows 11 is undeniable. With its sleek new interface, enhanced productivity features, and promises of improved performance and security, many users are eager to upgrade from their current Windows 10 installations. However, a frustrating roadblock can emerge: you’ve meticulously checked the system requirements, confirmed your hardware is compatible, and yet, the installation process stubbornly refuses to proceed. This isn’t an isolated incident; it’s a common predicament that leaves many scratching their heads. This article delves into the core reasons why you might be facing this installation barrier, even when you believe you’ve ticked all the boxes, and provides actionable steps to overcome these hurdles.
The digital landscape is constantly evolving, and with each major software release, especially an operating system as significant as Windows 11, a certain level of complexity in the upgrade path is to be expected. While Microsoft has made strides in simplifying the process, the reality on the ground can be quite different. The initial excitement of a new OS can quickly turn into a troubleshooting marathon if compatibility issues, configuration quirks, or even seemingly unrelated software interfere with the installation. Understanding the nuances beyond the basic TPM 2.0 and Secure Boot checks is crucial for a smooth transition.
Beyond the Basics: Unpacking Hidden Windows 11 Installation Blockers
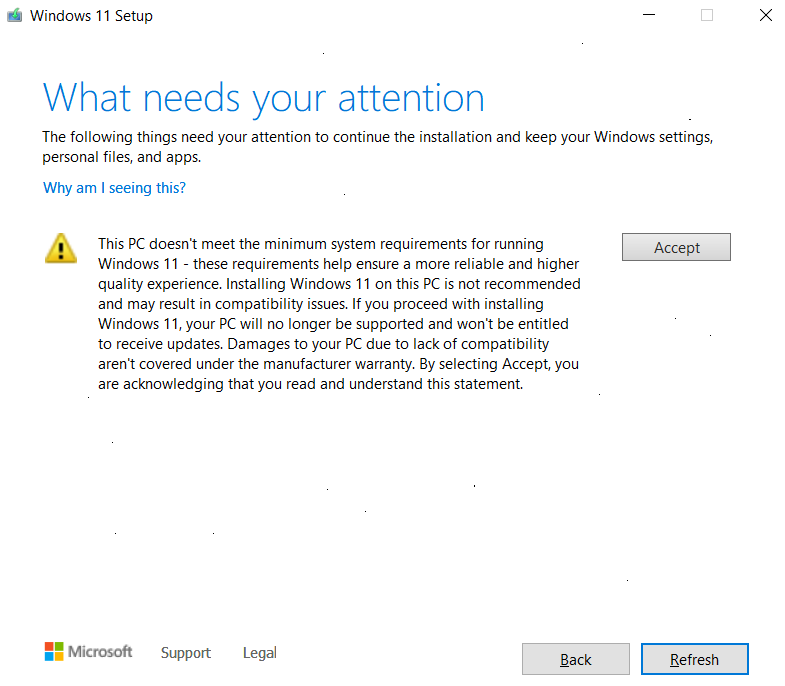
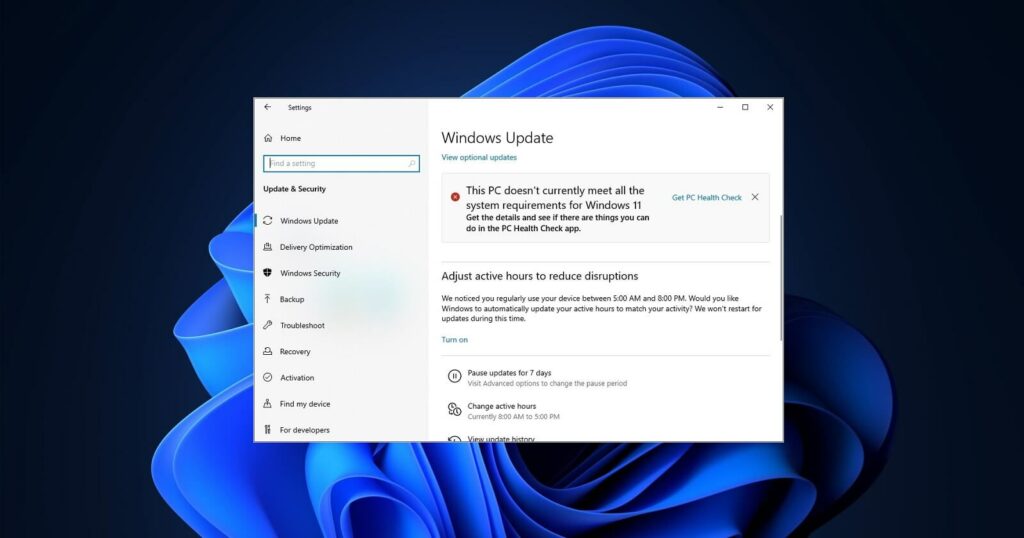
The official Windows 11 system requirements are a starting point, but they don’t paint the full picture of every potential installation conflict. While your processor might be on the supported list and your TPM 2.0 chip is enabled, numerous other factors can act as silent saboteurs to your upgrade. These range from subtle BIOS/UEFI settings and driver incompatibilities to the presence of specific software that conflicts with the installer.
The Crucial Role of BIOS/UEFI Configuration
The foundational layer of your computer’s hardware and software interaction lies within the BIOS (Basic Input/Output System) or its modern successor, UEFI (Unified Extensible Firmware Interface). These firmware settings dictate how your hardware initializes and boots up, and they play a critical role in Windows 11’s stringent security requirements.
Ensuring TPM 2.0 and Secure Boot Are Properly Enabled
Two of the most talked-about Windows 11 requirements are Trusted Platform Module (TPM) version 2.0 and Secure Boot. While you might have confirmed their presence, their actual enablement within your BIOS/UEFI is paramount.
-
TPM 2.0: This is a dedicated security chip that provides hardware-based security features. For Windows 11, TPM 2.0 is essential for features like BitLocker disk encryption and Windows Hello. Often, a TPM chip might be present on your motherboard but disabled by default in the BIOS/UEFI. You’ll need to navigate to your system’s firmware settings (typically by pressing Del, F2, F10, or F12 during boot-up) and locate the “Security” or “Advanced” settings. Look for an option related to “TPM,” “PTT” (Platform Trust Technology, Intel’s implementation), or “fTPM” (Firmware TPM, AMD’s implementation) and ensure it’s enabled. The specific naming convention can vary significantly between motherboard manufacturers.
-
Secure Boot: This is a security standard that helps ensure your PC boots using only software that is trusted by the PC manufacturer. It prevents malicious software from loading during the boot process. Secure Boot relies on UEFI. To enable it, you’ll also need to be in your BIOS/UEFI. Under the “Boot” or “Security” section, you should find an option for “Secure Boot.” Ensure it is enabled. It’s also important to note that Secure Boot often requires your system to be in UEFI mode, not Legacy BIOS mode. If your system is still booting in Legacy mode, you might need to convert your drive to GPT (GUID Partition Table) and switch to UEFI boot mode, which can be a more complex process.
Understanding Boot Mode: UEFI vs. Legacy BIOS
Windows 11 exclusively supports UEFI booting. If your system is still configured to boot in Legacy BIOS mode, even if you have Secure Boot enabled, the installation may fail. Older systems often default to Legacy BIOS. To check your boot mode, you can open System Information (type msinfo32 in the Run dialog). Look for “BIOS Mode.” If it says “Legacy,” you’ll need to convert your system to UEFI. This usually involves converting your primary hard drive’s partition style from MBR (Master Boot Record) to GPT. This conversion can sometimes be done without data loss using tools like MBR2GPT.exe (which comes built-in with Windows 10), but it’s always advisable to back up your data first. Once converted, you’ll need to change the boot order in your BIOS/UEFI to prioritize UEFI.
Driver Dilemmas: The Unsung Heroes (or Villains) of Installation
Drivers are software that allow your operating system to communicate with your hardware components. Outdated, corrupted, or incompatible drivers can silently wreak havoc on system operations, including the Windows 11 installation process.
Outdated or Corrupt Storage Controller Drivers
One of the most common culprits for installation failures, especially when the installer can’t see your hard drive, is an outdated or corrupt storage controller driver. This driver is responsible for managing your SATA, NVMe, or other storage devices.
- What to do: Before attempting the Windows 11 installation, it’s highly recommended to visit your motherboard manufacturer’s website (or your laptop manufacturer’s website) and download the latest storage controller drivers for your specific model. During the Windows 11 installation, when you reach the disk selection screen, there’s an option to “Load driver.” This is where you can point the installer to the extracted storage controller drivers you downloaded. This step can be particularly important if you’re using newer NVMe SSDs or specific RAID configurations.
Graphics Card Driver Issues
While less common as a direct installation blocker, an extremely outdated or incompatible graphics card driver can sometimes lead to display issues during the setup process, making it difficult to proceed. It’s a good practice to update your graphics drivers to the latest version available from NVIDIA, AMD, or Intel before attempting an upgrade.
Other Hardware Driver Conflicts
While the focus is often on storage and graphics, other drivers, such as those for network adapters or chipsets, can also play a role. If you suspect a driver issue, you can try updating all critical drivers from your motherboard manufacturer’s website.
Software Interference: Uninvited Guests at the Upgrade Party
Sometimes, the software already installed on your Windows 10 system can actively interfere with the Windows 11 installer. This is particularly true for security software, system optimization tools, or even certain older applications.

Antivirus and Security Software Conflicts
Third-party antivirus programs, while essential for protecting your system, can sometimes be overly aggressive and flag the Windows 11 installer as a potential threat or block its access to critical files.
- What to do: The safest approach is to temporarily disable or uninstall your third-party antivirus software before initiating the Windows 11 installation. Remember to re-enable or reinstall it after the upgrade is complete. Windows Defender, Microsoft’s built-in security solution, is generally compatible and doesn’t typically cause installation issues.
System Optimization and Cleanup Tools
Tools designed to “speed up” your PC by cleaning registries, removing temporary files, or tweaking system settings can sometimes create inconsistencies or corrupt system files that the Windows 11 installer relies on.
- What to do: If you frequently use such tools, it’s a good idea to run a thorough system scan and perhaps perform a “System File Checker” (
sfc /scannow) scan in Command Prompt (as administrator) to ensure your Windows 10 installation is healthy before attempting the upgrade.
Firmware Updates: The Forgotten Frontier
Beyond BIOS/UEFI settings, your system’s firmware itself might need an update. Many motherboard manufacturers release BIOS/UEFI updates that not only improve stability and performance but also enhance compatibility with newer operating system versions.
- What to do: Check your motherboard manufacturer’s support page for your specific model. Look for the latest BIOS/UEFI updates. Following the manufacturer’s instructions carefully for flashing the BIOS is crucial, as an interruption during this process can render your system unbootable.
Troubleshooting the Installation Media and Process
Even if your system is perfectly configured, issues with the installation media itself or how you’re attempting the upgrade can lead to failure.
Creating a Clean Installation Media
While the Windows 11 Media Creation Tool is generally reliable, sometimes the downloaded ISO file or USB drive can become corrupted.
- What to do: If you’re using a USB drive or DVD for installation, try re-downloading the Windows 11 ISO from Microsoft’s official website and re-creating the installation media. Ensure you use a reputable USB drive and follow the Media Creation Tool’s instructions precisely.
The “Get Windows 11” App vs. Media Creation Tool
Microsoft offers multiple ways to upgrade. The “Get Windows 11” app (often a prompt within Windows Update) and the Media Creation Tool can behave differently. If one fails, the other might succeed.
- What to do: If you’re trying to upgrade via Windows Update and it’s failing, try downloading the Media Creation Tool and performing an in-place upgrade using the created USB drive. Conversely, if the Media Creation Tool fails, ensure your Windows 10 is fully updated and try the Windows Update method.
Beyond the Upgrade: Considerations for a Smooth Transition
Once you’ve successfully installed Windows 11, it’s important to be aware of post-installation steps and potential issues.
Post-Installation Driver Updates and Windows Updates
After the installation, the first thing you should do is run Windows Update to ensure you have the latest patches and drivers. Windows Update will often detect and install missing drivers or provide updated versions.
Performance and Compatibility Checks
While Windows 11 aims for broad compatibility, some older applications or specific hardware might still exhibit issues.
- What to do: Test your critical applications to ensure they function correctly. If you encounter problems, check for application updates or compatibility modes within Windows.
The journey to installing Windows 11 can sometimes feel like navigating a digital maze. However, by systematically addressing the potential roadblocks outlined in this article—from meticulous BIOS/UEFI configuration and driver management to careful software handling and robust installation media—you can significantly increase your chances of a successful upgrade. Remember, patience and a methodical approach are your greatest allies when troubleshooting complex technical issues.
aViewFromTheCave is a participant in the Amazon Services LLC Associates Program, an affiliate advertising program designed to provide a means for sites to earn advertising fees by advertising and linking to Amazon.com. Amazon, the Amazon logo, AmazonSupply, and the AmazonSupply logo are trademarks of Amazon.com, Inc. or its affiliates. As an Amazon Associate we earn affiliate commissions from qualifying purchases.