
In the dynamic world of computing, the allure of customizability and open-source freedom often leads users to explore alternatives beyond their default operating systems. For many MacBook owners, this journey invariably raises a compelling question: “Can you install Linux on a MacBook?” The short answer is a resounding yes, but the path to achieving this Apple-Linux harmony is nuanced, presenting both exciting opportunities and unique challenges. This article delves deep into the feasibility, methods, considerations, and practical steps involved in running Linux on your MacBook, whether you’re seeking to revitalize an older machine, tap into Linux-specific tools, or simply embrace a new computing experience.
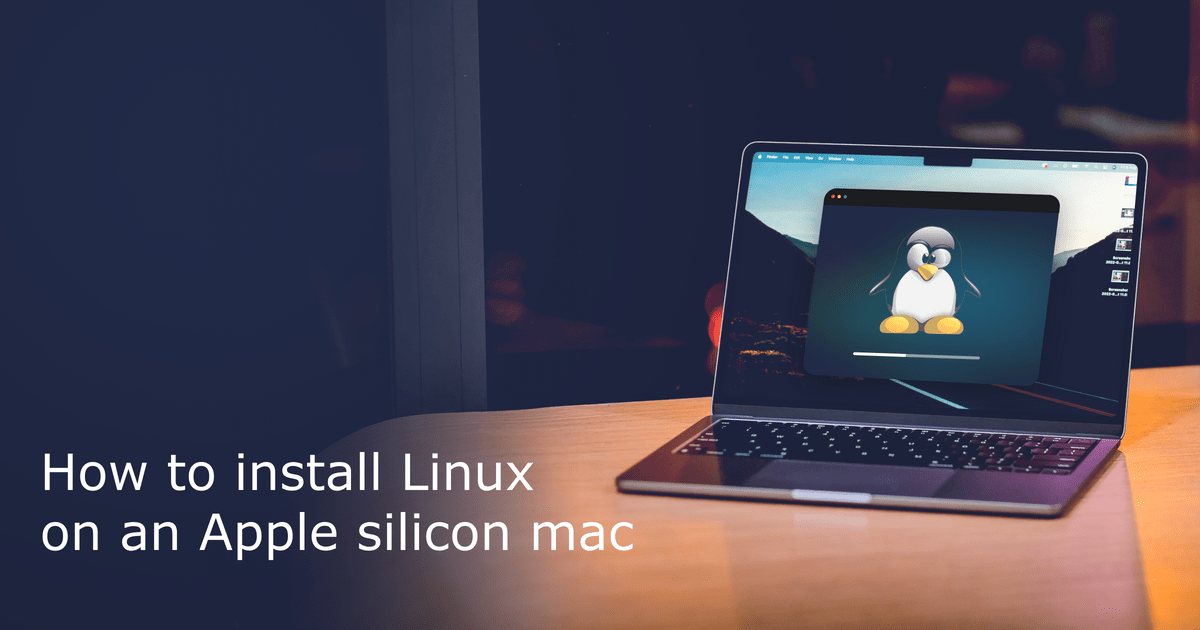
The integration of Linux onto a MacBook is more than just a technical endeavor; it’s a statement of digital independence and a testament to the versatility of modern hardware. From the robust security features and vast software repositories of Linux to its legendary stability and performance, the benefits for a dedicated user can be substantial. However, MacBooks, particularly newer models, are designed with Apple’s proprietary ecosystem in mind, which can create compatibility hurdles. Understanding these distinctions is key to a successful installation and a satisfying user experience.
The Allure of Linux on a MacBook: Why Make the Switch?
The decision to install Linux on a MacBook often stems from a desire to explore beyond macOS, driven by a myriad of benefits that Linux offers. While macOS is undoubtedly a polished and user-friendly operating system, Linux provides an unparalleled degree of control, customization, and access to a vibrant open-source ecosystem that can be incredibly appealing to power users, developers, and those seeking an alternative computing paradigm.
One of the primary draws is unrivalled customization. Unlike macOS, which offers a relatively fixed user experience, Linux distributions (distros) provide a vast array of desktop environments (GNOME, KDE Plasma, XFCE, etc.), each with its unique aesthetic and workflow. This allows users to sculpt their operating system precisely to their preferences, from visual themes to keyboard shortcuts, creating a truly personalized computing environment. This level of control extends to the core of the system, enabling users to fine-tune processes and optimize performance in ways simply not possible with proprietary operating systems.
For developers and tech enthusiasts, Linux is often the preferred choice due to its robust command-line interface, extensive development tools, and seamless integration with various programming languages and frameworks. Many popular server technologies, containerization tools like Docker, and web development stacks are either built on Linux or perform optimally within a Linux environment. Installing Linux on a MacBook can transform it into a powerful development workstation, offering the best of both hardware worlds – Apple’s premium build quality and Linux’s development prowess.
Revitalizing older MacBooks is another significant motivation. As macOS updates continue to increase system requirements, older MacBooks often become sluggish or are no longer supported. Linux, renowned for its efficiency and ability to run on minimal hardware, can breathe new life into these machines. Lightweight Linux distros can dramatically improve performance, extending the usable lifespan of a MacBook that might otherwise be relegated to the tech graveyard. This not only offers a cost-effective way to get more mileage out of existing hardware but also aligns with more sustainable technology practices.
Furthermore, Linux is often praised for its enhanced security and privacy features. Its open-source nature means that its code is continuously reviewed by a global community of developers, leading to quicker identification and patching of vulnerabilities. While no operating system is entirely immune to threats, the transparency and community-driven development of Linux often result in a more secure environment. Users also appreciate the granular control over data and processes, reducing reliance on corporate ecosystems that may collect personal information.
Finally, the open-source philosophy itself is a strong draw. Being part of a community that values shared knowledge, collaborative development, and free access to software resonates with many. This community aspect also means readily available support, extensive documentation, and a wealth of free applications, eliminating the need for expensive software licenses. Embracing Linux on a MacBook is, for many, a step towards greater digital freedom and a deeper understanding of their computing environment.
Navigating the Landscape: Intel vs. Apple Silicon Macs
The process and feasibility of installing Linux on a MacBook vary significantly depending on its underlying processor architecture. Apple’s transition from Intel processors to its custom-designed Apple Silicon (M1, M2, M3 chips) has created two distinct landscapes for Linux enthusiasts, each with its own set of considerations and challenges.
The Intel MacBook Experience: A More Straightforward Path
For MacBooks equipped with Intel processors (generally models released before late 2020), installing Linux is a relatively mature and well-documented process. These machines, architecturally similar to standard x86-based PCs, have long benefited from robust Linux support.
The key advantage here is hardware compatibility. Most Intel MacBook components, including Wi-Fi cards, graphics processors, trackpads, and webcams, have existing drivers within the Linux kernel or readily available open-source alternatives. This means that a wide array of Linux distributions, such as Ubuntu, Fedora, Debian, and Mint, can be installed with a high degree of functionality out of the box or with minimal post-installation tweaks.
Dual-booting is the most common and often recommended method for Intel Macs. This involves partitioning your hard drive to create a separate space for Linux alongside macOS. While Apple’s Boot Camp assistant is exclusively for Windows, the manual partitioning and installation process for Linux is well-understood. The Mac’s UEFI firmware, which replaced the older BIOS, provides a standard boot environment that Linux distributions are designed to work with, simplifying the bootloader configuration (typically GRUB).
However, even with Intel Macs, some minor compatibility quirks can arise. Specific Wi-Fi chipsets or integrated graphics cards might require proprietary drivers or additional configuration steps to achieve optimal performance and stability. Features like the MacBook’s high-resolution Retina display might need scaling adjustments, and the precise functionality of the trackpad’s gestures might not be fully replicated without dedicated software. Nonetheless, the vast Linux community provides ample resources and solutions for these issues, making the Intel MacBook an excellent platform for a full Linux installation.
The Apple Silicon Frontier: A Journey for the Adventurous
The advent of Apple Silicon Macs (M1, M2, M3 chips, and beyond) marked a fundamental shift in architecture from x86 to ARM. While these chips offer unparalleled performance and power efficiency for macOS applications, they present a significantly more challenging environment for installing Linux natively.
The primary hurdle is the proprietary nature of Apple’s ARM hardware and firmware. Apple does not officially support running alternative operating systems on Apple Silicon Macs, and they have implemented several security measures, including Secure Boot, that make it difficult to boot non-Apple-signed operating systems. Furthermore, the custom hardware components, such as the GPU, Wi-Fi, and various I/O controllers, lack open-source drivers, requiring dedicated and complex reverse engineering efforts.
Despite these obstacles, a groundbreaking project called Asahi Linux has emerged as the spearhead for bringing Linux to Apple Silicon. Asahi Linux is a community-driven effort specifically designed to support Apple M-series Macs, making impressive strides in reverse engineering the hardware and developing drivers. While still under active development, Asahi Linux has achieved significant milestones, including functional desktop environments, basic Wi-Fi, and sound on many M1/M2 models. However, it’s crucial to understand that it’s not a complete, production-ready solution for all hardware components. Features like advanced GPU acceleration, Thunderbolt, and sleep modes might still be experimental or unsupported, and the installation process is more involved than on Intel Macs.
For most users with Apple Silicon Macs, virtualization remains the most practical and stable method for running Linux. Tools like Parallels Desktop, VMware Fusion, or the open-source UTM allow users to run ARM-based Linux distributions (like Ubuntu for ARM) in a virtual machine directly on macOS. This method offers excellent performance and full compatibility with the host hardware, without the complexities of native installation or the limitations of nascent driver support. While it doesn’t offer a true native Linux experience, it provides a highly functional environment for development and general use.
In summary, if you own an Intel MacBook, you can expect a relatively smooth journey to a full, native Linux installation. If you have an Apple Silicon MacBook, you’ll need to decide between the experimental but exciting native experience offered by projects like Asahi Linux or the more stable and practical approach of virtualization. Both pathways offer a gateway to the powerful world of Linux, but with different levels of technical commitment and functional maturity.
Methods for Bringing Linux to Your Mac
Once you’ve considered the architecture of your MacBook, the next step is to choose the method that best suits your needs and technical comfort level. There are several popular approaches to running Linux on a Mac, ranging from full native installations to temporary test drives.
Dual-Booting: The Native Experience
Dual-booting involves installing Linux directly onto your MacBook’s internal storage alongside macOS, allowing you to choose which operating system to boot into each time you start your computer. This method provides a “bare metal” or native Linux experience, meaning Linux has direct access to your hardware, often resulting in the best possible performance.
Pros:
- Optimal Performance: Linux runs directly on the hardware, maximizing speed and efficiency.
- Full Hardware Access: All hardware resources are dedicated to Linux, which is crucial for resource-intensive tasks.
- True Linux Experience: Provides the authentic feel and functionality of a native Linux environment.
Cons:
- Complex Installation: Requires partitioning your drive, which carries a risk of data loss if not done carefully.
- Commitment: Dedicates a significant portion of your hard drive space to Linux.
- Bootloader Management: Setting up GRUB (the Linux bootloader) to coexist with macOS can be tricky.
- Limited for Apple Silicon: Currently very challenging and experimental for M-series Macs.
Dual-booting is generally recommended for Intel Mac users who want to fully immerse themselves in Linux and require its maximum performance. It’s ideal for developers, power users, and those looking to replace macOS as their primary operating system or run demanding Linux-native applications.
Virtualization: A Sandboxed Solution
Virtualization involves running Linux within a virtual machine (VM) on top of macOS. Software like Parallels Desktop, VMware Fusion, or VirtualBox (for Intel Macs) and UTM (for Apple Silicon Macs) creates a virtualized hardware environment within macOS, allowing you to install and run an entire Linux operating system as an application.
Pros:
- Safety and Simplicity: No partitioning required, reducing the risk of data loss. The Linux installation is isolated from macOS.
- Easy Management: VMs can be easily created, cloned, backed up, and deleted without affecting your primary macOS installation.
- Simultaneous Use: You can run macOS and Linux simultaneously, switching between them with ease.
- Excellent for Apple Silicon: Currently the most practical and stable way to run Linux on M-series Macs, using ARM-compatible Linux distros.
Cons:
- Performance Overhead: Linux in a VM shares hardware resources with macOS, leading to some performance degradation compared to native installation.
- Resource Intensive: Requires sufficient RAM and CPU cycles to run both macOS and the VM comfortably.
- Hardware Passthrough Issues: Accessing certain host hardware directly (e.g., advanced GPU features, specific USB devices) can be more complex or limited.
Virtualization is an excellent choice for users who need to run Linux applications occasionally, want a safe environment for experimentation, or need to run Linux on an Apple Silicon Mac without the complexities of native installation. It offers a low-risk, high-convenience way to access Linux functionalities.
Live USB: Your Risk-Free Test Drive
A Live USB allows you to boot and run a full Linux operating system directly from a USB flash drive without installing anything on your MacBook’s internal hard drive. This is often the first step for anyone considering installing Linux.
Pros:
- Zero Risk: No changes are made to your MacBook’s internal storage or macOS installation.
- Portability: You can carry your personalized Linux environment on a USB drive and use it on multiple compatible machines.
- Testing Ground: Perfect for trying out different Linux distributions, testing hardware compatibility, and exploring the Linux environment before committing to an installation.
- Troubleshooting: Can be used as a recovery or diagnostic tool if your primary OS encounters issues.
Cons:
- Performance Limitations: Running from a USB drive is significantly slower than from an internal SSD, leading to longer boot times and slower application performance.
- Non-Persistent (by default): Changes and saved files are usually lost upon reboot, though some tools allow for “persistence” on the USB drive.
- Limited Features: Some advanced features or drivers might not be fully functional in a Live environment.
A Live USB is ideal for beginners, those who want to “kick the tires” of Linux, or anyone needing a temporary, portable Linux environment. It’s an indispensable tool for initial exploration and compatibility checks, especially for Intel Macs. While technically possible on Apple Silicon with specific setups, it’s less straightforward than on Intel Macs due to boot limitations.
Each method caters to different needs and technical proficiencies. Carefully considering your goals and your MacBook’s architecture will help you choose the most appropriate pathway to bringing Linux into your Apple ecosystem.
Embarking on the Installation Journey: A Step-by-Step Overview
For those opting for a native dual-boot Linux installation on an Intel MacBook, the journey involves several critical steps. While the precise details can vary slightly depending on your chosen Linux distribution and MacBook model, the general outline remains consistent. Crucially, this section primarily applies to Intel-based MacBooks due to the current complexities and developmental nature of native Linux on Apple Silicon.
Crucial Preparations: Backup and Boot Media Creation
Before you even think about partitioning your drive, backing up your entire macOS system is non-negotiable. This is the most important step to prevent data loss in case anything goes awry during the installation process. Use Apple’s Time Machine, a third-party backup solution, or cloud storage to ensure all your important files and the macOS installation itself are safely recoverable.
Next, you’ll need to choose your Linux distribution. Popular and beginner-friendly choices for MacBooks include:
- Ubuntu: Widely supported, user-friendly, and has a vast community.
- Fedora: Known for adopting the latest open-source technologies, strong security.
- Linux Mint: Based on Ubuntu, offers a familiar desktop experience for those transitioning from macOS or Windows.
- Debian: The foundation for many other distros, stable but can be more challenging for beginners.
Once you’ve selected a distro, download its ISO image file from the official website. Then, you’ll need to create a bootable USB drive from this ISO. On macOS, tools like BalenaEtcher are excellent for this purpose, providing a simple graphical interface to write the ISO to a USB flash drive (ensure the USB drive is at least 8GB). This bootable USB will be your installation medium.
Partitioning Your MacBook’s Drive
With your backup secure and bootable USB ready, the next step is to make space for Linux on your MacBook’s internal drive.
- Boot into macOS and open Disk Utility (found in
Applications/Utilities). - Select your main Macintosh HD volume in the sidebar.
- Click on the “Partition” button (or “Add Volume” for APFS).
- Shrink your macOS partition to free up unallocated space. Aim for at least 50-100GB for a comfortable Linux installation, though more is always better if you plan to store many files or install large applications.
- Do NOT format the newly freed space. Leave it as “Free Space” or “Unformatted” – the Linux installer will handle formatting it correctly (e.g., ext4 for the root partition, swap space).
- Apply the changes. This process might take some time.
It’s crucial to understand the implications of partitioning. Incorrectly modifying partitions can lead to data loss or an unbootable system. Proceed with caution, and double-check your selections.
The Linux Installation Process
Now for the main event: installing Linux.
- Reboot your MacBook and immediately hold down the Option (Alt) key.
- This will bring up the macOS Boot Manager. You should see your Macintosh HD and the newly created bootable USB drive (often labeled as “EFI Boot” or the name of the Linux distro).
- Select the bootable USB drive and press Enter.
- The MacBook will boot into the Linux Live environment. You’ll typically be given the option to “Try Linux” or “Install Linux.” It’s often wise to “Try Linux” first to ensure basic hardware functionality (Wi-Fi, trackpad) before committing.
- Once you’re satisfied, double-click the “Install Linux” icon on the desktop.
- Follow the on-screen installer prompts:
- Language and Keyboard Layout: Choose your preferences.
- Network Connection: Connect to Wi-Fi if available. This allows the installer to download updates and drivers.
- Installation Type: This is a critical step.
- Do NOT choose “Erase disk and install Linux” unless you intend to completely remove macOS.
- Select “Something else” or “Manual partitioning” (exact wording varies by distro).
- This will bring up a partitioning table. Locate the “Free Space” you created earlier.
- Create at least two new partitions within this free space:
- Root Partition (
/): Primary partition, mount point/, file system Ext4. Allocate most of your free space here. - Swap Area: Logical partition, mount point
swap area. Typically 1.5x your RAM, or equal to RAM for modern systems with plenty of RAM. - (Optional) Home Partition (
/home): Logical partition, mount point/home, file system Ext4. Separates user data from the system, useful for reinstallations.
- Root Partition (
- Bootloader Installation: Ensure the bootloader (GRUB) is installed to the correct device – usually the main hard drive (e.g.,
/dev/sdaor/dev/nvme0n1). The installer usually defaults to the correct option. - Time Zone, User Account: Set these up as prompted.
- Click “Install Now” and let the installer do its work. This can take anywhere from 15 minutes to an hour.
- Once finished, the installer will prompt you to reboot. Remove the USB drive when instructed.
Post-Installation: Tweaks, Drivers, and Bootloader Management
After a successful installation and reboot, you should be greeted by the GRUB bootloader, giving you the option to boot into Linux or macOS.
- Boot into your new Linux installation.
- Update your system: Open a terminal and run
sudo apt update && sudo apt upgrade(for Debian/Ubuntu-based distros) orsudo dnf update(for Fedora). - Install proprietary drivers: Some hardware components, especially Wi-Fi cards and graphics (for older Intel Macs with discrete GPUs), might require proprietary drivers for optimal performance or full functionality. These are often available through your distro’s “Additional Drivers” utility or package manager.
- Adjust display scaling: For Retina displays, you might need to adjust fractional scaling settings in your desktop environment (e.g., GNOME, KDE Plasma) to make text and icons comfortable to view.
- Refine trackpad gestures: While basic trackpad functionality should work, advanced multi-touch gestures might need configuration or third-party tools to mimic the macOS experience.
- Power management: Linux power management can sometimes be less optimized than macOS on MacBooks. Explore tools like TLP or PowerTOP to improve battery life.
- Software Installation: Start installing your favorite Linux applications!
This journey, while rewarding, demands careful attention to detail. By following these steps and proceeding cautiously, you can successfully dual-boot Linux on your Intel MacBook, unlocking a world of open-source possibilities.
Overcoming Hurdles and Optimizing Your Linux-Mac Experience
While the promise of running Linux on a MacBook is exciting, the journey isn’t always without its bumps. Successfully integrating these two distinct ecosystems often requires navigating specific challenges and applying strategic optimizations to ensure a smooth and productive experience.
Addressing Hardware Compatibility Challenges
The biggest hurdle for many MacBook users installing Linux, particularly on older or specific Intel models, is hardware compatibility. Apple often uses custom components or specific configurations that aren’t immediately recognized by the generic Linux kernel or require proprietary drivers.
- Wi-Fi Cards: This is a common pain point. Some Broadcom Wi-Fi chipsets, frequently found in older MacBooks, may not work out of the box. You might need to use a wired Ethernet connection during installation (if available) or download and install specific
bcmwl-kernel-sourcepackages or firmware to get Wi-Fi working. Researching your MacBook’s specific Wi-Fi chip model is crucial. - Graphics (GPU): While integrated Intel graphics usually work well, discrete AMD or NVIDIA GPUs in some MacBook Pro models might require proprietary drivers for optimal performance, especially for tasks like gaming or video editing. The open-source drivers often provide basic functionality but may lack full acceleration.
- Trackpad and Keyboard: Basic functionality usually works, but advanced multi-touch gestures on the trackpad (like pinch-to-zoom or three-finger swipe) often require extra configuration or specific drivers (e.g.,
mtrackorlibinputconfiguration). Function keys (brightness, volume, keyboard backlight) may also need mapping or specific daemon installations to work correctly. - Webcam and Bluetooth: These generally have better out-of-the-box support, but occasional issues can arise, particularly with specific models or newer hardware.
The key to overcoming these challenges is thorough research. Before installing, search for your specific MacBook model (e.g., “Linux on MacBook Pro 2015”) to find community-driven solutions, driver guides, and known issues. Most problems have documented workarounds or dedicated forum threads within the vast Linux community.
Performance and Power Management Considerations
While Linux can breathe new life into older hardware, maintaining optimal performance and decent battery life on a MacBook running Linux often requires some tweaking.
- Battery Life: MacBooks are known for their excellent battery life under macOS, thanks to highly optimized hardware and software integration. Linux, especially without specific optimizations, can sometimes consume more power. Tools like TLP (Linux Advanced Power Management) or PowerTOP can significantly improve battery longevity by intelligently managing CPU frequencies, device power states, and background processes. Installing and configuring these utilities is often a recommended post-installation step.
- Heat Management: Increased power consumption can sometimes lead to higher temperatures. Ensuring proper fan control (though sometimes difficult to achieve with Linux on Macs) and monitoring CPU temperatures can help prevent thermal throttling.
- SSD Trim: For internal SSDs, ensure that TRIM is enabled. Most modern Linux distributions enable it by default, but verifying its status (
sudo systemctl status fstrim.timer) ensures optimal SSD performance and lifespan. - Desktop Environment Choice: The choice of desktop environment significantly impacts performance and resource usage. Lightweight options like XFCE, LXQt, or MATE consume fewer resources than GNOME or KDE Plasma, making them ideal for older MacBooks or those prioritizing battery life.
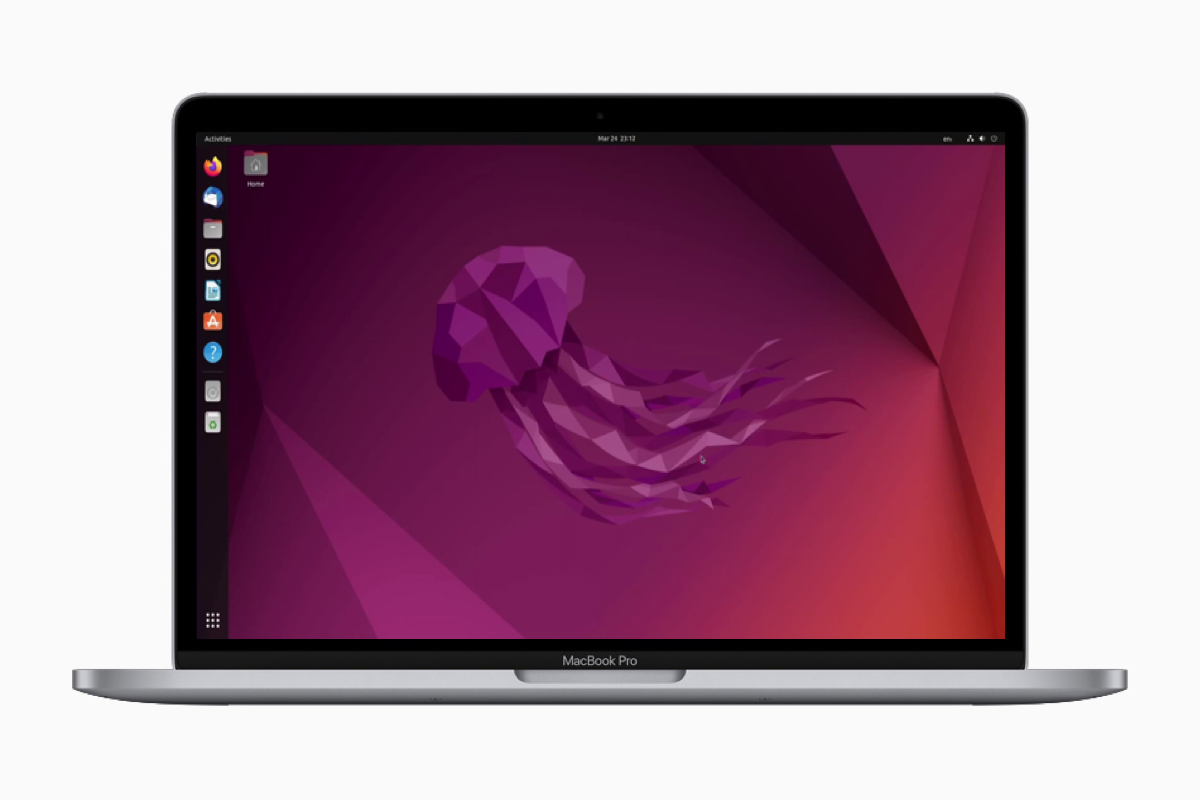
Choosing the Right Linux Distribution
The vast number of Linux distributions can be overwhelming, but selecting the right one for your MacBook can greatly impact your experience.
- Beginner-Friendly Distros: For those new to Linux, Ubuntu and Linux Mint are excellent starting points. They offer comprehensive installers, large communities for support, and a wide array of pre-installed software, minimizing the need for manual configuration.
- Cutting-Edge Distros: Fedora is a good choice for users who want the latest software and kernel versions. Manjaro (based on Arch Linux) provides a rolling release model and user-friendly tools for accessing bleeding-edge packages.
- Lightweight Distros: For older MacBooks or those with limited RAM, consider Xubuntu, Lubuntu, or Pop!_OS with the lightweight Cosmic desktop. These distros prioritize efficiency without sacrificing usability.
- Apple Silicon Specific: For M1/M2/M3 Macs, Asahi Linux is currently the only viable option for a native installation. It’s purpose-built for Apple Silicon and is the driving force behind unlocking Linux on these machines.
Ultimately, the best way to choose is to experiment. Use a Live USB for different distros on an Intel Mac, or try various ARM-based distros in a virtual machine on an Apple Silicon Mac. This hands-on approach will help you determine which distribution best suits your workflow, hardware, and aesthetic preferences.
By anticipating these hurdles and being prepared to delve into community resources and configuration files, you can turn potential frustrations into learning opportunities, ultimately crafting a highly functional and personalized Linux experience on your MacBook. The journey from macOS to Linux on Apple hardware is a testament to the open-source spirit and the enduring versatility of computing.
aViewFromTheCave is a participant in the Amazon Services LLC Associates Program, an affiliate advertising program designed to provide a means for sites to earn advertising fees by advertising and linking to Amazon.com. Amazon, the Amazon logo, AmazonSupply, and the AmazonSupply logo are trademarks of Amazon.com, Inc. or its affiliates. As an Amazon Associate we earn affiliate commissions from qualifying purchases.