The digital heart of any computer system beats in tandem with its brain. For most, this fundamental truth establishes a hierarchy: the Central Processing Unit (CPU) orchestrates operations, while the Basic Input/Output System (BIOS) acts as the primal instruction set that wakes everything up. When building a new PC, upgrading components, or troubleshooting a non-responsive system, a common, often perplexing question arises: can you access the motherboard’s BIOS without a CPU installed?
The straightforward answer, for the vast majority of modern motherboards and in conventional operation, is an emphatic no. A motherboard without a CPU is, by definition, a dormant collection of circuits. It lacks the essential processing power to initiate even the most basic functions, including loading the BIOS firmware. However, like many things in the ever-evolving world of technology, there are crucial, game-changing exceptions offered by leading manufacturers that cater to specific scenarios, particularly in the realm of PC building and system recovery.
The Indispensable Role of the CPU in System Boot-Up
To understand why accessing BIOS without a CPU is generally impossible, we must first appreciate the intricate dance between these two critical components during the power-on sequence.
The CPU: The Brain of Your System
At its core, the CPU is the “brain” of your computer. It’s responsible for executing instructions, performing calculations, and managing the flow of data across the entire system. From the moment you press the power button, the CPU is tasked with initiating the boot process. Without a CPU, there is no entity capable of reading instructions, let alone executing them. Imagine an orchestra without a conductor; the instruments are all there, but no one is telling them when to play or what notes to produce. The motherboard, in this scenario, has all the components, but no central intelligence to direct them.
The CPU is not merely a passive recipient of instructions; it actively fetches them. Its internal architecture—comprising an Arithmetic Logic Unit (ALU), control unit, registers, and cache—is designed to perform a continuous cycle of fetch, decode, execute, and write-back. This cycle is fundamental to any operation, and the very first instructions fetched upon power-up are those contained within the BIOS.
BIOS: The System’s First Breath
The BIOS, or its modern successor, UEFI (Unified Extensible Firmware Interface), is a firmware stored on a small, non-volatile flash memory chip located on the motherboard. It’s the very first software that runs when you power on your computer. Its primary functions include:
- Power-On Self-Test (POST): The BIOS initiates a series of diagnostic tests to ensure that critical hardware components (like the CPU, RAM, graphics card, keyboard, and mouse) are present and functioning correctly. If any critical component fails this test, the system typically won’t boot, and you might hear a series of beeps (POST codes) indicating the issue.
- Hardware Initialization: After POST, the BIOS initializes various hardware components, setting them up so they can communicate with each other and eventually with the operating system. This involves configuring controllers, buses, and essential I/O devices.
- Boot Device Selection: The BIOS looks for a bootable device (like an SSD or HDD) according to a predefined boot order. Once found, it hands over control to the bootloader program on that device, which then loads the operating system.
The relationship between the CPU and BIOS is symbiotic from the very beginning. The CPU relies on the BIOS to provide the initial instructions for how to wake up and function, while the BIOS relies on the CPU to execute those instructions and perform the necessary checks and initializations. Without the CPU to fetch and execute the BIOS code, the BIOS chip might as well be an inert piece of silicon; its data remains unread and unused.
Why a CPU-less Boot is Mostly Impossible
The sequence of events during a conventional boot process clarifies why a CPU is a prerequisite for BIOS interaction. When you press the power button:
- Power Delivery: Power flows to the motherboard and its components, including the CPU.
- CPU Awakening: The CPU receives power and begins its internal initialization sequence. It doesn’t “know” anything yet; it simply has a hardwired starting point.
- Initial Instruction Fetch: The CPU’s internal design directs it to a specific memory address where the BIOS firmware resides. It then fetches the very first instruction from the BIOS chip.
- BIOS Execution: The CPU starts executing the BIOS code, which then proceeds with the POST and hardware initialization routines.
If there’s no CPU present, this entire chain of events breaks at step 2. There’s no processing unit to “wake up,” no entity to fetch initial instructions, and no “brain” to execute the BIOS code. The motherboard might receive power, indicator lights might illuminate, and fans might even spin (as some basic power circuits can activate independently), but the system will never progress to the point of executing any firmware or displaying anything on a screen. You will experience what’s known as a “no POST” or “no boot” scenario.
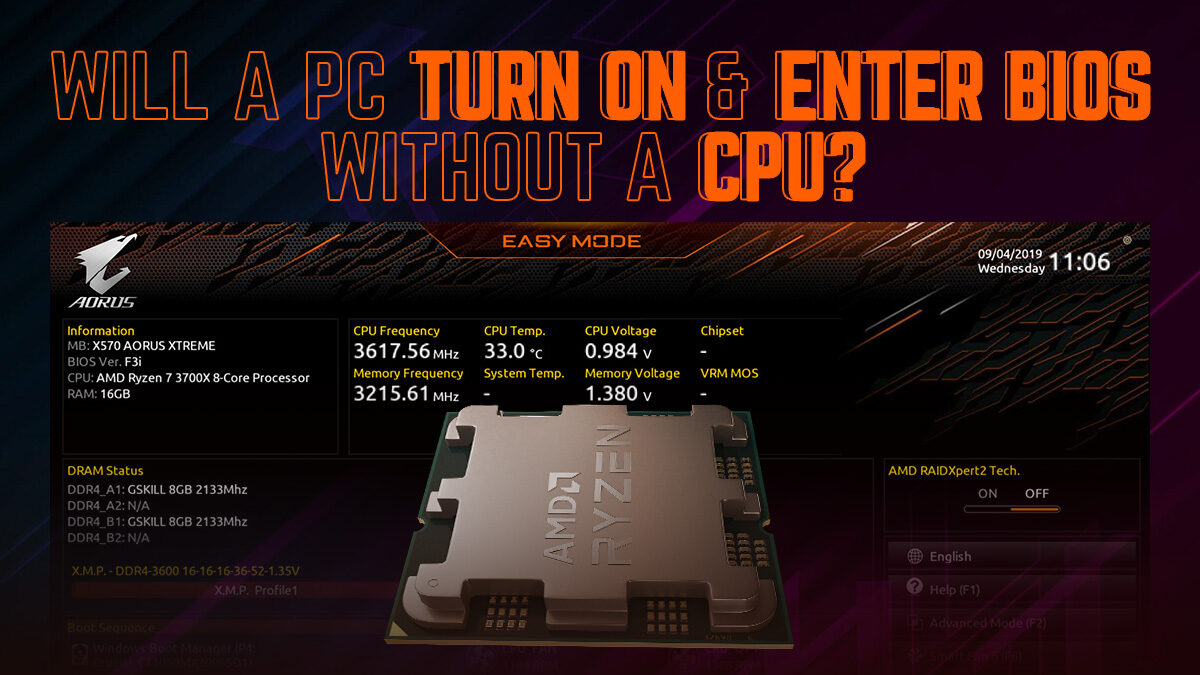
This fundamental requirement means that for standard operations like entering the BIOS setup utility (to change settings, update drivers, or adjust boot order), a fully functional CPU, along with memory (RAM) and often a graphics card, is absolutely necessary. These components work in concert to display the BIOS interface and allow user interaction.
The Game-Changing Exceptions: BIOS Flashback and Similar Technologies
While the general rule holds true, advanced motherboard manufacturers have developed ingenious solutions to address specific, critical scenarios where the ability to update BIOS without a fully functional system is invaluable. These features, often branded as BIOS Flashback, Q-Flash Plus, USB BIOS Flashback, or EZ Flash 3, represent a significant technological leap.
Understanding BIOS Flashback Features
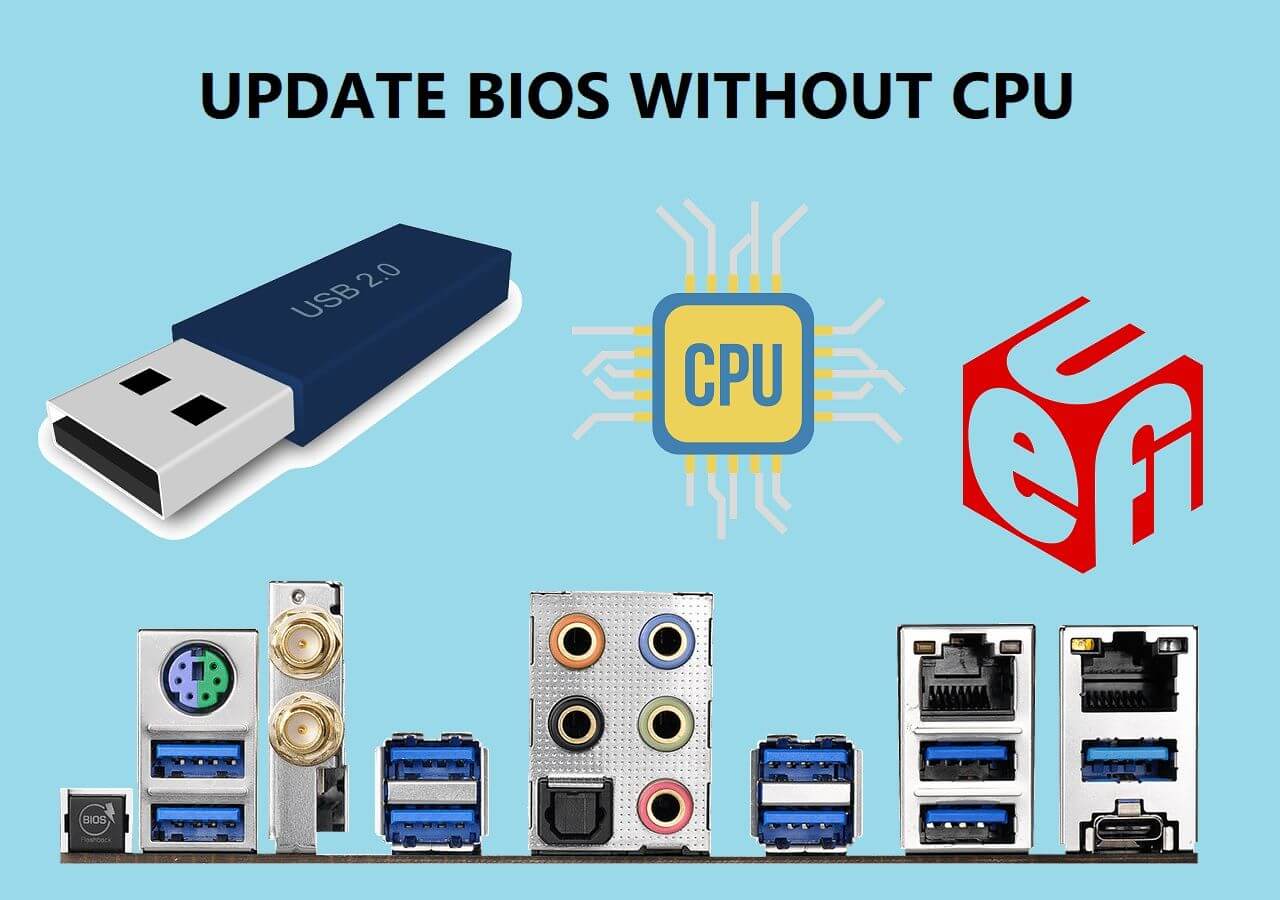
These proprietary technologies are designed to update the motherboard’s BIOS firmware even when the CPU, RAM, or a graphics card is not installed or fully functional. This capability is usually facilitated by a dedicated microcontroller on the motherboard. This small, independent chip handles the flashing process, bypassing the need for the main CPU to execute the update.
Here’s a breakdown of how these features generally work and why they are so crucial:
- Dedicated Microcontroller: Unlike the main CPU, this secondary controller is specifically designed for a limited set of tasks, including managing the BIOS update process. It operates independently, drawing minimal power and requiring only the necessary input from an external USB drive.
- External USB Drive: The new BIOS firmware (downloaded from the manufacturer’s website) is placed on a USB flash drive. This drive acts as the source of the update.
- Specific USB Port and Button: Motherboards equipped with these features typically have a designated USB port (often labeled “BIOS,” “Flashback,” or outlined) and a dedicated button (e.g., “Flash BIOS Button,” “Q-Flash Plus Button”). These are the interface points for the BIOS update process.
- No Main System Components Required: The beauty of these features is that they can often work with just the motherboard connected to power. You don’t need the CPU, RAM, or a graphics card installed, making them incredibly useful for specific troubleshooting or initial setup scenarios.
Why these features exist:
- CPU Compatibility Issues: This is perhaps the most common reason. When a new generation of CPUs is released, older motherboards might require a BIOS update to recognize and properly function with these newer processors. If a user buys a new CPU and an older motherboard (or an older stock of a newer board), they would face a “no boot” situation if the BIOS isn’t compatible. BIOS Flashback allows them to update the firmware without needing an older, compatible CPU first.
- Recovery from Corrupted BIOS: If a BIOS update fails or gets corrupted (e.g., due to a power outage during the update), the system can become unbootable. BIOS Flashback provides a mechanism to restore a working BIOS, effectively “unbricking” the motherboard.
- Convenience for Enthusiasts and Builders: It streamlines the build process, especially for those using the latest hardware, by removing a potential compatibility roadblock. It’s an example of how leading tech brands prioritize user experience and advanced functionality.
A Step-by-Step Overview of a Typical BIOS Flashback Process
While the exact steps can vary slightly between manufacturers (ASUS, MSI, Gigabyte, ASRock, etc.), the general procedure for using BIOS Flashback is as follows:
- Download the Correct BIOS: Visit the motherboard manufacturer’s support website and download the latest BIOS version for your specific motherboard model. Ensure it’s the correct file; using the wrong BIOS can brick the board.
- Prepare the USB Drive: Format a USB flash drive (usually to FAT32). Extract the downloaded BIOS file and rename it according to the manufacturer’s specific instructions (e.g.,
ROG.CAPfor ASUS,MSI.ROMfor MSI,GIGABYTE.BINfor Gigabyte). This renaming is crucial for the microcontroller to recognize the file. - Connect Power to Motherboard: Connect the main 24-pin ATX power connector and the 8-pin CPU power connector (even without a CPU, these are needed to power the flashing circuit). Ensure the system is otherwise powered off.
- Insert USB Drive: Plug the prepared USB drive into the designated BIOS Flashback USB port on the motherboard’s rear I/O panel.
- Initiate Flashback: Press and hold the dedicated BIOS Flashback button (usually for 3-5 seconds) until an LED starts flashing, indicating the process has begun.
- Wait for Completion: The LED will continue to flash, indicating the update progress. This can take several minutes. Do not power off or interrupt the process. Once the LED stops flashing (or changes color, depending on the board), the BIOS update is complete.
- Power Off and Install Components: After the process finishes, power off the system, remove the USB drive, and then proceed to install your CPU, RAM, and other components.
It’s paramount to follow the specific instructions provided by your motherboard’s manufacturer for their particular BIOS Flashback feature, as details can differ and improper procedure can still lead to issues.
Practical Implications and Scenarios
The existence of BIOS Flashback technologies fundamentally changes the answer to our initial question in certain practical contexts.
Building a New PC: CPU Compatibility Challenges
One of the most common and frustrating scenarios for PC builders involves CPU compatibility. A newly released CPU might require a BIOS version that wasn’t available when the motherboard was manufactured. For example, if you buy an AMD Ryzen 5000 series CPU with an X570 motherboard that was produced before the Ryzen 5000 series launched, the motherboard’s factory BIOS might not recognize the CPU. Without BIOS Flashback, your options would be:
- Borrow an older, compatible CPU: Install an older Ryzen 3000 series CPU (if available), boot into BIOS, update it, then swap in your new Ryzen 5000 series CPU. This is inconvenient and often impossible for most users.
- Seek retailer assistance: Some retailers offer BIOS update services, but this adds time and potentially cost.
- Return the motherboard: If you can’t update it, the motherboard might be unusable with your chosen CPU.
BIOS Flashback eliminates this hurdle. A builder can simply update the motherboard’s BIOS straight out of the box, without ever installing the new CPU, and then proceed with the build. This not only saves time and effort but also prevents potential financial pitfalls associated with incompatible hardware, making the “Tech” aspect of PC building much more accessible and less stressful. This kind of thoughtful feature from “Brand” leaders enhances customer loyalty and simplifies the process for the “Money”-conscious consumer who wants to get the most out of their components.
Troubleshooting and System Recovery
Beyond initial builds, BIOS Flashback also plays a vital role in troubleshooting and recovery. Imagine a situation where a routine BIOS update through the operating system or the in-BIOS utility goes awry due to a power flicker or an incorrect file. The motherboard is then “bricked,” unable to boot. In the past, this often meant sending the motherboard back for repair or replacement—a costly and time-consuming endeavor.
With BIOS Flashback, users often have a self-service recovery option. As long as the dedicated microcontroller and its associated circuitry are intact, a corrupted BIOS can be overwritten with a known good version. This ability to recover a system without needing a fully operational CPU provides a crucial safety net for enthusiasts and professionals alike, reducing downtime and potentially saving significant repair costs. It allows users to confidently engage with firmware updates, knowing that a fallback mechanism exists.

Conclusion
The answer to “can you access motherboard BIOS without CPU installed?” remains a qualified “no” in the traditional sense, as the CPU is the fundamental engine required to fetch and execute any instructions, including those of the BIOS. A motherboard without a CPU is inert and cannot perform any active functions.
However, the rapid advancement in motherboard design, driven by the need for greater flexibility and user empowerment, has introduced critical exceptions. Features like ASUS’s USB BIOS Flashback, MSI’s Q-Flash Plus, and Gigabyte’s Q-Flash Plus are technological triumphs that allow for BIOS updates using a dedicated microcontroller, bypassing the need for a fully installed CPU, RAM, or even a graphics card. These innovations are indispensable for modern PC builders facing CPU compatibility challenges and offer a vital recovery mechanism for corrupted BIOS updates.
For anyone building a new PC or troubleshooting a non-booting system, understanding these distinctions is crucial. While you cannot conventionally “access” the BIOS setup menu without a CPU, the ability to flash the BIOS using these special features empowers users to overcome significant compatibility hurdles and recover from firmware issues, making the intricate world of PC hardware assembly and maintenance considerably more manageable. Always consult your motherboard’s manual to determine if it supports such features and how to properly utilize them.
aViewFromTheCave is a participant in the Amazon Services LLC Associates Program, an affiliate advertising program designed to provide a means for sites to earn advertising fees by advertising and linking to Amazon.com. Amazon, the Amazon logo, AmazonSupply, and the AmazonSupply logo are trademarks of Amazon.com, Inc. or its affiliates. As an Amazon Associate we earn affiliate commissions from qualifying purchases.