In the ever-evolving landscape of computing, the demand for more memory (RAM) is a constant. From casual browsing to intensive gaming, professional video editing, and complex data analysis, sufficient RAM is paramount for a smooth and responsive user experience. Many users eventually find themselves contemplating a RAM upgrade, often starting with a system that has 8GB and wondering if they can simply add a 16GB stick to boost performance. The question “can you install 16GB RAM with 8GB?” isn’t just about physical compatibility; it delves into the intricate world of memory architecture, compatibility nuances, and potential performance implications.

This comprehensive guide will unpack the complexities of mixing RAM modules, specifically addressing the scenario of combining an 8GB stick with a 16GB stick. We’ll explore the technical considerations, potential benefits, and common pitfalls, providing you with the knowledge to make an informed decision about your next memory upgrade. Whether you’re a tech enthusiast looking to squeeze every drop of performance from your rig or a professional seeking to optimize your workstation, understanding the intricacies of RAM compatibility is crucial.
Understanding RAM and Its Role in Your System
Before diving into the specifics of mixing memory, it’s essential to grasp what RAM is, why it’s critical, and the key specifications that define its performance. RAM, or Random Access Memory, serves as your computer’s short-term memory, a high-speed storage area where your operating system, applications, and active data reside while your computer is running. The more RAM you have, the more programs and data your computer can handle simultaneously without slowing down, as it reduces the need to constantly swap data with slower storage devices like SSDs or HDDs.
The Basics: What is RAM and Why is it Crucial?
Imagine your computer’s processor as a chef and the hard drive/SSD as a pantry full of ingredients. RAM is like the chef’s counter space – the larger the counter, the more ingredients (data) the chef can have readily available to work with. If the counter space is too small, the chef has to constantly go back and forth to the pantry, significantly slowing down the cooking process. Similarly, insufficient RAM forces your CPU to constantly access the much slower permanent storage, leading to system lag, stuttering, and reduced responsiveness.
For modern applications and multitasking, 8GB of RAM is often considered the bare minimum, while 16GB is the sweet spot for most users, and 32GB or more is ideal for professionals dealing with demanding tasks like 3D rendering, large-scale simulations, or virtual machines. Understanding your workload and how much RAM it consumes is the first step in assessing your upgrade needs.
Key RAM Specifications to Consider
When evaluating RAM, several specifications come into play, each influencing compatibility and performance:
- Capacity (GB): This is the total amount of data the RAM module can store. Common capacities include 4GB, 8GB, 16GB, and 32GB per stick.
- Generation (DDR4, DDR5, etc.): RAM modules come in different generations (e.g., DDR3, DDR4, DDR5). Each generation has a unique physical connector (notch position) and electrical specifications, meaning you cannot mix different generations on the same motherboard. Most modern systems use DDR4 or DDR5.
- Speed (MHz): Measured in megahertz (MHz), this indicates how many data cycles per second the RAM can perform. Higher speeds generally translate to better performance, especially in CPU-intensive tasks and gaming. Common speeds range from 2133MHz to 6000MHz and beyond.
- Latency (CL): Also known as CAS Latency (Column Access Strobe Latency), this measures the delay between when the memory controller requests data and when the data is available. Lower CL numbers generally indicate faster response times. Latency is typically expressed as part of a set of timings (e.g., 16-18-18-38).
- Voltage (V): RAM modules operate at specific voltages (e.g., 1.2V for standard DDR4, 1.35V for performance DDR4). While motherboards can often adjust voltage slightly, significant discrepancies can lead to instability or damage.
- Form Factor (DIMM, SODIMM): DIMM (Dual In-line Memory Module) is used in desktop computers, while SODIMM (Small Outline Dual In-line Memory Module) is used in laptops and compact systems. They are physically different and not interchangeable.
For optimal performance and stability, it’s generally recommended to match these specifications as closely as possible when adding or replacing RAM. This becomes particularly critical when attempting to mix different modules.
The Nuances of Mixing RAM Modules
The central question remains: “Can you install 16GB RAM with 8GB?” The short answer is often “yes, but with caveats.” While physically installing them might be possible if they are of the same DDR generation and form factor, getting them to work together optimally is where the complexities arise.
The “Can You?” vs. “Should You?” Dilemma
Physically inserting an 8GB DDR4 DIMM alongside a 16GB DDR4 DIMM into your motherboard’s slots is usually straightforward. If your motherboard has two or four RAM slots and both sticks are the correct DDR generation (e.g., both DDR4), they will fit. The system might boot up, and Windows might report 24GB of RAM (16GB + 8GB). So, in a literal sense, you can.
However, the “should you?” question is far more critical. Mixing RAM sticks with different capacities, speeds, or latencies can introduce a range of issues, from minor performance degradation to system instability, frequent crashes (Blue Screens of Death), or even failure to boot altogether. The goal of a RAM upgrade is to improve performance and stability, not to introduce new problems.
Compatibility Factors: Speed, Latency, Voltage, and More
When mixing RAM, the system will attempt to run all modules at the lowest common denominator for speed and voltage.
- Speed: If you combine a 3200MHz stick with a 2400MHz stick, both will likely operate at 2400MHz (or potentially even lower, depending on the motherboard and CPU’s memory controller). This means your faster 3200MHz stick will be throttled down, negating its performance advantage.
- Latency: Similarly, if one stick has a CAS Latency of CL16 and another has CL18, the system will typically defer to the higher (slower) latency to ensure stability across both modules.
- Voltage: While less common, voltage mismatches can be problematic. If one stick requires 1.2V and another 1.35V, the motherboard might struggle to provide the correct voltage for both simultaneously, leading to instability. Usually, motherboards will try to run all sticks at the highest safe voltage supported by the memory controller, but this isn’t guaranteed to be stable for all modules.
- Manufacturer/Model: While not strictly necessary to match, using modules from the same manufacturer and, ideally, the same product line (SKU) within a factory-matched kit provides the best chance of seamless compatibility. RAM kits are rigorously tested together to ensure they function perfectly as a pair or quad.
The Impact on Dual-Channel Memory and Performance
One of the most significant performance benefits of modern memory configurations comes from dual-channel (or quad-channel) memory architecture. Most motherboards support dual-channel mode, which allows the CPU to access two RAM modules simultaneously, effectively doubling the memory bandwidth compared to single-channel mode. This can lead to substantial performance gains, especially in CPU-intensive applications, gaming, and integrated graphics performance.
For dual-channel to work optimally, the modules typically need to be installed in specific slots (as indicated by your motherboard manual) and, crucially, should ideally be identical in capacity, speed, and timings. When you mix an 8GB stick with a 16GB stick, you create an asymmetrical configuration.
Introducing Asymmetrical Dual-Channel (Flex Mode)
Modern memory controllers and chipsets, particularly those from Intel (often referred to as Flex Mode) and AMD, are quite sophisticated. They can often operate in a mode called Asymmetrical Dual-Channel or Flex Mode. In this scenario, the controller attempts to run the matched portions of the RAM in dual-channel mode, while the remaining, unmatched portion runs in single-channel mode.
For instance, if you have an 8GB stick and a 16GB stick:
- The first 8GB of the 16GB stick will operate in dual-channel with the 8GB stick. This gives you 16GB (8GB + 8GB) operating in dual-channel mode.
- The remaining 8GB of the 16GB stick will operate in single-channel mode.
While this is better than having the entire system run in single-channel mode, it’s not as efficient as a true symmetrical dual-channel setup (e.g., two 8GB sticks or two 16GB sticks). Applications that heavily rely on memory bandwidth might see a performance dip when accessing the single-channel portion of the RAM. For most general use cases and many games, the impact might not be severely noticeable, but it’s a compromise.
It’s important to note that the effectiveness and reliability of Flex Mode can vary depending on your motherboard, chipset, and CPU’s memory controller. Some systems handle it gracefully, others might exhibit minor instability, and a few might struggle significantly. Checking your motherboard’s manual or manufacturer’s QVL (Qualified Vendor List) for specific recommendations is always a good practice.
Practical Considerations Before You Upgrade
Before you purchase a new RAM stick, a few essential steps will help ensure a successful and stable upgrade. Proper preparation minimizes the risk of compatibility issues and wasted investment.
Identifying Your Current RAM and Motherboard Limitations
The first step is to understand what you currently have. You need to know:
- Current RAM capacity (per stick and total): e.g., one 8GB stick, two 4GB sticks, etc.
- RAM generation: DDR3, DDR4, or DDR5?
- RAM speed (MHz): e.g., 2400MHz, 3200MHz.
- RAM latency (CL): e.g., CL16.
- Motherboard model: This is crucial for checking compatibility.
- Number of available RAM slots: How many slots does your motherboard have, and how many are currently occupied?
- Maximum RAM capacity supported by your motherboard and CPU: Motherboards and CPUs have a maximum amount of RAM they can address. While unlikely to be an issue with 24GB, it’s good to be aware of.
Step-by-Step: How to Check Your System’s RAM
There are several ways to gather this information:
- Task Manager (Windows):
- Press
Ctrl + Shift + Escto open Task Manager. - Go to the “Performance” tab.
- Click on “Memory” on the left pane.
- You’ll see total RAM, speed, form factor, and used slots. For more detail on individual sticks, you might need third-party software.
- Press
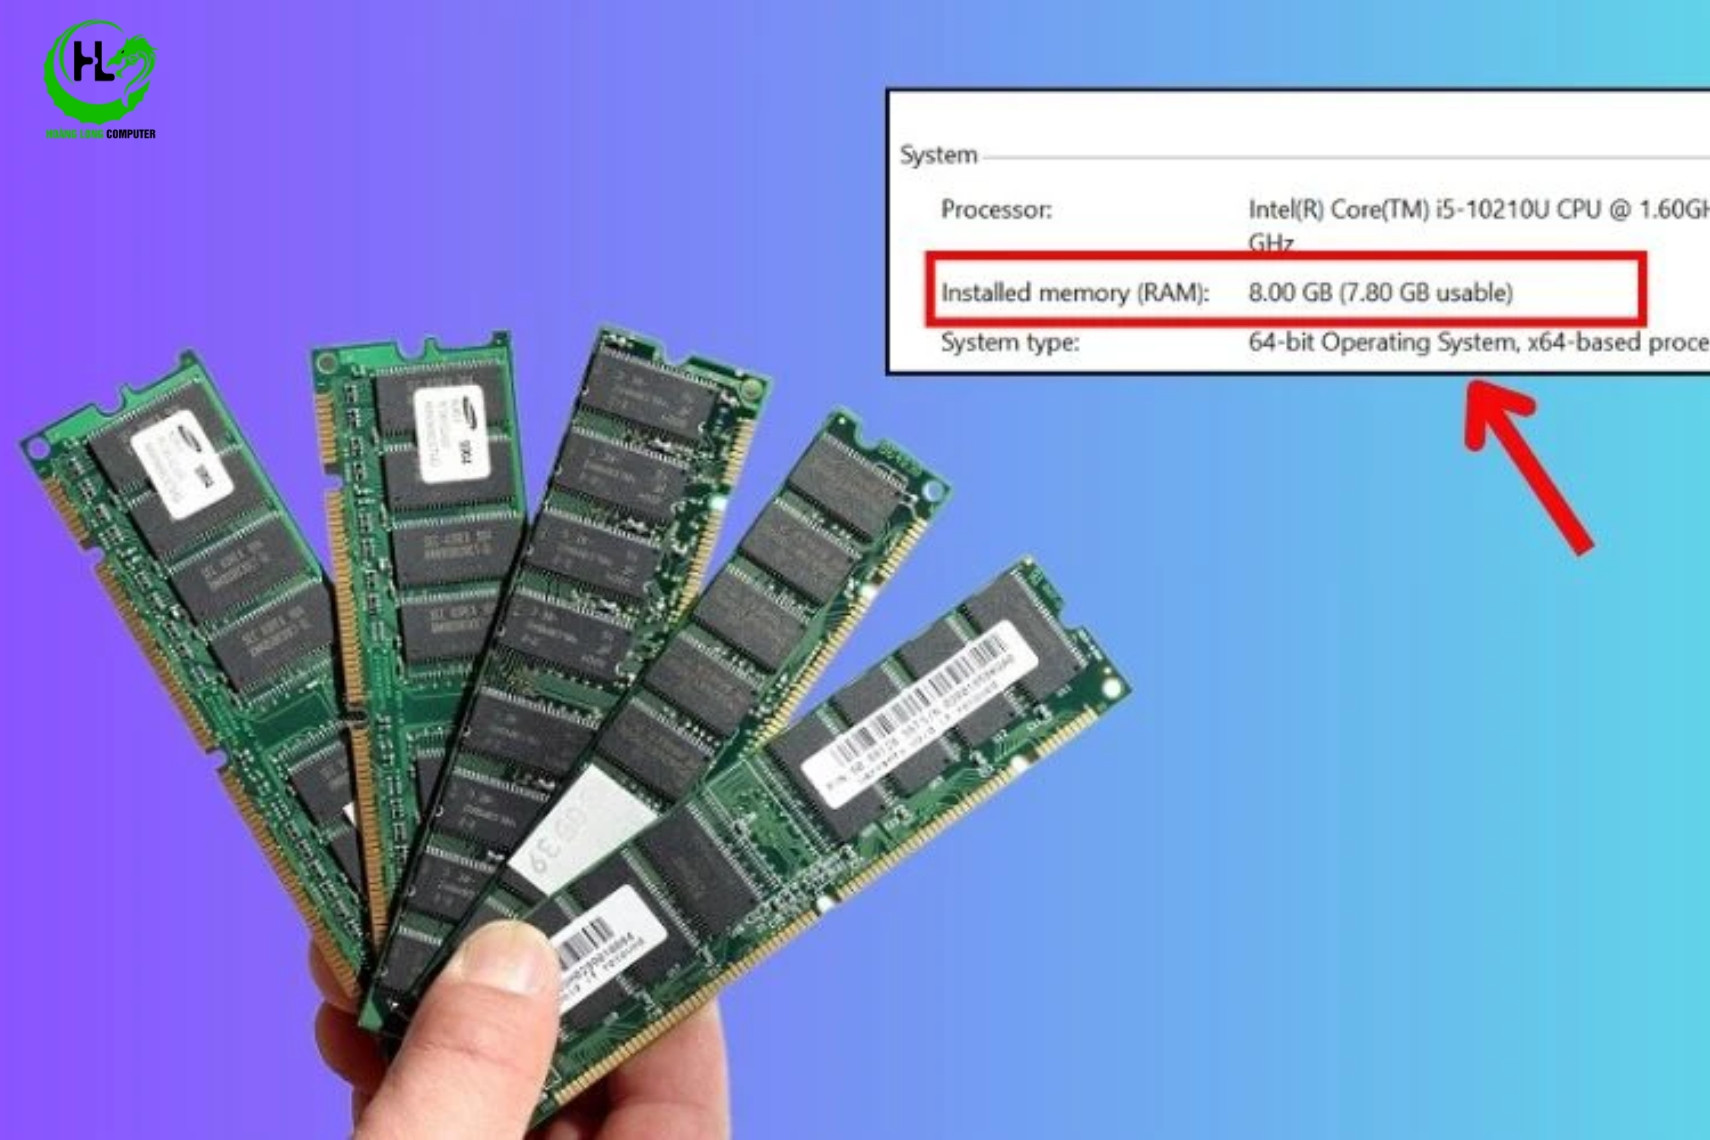
- System Information (Windows):
- Search for “System Information” in the Start menu.
- Under “System Summary,” look for “Installed Physical Memory (RAM).”
- CPU-Z (Third-Party Software):
- Download and install CPU-Z (it’s free and lightweight).
- Go to the “Memory” tab for overall RAM type, size, and timings.
- Go to the “SPD” (Serial Presence Detect) tab. This tab shows detailed information for each individual RAM slot, including manufacturer, part number, speed, and timings for the installed modules. This is the most accurate way to get individual stick details.
- Physical Inspection: If you’re comfortable opening your PC case, you can often read the specifications directly from the labels on the RAM sticks themselves. Make sure to discharge static electricity before touching internal components.
Once you have this information, you can cross-reference it with your motherboard’s specifications, usually found on the manufacturer’s website. Look for the “Memory QVL” (Qualified Vendor List), which lists RAM modules officially tested and guaranteed to be compatible with your specific motherboard.
Best Practices for a Successful RAM Upgrade
Given the complexities, here are some best practices for upgrading your RAM, especially when considering mixing modules:
- Prioritize Matching RAM Kits: The absolute best approach is to purchase RAM in a factory-matched kit (e.g., a 2x16GB kit if you want 32GB total). These kits are guaranteed to work together seamlessly in dual-channel mode.
- Match Specifications as Closely as Possible: If you absolutely must mix, try to match the new stick to your existing stick’s generation, speed, latency, and voltage. If your existing stick is 8GB DDR4 3200MHz CL16 1.2V, try to find a 16GB DDR4 3200MHz CL16 1.2V stick.
- Buy from Reputable Brands: Stick to well-known memory manufacturers like Corsair, G.Skill, Crucial, Kingston, and Samsung. They generally have better quality control and more consistent performance.
- Consult Your Motherboard Manual/QVL: Your motherboard’s manual provides crucial information on slot population order for dual-channel, maximum supported RAM, and tested compatible modules. The QVL is an invaluable resource.
- BIOS/UEFI Update: Sometimes, a motherboard BIOS/UEFI update can improve memory compatibility and stability, especially with newer or less common RAM configurations.
- Test Thoroughly: After installing new RAM, run memory diagnostic tools (like Windows Memory Diagnostic or MemTest86) to check for errors and ensure stability. Stress test your system with demanding applications.
Troubleshooting Common Issues After Mixing RAM
Even with careful planning, mixing RAM can sometimes lead to unforeseen issues. Knowing how to troubleshoot these problems can save you a lot of frustration.
System Instability and Performance Degradation
If your system boots but experiences random freezes, crashes, or Blue Screens of Death (BSODs), especially under load, mixed RAM is a prime suspect. Performance degradation, where the system feels slower despite having more RAM, can also occur due to modules running at lower speeds or increased latency, or if the system frequently drops out of dual-channel mode.
Troubleshooting Steps:
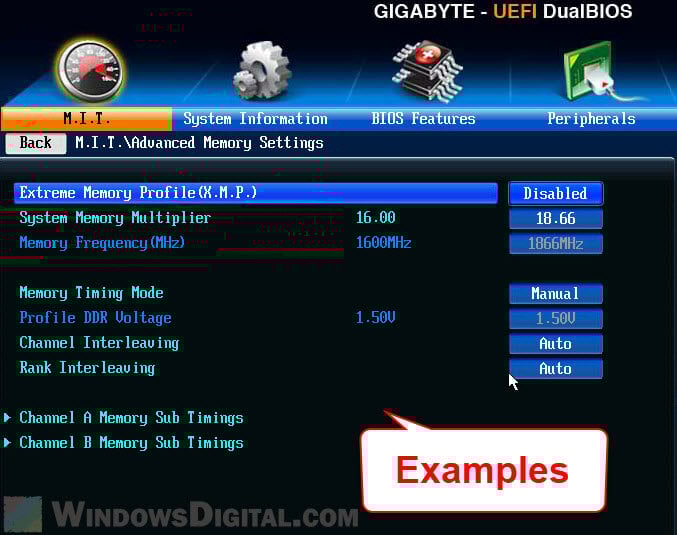
- Check RAM Speed in BIOS/UEFI: Ensure that the RAM is running at the expected speed. If you mixed a fast and a slow stick, they will likely default to the slower speed. Enable XMP/DOCP (Extreme Memory Profile / D.O.C.P.) if available, but be cautious as it applies an overclock profile, which might not be stable with mixed sticks.
- Run Memory Diagnostics: Use MemTest86 (bootable USB) for a thorough test. It can detect even subtle memory errors that Windows Diagnostic might miss.
- Try Each Stick Individually: If stability issues persist, remove one stick and test the system with only the other, then swap them. This helps identify if one particular stick is faulty or incompatible.
Boot Failures and POST Errors
In more severe cases, your system might not even boot, or you might hear a series of beeps (POST codes) indicating a memory error. This usually means the system cannot initialize the RAM correctly.
Troubleshooting Steps:
- Reseat RAM Modules: Remove and reinsert both RAM sticks firmly into their slots. Sometimes, a loose connection is all it takes.
- Clear CMOS: Resetting your motherboard’s BIOS settings to default (by removing the CMOS battery for a few minutes or using the motherboard’s clear CMOS jumper/button) can sometimes resolve memory initialization issues.
- Try One Stick at a Time: If the system doesn’t boot with both, try booting with just the original 8GB stick. If that works, try booting with just the new 16GB stick. This helps pinpoint if one of the modules is defective or entirely incompatible.
- Check Motherboard Manual for Slot Order: Ensure you’ve placed the RAM sticks in the correct slots for dual-channel operation, even if it’s an asymmetrical setup.
The Importance of BIOS/UEFI Updates
Motherboard manufacturers frequently release BIOS/UEFI updates that include improved memory compatibility, support for newer RAM modules, and bug fixes. If you’re experiencing memory issues, especially with newer or less common RAM configurations, checking for and applying the latest BIOS/UEFI update for your motherboard is highly recommended. Always follow the manufacturer’s instructions carefully when updating your BIOS, as an interrupted or failed update can brick your motherboard.
The Financial and Performance Benefits of Smart RAM Upgrades
While the technical aspects of mixing RAM can be complex, the ultimate goal of an upgrade is to achieve a noticeable improvement in system performance and value. Making smart choices here not only enhances your current setup but can also have long-term financial implications.
When Does a RAM Upgrade Make Financial Sense?
A RAM upgrade is one of the most cost-effective ways to breathe new life into an aging system, assuming your CPU and storage are still adequate.
- From 8GB to 16GB (or 32GB): If you frequently multitask, use memory-intensive applications (like video editors, CAD software, virtual machines), or play modern games, moving from 8GB to 16GB or even 32GB will provide a dramatic performance boost. Applications will load faster, stuttering will decrease, and overall system responsiveness will improve.
- Cost-Effectiveness: Compared to upgrading a CPU or GPU, RAM is relatively inexpensive, offering a high return on investment for the performance gain it provides.
- Avoiding a Full System Replacement: A well-considered RAM upgrade can extend the useful life of your computer by several years, postponing the need for a costly full system replacement.
However, if your primary bottleneck is an old CPU, a slow hard drive, or an underpowered GPU, increasing RAM might offer diminishing returns. Always identify your system’s weakest link first.
Maximizing Your System’s Longevity and Value
A stable and performant system is not just about raw power; it’s about reliability and user experience. For professionals and small businesses, a stable workstation directly impacts productivity and, by extension, profitability. Unstable systems lead to downtime, lost work, and frustration. Investing in compatible, matched RAM ensures not only performance but also the reliability crucial for professional workloads.
While mixing RAM can seem like a budget-friendly way to get more memory, the potential for instability and performance degradation can ultimately negate the cost savings. A system prone to crashes requires more troubleshooting time, potentially leading to missed deadlines or disruptions in service. From a “Brand” perspective, a professional whose tools are unreliable may find their reputation indirectly affected, making consistent performance a vital consideration.
Investing in the Right Memory for Future Needs
When planning a RAM upgrade, consider not just your current needs but also your future requirements. If you’re building a new PC or upgrading an older one, aim for a total RAM capacity that will serve you for the next 3-5 years.
- Standard Users: 16GB is typically sufficient for browsing, office tasks, and light gaming.
- Power Users/Gamers/Content Creators: 32GB provides ample headroom for demanding games, streaming, video editing, and complex software.
- Specialized Workloads: 64GB or more might be necessary for serious data analysis, virtualization servers, or very high-resolution media production.
If you start with 16GB (e.g., two 8GB sticks) and your motherboard has four slots, you leave room to expand to 32GB later by adding another two 8GB sticks. If you start with a single 16GB stick, you have one slot left for another 16GB, bringing you to 32GB. These configurations are generally more reliable than mixing different capacities.
In conclusion, while it is technically possible to install a 16GB RAM stick alongside an 8GB stick, it comes with a strong recommendation to proceed with caution. The best practice for optimal performance and stability remains using identical RAM modules, ideally purchased as a matched kit. If you must mix, aim for modules with the same speed, latency, and voltage, and be prepared for the possibility of minor performance compromises due to asymmetrical dual-channel operation or instability. By understanding these nuances and following best practices, you can make an informed decision that truly enhances your computing experience without introducing unforeseen headaches.
aViewFromTheCave is a participant in the Amazon Services LLC Associates Program, an affiliate advertising program designed to provide a means for sites to earn advertising fees by advertising and linking to Amazon.com. Amazon, the Amazon logo, AmazonSupply, and the AmazonSupply logo are trademarks of Amazon.com, Inc. or its affiliates. As an Amazon Associate we earn affiliate commissions from qualifying purchases.