In the ever-evolving landscape of PC gaming, managing storage space is a constant challenge. Modern games, with their expansive worlds, detailed graphics, and frequent updates, can quickly consume even the most generous internal hard drives. For avid players of life simulation games like The Sims 4, which boasts a vast array of expansion packs, game packs, and stuff packs, the cumulative storage requirement can become truly staggering. This often leads to a crucial question: “Can I install Sims 4 on an external hard drive?”
The short and definitive answer is yes, absolutely! Installing The Sims 4 on an external hard drive is not only possible but also a remarkably common and often recommended practice for a multitude of reasons. It offers a practical solution to storage limitations, enhances portability, and can even contribute to a more organized digital life. This comprehensive guide will walk you through the why, what, and how of installing and managing The Sims 4 on an external hard drive, ensuring you have the best possible experience.
The Growing Need for Flexible Game Storage
The Sims 4, while not the most graphically demanding game, becomes a storage behemoth once you start adding its numerous DLCs. The base game alone requires around 18 GB, but with all current expansions, game packs, and stuff packs, your Sims 4 folder can easily swell to over 100 GB. For many users, especially those with laptops or desktop PCs equipped with smaller, faster SSDs (Solid State Drives) as their primary system drives, dedicating such a significant chunk of internal storage to a single game can be impractical. This is where external storage solutions become invaluable.
Why Consider an External Drive for Sims 4?
There are several compelling reasons why players choose to house their Sims 4 installation on an external hard drive, addressing common pain points for PC gamers and digital power users alike.
- Internal Storage Limitations: This is arguably the primary driver. Many modern computers come with relatively small, albeit fast, SSDs (e.g., 256GB, 512GB) for the operating system and essential applications. While SSDs offer lightning-fast boot times and application loading, they are often insufficient for a vast game library. Offloading large games like Sims 4 to an external drive frees up critical internal space, ensuring your system drive remains uncongested for optimal performance of your operating system and productivity software.
- Portability and Multi-PC Gaming: An external drive transforms your Sims 4 installation into a portable gaming powerhouse. Imagine being able to carry your entire Sims 4 universe, complete with all its DLCs and custom content, between different computers – your desktop, your laptop, or even a friend’s PC. This eliminates the need to download and install the game repeatedly, saving significant time and bandwidth. It’s an excellent solution for those who game on the go or split their time between multiple setups.
- System Drive De-cluttering and Optimization: Keeping your operating system drive (usually your C: drive) lean and dedicated primarily to the OS and core applications is a best practice for system health and speed. By moving large game files to an external drive, you reduce fragmentation on your primary drive (especially if it’s an HDD) and ensure that vital system operations aren’t competing with game assets for read/write bandwidth. This contributes to better overall system responsiveness, which is a key aspect of digital productivity and efficiency.
- Easier Backups and Reinstallation: Having your game files separate from your operating system simplifies backup procedures. If you ever need to reinstall your operating system or upgrade your internal drive, your Sims 4 installation remains untouched and readily available on your external drive. This makes the process of getting back into your game much faster and less cumbersome, protecting your investment in the game and its many additions.
- Protecting Your Investment: While not directly a financial “money” topic, preserving the longevity of your hardware is a form of asset management. Constantly filling and emptying your internal SSD with large game files can, over time, contribute to wear cycles. Using an external drive for games can help mitigate this, potentially extending the lifespan of your more expensive internal SSD.
Essential Considerations Before You Begin
While the feasibility of installing Sims 4 on an external drive is clear, achieving a smooth and enjoyable experience requires some thoughtful preparation. Not all external drives are created equal, and understanding the nuances of hardware and software compatibility is crucial.
Choosing the Right External Hard Drive
The type of external drive you select will significantly impact your gaming experience, particularly in terms of loading times and overall responsiveness within The Sims 4.
- SSD vs. HDD: The Performance Divide
- External SSD (Solid State Drive): This is the strongest recommendation for installing The Sims 4. SSDs use flash memory, offering vastly superior read/write speeds compared to traditional HDDs. This translates directly to much faster loading screens (which Sims 4 has plenty of!), quicker game startup, and smoother asset streaming within the game. They are also more durable (no moving parts), quieter, and more compact. While generally more expensive per gigabyte than HDDs, the performance benefits for gaming are undeniable and worth the investment for an optimal experience.
- External HDD (Hard Disk Drive): HDDs use spinning platters and read/write heads. They are significantly slower than SSDs but offer a much lower cost per gigabyte, making them attractive for sheer storage capacity. If budget is a major concern, an HDD can work, but be prepared for noticeably longer loading times and potentially some minor stuttering during intense asset loading within the game. For Sims 4, where you frequently navigate between lots and load different families, these slower speeds can become a source of frustration.
- Capacity: Consider not just the current size of Sims 4, but also future expansions and custom content. A full Sims 4 installation with all official DLCs can exceed 100GB. If you plan to download a lot of custom content (CC) and mods, that number will grow even larger. A 500GB or 1TB external drive is a good starting point, providing ample room for Sims 4 and potentially other games.
- Connection Interface: This is critical for performance.
- USB 3.0/3.1/3.2: These are standard and widely available on modern computers. They offer speeds far superior to USB 2.0 and are perfectly adequate for most external SSDs and even fast HDDs. Look for blue ports or ports labeled “SS” (SuperSpeed).
- USB-C/Thunderbolt: These interfaces offer even higher bandwidth, especially Thunderbolt 3/4, which can handle extremely fast external SSDs without bottlenecking. If your computer has these ports and you’re investing in a premium external SSD, this combination will yield the best possible performance.
- Avoid USB 2.0: While compatible, USB 2.0’s limited bandwidth (480 Mbps) will severely bottleneck even a moderately fast external drive, leading to painfully slow loading times. Ensure your drive and your computer’s port support at least USB 3.0.
- Power Source: Most modern external SSDs and smaller HDDs are “bus-powered,” meaning they draw power directly from the USB port. Larger or older HDDs might require an external power adapter. Bus-powered drives are more convenient for portability.
Drive Formatting and Compatibility
Before you can use an external drive, it needs to be formatted correctly for your operating system.
- For Windows Users: The standard format is NTFS. This format handles large files efficiently and is fully compatible with Windows operating systems.
- For macOS Users: Modern Macs typically use APFS (Apple File System) or older Macs might use HFS+ (Mac OS Extended). If you’re using the drive exclusively with a Mac, choose the native Mac format for best performance.
- Cross-Platform (Windows & Mac): If you intend to use the external drive with both Windows and macOS machines, exFAT is an option. However, exFAT can sometimes be less efficient and may have minor performance drawbacks compared to native formats. For a dedicated Sims 4 drive, it’s generally best to stick to the native format of the primary OS you’ll be gaming on.
Potential Drawbacks and Limitations
While the benefits are numerous, it’s also important to acknowledge potential downsides:
- Performance Impact (if not chosen carefully): As mentioned, using an external HDD or an older/slower USB interface can lead to significantly longer loading times compared to an internal SSD.
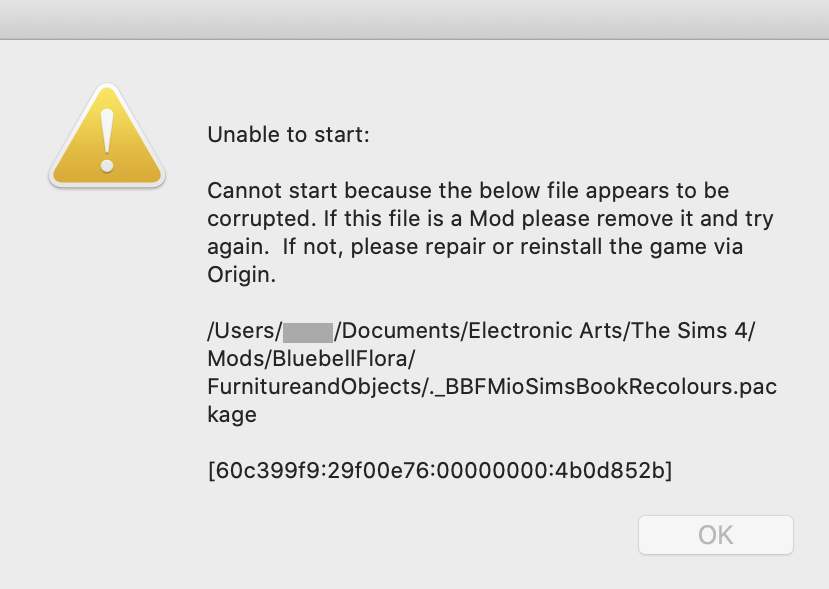
- Reliability Concerns: External drives are more susceptible to physical damage (drops, bumps) and accidental disconnection than internal drives. A sudden disconnection during gameplay or file transfer can lead to data corruption or game instability.
- Setup Complexity: While straightforward for tech-savvy users, redirecting game installations and ensuring proper file paths might be a slight learning curve for novice users.
- Additional Cable Management: An extra drive means an extra cable, which can add to desktop clutter.
Step-by-Step Guide: Installing and Moving Sims 4

Now that you understand the considerations, let’s dive into the practical steps of getting The Sims 4 onto your external drive. We’ll cover both installing a new copy and moving an existing one.
Preparing Your External Hard Drive
- Plug In and Connect: Connect your external hard drive to an available high-speed USB port on your computer (preferably USB 3.0/3.1/USB-C/Thunderbolt). Ensure it’s recognized by your operating system. You should see it appear in File Explorer (Windows) or Finder (macOS).
- Format (if necessary): If it’s a brand new drive or if you’re switching between operating systems, you might need to format it.
- Windows: Right-click on “This PC,” select “Manage,” then “Disk Management.” Find your external drive, right-click, and choose “Format.” Select NTFS as the file system.
- macOS: Open “Disk Utility,” select your external drive, and click “Erase.” Choose APFS or Mac OS Extended (Journaled) as the format.
- Create a Dedicated Folder (Optional but Recommended): On your external drive, it’s good practice to create a new folder, perhaps named “EA Games” or “My Games,” to keep your Sims 4 installation organized. For example,
D:EA GamesThe Sims 4.
Installing a New Copy of Sims 4 via EA App (formerly Origin)
The Sims 4 primarily runs through EA’s desktop application. The process for setting the installation path is very simple:
- Open the EA App: Launch the EA App on your computer.
- Access Settings: Click on the three horizontal lines (menu icon) in the top-left corner, then select “Settings.”
- Navigate to Download Settings: In the Settings menu, go to the “Download” tab.
- Change Game Install Location: Under “Game Install Location,” you will see the current default path. Click “Change folder” or “Browse” and navigate to the dedicated folder you created on your external hard drive (e.g.,
D:EA Games). Select this folder and click “Select Folder.” - Start Sims 4 Installation: Go back to your game library, find The Sims 4, and click “Download” or “Install.” The EA App will now install the game directly to your specified external drive location.
- Verify: After installation, launch the game to ensure everything is working correctly.
(Note: If you happen to own Sims 4 on Steam, the process is similar within Steam’s settings: Go to Steam > Settings > Downloads > Steam Library Folders, and add your external drive folder as a new library. Then, when installing Sims 4, select this library.)
Moving an Existing Sims 4 Installation
If you already have The Sims 4 installed on your internal drive and want to move it to an external one, follow these steps:
- Close EA App and The Sims 4: Ensure both the game and the EA App are completely closed before proceeding.
- Locate the Existing Game Folder: The default installation path for The Sims 4 is usually:
- Windows:
C:Program Files (x86)Origin GamesThe Sims 4orC:Program FilesEA GamesThe Sims 4 - macOS:
/Applications/The Sims 4.app(right-click and “Show Package Contents” to access the actual game files)
- Windows:
- Copy (or Cut) the Folder: Copy the entire “The Sims 4” folder from its current location to your chosen folder on the external hard drive (e.g.,
D:EA GamesThe Sims 4). It’s safer to copy first, and only delete the original after you’ve confirmed the game runs from the new location. - Update EA App with New Location:
- Open the EA App.
- Go to your game library and find The Sims 4.
- The EA App might show the game as “Ready to Download” or give an error indicating it can’t find the game. Hover over the game tile, click on the three dots (More options), and look for an option like “Locate Game,” “Find Game,” or “Browse Files.”
- Click this option and navigate to the new “The Sims 4” folder on your external drive (e.g.,
D:EA GamesThe Sims 4). Select the folder. - The EA App should now recognize the game’s new location and might perform a quick “Verifying game files” check.
- Test the Game: Launch The Sims 4 to ensure it loads correctly from the external drive.
- Delete Original Files (Optional, but recommended for space-saving): Once you’ve confirmed the game runs perfectly from the external drive, you can safely delete the original “The Sims 4” folder from your internal drive to free up space.
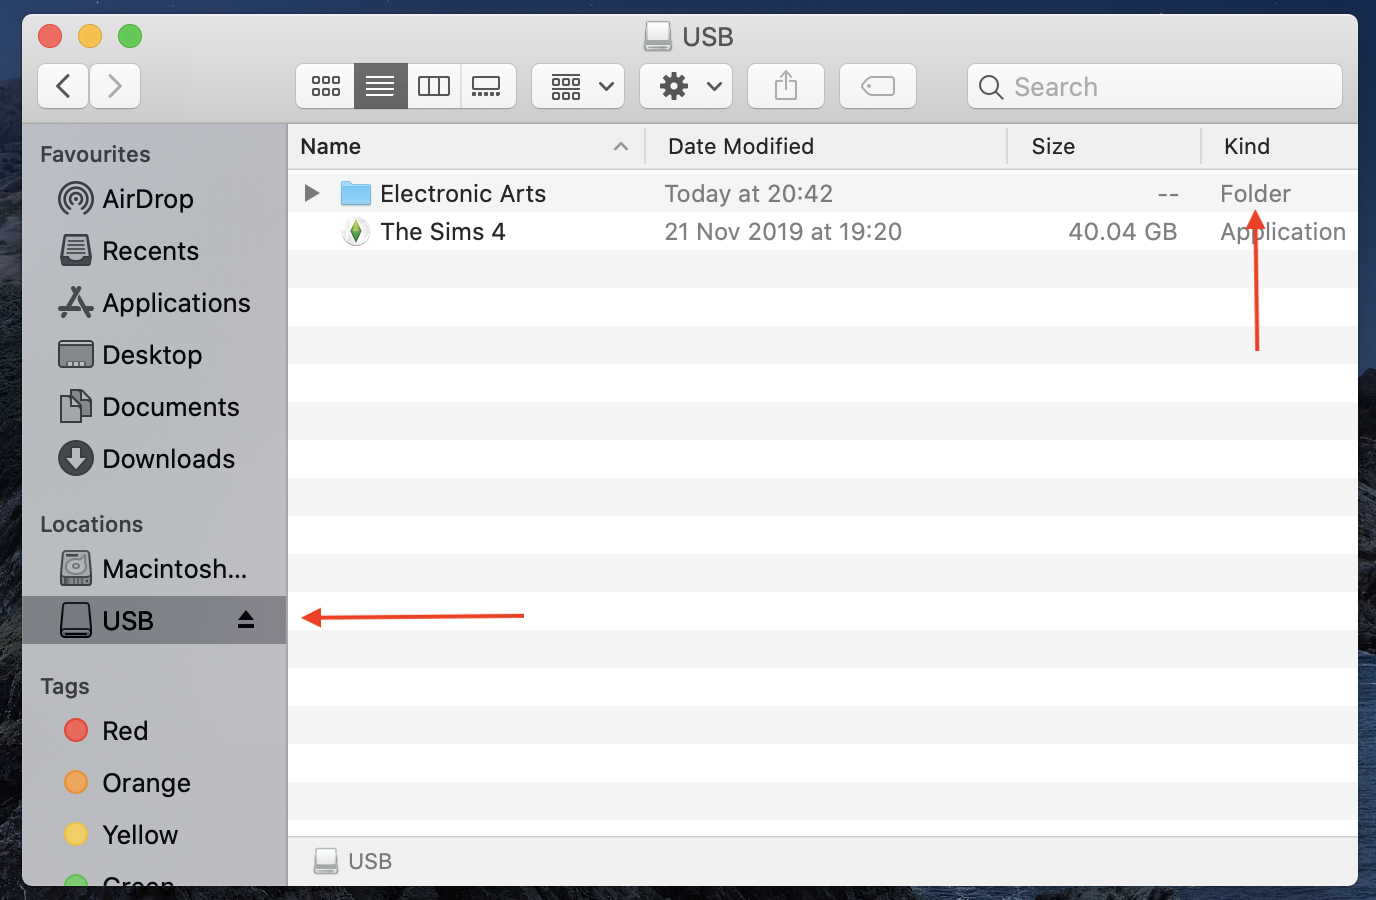
Important Note on Save Files and Custom Content: The Sims 4 save files, custom content (CC), mods, and screenshots are not stored with the game installation files. They are typically located in DocumentsElectronic ArtsThe Sims 4 on your internal drive. This folder usually remains on your internal drive even if you move the game installation. If you wish to move this folder for better organization or portability, you’ll need to do so manually and then use a symlink (symbolic link) or change the game’s manifest file to point to the new location. However, for most users, leaving the Documents folder on the internal drive is perfectly fine and often recommended for performance with a large amount of CC.
Optimizing Your External Sims 4 Experience
Once you have The Sims 4 running from your external drive, there are a few additional steps you can take to ensure the best possible performance and longevity for your setup.
Maximizing Performance
- Prioritize SSD and Fast USB: This cannot be overstressed. If you initially opted for an HDD and are experiencing slow loading, upgrading to an external SSD with a USB 3.0/3.1 or Thunderbolt connection will be the single most impactful upgrade.
- Direct Connection: Always plug your external drive directly into a high-speed USB port on your computer. Avoid using unpowered USB hubs or extensions if possible, as they can sometimes introduce bottlenecks or power delivery issues.
- Keep Drivers Updated: Ensure your computer’s USB controller drivers and external drive firmware are up to date. This ensures optimal communication between your computer and the drive.
- Dedicated Drive (Optional): If you have multiple large games, consider dedicating one external drive solely to your gaming library. This minimizes contention for read/write operations with other files or applications.
- Disk Maintenance:
- For HDDs: Periodically defragment your external HDD using Windows’ built-in Disk Defragmenter. This reorganizes fragmented game files for faster access.
- For SSDs: SSDs do not need defragmentation. Ensure TRIM is enabled (it usually is by default in modern operating systems) to maintain performance over time.
Maintaining Drive Health and Security
- Safely Eject Your Drive: Always use the “Safely Remove Hardware and Eject Media” option in Windows or drag the drive to the trash in macOS before physically disconnecting your external drive. This prevents data corruption that can occur if files are still being written when the drive is unplugged.
- Regular Backups of Saves: Even the most reliable external drives can fail. It is absolutely critical to regularly back up your Sims 4 save files (the
savesfolder withinDocumentsElectronic ArtsThe Sims 4). Consider cloud storage services or another backup drive for this precious data. This is a vital component of digital security, protecting your creative efforts and gaming progress. - Physical Protection: Treat your external drive with care. Avoid dropping it, exposing it to extreme temperatures, or placing it in precarious positions where it could be knocked over.
- Software and OS Updates: Keep your operating system and the EA App updated. These updates often include performance improvements, bug fixes, and better compatibility with external hardware.
Conclusion
Installing The Sims 4 on an external hard drive is a perfectly viable and often advantageous solution for modern gamers facing storage constraints. It empowers you with greater flexibility, improves internal system performance, and provides excellent portability for your entire Sims 4 universe.
By carefully selecting an appropriate external drive—ideally an SSD with a fast USB 3.0 or higher connection—and following the straightforward installation or migration steps outlined above, you can effortlessly expand your gaming horizons. Remember to prioritize performance, maintain drive health, and always back up your precious save files. With these best practices in mind, you’ll be well-equipped to manage your digital assets, optimize your gaming setup, and enjoy countless hours of simming without worrying about internal storage limitations. Embrace the freedom and flexibility that external storage brings, enhancing your overall tech experience and productivity in the digital realm.
aViewFromTheCave is a participant in the Amazon Services LLC Associates Program, an affiliate advertising program designed to provide a means for sites to earn advertising fees by advertising and linking to Amazon.com. Amazon, the Amazon logo, AmazonSupply, and the AmazonSupply logo are trademarks of Amazon.com, Inc. or its affiliates. As an Amazon Associate we earn affiliate commissions from qualifying purchases.