
Rifle scopes are sophisticated optical instruments designed to enhance accuracy and precision for shooters across various disciplines, from hunting and sport shooting to tactical applications. Far from being simple magnifiers, these devices incorporate a complex array of features and adjustments, each represented by specific numbers and markings. Understanding these numerical indicators is fundamental to unlocking a scope’s full potential, allowing users to precisely zero their rifles, compensate for bullet drop, adjust for wind, and adapt to varying environmental conditions. This guide delves into the core numerical designations found on modern rifle scopes, demystifying their functions and explaining their critical role in achieving consistent, accurate shots.

The Foundation: Understanding Magnification and Objective Lens Diameter
At the most basic level, the prominent numbers often stamped on the scope’s body or packaging refer to its optical power and light-gathering capabilities. These are typically presented in a format like “3-9×40” or “6×32”.
Magnification: The “Power” of Your Scope
The first set of numbers, such as “3-9x” or “6x”, denotes the scope’s magnification power.
- Variable Magnification (e.g., 3-9x): Most modern scopes offer variable magnification, allowing the user to adjust the level of zoom. In a “3-9x” scope, the target appears 3 times closer at its lowest setting and 9 times closer at its highest. This versatility is crucial for engaging targets at different distances or in varying scenarios, providing a wider field of view at lower magnifications for close-range situational awareness and higher magnification for precise long-range shots. The “x” signifies “times magnification.”
- Fixed Magnification (e.g., 6x): Some scopes, particularly those designed for specific applications where consistent magnification is preferred, feature a fixed power. A “6x” scope will always make the target appear 6 times closer. While less versatile, fixed-power scopes often offer superior optical clarity and brightness due to fewer internal moving parts and lenses.
Understanding magnification is not just about making the target bigger; it’s about discerning detail and placing the reticle accurately. However, higher magnification doesn’t always equate to better performance; it can reduce the field of view, make minor movements more pronounced, and require more stable shooting positions.
Objective Lens Diameter: Gathering Light and Clarity
The second number in the common “3-9×40” format, typically expressed in millimeters (mm), represents the diameter of the objective lens—the large lens at the front of the scope closest to the target. In the example, “40” means the objective lens is 40mm in diameter.
- Light Transmission: The primary function of the objective lens is to gather ambient light and transmit it to the shooter’s eye. A larger objective lens can gather more light, resulting in a brighter, clearer image, especially in low-light conditions like dawn or dusk.
- Exit Pupil: The objective lens diameter, in conjunction with the magnification setting, determines the “exit pupil” size—the small circle of light visible through the eyepiece when held at arm’s length. Calculated by dividing the objective lens diameter by the magnification (e.g., 40mm / 9x = 4.4mm exit pupil), the exit pupil should ideally be similar to or larger than the shooter’s own pupil for optimal light utilization. A human pupil dilates to about 2-3mm in bright light and up to 7mm in darkness.
- Physical Bulk and Weight: While a larger objective lens enhances brightness, it also increases the scope’s physical size, weight, and sometimes its cost. Shooters must balance desired light-gathering capability with practical considerations such as rifle balance and mounting height.
Reticle Adjustments: Clicks, MOA, and MIL
Beyond magnification, the numbers found on the windage and elevation turrets are arguably the most critical for achieving precision. These numbers define the incremental adjustments a shooter can make to compensate for bullet drop and wind drift.
Windage and Elevation Turrets: Precision Control
Located typically on the top (elevation) and right side (windage) of the scope, these turrets feature numbered dials and audible “clicks” that correspond to precise angular adjustments of the reticle.
- Elevation Turret: Adjusts the reticle vertically, primarily used to compensate for bullet drop over distance.
- Windage Turret: Adjusts the reticle horizontally, used to account for the effects of crosswinds.
Minutes of Angle (MOA): An Angular Measurement System
One of the most common systems for scope adjustments is Minutes of Angle (MOA). An MOA is an angular measurement, where 1 MOA subtends approximately 1.047 inches at 100 yards. For practical purposes, it’s often rounded to 1 inch at 100 yards.
- Scaling with Distance: The beauty of MOA is its scalability: 1 MOA represents roughly 1 inch at 100 yards, 2 inches at 200 yards, 3 inches at 300 yards, and so on. This makes ballistic calculations relatively straightforward.
- Click Values: Scope turrets are usually marked with click values in fractions of an MOA, most commonly 1/4 MOA or 1/8 MOA per click. A 1/4 MOA click means that each click moves the bullet’s point of impact by 0.25 inches at 100 yards (or 0.5 inches at 200 yards, 0.75 inches at 300 yards, etc.). The numbers on the turret typically indicate larger MOA increments, allowing the shooter to track how many total MOA adjustments have been made.
Milliradians (MIL): The Metric Counterpart
The other prevalent system for scope adjustments is Milliradians (MIL or Mil-Dot). A milliradian is also an angular measurement, where 1 MIL subtends exactly 10 centimeters (or 3.93 inches) at 100 meters (or 10.9 yards).
- Scaling with Distance: Similar to MOA, MILs scale with distance: 1 MIL represents 10 cm at 100 meters, 20 cm at 200 meters, and so on. In imperial units, 1 MIL is approximately 3.6 inches at 100 yards.
- Click Values: MIL-based scopes commonly feature 0.1 MIL per click. This means each click moves the bullet’s point of impact by 1 centimeter at 100 meters (or 0.36 inches at 100 yards). The numbers on MIL turrets typically represent full MIL increments. MIL is widely adopted in military and law enforcement circles due to its compatibility with metric rangefinders and simplified calculations for ranging.
Click Values: Translating Adjustments into Impact
The “click” value—e.g., 1/4 MOA, 0.1 MIL—is printed on the turrets and dictates the precision of your adjustments. If your bullet is consistently hitting 2 inches low at 100 yards with a 1/4 MOA scope, you would need to adjust your elevation turret up by 8 clicks (2 inches / 0.25 inches per click = 8 clicks). Understanding this relationship is critical for zeroing your rifle and making precise corrections in the field.
Parallax Adjustment: Eliminating Optical Illusion
Parallax is an optical phenomenon that occurs when the target image and the reticle are not on the same focal plane within the scope. This creates an apparent shift in the reticle’s position relative to the target when the shooter moves their eye slightly, leading to accuracy errors.
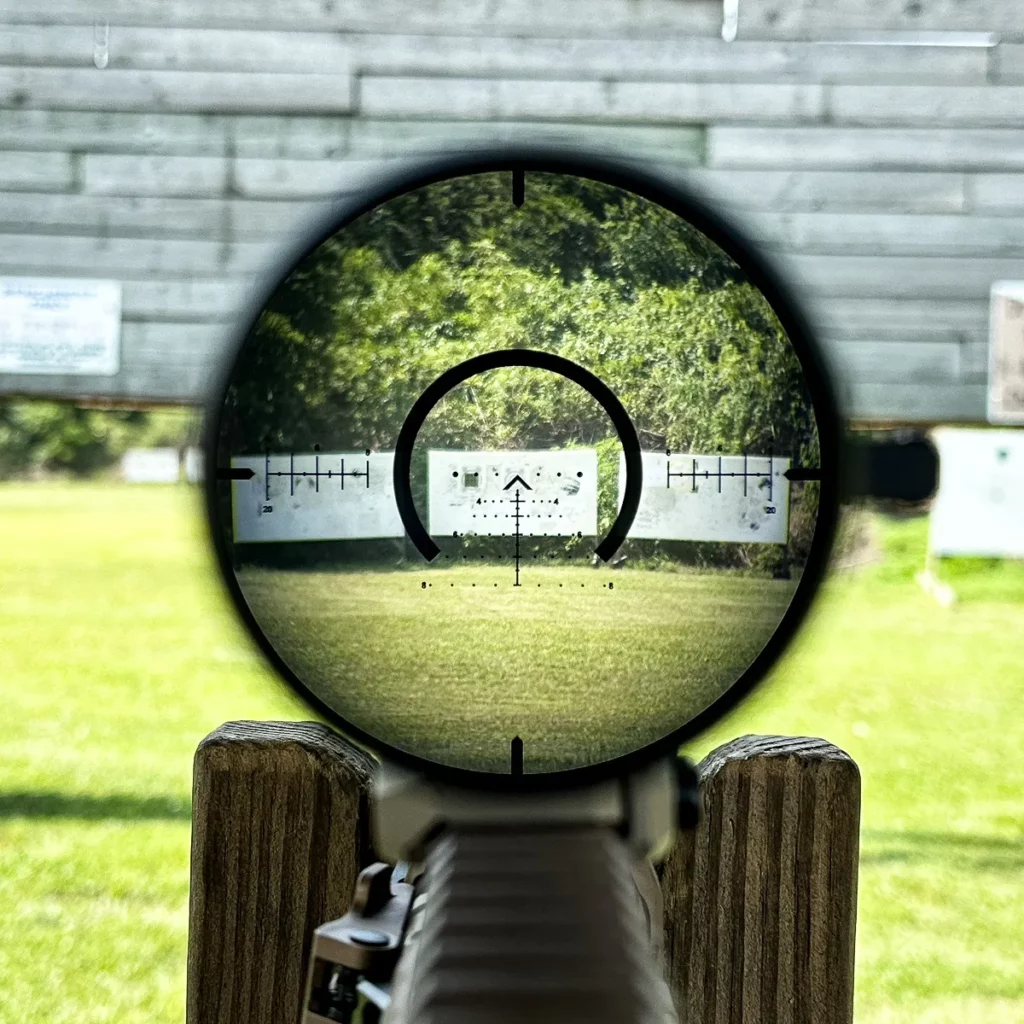
What is Parallax?
At close ranges, parallax is negligible. However, as distances increase, even a small amount of parallax can cause significant shifts in point of impact. Most scopes are factory-set to be parallax-free at a specific distance (e.g., 100 yards). Beyond that, or for precision shooting, an adjustable parallax feature becomes essential.
How Parallax Adjustment Works
Scopes equipped with parallax adjustment typically have a third turret on the left side (side focus) or an adjustable ring on the objective lens (adjustable objective or AO). This adjustment mechanism allows the shooter to move the internal lens elements to bring the target image into the same focal plane as the reticle.
- Numbered Dial: The parallax turret often has numbers indicating various distances (e.g., 25, 50, 100, 200, 300, 500+ yards/meters). To eliminate parallax, the shooter adjusts this dial until the target appears sharp and clear, and the reticle shows no movement relative to the target when moving their head slightly.
- Focusing the Image: While also focusing the image, the primary purpose of this adjustment is to eliminate parallax error, ensuring that the reticle remains precisely on the point of aim regardless of minor eye position shifts.
Diopter Adjustment: Tailoring Focus to Your Eye
The diopter adjustment is a simple but crucial feature often overlooked. It’s usually a rotating ring located on the eyepiece (the lens closest to your eye).
Sharpening the Reticle for Your Vision
Unlike the parallax adjustment which focuses the target image, the diopter adjustment focuses the reticle itself to the individual shooter’s eye. Everyone’s eyes are slightly different, and this adjustment compensates for minor differences in vision (within reasonable limits, it’s not a substitute for eyeglasses).
- Crisp Reticle: To properly set the diopter, point the scope at a clear, bright background (like the sky or a plain wall), ensuring no specific target is in view. Rapidly glance at the reticle and then away. Adjust the diopter ring until the reticle appears perfectly sharp, crisp, and black instantly when you look through the scope. The goal is to focus the reticle so it’s clear without straining your eye, ensuring the sharpest possible aim point. This adjustment only needs to be made once per shooter.
Other Key Numbers and Markings
Several other numerical specifications contribute to a scope’s performance, durability, and user experience.
Tube Diameter: Rigidity and Light Transmission
The main body tube of the scope, where it mounts to the rifle, typically comes in two common diameters: 1 inch (25.4mm) or 30mm. Some specialized scopes use 34mm or even 35mm tubes.
- Strength and Durability: Larger tube diameters (e.g., 30mm, 34mm) generally offer increased structural rigidity and strength, making the scope more robust and resistant to impact.
- Adjustment Range: A larger tube diameter also often allows for a greater internal adjustment range for elevation and windage, which is particularly beneficial for long-range shooting where significant adjustments are needed.
- Light Transmission (Limited Impact): While sometimes misunderstood, the tube diameter itself doesn’t directly gather more light like the objective lens. However, a larger tube can allow for larger internal lenses, potentially improving overall light transmission and optical quality.
Eye Relief: Comfort and Safety
Eye relief is the optimal distance between the shooter’s eye and the eyepiece of the scope to obtain a full, clear field of view without vignetting (dark rings around the image). It’s typically expressed in inches.
- Safety: Sufficient eye relief is critical for safety, especially with powerful calibers that produce significant recoil. Too little eye relief can lead to “scope bite,” where the scope impacts the shooter’s eyebrow.
- Comfort and Consistency: Good eye relief ensures comfortable shooting and allows for consistent head placement, which is vital for accuracy. Most scopes offer eye relief in the range of 3 to 4.5 inches.
Field of View: What You Can See
Field of view (FOV) refers to the width of the area you can see through the scope at a specific distance, usually 100 yards or 100 meters. It’s typically expressed in feet at 100 yards (e.g., 38 ft @ 100 yds).
- Situational Awareness: A wider field of view (generally at lower magnifications) provides better situational awareness, making it easier to acquire targets, especially moving ones, and observe surroundings.
- Magnification Relationship: FOV decreases as magnification increases. Understanding this trade-off helps shooters select the appropriate magnification for their shooting scenario.
Zero Stop: Returning to Your Baseline
Found on many higher-end scopes, a zero stop is a mechanical feature that prevents the elevation turret from rotating below a pre-set zero point.
- Rapid Return: Once set, it allows the shooter to dial back down to their established zero point quickly and confidently without having to look at the numbers, even in low light or under pressure. This prevents accidentally dialing too far down and losing the original zero.
- Tactical and Competition Advantage: It’s particularly useful in dynamic shooting environments or competitions where rapid adjustments and reliable returns to zero are essential.

First Focal Plane (FFP) vs. Second Focal Plane (SFP): Reticle Behavior
The placement of the reticle within the scope’s optical system determines how its size appears relative to the target as magnification is changed.
- First Focal Plane (FFP): The reticle is placed in front of the magnification erector system. This means the reticle appears to grow and shrink proportionally with the target as magnification is adjusted. The subtension values of the reticle (e.g., MOA or MIL hash marks) remain accurate at all magnification settings, making range estimation and holdovers consistent. FFP scopes are highly favored for long-range and tactical shooting where consistent reticle subtension is critical.
- Second Focal Plane (SFP): The reticle is placed behind the magnification erector system. The reticle’s apparent size remains constant regardless of the magnification setting. This means that the subtension values of the reticle are only accurate at one specific magnification setting (usually the highest, or a marked setting like 10x). SFP scopes are very common, especially in hunting and general-purpose shooting, offering a consistently sized reticle that doesn’t become too thin or too thick.
In conclusion, the numbers and markings on a rifle scope are not arbitrary; they represent a detailed language that, once understood, empowers a shooter with precise control over their aim. From optimizing light intake and adjusting for ballistic trajectories to ensuring parallax-free clarity and a sharp reticle, each numerical designation plays a vital role in the intricate dance between technology and marksmanship. Mastering these optical and mechanical indicators is a crucial step towards consistent accuracy and a deeper appreciation for the engineering behind these sophisticated aiming devices.
aViewFromTheCave is a participant in the Amazon Services LLC Associates Program, an affiliate advertising program designed to provide a means for sites to earn advertising fees by advertising and linking to Amazon.com. Amazon, the Amazon logo, AmazonSupply, and the AmazonSupply logo are trademarks of Amazon.com, Inc. or its affiliates. As an Amazon Associate we earn affiliate commissions from qualifying purchases.