
Light metering is a fundamental process in photography, an indispensable technical aspect that dictates the success or failure of an image’s exposure. At its core, light metering is the act of measuring the intensity of light present in a scene to determine the optimal camera settings—aperture, shutter speed, and ISO—required to produce a correctly exposed photograph. It is a critical bridge between the photographer’s artistic vision and the technical capabilities of their imaging device, ensuring that the camera’s sensor captures an appropriate amount of light to render detail across both highlights and shadows.
The Core Concept of Exposure in Photography
Understanding light metering begins with grasping the concept of exposure. Exposure refers to the total amount of light allowed to fall on the camera’s sensor (or film) during the process of taking a photograph. Too much light results in an overexposed image, where highlights are “blown out” and detail is lost. Too little light leads to underexposure, with shadows “crushed” and an overall dark, muddy appearance. The goal of light metering is to achieve a balanced, “correct” exposure that preserves detail across the entire tonal range of the scene.
The Exposure Triangle: Aperture, Shutter Speed, and ISO
The three primary controls that collectively determine exposure are known as the exposure triangle:
- Aperture: This refers to the size of the opening in the lens that allows light to pass through to the sensor. Measured in f-stops (e.g., f/2.8, f/8, f/16), a wider aperture (smaller f-number) lets in more light but creates a shallower depth of field, blurring the background. A narrower aperture (larger f-number) lets in less light but keeps more of the scene in focus.
- Shutter Speed: This is the duration for which the camera’s shutter remains open, allowing light to strike the sensor. Measured in fractions of a second (e.g., 1/1000s, 1/60s, 1s), faster speeds freeze motion but require more light, while slower speeds capture motion blur and demand less ambient light.
- ISO: This represents the sensitivity of the camera’s sensor to light. A lower ISO (e.g., 100, 200) results in less noise and higher image quality but requires more light. A higher ISO (e.g., 1600, 3200) increases sensitivity, allowing for shooting in low light conditions, but often introduces digital noise or grain.
Light metering systems work by analyzing the available light and suggesting a combination of these three settings to achieve a desired exposure level, which is typically calibrated to render a mid-tone as 18% grey.
The Role of Light in Image Capture
Light is not merely an illuminator; it is the raw material from which photographs are made. Its quality, direction, and intensity profoundly influence the mood, texture, and dimensionality of an image. Metering systems, therefore, are designed to interpret this complex light data. They account for various factors like specular highlights, deep shadows, and overall ambient illumination, translating them into actionable camera settings. Modern cameras, leveraging sophisticated algorithms, attempt to predict how these light conditions will translate into a final image, providing photographers with a starting point for their creative adjustments.
How Light Meters Work: Principles and Technology
The fundamental principle behind all light meters is the measurement of light intensity. This measurement is then translated into an exposure value (EV), which corresponds to various combinations of aperture and shutter speed at a given ISO.
Reflective vs. Incident Light Metering
Light meters generally operate using one of two core methodologies:
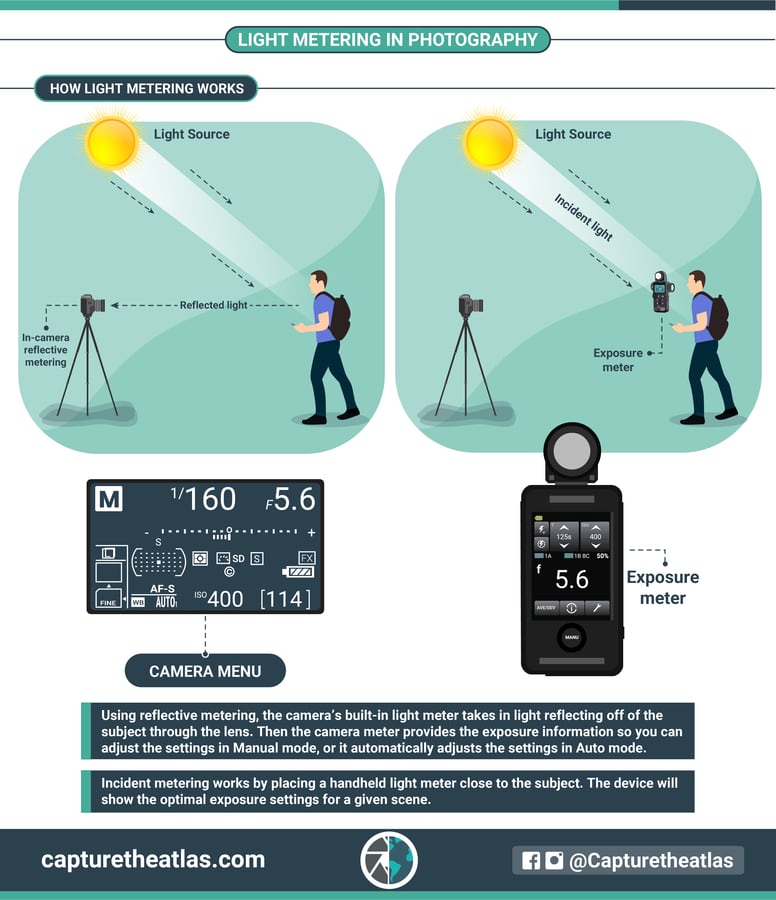
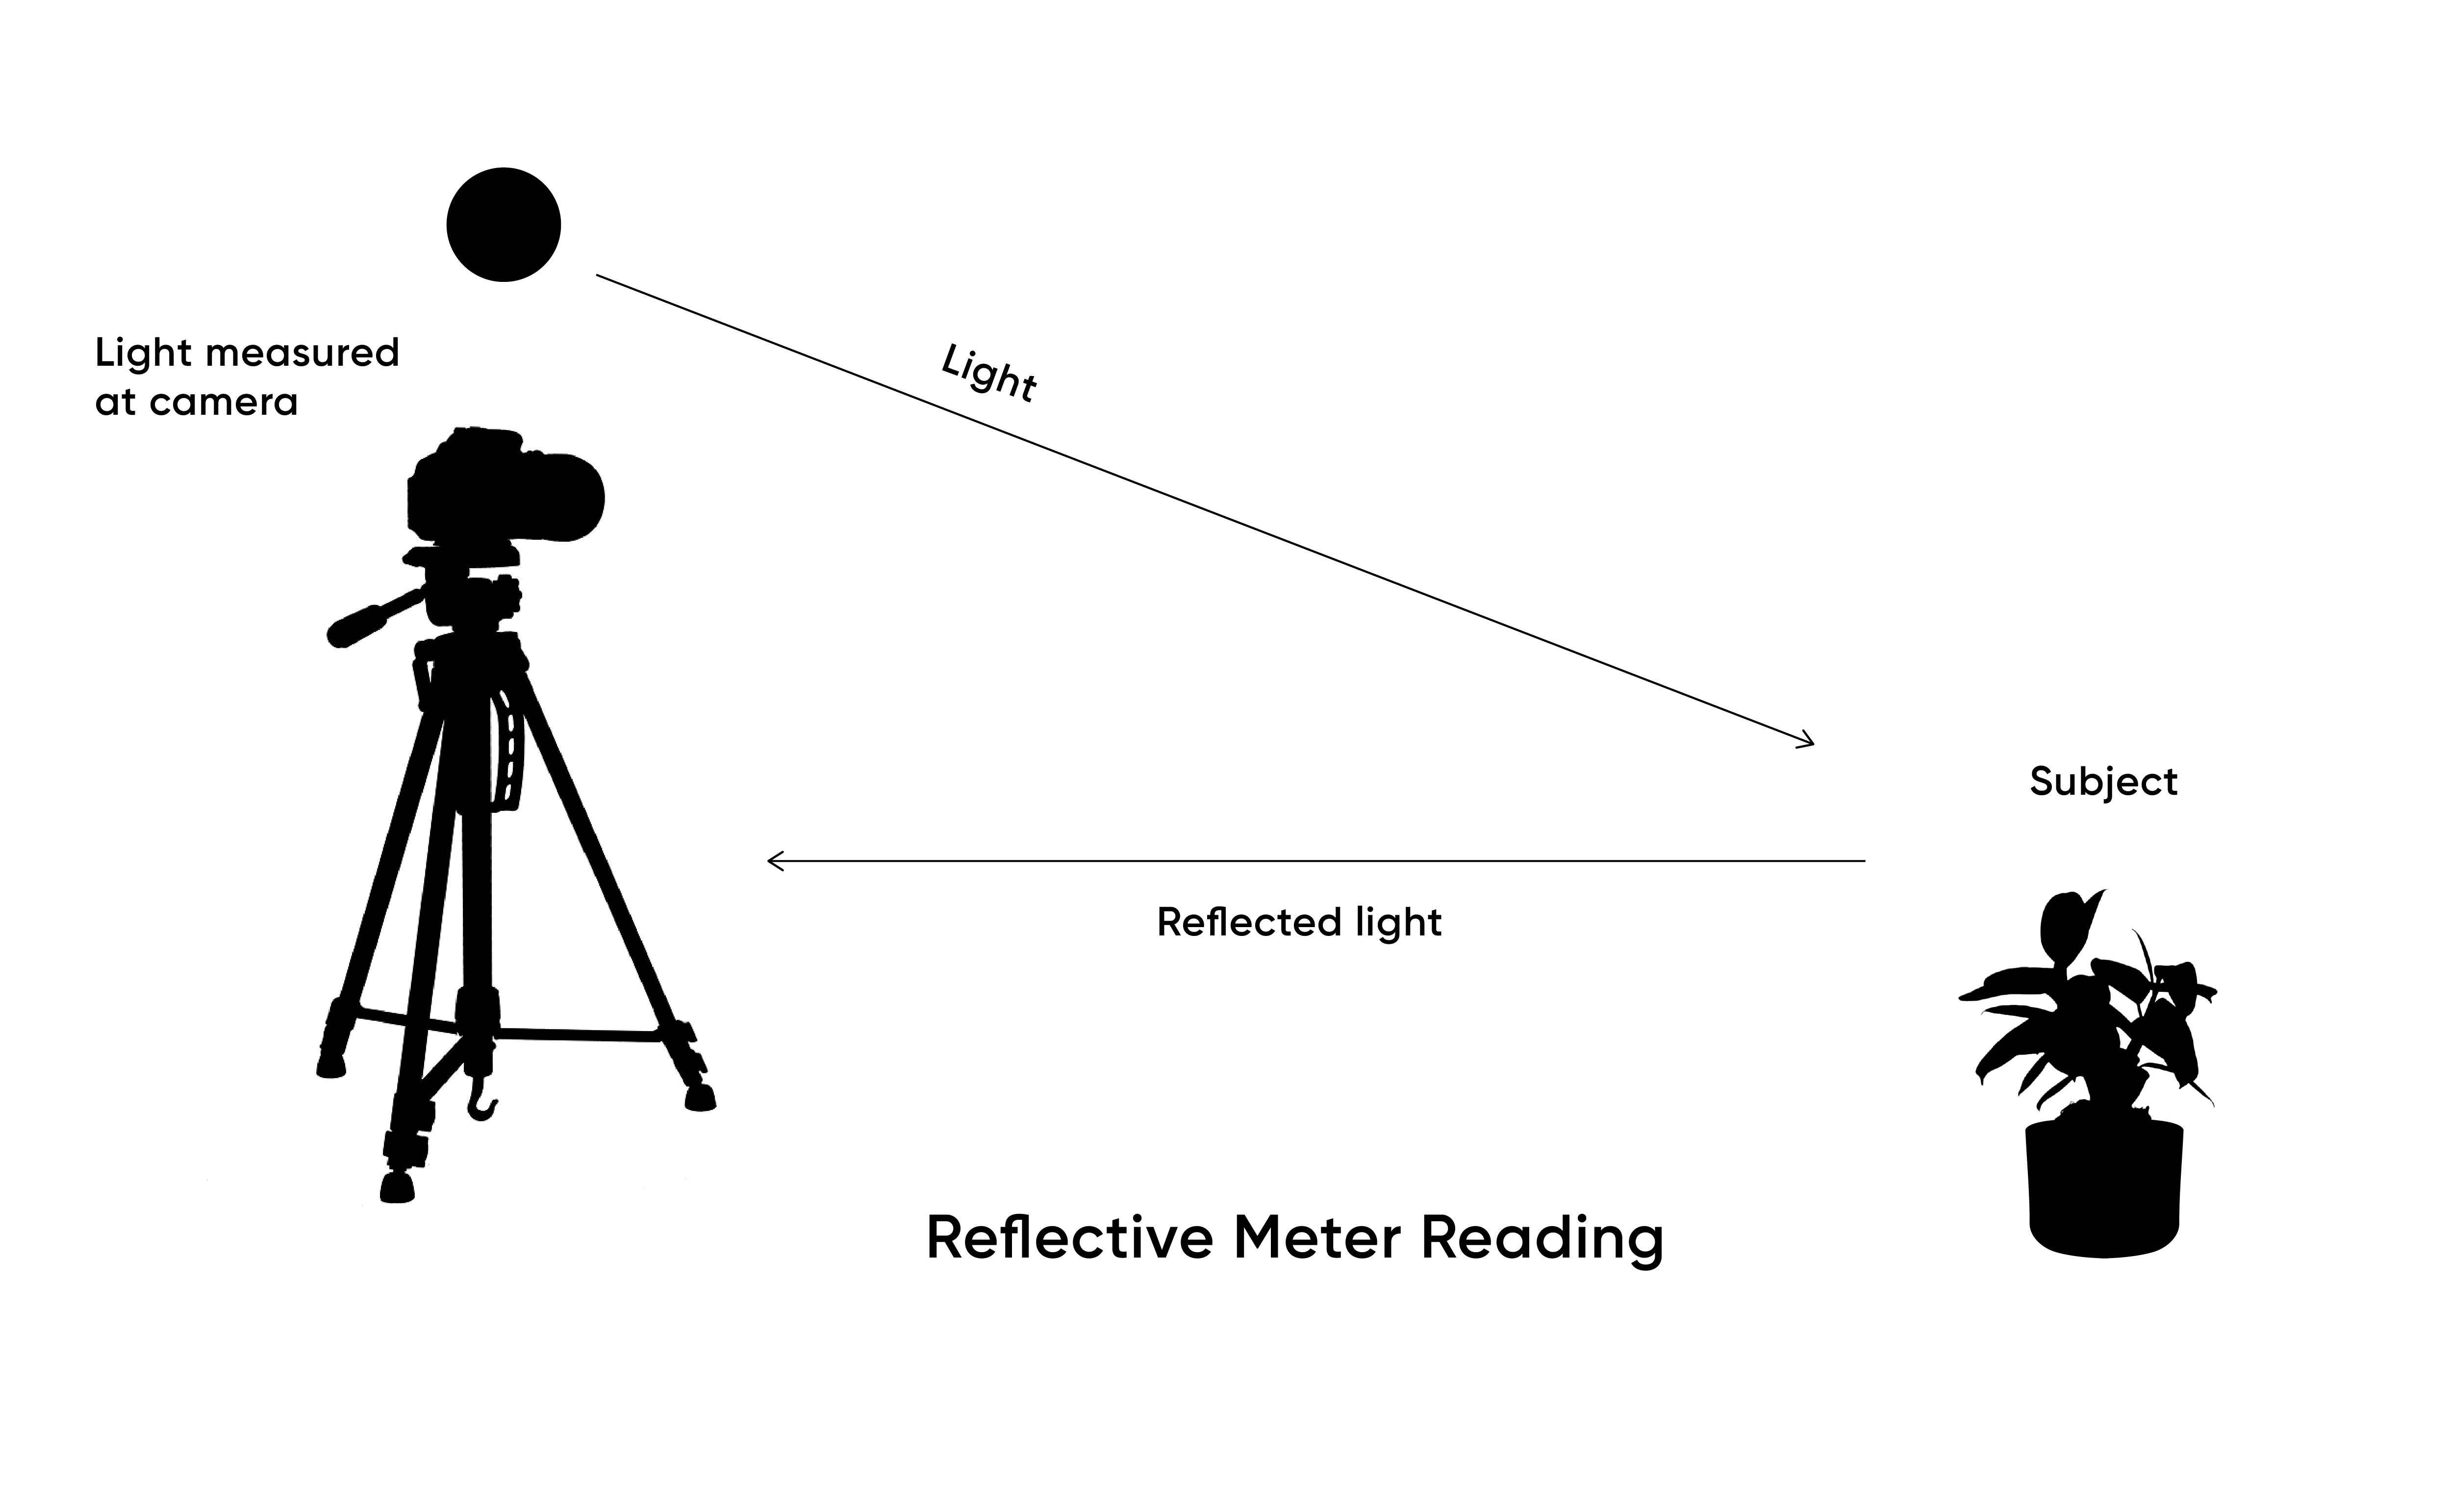
- Reflective Metering: This is the most common type, built into virtually all modern cameras. A reflective meter measures the light reflecting off the subject towards the camera. It assumes that the subject, or the scene as a whole, averages out to an 18% grey tone. This assumption can be problematic in scenes dominated by very bright subjects (e.g., snow, a white wedding dress), which the meter will try to underexpose, or very dark subjects (e.g., a black cat in a coal bin), which it will try to overexpose, to make them appear 18% grey. Photographers often need to apply exposure compensation to correct for this.
- Incident Light Metering: Typically found in handheld light meters, an incident meter measures the light falling onto the subject. The meter is held at the subject’s position, facing the camera, and measures the light directly. This method is often considered more accurate because it doesn’t make assumptions about the subject’s reflectance and is unaffected by the subject’s color or brightness. It provides a true reading of the light illuminating the scene.
Sensor Technology: From Selenium to Silicon
The technology driving light meters has evolved significantly. Early light meters used selenium cells, which generated a small electrical current proportional to the light hitting them. These were passive, requiring no batteries, but were less sensitive and prone to aging. The advent of cadmium sulfide (CdS) cells offered greater sensitivity, especially in low light, and were smaller, allowing for integration into camera bodies. However, CdS cells suffered from “memory effect” and were also sensitive to temperature.
Today, most light meters, both in-camera and handheld, utilize silicon photodiodes (SPD). These semiconductor devices offer excellent linearity, rapid response, high sensitivity, and a broad spectral range. SPD technology allows for incredibly precise and fast light measurements, making modern metering systems highly responsive to changing light conditions. Advanced SPDs, often arranged in multi-segment arrays, are crucial for the sophisticated evaluative metering modes found in contemporary digital cameras.
The 18% Grey Standard
The concept of “18% grey” is central to reflective light metering. It refers to a neutral grey tone that reflects 18% of the light that falls on it. This value was empirically determined to represent the average reflectance of a typical scene. When a reflective light meter reads a scene, it’s essentially trying to adjust the exposure settings to make whatever it’s pointing at appear as 18% grey in the final image. This is why a light meter can be fooled by scenes that are either much brighter or much darker than average, requiring the photographer to manually intervene with exposure compensation.
Types of Light Meters and Their Applications
Modern photography benefits from a range of metering tools, each suited for different applications and levels of precision.
In-Camera Meters: Spot, Evaluative, Center-Weighted
Digital Single-Lens Reflex (DSLR) and mirrorless cameras feature sophisticated built-in metering systems that analyze light through the lens (TTL). These systems typically offer several modes:
- Evaluative (or Matrix) Metering: This is the default and most complex mode. The camera divides the scene into multiple zones, analyzes the light in each zone, and compares it against an extensive database of pre-programmed scenarios. It then calculates an exposure setting that balances the light across the entire frame, prioritizing the subject and often accounting for highlights and shadows. This mode is excellent for general photography and complex lighting.
- Center-Weighted Average Metering: This mode gives priority to the light in the central area of the frame, typically 60-80% of the image, while still taking the rest of the scene into account. It’s useful when the main subject is in the center and the background lighting is significantly different.
- Spot Metering: This highly precise mode measures light from a very small area (1-5%) of the frame, usually around the center or linked to the active autofocus point. It allows photographers to meter specific elements of a scene, like a subject’s face or a critical highlight, giving them exact control over how that specific area is rendered in terms of brightness. This is invaluable in high-contrast situations or when precise control over tonal values is crucial.
Handheld Light Meters: Incident, Flash, Color Temperature
External, handheld light meters offer greater flexibility and often higher accuracy than in-camera meters, particularly for studio work or complex lighting setups.
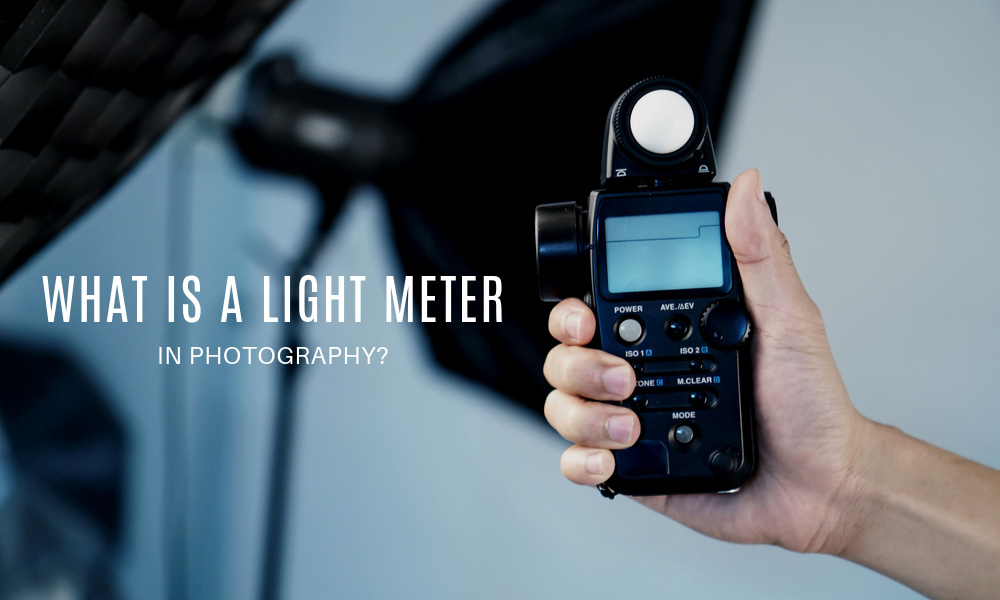
- Incident Light Meters: As discussed, these measure the light falling on the subject, providing an objective exposure reading independent of the subject’s reflectivity. They are widely used in portrait, product, and landscape photography where consistent and accurate exposure is paramount.
- Flash Meters: A specialized type of incident meter, flash meters measure the light output of electronic flashes. They are essential in studio photography to balance multiple strobes, determine proper flash power settings, and ensure consistent exposure across different light sources. Many flash meters can also measure ambient light.
- Color Temperature Meters: While not strictly “light meters” in the exposure sense, these tools measure the color temperature of light (in Kelvin). This allows photographers to set the camera’s white balance precisely, ensuring accurate color reproduction regardless of the light source (daylight, tungsten, fluorescent, etc.).
Specialized Metering Tools and Software
Beyond physical meters, advancements in digital imaging have introduced software-based metering tools. Many camera apps for smartphones include rudimentary light metering functions. Furthermore, advanced image editing software like Adobe Lightroom and Photoshop incorporate sophisticated histogram and waveform displays, which are essentially post-capture metering tools. These tools allow photographers to analyze the tonal distribution of an image, identify clipping in highlights or shadows, and make precise adjustments to exposure, contrast, and tone mapping during post-processing. Some even feature “false color” or “zebra patterns” in live view, providing real-time exposure warnings.
Mastering Light Metering for Optimal Image Quality
Effective light metering is not just about understanding the technology; it’s about applying that knowledge creatively to achieve desired photographic results.
Dealing with Tricky Lighting Situations
Complex lighting, such as high-contrast scenes (e.g., a bright sky and a dark foreground), backlighting, or scenes with dominant bright/dark elements, often challenges reflective meters. In these scenarios, photographers must override the camera’s default readings.
- High Contrast: Use spot metering on a mid-tone in the most important part of the scene, or bracket exposures (see below).
- Backlighting: Meter off the subject, often requiring positive exposure compensation to prevent the subject from becoming a silhouette.
- Predominantly Bright Scenes (Snow, Beach): The camera will try to make the scene 18% grey, leading to underexposure. Add 1 to 2 stops of positive exposure compensation.
- Predominantly Dark Scenes (Night, Dark Interiors): The camera will try to make the scene 18% grey, leading to overexposure. Subtract 1 to 2 stops of negative exposure compensation.
Exposure Compensation and Bracketing
- Exposure Compensation: This feature allows photographers to manually adjust the exposure recommended by the camera’s meter. Measured in stops (e.g., +1 EV, -2 EV), it’s crucial for fine-tuning exposure in tricky situations or for creative effect. Positive compensation brightens the image, while negative compensation darkens it.
- Exposure Bracketing: This technique involves taking multiple shots of the same scene at different exposures (e.g., one at the metered exposure, one underexposed, and one overexposed). This provides a safety net against incorrect exposure and is particularly useful for high dynamic range (HDR) photography, where the bracketed images are later combined in software to create a single image with extended tonal range.
Integrating Metering with Digital Workflow and Post-Processing
In the digital age, light metering doesn’t end when the shutter clicks. Understanding the histogram on your camera’s LCD or in your editing software is vital. A histogram graphically represents the tonal distribution of an image, showing the number of pixels at each brightness level from pure black to pure white. A well-exposed image typically has a histogram that is spread across the entire range without significant clipping at either end.
Photographers often aim to “expose to the right” (ETTR) when shooting in RAW format. This technique involves slightly overexposing the image without blowing out highlights, pushing the histogram further to the right. This collects more light data, resulting in a cleaner image with less noise, especially in the shadows, which can then be safely darkened in post-processing. Modern RAW files offer significant latitude for adjustment, making precise initial metering less critical than in the film era, but still foundational for optimal image quality and efficient workflow.
The Evolution of Light Metering Technology
The journey of light metering technology mirrors the broader evolution of photography itself, driven by the continuous quest for automation, precision, and ease of use.
Early Mechanical Meters
The earliest light meters were essentially simple photometric devices, requiring manual calculation and interpretation. These were often cumbersome and less accurate than modern devices. Early innovations, such as the aforementioned selenium cell meters, began to automate the process, providing direct readings of aperture and shutter speed combinations. These independent handheld units freed photographers from complex mental arithmetic, marking a significant step towards accessible photography.
Electronic Advancements and Predictive Metering
The integration of CdS and later silicon photodiodes within camera bodies revolutionized metering. Through-the-lens (TTL) metering, first introduced in the late 1960s, allowed the camera to measure light directly from the scene as seen through the lens, factoring in filter effects and lens characteristics. This innovation paved the way for sophisticated multi-segment evaluative metering systems that could analyze complex scenes. Microprocessors enabled these systems to compare light patterns against vast databases, leading to increasingly intelligent and predictive metering algorithms that could reliably determine exposure in a wide array of conditions.
AI and Computational Photography’s Influence
Today, the cutting edge of light metering is deeply intertwined with Artificial Intelligence (AI) and computational photography. Modern cameras use advanced AI algorithms to not only analyze light but also to identify subjects, understand scene context (e.g., portrait, landscape, night), and even predict how light will interact with different materials. This allows for incredibly nuanced exposure decisions, dynamic range optimization, and even the reconstruction of detail in severely over- or underexposed areas. Features like “intelligent auto” modes, advanced HDR algorithms, and real-time scene recognition leverage AI to push the boundaries of what automated light metering can achieve, empowering photographers to focus more on composition and creative expression while the technology handles the complex technicalities of light capture.
aViewFromTheCave is a participant in the Amazon Services LLC Associates Program, an affiliate advertising program designed to provide a means for sites to earn advertising fees by advertising and linking to Amazon.com. Amazon, the Amazon logo, AmazonSupply, and the AmazonSupply logo are trademarks of Amazon.com, Inc. or its affiliates. As an Amazon Associate we earn affiliate commissions from qualifying purchases.