
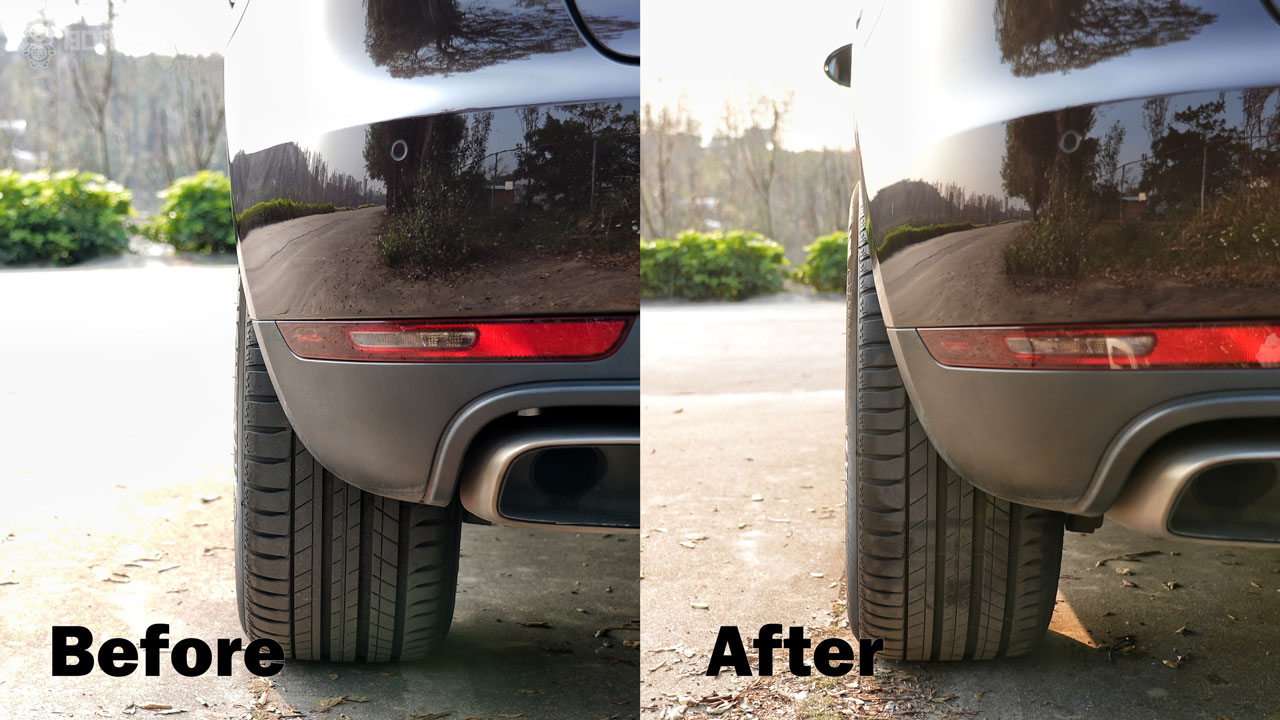
In the world of automotive customization, few modifications are as visually transformative or technically misunderstood as the wheel spacer. Whether you are aiming to achieve a “flush” stance, clear oversized brake calipers, or correct an incorrect wheel offset, understanding the mechanics of wheel spacers is critical to maintaining vehicle safety and performance. At its core, a wheel spacer is a metal disc—typically crafted from high-grade aluminum—that sits between the vehicle’s wheel hub assembly and the wheel itself. By adding thickness to the mounting surface, the spacer pushes the wheel outward, effectively altering the wheel’s track width and its position relative to the fender line.
The Mechanics and Purpose of Wheel Spacers
The primary function of a wheel spacer is to change the effective offset of a wheel. Offset, or “ET,” represents the distance from the mounting surface of the wheel to its geometric centerline. Many enthusiasts find that their chosen aftermarket wheels do not align perfectly with their vehicle’s fender arches, resulting in a sunken appearance. By installing a spacer, the wheel is moved away from the hub, bringing the outer edge of the tire closer to the fender for a wider, more aggressive stance.
Beyond aesthetics, there are technical justifications for the use of spacers. Modern performance cars often feature large, multi-piston big brake kits. These kits require significantly more clearance between the back of the wheel spokes and the brake caliper housing. In instances where an aftermarket wheel has a “flat” spoke design that interferes with these massive calipers, a wheel spacer provides the necessary room to prevent contact, which would otherwise cause catastrophic damage to both components.
Types of Wheel Spacers
It is vital to distinguish between the two primary types of spacers available on the market: slip-on and bolt-on.
Slip-on spacers are the simplest form. They are essentially flat plates with holes drilled for the wheel studs. These spacers rely on the vehicle’s original wheel studs. If you choose a very thin slip-on spacer—typically 3mm to 8mm—the original studs usually have enough remaining length to securely fasten the lug nuts. However, if you opt for thicker slip-on spacers, you must replace your factory wheel studs with longer, high-tensile strength studs to ensure full thread engagement. Failing to account for thread engagement is a primary cause of wheel separation while driving.
Bolt-on spacers, often referred to as “adapter spacers,” feature their own set of integrated studs. You bolt the spacer to the vehicle’s hub using provided hardware, and then you bolt the wheel to the spacer’s studs. These are typically thicker, ranging from 15mm to 30mm or more. Because they attach independently to the hub, they are often favored for wider track adjustments, but they add significant unsprung weight to the vehicle.
Hub-Centric vs. Lug-Centric Design
The most common point of failure for inexperienced modifiers is neglecting the distinction between hub-centric and lug-centric spacers. This is not merely a preference; it is a fundamental engineering requirement.
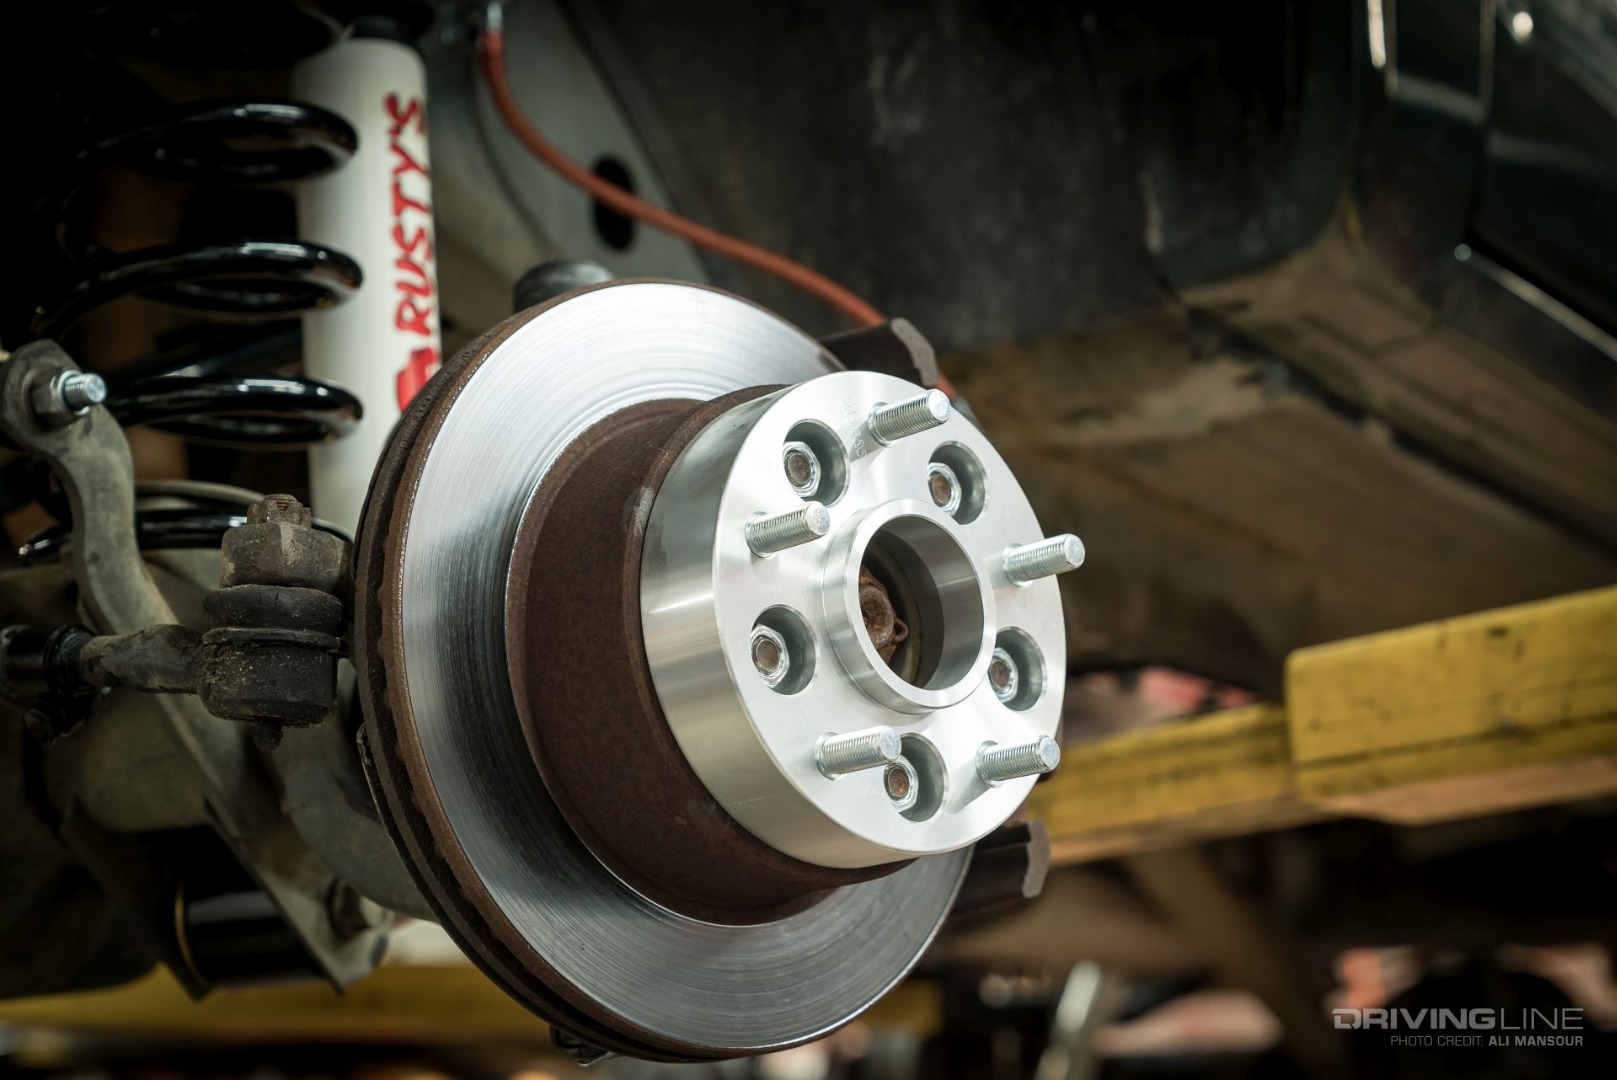
A hub-centric spacer features a center bore that matches the vehicle’s hub diameter exactly. When installed, the weight of the vehicle is supported by the hub itself—a rigid, steel or aluminum protrusion that sits in the center of the wheel bearing. The wheel “seats” onto this hub, ensuring that it is perfectly centered and that the weight of the car is distributed across the hub, rather than resting solely on the lug studs.
A lug-centric spacer does not have this matching center bore. Instead, it relies entirely on the lug nuts to center the wheel. Because even the smallest manufacturing tolerance gaps can lead to misalignment, lug-centric spacers are notorious for causing high-speed vibrations. If your steering wheel shakes at 60 mph, it is often a sign that your wheel assembly is not truly centered on the hub. For safety and longevity, always prioritize hub-centric spacers that are machined to the exact specifications of your vehicle’s center bore.
Safety Considerations and Engineering Impact
Installing wheel spacers changes the geometry of your suspension, and it is imperative to understand the implications of these changes. When you move a wheel further out from the hub, you change the scrub radius and increase the leverage applied to your wheel bearings.
Increased Bearing Load
The wheel bearing is designed to handle loads at a specific distance from the center of the hub. By pushing the wheel outward, you are essentially increasing the lever arm that the wheel acts upon. This results in greater stress on the bearings, potentially leading to premature wear. While a 5mm or 10mm spacer may have a negligible impact on a daily driver, aggressive spacing can significantly shorten the lifespan of your hub assemblies and wheel bearings.
Suspension Geometry and Scrub Radius
The “scrub radius” is the distance between the point where the steering axis hits the road and the center of the tire’s contact patch. By pushing the wheel out with a spacer, you alter this distance. A dramatic change in scrub radius can make the steering feel “heavy” or “darty,” and it may change the way the vehicle tracks under heavy braking. Furthermore, wider track widths can alter the spring rate effectiveness, as the suspension components are now acting at different angles.
Material Quality
Not all spacers are created equal. High-quality spacers are typically CNC-machined from 6061-T6 or 7075-T6 aluminum alloys. These materials offer an excellent strength-to-weight ratio. Cheap, cast-metal, or unbranded spacers should be avoided at all costs. Because the spacer is a critical link between the wheel and the car, any structural failure of the spacer while in motion could lead to the loss of a wheel. Always look for spacers that are hard-anodized, which helps prevent corrosion—a common issue where aluminum spacers become “seized” onto steel hubs, making them nearly impossible to remove later.

Best Practices for Installation
Installation is where most errors occur. Before mounting spacers, the mating surfaces must be cleaned of all rust, paint, and debris using a wire brush. A spacer must sit perfectly flat against the hub; even a tiny piece of grit trapped behind the spacer can create a “wobble” that vibrates through the entire chassis.
When tightening the lug nuts or the spacer bolts, always use a torque wrench. Never rely on an impact gun for final tightening. Lug nuts should be torqued to the manufacturer’s specification in a star pattern to ensure even pressure distribution. After the first 50 to 100 miles of driving, re-check the torque. Spacers can sometimes settle as they heat up and cool down during initial use, and a quick re-torque ensures that the connection remains secure.
Additionally, ensure that your wheel studs are not bottoming out inside the lug nut. If you are using open-ended lug nuts, this is easy to visualize, but with closed-ended nuts, it is difficult to tell if the nut is tight against the wheel or if it has hit the end of the stud. If the nut bottoms out on the stud before it compresses the wheel against the spacer, your wheel will be loose, regardless of how much torque you apply.
By approaching wheel spacers with a focus on engineering principles rather than mere aesthetics, you can effectively improve your vehicle’s stance and functionality. The key lies in selecting high-quality, hub-centric components, ensuring proper fitment, and respecting the added stress placed on the drivetrain. When done correctly, spacers are a safe and effective tool in the automotive enthusiast’s arsenal.
aViewFromTheCave is a participant in the Amazon Services LLC Associates Program, an affiliate advertising program designed to provide a means for sites to earn advertising fees by advertising and linking to Amazon.com. Amazon, the Amazon logo, AmazonSupply, and the AmazonSupply logo are trademarks of Amazon.com, Inc. or its affiliates. As an Amazon Associate we earn affiliate commissions from qualifying purchases.