
For anyone utilizing an NVIDIA graphics processing unit (GPU), whether for high-fidelity gaming, professional content creation, scientific computing, or even just general desktop use, ensuring your drivers are correctly installed and up-to-date is paramount. NVIDIA drivers are the essential software bridge between your operating system and your graphics card, dictating how effectively your hardware performs. A poorly installed or outdated driver can lead to a myriad of issues, from performance bottlenecks and graphical glitches to system instability and security vulnerabilities. This guide will walk you through the entire process, from understanding why drivers are crucial to performing a clean installation and troubleshooting common problems, ensuring your NVIDIA GPU operates at its peak potential.
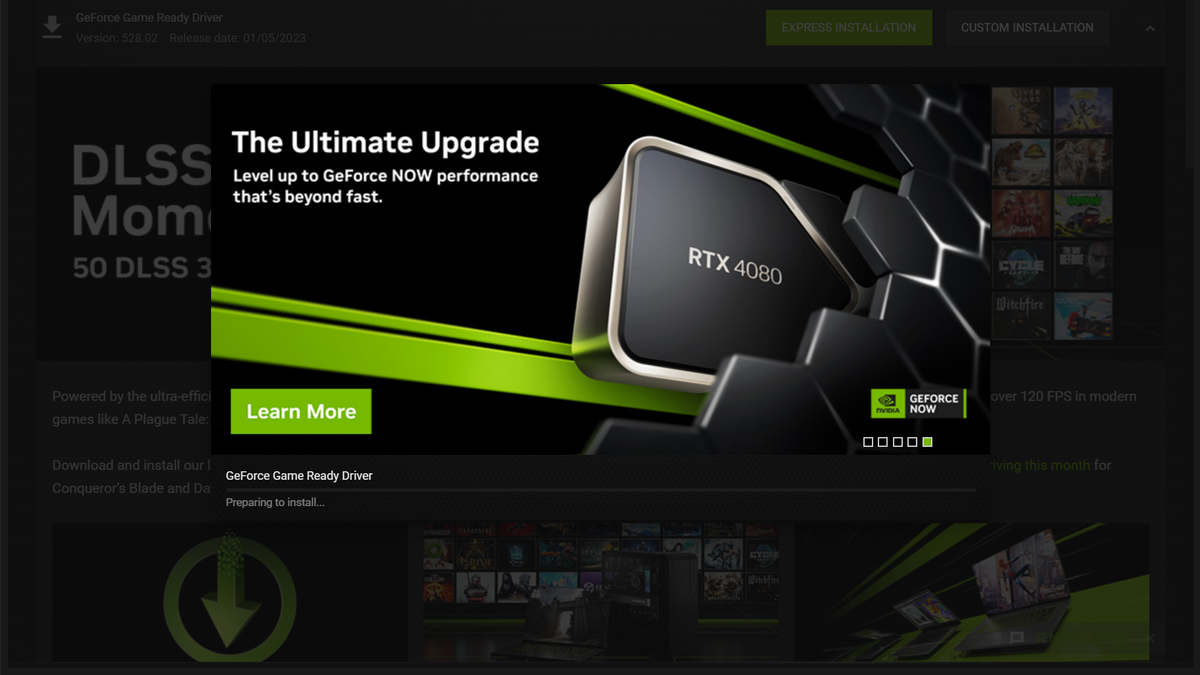
Why Keeping Your NVIDIA Drivers Updated Matters
Before diving into the installation process, it’s crucial to understand why driver updates are so important. It’s not just about getting the latest features; it’s about optimizing your entire system’s performance and stability.
Enhanced Performance and Stability
Every new game release or software application pushes the boundaries of hardware capabilities. NVIDIA engineers continuously work on optimizing their drivers to squeeze out more performance from existing hardware, often releasing “Game Ready Drivers” specifically tuned for new titles. These updates can provide significant frame rate improvements, reduce latency, and prevent common graphical artifacts. Beyond gaming, professional applications like video editors, 3D rendering software, and CAD programs also benefit immensely from performance optimizations that newer drivers provide, leading to faster render times and smoother workflows. Conversely, outdated drivers can cause crashes, freezes, and general system instability, turning a powerful GPU into a source of frustration.
Access to New Features and Technologies
NVIDIA is constantly innovating, introducing new technologies such as DLSS (Deep Learning Super Sampling), Ray Tracing, NVIDIA Reflex, and various features within their Broadcast and Canvas applications. These cutting-edge features often require specific driver versions to function correctly. Without the latest drivers, you might miss out on these advancements that can significantly enhance your experience, whether it’s achieving higher resolutions with better performance or leveraging AI-powered tools for content creation. Keeping your drivers current ensures you have access to the full suite of functionalities your NVIDIA card is capable of delivering.
Critical Bug Fixes and Security Updates
Like any complex software, graphics drivers can contain bugs or vulnerabilities. NVIDIA regularly releases updates that address these issues, improving overall system stability and patching potential security holes. Running outdated drivers leaves your system exposed to known exploits and can lead to unexpected crashes, display issues, or compatibility problems with new operating system updates. Staying current with driver releases is a critical aspect of maintaining a secure and reliable computing environment, safeguarding your data and ensuring uninterrupted operation.
Preparing for Driver Installation
A smooth driver installation begins with proper preparation. Skipping these preliminary steps can lead to unnecessary complications and frustration.
Identifying Your NVIDIA GPU Model
The first and most critical step is to accurately identify your specific NVIDIA GPU model. Installing the wrong driver can cause system instability or simply fail to install.
- For Windows users:
- Device Manager: Press
Win + Xand select “Device Manager.” Expand “Display adapters” to see your GPU model. - NVIDIA Control Panel: Right-click on your desktop and select “NVIDIA Control Panel.” In the bottom left, click “System Information” to find details about your GPU.
- DirectX Diagnostic Tool: Press
Win + R, typedxdiag, and press Enter. Go to the “Display” tab to see your graphics card information.
- Device Manager: Press
- For Linux users: Use commands like
lspci -k | grep -EA3 'VGA|3D|Display'ornvidia-smi(if drivers are already installed) to identify your card.
Knowing the exact model (e.g., GeForce RTX 3070, GTX 1660 Super, Quadro P5000) is essential for downloading the correct driver package.
Checking Your Operating System Version
NVIDIA drivers are OS-specific. You need to know not only your operating system (Windows 10, Windows 11, various Linux distributions) but also its architecture (64-bit).
- For Windows: Press
Win + R, typewinver, and press Enter for the Windows version. For system type (64-bit), right-click “This PC” or “My Computer,” select “Properties,” and look under “System type.” - For Linux: Use
lsb_release -aorcat /etc/os-releaseto find your distribution and version.uname -mwill show your architecture (e.g., x86_64 for 64-bit).
This information is crucial when navigating NVIDIA’s driver download page.
Backing Up Your System (Optional, but Recommended)
While driver installations are generally straightforward, there’s always a slight risk of unforeseen issues. Creating a system restore point or a full system backup before a major driver update can be a lifesaver. If something goes wrong, you can easily revert to a previous working state, minimizing downtime and data loss. For Windows, search for “Create a restore point” in the Start menu.
Uninstalling Previous Drivers (Clean Installation Best Practices)
For a truly clean and problem-free installation, it’s often best practice to completely uninstall any previous NVIDIA drivers. This prevents conflicts between old and new driver files.
- Using NVIDIA GeForce Experience (if installed): Go to the “Drivers” tab, click the three dots, and select “Reinstall driver” then “Custom Installation” and check “Perform a clean installation.”
- Manual Uninstallation (Windows):
- Go to
Settings > Apps > Apps & features. - Find all NVIDIA software (Graphics Driver, GeForce Experience, PhysX, etc.).
- Uninstall them one by one, starting with the graphics driver.
- Restart your computer.
- Go to
- Using Display Driver Uninstaller (DDU): This third-party tool is highly recommended for a thorough clean-up. Boot into Windows Safe Mode, run DDU, select NVIDIA, and perform a “Clean and restart” operation. DDU removes all traces of previous drivers, ensuring a pristine environment for the new installation.
Step-by-Step Installation Methods
With your system prepared, you can proceed with the actual driver installation using one of the following methods.
Method 1: Using NVIDIA GeForce Experience (Recommended for Gamers/Consumers)
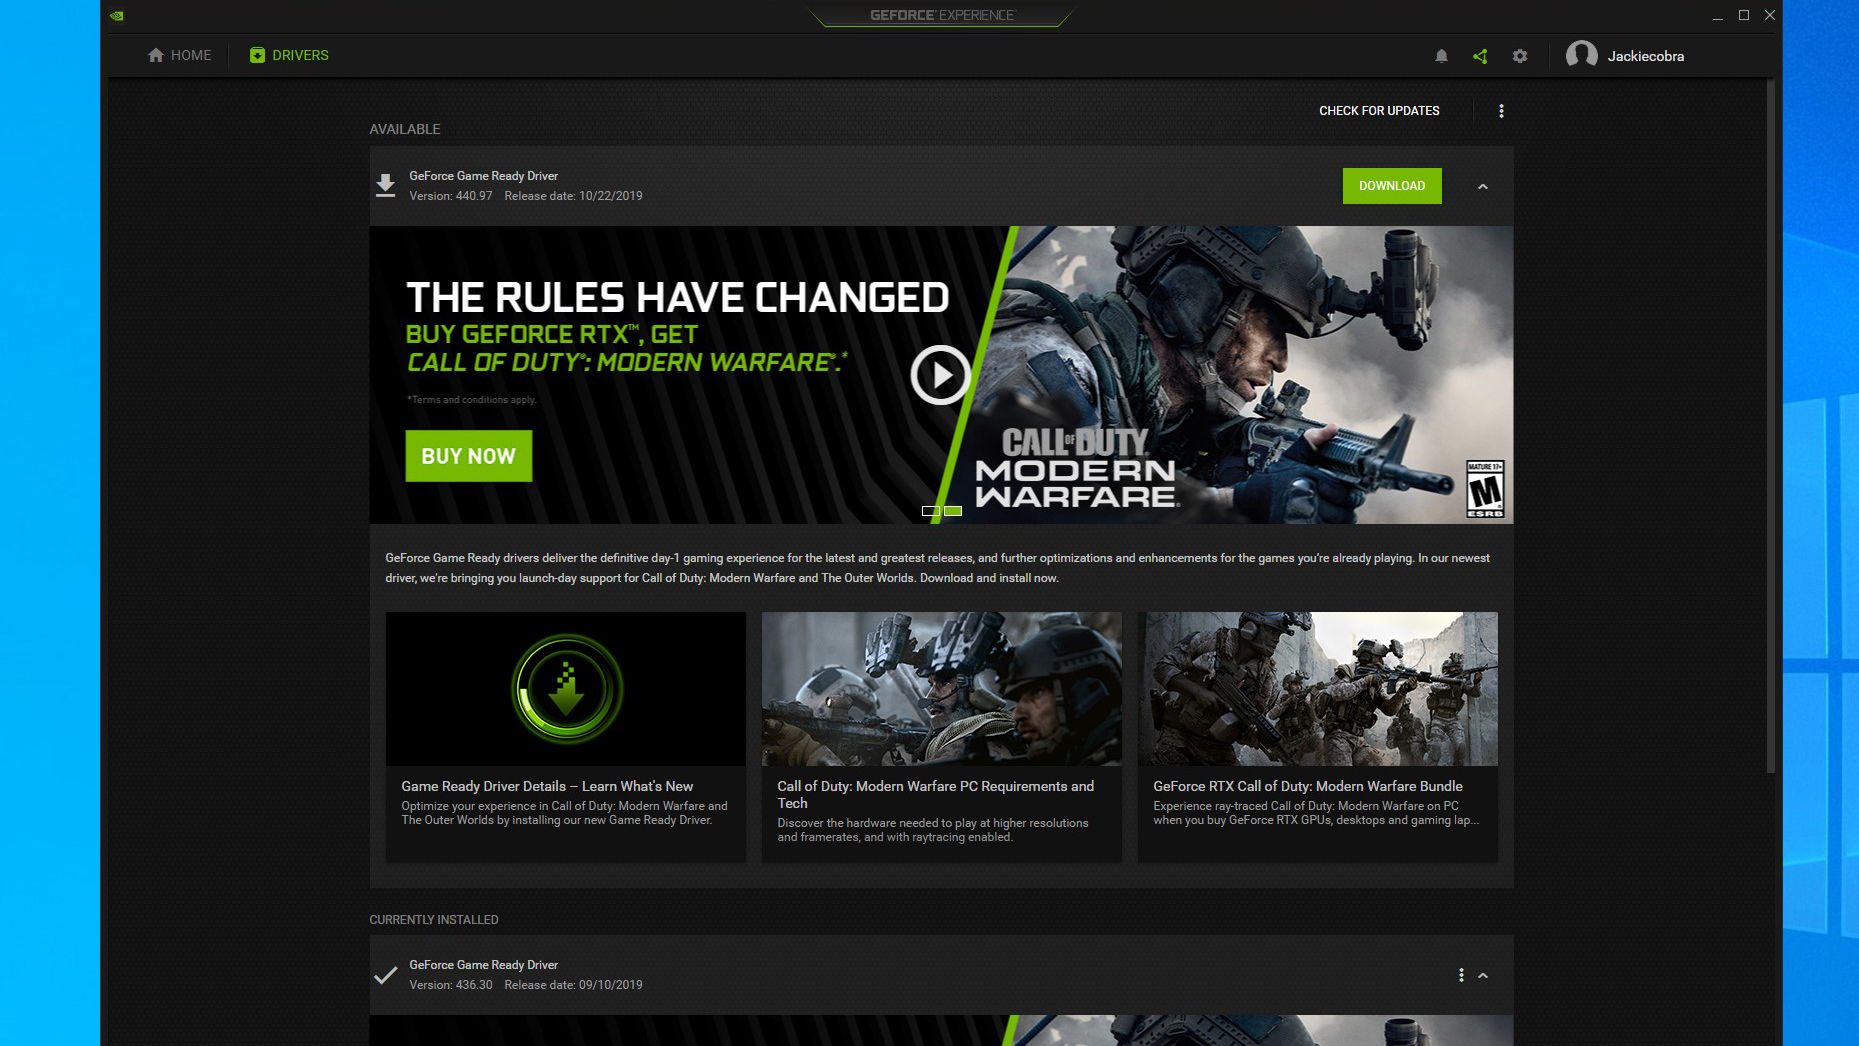
NVIDIA GeForce Experience is a companion application designed to optimize game settings, record gameplay, and simplify driver updates. It’s the most user-friendly method for many.
Installation via GeForce Experience
- Open GeForce Experience: If you don’t have it, download and install it from NVIDIA’s official website.
- Navigate to Drivers Tab: Once open, click on the “Drivers” tab at the top left.
- Check for Updates: GeForce Experience will automatically check for new drivers. If an update is available, you’ll see a notification.
- Download and Install: Click “Download” next to the available driver.
- Express vs. Custom Installation:
- Express Installation (Recommended): This option automatically installs all components with default settings.
- Custom Installation: Allows you to choose which components to install (e.g., driver, PhysX, HD Audio Driver) and offers the crucial “Perform a clean installation” checkbox. This is generally preferred for optimal results.
- Follow Prompts: The installer will guide you through the rest of the process. Your screen may flicker or go black momentarily during installation.
- Restart (if prompted): After installation, a restart is often recommended or required to finalize the changes.
Method 2: Manual Download from NVIDIA’s Official Website (For All Users)
This method provides more control and is ideal if you prefer not to use GeForce Experience or are troubleshooting specific issues.
Navigating the NVIDIA Driver Download Page
- Visit NVIDIA’s Driver Download Page: Go to
www.nvidia.com/drivers. - Use the Manual Driver Search:
- Product Type: Select your GPU series (e.g., GeForce, Quadro, NVS).
- Product Series: Choose the specific series (e.g., GeForce RTX 30 Series, GeForce GTX 16 Series).
- Product: Select your exact GPU model (e.g., RTX 3070, GTX 1660 Super).
- Operating System: Choose your OS (e.g., Windows 10 64-bit, Linux 64-bit).
- Download Type: Select “Game Ready Driver (GRD)” for gaming and general use, or “Studio Driver (SD)” for creative applications (check NVIDIA’s recommendations for your workflow).
- Language: Select your preferred language.
- Search and Download: Click “Search,” then “Download” on the result page. Save the executable file to a known location.
Performing the Installation
- Run the Installer: Double-click the downloaded
.exefile. - Extraction Path: The installer will prompt you to choose an extraction path. The default is usually fine.
- License Agreement: Accept the NVIDIA Software License Agreement.
- Installation Options:
- Express (Recommended): Installs all components with default settings.
- Custom (Advanced): Allows you to select components. Crucially, this is where you can select “Perform a clean installation,” which is highly recommended.
- Complete Installation: Follow the on-screen prompts. Your screen may flicker or go black.
- Restart: Restart your computer when prompted to ensure the new drivers are fully loaded.
Method 3: Via Your Operating System’s Update Utility (Windows Update / Linux Package Manager)
While less common for obtaining the absolute latest drivers, your OS can sometimes provide basic or stable versions.
Windows Update Driver Installation
Windows Update can occasionally provide NVIDIA drivers. These are often not the very latest “Game Ready” drivers but are stable, WHQL-certified versions.
- Go to Settings:
Settings > Update & Security > Windows Update(Windows 10) orSettings > Windows Update > Advanced options > Optional updates(Windows 11). - Check for Updates: If an NVIDIA driver is available, it might appear under “Optional updates” or be installed automatically.
- Install: Allow Windows to download and install the driver. This method rarely offers a “clean installation” option.
Linux: Using Distribution-Specific Tools (e.g., Ubuntu’s “Additional Drivers”)
For many Linux distributions, especially user-friendly ones like Ubuntu, there are built-in tools to manage proprietary drivers.
- Open Software & Updates: Search for “Software & Updates” in your application launcher.
- Navigate to Additional Drivers: Go to the “Additional Drivers” tab.
- Select NVIDIA Driver: The system will scan for available proprietary drivers for your hardware. Select the latest recommended NVIDIA driver (often listed with “(proprietary, tested)”).
- Apply Changes: Click “Apply Changes” and authenticate with your password.
- Restart: Restart your system for the new drivers to take effect.
For other Linux distributions, manual installation from NVIDIA’s.runfile is also an option, but it’s more complex and generally recommended for experienced users as it involves command-line operations and potential kernel module compilation.
Troubleshooting Common Installation Issues
Even with careful preparation, issues can sometimes arise. Here are solutions to common problems.
Driver Installation Failed Error
- Clean Installation: The most common cause is remnants of old drivers. Use DDU in Safe Mode (as described in “Uninstalling Previous Drivers”) to thoroughly clean your system, then try a manual installation.
- Administrator Privileges: Ensure you are running the installer with administrator rights.
- Antivirus/Firewall: Temporarily disable your antivirus software or firewall, as they can sometimes interfere with the installation process.
- Corrupt Download: Re-download the driver package from NVIDIA’s official website.
- System Specifications: Double-check that you selected the correct driver for your exact GPU model and OS version.
Black Screen After Installation
- Wait a Moment: Sometimes the screen goes black temporarily during installation. Give it a few minutes.
- Force Restart: If it persists, try a hard restart (hold down the power button).
- Boot into Safe Mode: If you can’t see anything, boot into Windows Safe Mode (press F8 or Shift+F8 repeatedly during startup, or use the recovery environment). Once in Safe Mode, you can either uninstall the problematic driver using DDU or revert to a previous driver using Device Manager.
- Integrated Graphics: If your system has integrated graphics (e.g., Intel HD Graphics), you might be able to connect your monitor to the motherboard’s video output to get a display while troubleshooting the NVIDIA card.
Performance Problems Post-Installation
- Clean Installation: If performance worsens, it’s often due to an imperfect upgrade. Perform a clean installation using DDU.
- NVIDIA Control Panel Settings: Open the NVIDIA Control Panel and check your 3D Settings. Ensure “Power management mode” is set to “Prefer maximum performance” for demanding applications.
- Game-Specific Issues: Some games might require specific settings or profiles. Check online forums or NVIDIA’s game readiness guides.
- Roll Back Driver: If a new driver causes issues, you can roll back to a previous stable version via Device Manager (
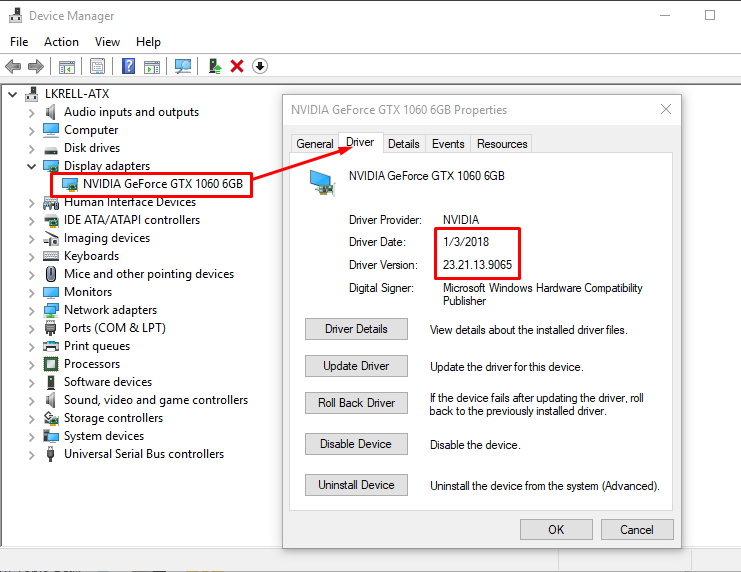
Device Manager > Display adapters > NVIDIA GPU > Properties > Driver tab > Roll Back Driver).
Driver Compatibility Issues
- Outdated OS: Ensure your operating system is fully updated. New NVIDIA drivers sometimes require specific OS patches.
- Hardware Conflicts: While rare, other hardware components or drivers could be conflicting. Check Device Manager for any yellow exclamation marks.
- BIOS/UEFI Update: In some rare cases, an outdated motherboard BIOS/UEFI can cause compatibility problems with newer drivers. Check your motherboard manufacturer’s website for updates.
Post-Installation Verification and Maintenance
Once your drivers are installed, a few final steps can ensure everything is working correctly and stays that way.
Verifying Driver Installation
- NVIDIA Control Panel: Right-click on your desktop and select “NVIDIA Control Panel.” If it opens successfully, your drivers are likely installed correctly. Check “System Information” for the driver version.
- Device Manager: Open Device Manager (Win + X), expand “Display adapters,” and check for your NVIDIA GPU. Ensure there are no error symbols. Right-click it, select “Properties,” and go to the “Driver” tab to verify the driver version and date.
- NVIDIA GeForce Experience: If using it, the “Drivers” tab should indicate that you have the latest driver installed.
Keeping Drivers Updated
Regularly check for new driver releases.
- GeForce Experience: The easiest way is to enable automatic driver update notifications within GeForce Experience.
- Manual Checks: Periodically visit NVIDIA’s driver download page or subscribe to their driver release announcements. Aim to update your drivers every few months, or whenever a new “Game Ready Driver” for a game you play is released.
Understanding Driver Types (Game Ready vs. Studio Drivers)
NVIDIA offers two primary driver branches:
- Game Ready Drivers (GRD): These are optimized for the latest games, often released in conjunction with major game launches to provide the best performance and bug fixes for those titles. Most gamers should use GRDs.
- Studio Drivers (SD): These are designed for stability and performance in creative applications like Adobe Creative Suite, Blender, DaVinci Resolve, and Autodesk products. They undergo extensive testing with these applications. If your primary use case is professional content creation, Studio Drivers are generally recommended.
You can switch between GRD and SD through GeForce Experience or by manually downloading from NVIDIA’s website. Choose the driver type that best suits your primary workload.
Properly installing and maintaining your NVIDIA drivers is fundamental to extracting the maximum performance, stability, and feature set from your graphics card. By following the comprehensive steps outlined in this guide, from meticulous preparation to careful installation and ongoing maintenance, you can ensure your NVIDIA GPU remains a powerful and reliable component of your computing experience, whether you’re conquering virtual worlds or crafting digital masterpieces.
aViewFromTheCave is a participant in the Amazon Services LLC Associates Program, an affiliate advertising program designed to provide a means for sites to earn advertising fees by advertising and linking to Amazon.com. Amazon, the Amazon logo, AmazonSupply, and the AmazonSupply logo are trademarks of Amazon.com, Inc. or its affiliates. As an Amazon Associate we earn affiliate commissions from qualifying purchases.