Creating a PayPal account establishes a critical node in an individual’s or business’s digital financial infrastructure, offering a robust platform for online transactions, peer-to-peer payments, and e-commerce functionalities. This tutorial delineates the technical process of setting up a PayPal account, emphasizing the interface navigation, security configurations, and digital integration required for effective operation within the contemporary digital ecosystem.
Navigating the Initial Setup: Choosing Your Account Type
The foundational step in establishing a PayPal presence involves selecting the appropriate account type. PayPal offers two primary classifications: Personal and Business, each tailored to distinct user requirements and operational scales. Understanding the nuanced differences between these accounts is crucial for optimizing the platform’s utility from a technical perspective.
Personal vs. Business Accounts: Key Distinctions
A Personal Account is engineered for individual use, facilitating everyday digital transactions such as sending money to friends and family, making online purchases, and receiving payments for casual services. The setup is streamlined, focusing on individual identity verification and linking to personal financial instruments. From a technical standpoint, its dashboard is designed for simplicity, providing quick access to common functionalities like payment initiation and transaction history. Security features are robust but geared towards individual protection, often relying on email and mobile phone verification.
A Business Account, conversely, is designed for merchants, freelancers, and organizations that process transactions on a larger, more structured scale. This account type unlocks advanced features such as customizable invoicing, multi-user access, integration with e-commerce platforms (APIs), and dedicated customer service channels. The technical setup for a Business Account involves more comprehensive verification processes, often requiring business registration details, tax identification numbers, and potentially multiple user roles with varying access permissions. Its interface provides sophisticated reporting tools and analytics, essential for managing digital sales and operational finances. Choosing a Business Account from the outset, even for sole proprietors, can preempt the need for a complex migration should professional needs escalate, offering a more scalable technical architecture.
Prerequisites for Account Creation
Before initiating the registration process, ensure you have the following digital and physical assets ready to streamline the technical onboarding:
- Valid Email Address: This serves as your primary identifier and communication channel. It must be actively monitored and secure.
- Mobile Phone Number: Essential for security verification, particularly for two-factor authentication (2FA) and password recovery.
- Identification Document: A government-issued photo ID (e.g., driver’s license, passport) is often required for identity verification, especially to lift sending/receiving limits or to link bank accounts.
- Financial Instrument Details: This includes bank account routing and account numbers, or debit/credit card information, necessary for funding your PayPal account and withdrawing funds.
- Secure Internet Connection: Protects your data during the registration process from potential interception.
- Updated Web Browser or PayPal App: Using the latest version ensures compatibility and leverages the most recent security protocols.
Having these prerequisites at hand significantly reduces friction during the technical verification steps, enabling a smoother and faster account activation.
The Step-by-Step Technical Onboarding Process
The actual creation of a PayPal account involves a methodical sequence of data entry, verification, and integration steps. Each stage is designed to establish your digital identity within the PayPal system and link it securely to your financial ecosystem.
Data Entry and Verification: Securing Your Digital Identity
- Initiate Registration: Navigate to the official PayPal website or download the PayPal mobile application. Select “Sign Up” or “Open an Account.”
- Choose Account Type: As discussed, select either “Personal Account” or “Business Account.”
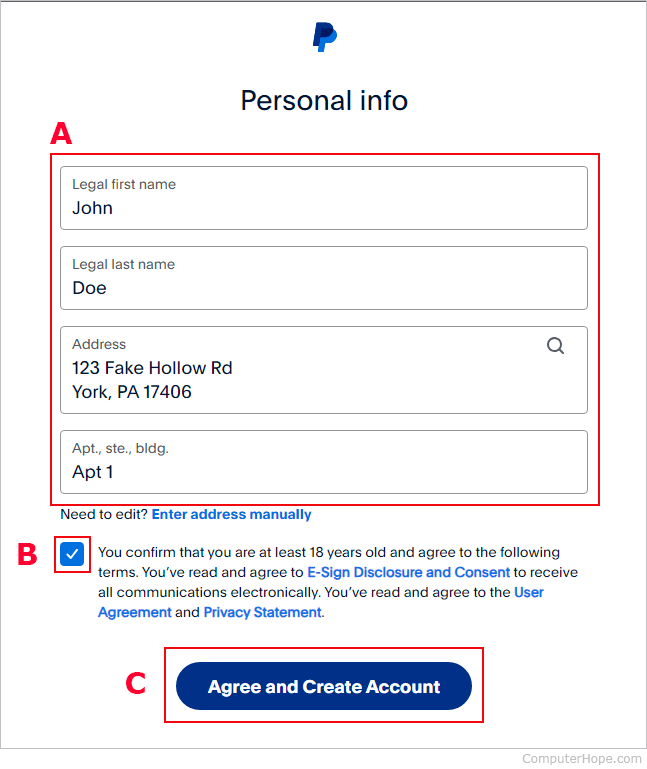
- Provide Personal Information:
- Personal Accounts: You will be prompted for your country/region, mobile phone number, first name, last name, email address, and to create a strong password. The system will send a verification code to your mobile number to confirm ownership.
- Business Accounts: In addition to personal details for the primary account holder, you’ll need to input business-specific information such as the business name, type, and potentially a business phone number and address.
- Confirm Identity: PayPal employs various methods to verify user identity, critical for digital security and compliance with financial regulations. This may involve:
- Email Verification: Clicking a link sent to your registered email address.
- SMS Verification: Entering a code sent to your mobile phone.
- Document Upload: For higher transaction limits or business accounts, you might be required to upload scans of your government-issued ID, proof of address, or business registration documents. This process often involves secure file upload interfaces and takes a short period for digital review.
Linking Financial Instruments: Integrating Your Digital Wallet
Once your primary account details are verified, the next crucial step is to integrate your PayPal digital wallet with your existing financial infrastructure.
- Link a Bank Account:
- Navigate to the “Wallet” or “Bank Accounts and Cards” section within your PayPal dashboard.
- Select “Link a Bank Account.”
- You will typically be offered two methods:
- Instant Verification (Recommended): Log in directly to your online banking portal through PayPal’s secure interface. This method is fast and establishes a verified link almost immediately. PayPal uses encrypted connections to protect your banking credentials during this process.
- Manual Verification: Enter your bank’s routing number and your account number manually. PayPal will then send two small deposits (micro-deposits) to your bank account, usually within 2-3 business days. You will need to return to your PayPal account and enter the exact amounts of these deposits to confirm ownership. This technically verifies the account.
- Link a Debit or Credit Card:
- From the “Wallet” section, choose “Link a Card.”
- Enter your card number, expiration date, and the 3 or 4-digit security code (CVV/CVC).
- PayPal may perform a temporary authorization charge (e.g., $1.00-$1.95) to verify the card. This charge is typically reversed within minutes or days. Some cards may also require a further verification code that appears on your bank statement alongside this temporary charge.
These linked instruments serve as funding sources for your PayPal transactions and destinations for withdrawing funds, effectively extending your digital wallet’s capabilities.
Setting Up Security Features: Protecting Your Digital Assets
Upon linking financial instruments, immediately configure PayPal’s built-in security features to fortify your account against unauthorized access.
- Enable Two-Factor Authentication (2FA):
- Go to “Settings” -> “Security” -> “Two-Factor Authentication.”
- Choose your preferred 2FA method:
- Authenticator App: Use an app like Google Authenticator or Authy to generate time-based one-time passwords (TOTP). This is generally considered the most secure method.
- Text Message (SMS): Receive a code via SMS to your registered mobile number. While convenient, it’s slightly less secure than an authenticator app.
- Follow the on-screen prompts to link your device or app. This adds an essential layer of security, requiring a second verification factor beyond your password.
- Review Security Questions: Ensure your security questions and answers are robust and memorable, yet not easily guessable by others. These are crucial for account recovery scenarios.
- Set Up PIN/Fingerprint/Face ID (Mobile App): For enhanced convenience and security on mobile devices, configure biometric authentication or a PIN to quickly access your PayPal app without repeatedly entering your password.
Post-Creation Configuration and Digital Wallet Management

With your PayPal account successfully created and secured, the focus shifts to optimizing its utility through configuration and ongoing management within its digital interface.
Exploring the Dashboard Interface
The PayPal dashboard is your central command for managing all digital transactions and account settings. Familiarize yourself with its layout:
- Summary: Provides an overview of your recent activity, available balance, and quick links to common actions.
- Send & Request: Dedicated sections for initiating payments or requesting funds from others.
- Wallet: Manages all linked bank accounts, debit/credit cards, and cryptocurrency holdings (if applicable). This is where you can add new instruments or update existing ones.
- Activity: A detailed ledger of all incoming and outgoing transactions, including filters and search functionalities for forensic review.
- Settings (Gear Icon): Access to personal profile updates, security settings, notification preferences, and business tools.
A thorough understanding of the dashboard enables efficient navigation and utilization of PayPal’s features.
Customizing Notification Settings for Optimal User Experience
PayPal offers extensive control over the notifications you receive, which is vital for monitoring account activity and enhancing digital security.
- Access Notification Preferences: Navigate to “Settings” -> “Notifications.”
- Configure Alerts: You can customize alerts for various events, including:
- Payments received/sent
- Refunds
- Account activity (e.g., suspicious logins)
- Promotional offers
- Choose Delivery Methods: Select whether to receive notifications via email, SMS, or push notifications through the mobile app. It is highly recommended to enable notifications for all financial transactions and security alerts to maintain real-time awareness of your account’s digital state.
Understanding Transaction Logs and Digital Receipts
Every transaction processed through PayPal generates a digital record. The “Activity” section serves as a comprehensive transaction log, detailing dates, amounts, recipients/senders, and transaction IDs. Each entry functions as a digital receipt, critical for:
- Reconciliation: Matching PayPal activity with bank statements or accounting software.
- Dispute Resolution: Providing evidence in case of a payment dispute or unauthorized transaction.
- Auditing: For business accounts, these logs are indispensable for financial audits and tax preparation.
Regularly reviewing your transaction logs ensures accuracy and helps identify any discrepancies promptly.
Best Practices for Digital Security and Account Maintenance
Maintaining the security of your PayPal account is an ongoing responsibility that transcends the initial setup. Proactive measures are essential to safeguard your digital assets and financial information.
Implementing Two-Factor Authentication (2FA)
As previously mentioned, 2FA is a non-negotiable security layer. It prevents unauthorized access even if your password is compromised. Always ensure it is active, and consider using an authenticator app for superior protection compared to SMS-based 2FA. Regularly review your 2FA setup to ensure linked devices or apps are current and secure.
Recognizing Phishing Attempts and Data Protection Strategies
Phishing remains a pervasive threat. Be vigilant for emails or messages that:
- Request personal information: PayPal will never ask for your password, bank details, or credit card number via email.
- Contain suspicious links: Always hover over links to check their destination URL before clicking. Ensure it directs to
paypal.com. - Have poor grammar or unusual sender addresses: These are common red flags.
- Create a sense of urgency: Scammers often try to rush you into making a mistake.
If you suspect a phishing attempt, do not engage. Forward the email to phishing@paypal.com and then delete it. Always access your PayPal account by typing www.paypal.com directly into your browser or using the official mobile app.

Regular Password Management and Account Reviews
- Strong, Unique Passwords: Use a complex password unique to your PayPal account, combining uppercase and lowercase letters, numbers, and symbols. Avoid using easily guessable information.
- Password Managers: Employ a reputable password manager to generate and store strong, unique passwords for all your online accounts, including PayPal.
- Periodic Password Changes: While 2FA significantly mitigates risks, changing your password periodically adds an extra layer of defense.
- Regular Account Audits: Periodically log into your PayPal account to review your “Activity” log, linked financial instruments, and security settings. Confirm all transactions are legitimate and that no unauthorized changes have been made to your profile or settings.
By diligently following these technical setup and maintenance guidelines, you can effectively create and secure your PayPal account, transforming it into a reliable digital tool for managing your online financial interactions.
aViewFromTheCave is a participant in the Amazon Services LLC Associates Program, an affiliate advertising program designed to provide a means for sites to earn advertising fees by advertising and linking to Amazon.com. Amazon, the Amazon logo, AmazonSupply, and the AmazonSupply logo are trademarks of Amazon.com, Inc. or its affiliates. As an Amazon Associate we earn affiliate commissions from qualifying purchases.