
Keeping your NVIDIA GPU drivers current is a foundational practice for anyone using an NVIDIA graphics card, whether for high-fidelity gaming, professional content creation, or everyday computing. Drivers are the essential software layer that allows your operating system and applications to communicate effectively with your graphics hardware. Over time, these drivers receive updates that bring a host of improvements, from performance boosts to crucial security fixes. Neglecting driver updates can lead to a myriad of issues, including reduced frame rates, software crashes, compatibility problems, and even potential security vulnerabilities. This guide delves into the significance of driver updates and provides a comprehensive, step-by-step approach to ensure your NVIDIA GPU is always performing at its peak.
The Critical Importance of Keeping Your Drivers Current
Updating your NVIDIA GPU drivers is not merely a suggestion; it’s a critical maintenance task that directly impacts the performance, stability, and security of your system. Understanding the benefits underscores why this routine should be a priority.
Enhanced Performance and Stability
One of the most immediate and tangible benefits of updating your drivers is the significant boost in performance. NVIDIA frequently releases optimizations specifically tailored for new game titles or demanding professional applications. These updates can translate into higher frame rates, smoother gameplay, and faster rendering times. Beyond performance, updated drivers often contain stability improvements, addressing bugs and glitches that could lead to application crashes, system freezes, or other unpredictable behavior, ensuring a more reliable computing experience.
Access to New Features and Optimizations
NVIDIA consistently innovates, introducing new features and technologies through its driver updates. This could include support for advanced rendering techniques like DLSS (Deep Learning Super Sampling) and Ray Tracing, or enhancements for specific software functionalities. Without the latest drivers, you might miss out on these cutting-edge capabilities, leaving your hardware underutilized and your experience suboptimal compared to what your GPU is truly capable of.
Crucial Security Patches
Like any software, drivers can have vulnerabilities that malicious actors might exploit. NVIDIA regularly identifies and patches these security flaws. Running outdated drivers leaves your system susceptible to potential exploits, compromising your digital security. Keeping drivers up-to-date is a fundamental aspect of maintaining a secure computing environment, protecting your data and privacy from emerging threats.
Resolving Common Issues and Bugs
Many common display issues, graphical artifacts, or application-specific errors can often be resolved simply by updating your GPU drivers. If you encounter strange graphical behavior, unexplained crashes in games or design software, or compatibility problems with new applications, the first troubleshooting step should almost always be a driver update. Developers frequently release fixes for these known issues in subsequent driver versions.
Understanding NVIDIA’s Driver Ecosystem
Before initiating an update, it’s beneficial to understand the different types of drivers NVIDIA offers and how to identify your current system configuration.
Game Ready Drivers (GRD) vs. Studio Drivers (SD)
NVIDIA provides two primary driver branches tailored to different user needs:
- Game Ready Drivers (GRD): These are the most common drivers, optimized for the latest game releases. They undergo extensive testing with upcoming titles to ensure the best possible day-one gaming experience, often including performance optimizations and bug fixes specific to new games. If you’re primarily a gamer, GRDs are your go-to.
- Studio Drivers (SD): Designed for content creators, designers, and developers, Studio Drivers prioritize stability and performance in professional applications like Adobe Creative Suite, Blender, DaVinci Resolve, and Autodesk products. They are rigorously tested with these specific applications to ensure maximum reliability and feature support. If your GPU is primarily used for creative work, Studio Drivers are recommended.
You can usually switch between these driver types via the NVIDIA GeForce Experience software or by selecting the desired driver type on NVIDIA’s website.
Checking Your Current Driver Version and GPU Model
Knowing your current driver version and GPU model is essential for a targeted and correct update.
- Open NVIDIA Control Panel: Right-click on your desktop and select “NVIDIA Control Panel.”
- Access System Information: In the bottom-left corner of the NVIDIA Control Panel, click “System Information.”
- Identify Details: A window will appear displaying your graphics card model, driver version, and other system specifications. Note these down, especially your GPU model (e.g., GeForce RTX 3080) and your operating system (e.g., Windows 10 64-bit).
Methods for Updating Your NVIDIA GPU Drivers
There are several reliable ways to update your NVIDIA GPU drivers. Each method has its advantages, catering to different user preferences and scenarios.
Method 1: NVIDIA GeForce Experience (Recommended for Gamers)
NVIDIA GeForce Experience is a comprehensive application that not only helps optimize game settings but also provides a streamlined process for driver management.
Installation and Setup
If you don’t already have it, download and install GeForce Experience from NVIDIA’s official website. During installation, you’ll likely be prompted to log in or create an NVIDIA account. This software is generally installed by default with your initial driver installation.
Driver Download and Installation Process
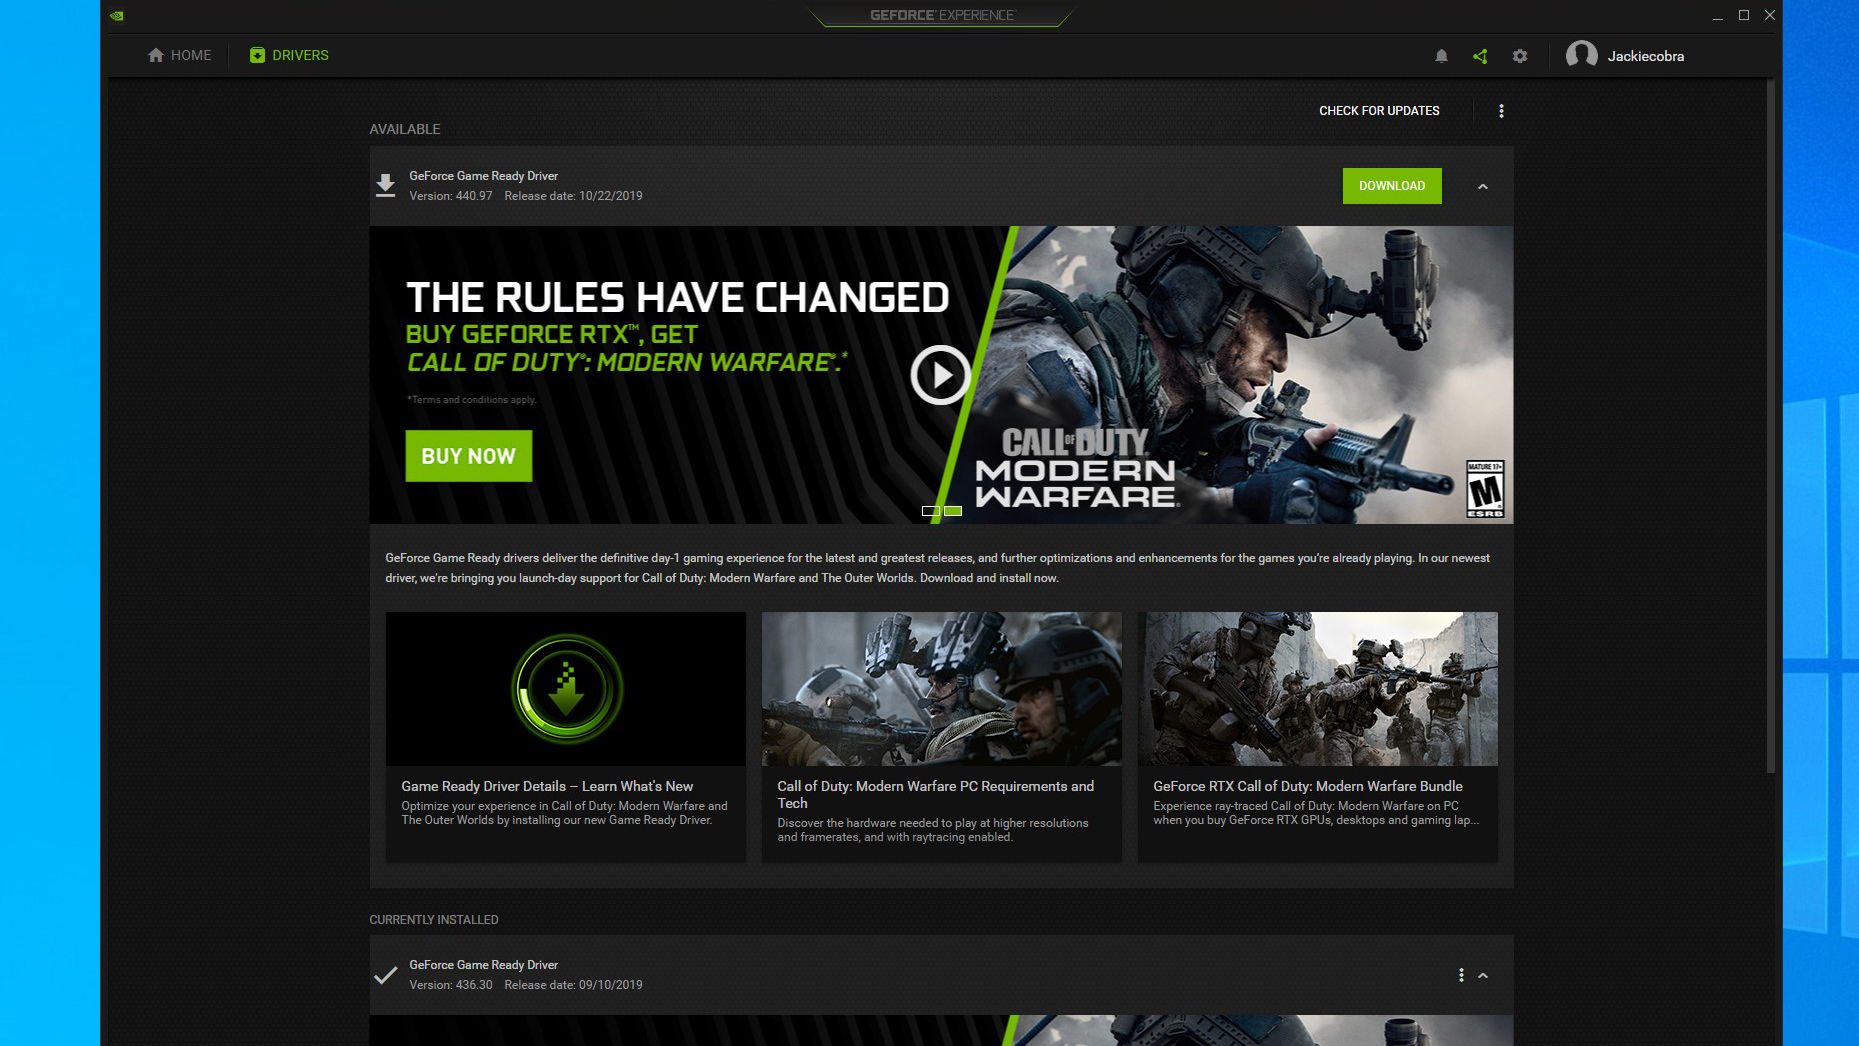
- Launch GeForce Experience: Open the application.
- Navigate to Drivers Tab: Click on the “Drivers” tab located in the top-left menu.
- Check for Updates: GeForce Experience automatically checks for new driver versions. If an update is available, you will see a notification and the option to “Download.”
- Download the Driver: Click “Download” and wait for the driver package to be retrieved.
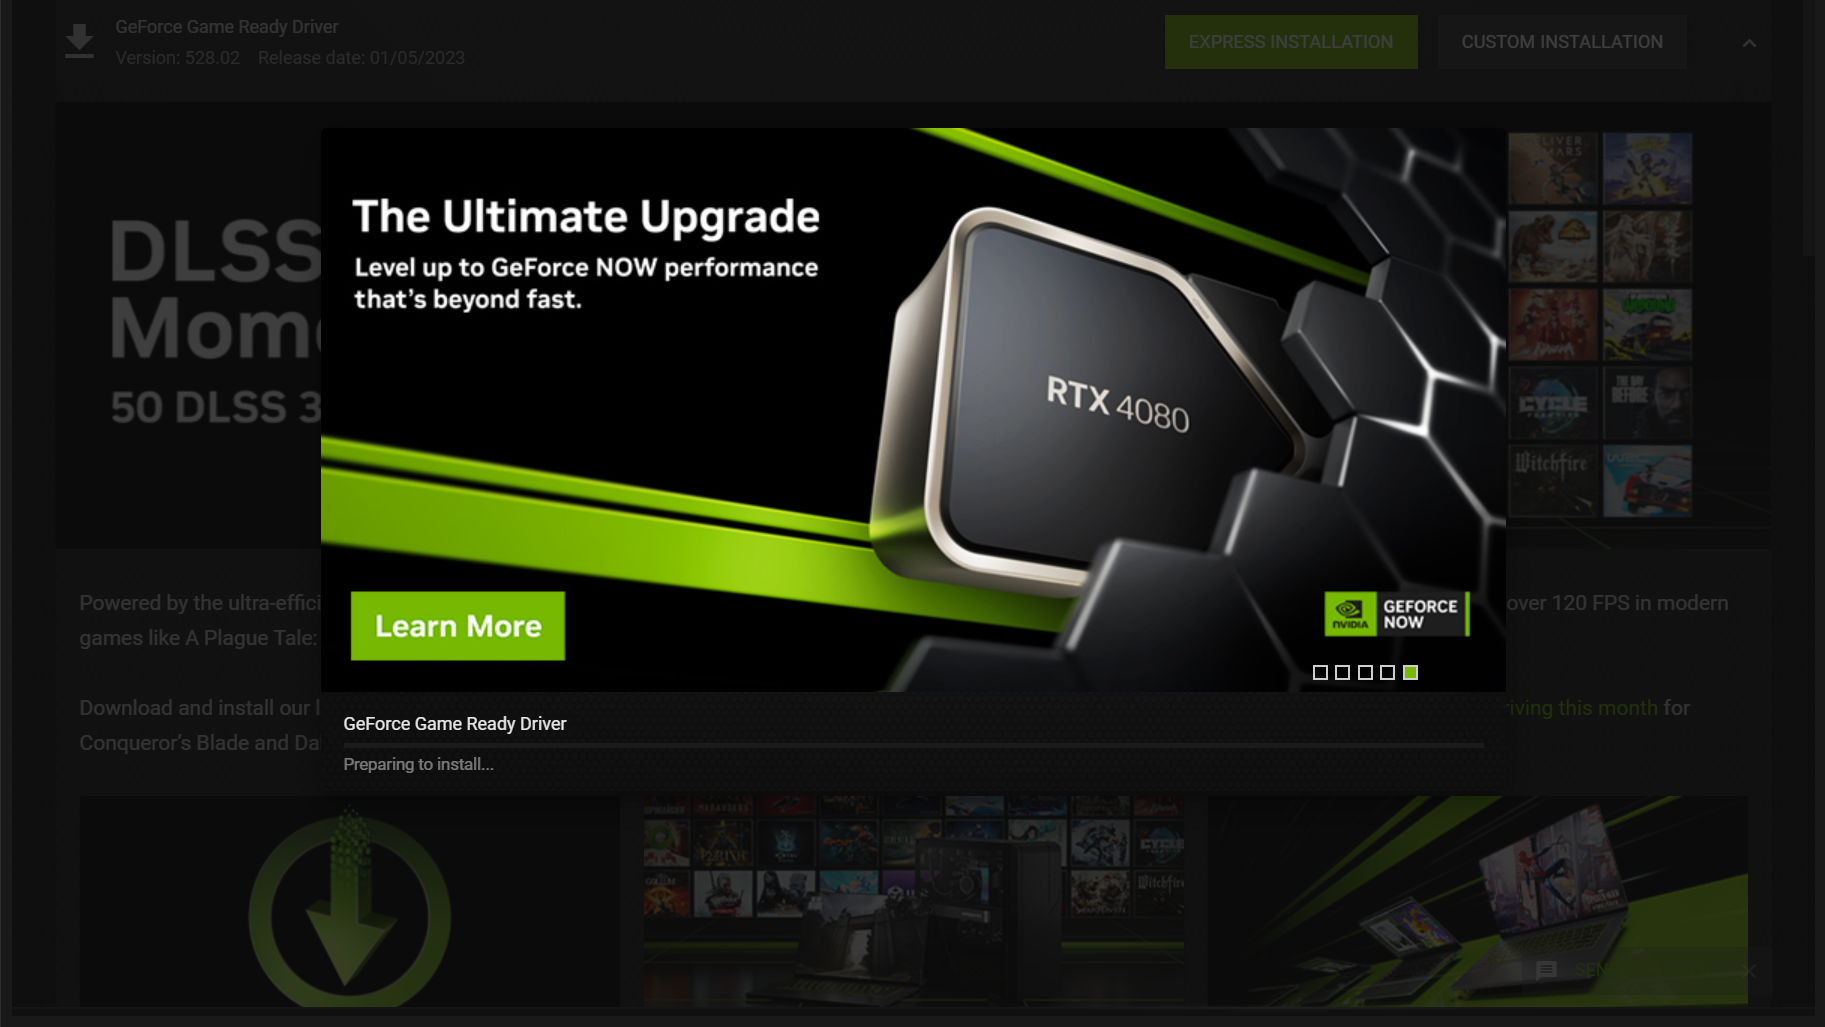
- Initiate Installation: Once downloaded, you will be presented with two installation options: “Express Installation” and “Custom Installation.”
Express vs. Custom Installation
- Express Installation: This is the quickest and simplest method. GeForce Experience will automatically install all components, including the graphics driver, NVIDIA HD Audio Driver, PhysX System Software, and GeForce Experience itself, using default settings. It’s suitable for most users who want a hassle-free update.
- Custom Installation: This option gives you more control. You can select which components to install (e.g., you might opt out of installing the HD Audio Driver if you use a separate sound card). Crucially, Custom Installation also offers a “Perform a clean installation” checkbox. This option uninstalls all previous NVIDIA drivers and associated files before installing the new ones, which is highly recommended for troubleshooting or ensuring optimal performance by removing any potential conflicts from old driver remnants. For most updates, a clean installation is a wise choice.
Method 2: Manual Download from NVIDIA’s Website (Recommended for Studio Users or Troubleshooting)
Manually downloading drivers from NVIDIA’s website offers precise control and is particularly useful for Studio Driver users, those troubleshooting issues, or users who prefer not to use GeForce Experience.
Identifying Your GPU and OS
Before visiting the download page, ensure you know your NVIDIA GPU model and your operating system (e.g., Windows 11 64-bit). You can find this information via the NVIDIA Control Panel’s System Information (as described earlier) or by checking your system’s “About” settings in Windows.
Navigating the NVIDIA Driver Download Page
- Visit NVIDIA’s Official Driver Page: Open your web browser and go to
www.nvidia.com/drivers. - Use the Manual Driver Search: You will see a series of drop-down menus.
- Product Type: Select “GeForce” (for consumer GPUs) or “Quadro/NVIDIA RTX” (for professional GPUs).
- Product Series: Choose your specific GPU series (e.g., GeForce RTX 40 Series, GeForce GTX 16 Series).
- Product: Select your exact GPU model (e.g., RTX 4080, GTX 1660 SUPER).
- Operating System: Choose your Windows version and architecture (e.g., Windows 10 64-bit, Windows 11 64-bit).
- Download Type: Here, you can select “Game Ready Driver (GRD)” or “Studio Driver (SD).”
- Language: Select your preferred language.
- Search and Download: Click “Search.” The website will present the latest compatible driver. Click “Download” and then “Download” again on the next page to start the download.
Executing the Installer
- Run the Installer: Once the driver package is downloaded, locate the
.exefile and double-click it to run. - Extraction Path: The installer will first ask where to extract the files. The default location is usually fine. Click “OK.”
- License Agreement: Read and accept the NVIDIA software license agreement.
- Installation Options: Similar to GeForce Experience, you will be offered “Express” and “Custom” installation options. For a thorough update, especially if you’ve experienced issues, choose “Custom” and select the “Perform a clean installation” checkbox. This ensures all old driver components are removed before the new ones are installed.
- Follow Prompts: Proceed with the installation. Your screen might flicker or go black momentarily during the process; this is normal as the display driver is updated.
- Restart: Once the installation is complete, it’s highly recommended to restart your computer to ensure all changes take effect.
Method 3: Through Windows Device Manager (Least Recommended for GPU Drivers)
While Windows Device Manager offers an option to update drivers, it is generally the least recommended method for GPU drivers. This is because Device Manager often fetches generic drivers or older, less optimized versions from Microsoft’s update catalog, rather than the latest, performance-tuned drivers directly from NVIDIA.
Steps to Update via Device Manager
- Open Device Manager: Right-click the Start button and select “Device Manager.”
- Locate Display Adapters: Expand the “Display adapters” section.
- Right-click on NVIDIA GPU: Right-click on your NVIDIA graphics card entry.
- Update Driver: Select “Update driver.”
- Search Automatically: Choose “Search automatically for updated driver software.” Windows will then attempt to find and install a driver.
Limitations of this Method
This method is primarily useful for initial driver installation on a fresh OS install or for very basic troubleshooting. It rarely provides the specialized Game Ready or Studio Drivers with their full suite of optimizations and features. For optimal performance and access to the latest capabilities, always prefer GeForce Experience or manual downloads from NVIDIA’s website.
Best Practices and Troubleshooting Tips
Maintaining your GPU drivers goes beyond just clicking “update.” Adhering to best practices and knowing how to troubleshoot common issues will save you time and ensure a smoother experience.
Clean Installation for Optimal Results
As mentioned, a “clean installation” removes all previous driver files, registry entries, and user profiles before installing the new driver. This is crucial for preventing conflicts, corruption, or performance issues that can arise from remnants of older driver versions. Always consider performing a clean installation, especially if you’re experiencing problems or updating after a long period. Both GeForce Experience (via Custom Install) and the manual installer offer this option.
Driver Rollback Options
If a new driver update causes unexpected issues (e.g., crashes, performance drops), Windows provides a way to revert to a previous driver version.
- Open Device Manager: Right-click the Start button and select “Device Manager.”
- Locate Display Adapters: Expand “Display adapters.”
- Right-click on NVIDIA GPU: Right-click your NVIDIA graphics card.
- Properties: Select “Properties.”
- Driver Tab: Go to the “Driver” tab.
- Roll Back Driver: If available, click “Roll Back Driver.” Follow the prompts. This option is only available if a previous driver version is stored on your system.
Alternatively, you can manually download and install an older, known-stable driver version from NVIDIA’s website if the rollback option isn’t available or doesn’t resolve the issue.
Common Issues and Solutions
- Driver Installation Failed: This can occur due to various reasons.
- Temporarily disable antivirus software: Sometimes, security software can interfere with the installation. Remember to re-enable it afterwards.
- Run installer as administrator: Right-click the installer executable and select “Run as administrator.”
- Clear temporary files: Use Disk Cleanup or a similar tool to clear temporary system files.
- Use DDU (Display Driver Uninstaller): For persistent issues, use a third-party tool like Display Driver Uninstaller (DDU) in Windows Safe Mode to completely remove all traces of NVIDIA drivers before attempting a clean install of the new driver. This is a powerful troubleshooting step but should be used with caution.
- Black Screen After Update: If your screen goes black and doesn’t recover after a driver update:
- Wait: Sometimes it just takes a few minutes longer than expected.
- Hard Restart: If it persists, perform a hard shutdown (hold power button) and restart your PC. Windows might revert to a basic driver, allowing you to troubleshoot.
- Boot into Safe Mode: If necessary, boot into Windows Safe Mode (search online for how to do this for your Windows version), then use DDU to uninstall drivers and try a fresh install.
Regular Maintenance Schedule
While there’s no strict rule for how often to update, a good practice is to check for updates:
- Before playing a new major game title: Especially if it’s a graphically demanding AAA release, a Game Ready Driver is likely available.
- Monthly: A general check once a month ensures you’re benefiting from ongoing optimizations and security patches without constantly interrupting your workflow.
- If experiencing issues: As a first troubleshooting step for any graphics-related problems.
By understanding these methods and best practices, you can confidently manage your NVIDIA GPU drivers, ensuring your system remains performant, stable, and secure for all your computing needs.
aViewFromTheCave is a participant in the Amazon Services LLC Associates Program, an affiliate advertising program designed to provide a means for sites to earn advertising fees by advertising and linking to Amazon.com. Amazon, the Amazon logo, AmazonSupply, and the AmazonSupply logo are trademarks of Amazon.com, Inc. or its affiliates. As an Amazon Associate we earn affiliate commissions from qualifying purchases.