In today’s interconnected world, the efficiency and comfort of our computing experience often hinge on the peripherals we choose. Among the most fundamental of these is the mouse, and when it comes to wireless convenience, Microsoft has long been a trusted name. Whether you’ve just acquired a brand-new wireless Microsoft mouse or are troubleshooting a connection issue, this guide will walk you through the entire process of installation and setup, ensuring you get the most out of your device. From unpacking to advanced customization, we’ll cover everything you need to know to achieve seamless wireless connectivity.

Our journey begins with the fundamental steps of preparing your mouse for use, delving into the different connection methods Microsoft employs, and then progressing to troubleshooting common issues and exploring advanced features. This guide is designed to be accessible to everyone, from novice computer users to seasoned tech enthusiasts, and is structured to logically guide you through each stage of the installation process.
Unboxing and Initial Setup: Getting Your Wireless Mouse Ready
The first step in enjoying your new wireless Microsoft mouse is to get it out of its packaging and ready for action. This seemingly simple stage is crucial for ensuring all necessary components are present and that the mouse is properly prepared for its first connection.
What’s in the Box? Essential Components
When you open the box of your new wireless Microsoft mouse, you’ll typically find a few key items. It’s always a good idea to confirm their presence before proceeding.
- The Wireless Mouse: This is, of course, the star of the show. Take a moment to examine it for any visible damage.
- USB Transceiver (Dongle): For mice that use a proprietary wireless connection, this small USB device is essential. It plugs into your computer and acts as the bridge between your mouse and your PC. Some newer Microsoft mice may utilize Bluetooth, in which case a separate dongle might not be included.
- Batteries: Most wireless mice are powered by AA or AAA batteries. Check if batteries are included in the packaging. If not, you’ll need to have them on hand.
- Documentation: This usually includes a quick start guide, warranty information, and sometimes a CD for software installation (though this is becoming less common with modern operating systems that often have drivers built-in).
Powering Up: Battery Installation and First Look
Before you can even think about connecting, your mouse needs power.
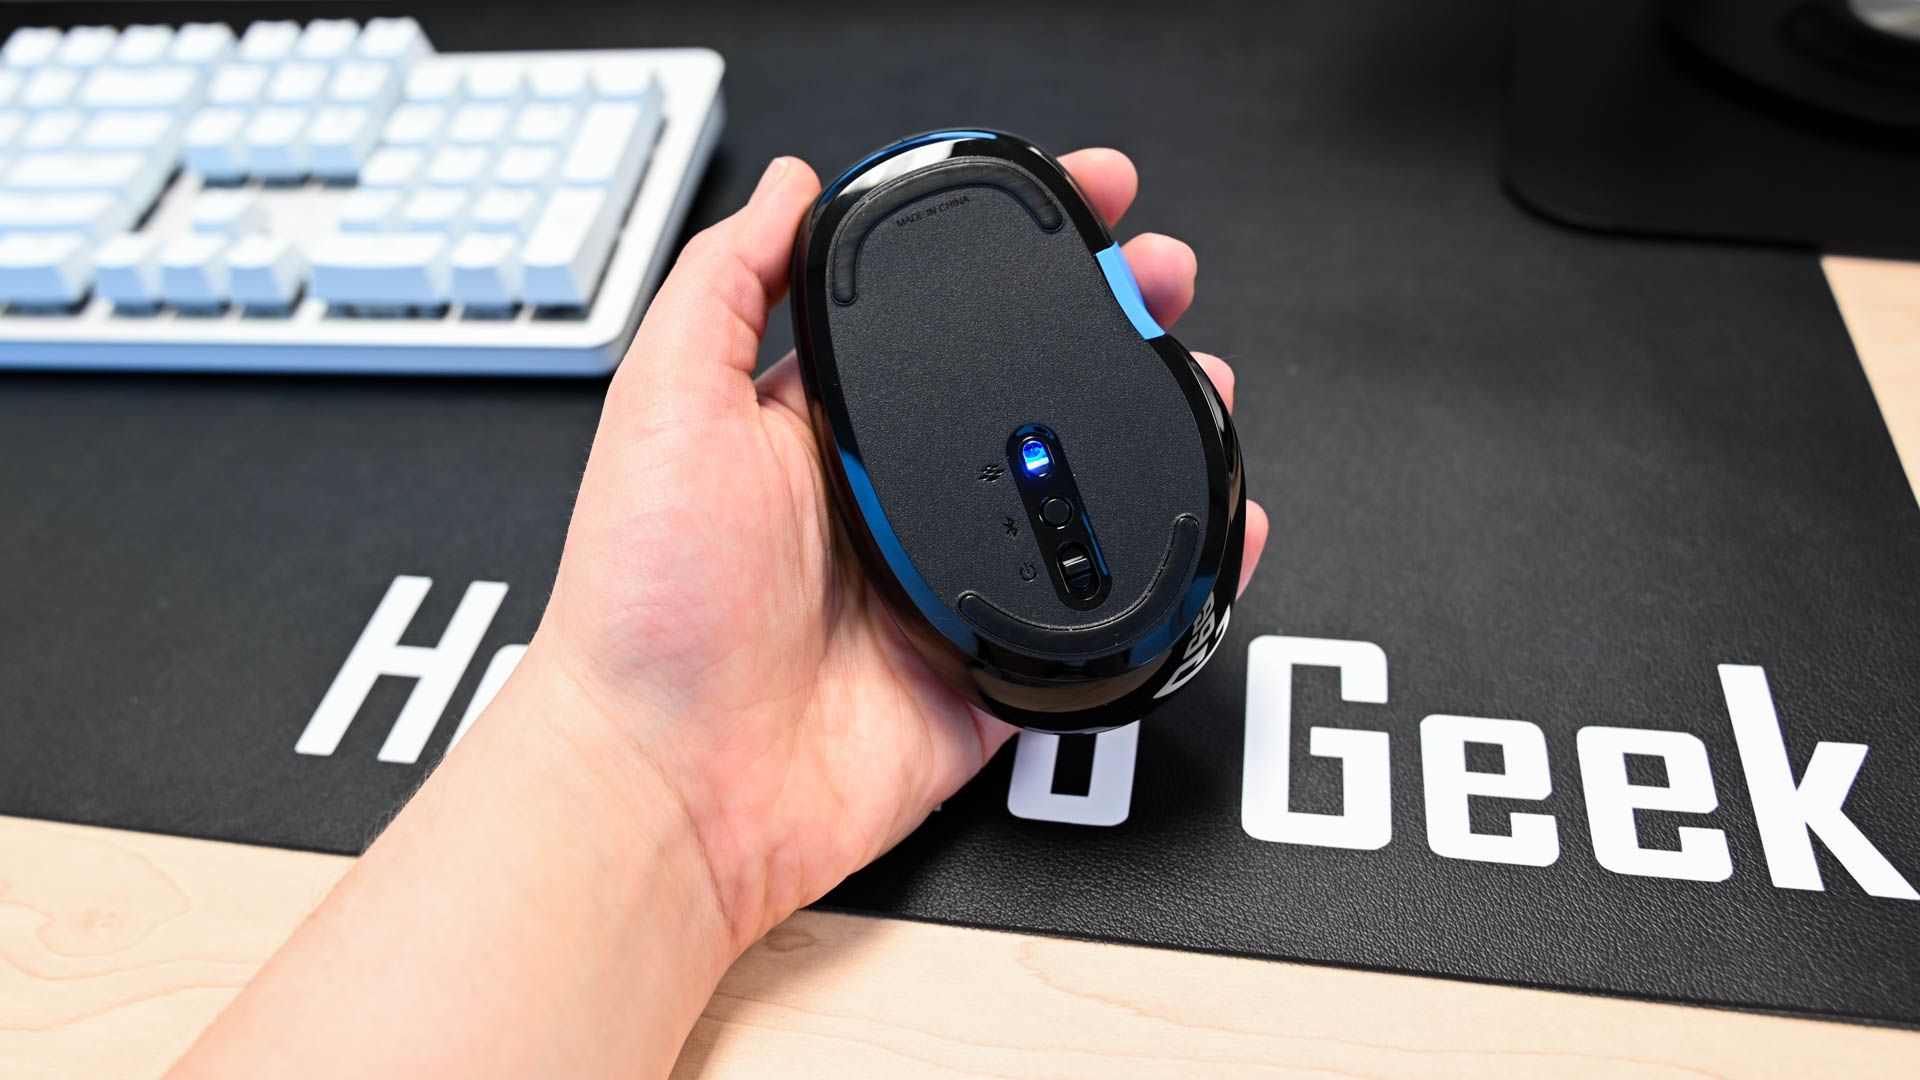
- Locate the Battery Compartment: On the underside of your mouse, you’ll find a small panel or cover. This is where the batteries go. It’s often secured with a small latch or screw.
- Install the Batteries: Open the compartment and insert the batteries, paying close attention to the positive (+) and negative (-) terminal indicators. Incorrect insertion will prevent the mouse from powering on.
- Close the Battery Compartment: Securely reattach the cover.
- Power Switch: Many wireless mice have an on/off switch, usually located on the underside. Ensure this switch is in the “on” position. You might see an LED indicator light up briefly to confirm it’s powered on.
Connecting Your Wireless Microsoft Mouse: Methods and Steps
Microsoft offers a couple of primary ways to connect its wireless mice to your computer, each with its own advantages and setup process. Understanding these methods will help you choose the right one for your needs and troubleshoot any connection hiccups.
Method 1: Using the USB Transceiver (RF Wireless)
This is the most traditional and often the simplest method for connecting many wireless Microsoft mice. It relies on a dedicated USB receiver that creates a direct wireless link.
- Plug in the USB Transceiver: Locate an available USB port on your computer. For optimal performance and to avoid interference, it’s generally recommended to plug the transceiver directly into a port on the computer itself, rather than a USB hub.
- Wait for Driver Installation: Once the transceiver is plugged in, your operating system (Windows, macOS, etc.) should automatically detect it and begin installing the necessary drivers. This usually happens in the background and may take a few moments. You might see a notification indicating that a device is being set up.
- Pairing (if necessary): In most cases, Microsoft mice that come with a transceiver are pre-paired. This means the mouse and dongle are designed to work together out of the box. If your mouse doesn’t start working immediately, there might be a small button on the transceiver and on the mouse itself for manual pairing. Pressing these buttons simultaneously or in a specific sequence will establish the connection. Consult your mouse’s documentation for specific pairing instructions.
- Test the Connection: Move the mouse around on your desk. If the cursor on your screen moves accordingly, the connection is successful.
Advantages of USB Transceiver Connection:
- Simplicity: Often plug-and-play with minimal setup.
- Reliability: Dedicated connection usually offers a stable link.
- Low Latency: Ideal for gaming or tasks requiring precise cursor control.
Method 2: Connecting via Bluetooth
Many newer Microsoft wireless mice are equipped with Bluetooth technology, allowing for a cable-free and dongle-free connection to compatible devices. This is particularly useful for freeing up USB ports.
- Ensure Bluetooth is Enabled on Your Computer:
- Windows: Go to Settings > Devices > Bluetooth & other devices. Make sure the Bluetooth toggle is switched “On.”
- macOS: Go to System Preferences > Bluetooth. Make sure Bluetooth is turned “On.”
- Put Your Microsoft Mouse into Pairing Mode: This is a critical step. The method for entering pairing mode varies between mouse models.
- Look for a dedicated Bluetooth button: Some mice have a small button, often on the underside, that you need to press and hold for a few seconds.
- Power switch combined with a button: Other models might require you to press and hold the power switch while simultaneously pressing another button.
- Check your mouse’s manual: The most reliable way to determine how to enter pairing mode is to consult the documentation that came with your mouse. You’ll typically see an LED indicator on the mouse flashing to signify it’s in pairing mode.
- Add the Mouse in Your Computer’s Bluetooth Settings:
- Windows: In the Bluetooth & other devices settings, click “Add Bluetooth or other device.” Select “Bluetooth.” Your computer will then scan for nearby discoverable Bluetooth devices.
- macOS: In the Bluetooth preferences, your Mac will automatically scan for devices.
- Select Your Mouse: Once your Microsoft mouse appears in the list of available devices, click on it to initiate the pairing process. You might be asked to confirm a pairing code, though this is less common with mice.
- Confirm Connection: After a successful pairing, your mouse should appear as a connected device in your computer’s Bluetooth settings.
- Test the Connection: Move the mouse to ensure the cursor responds on your screen.
Advantages of Bluetooth Connection:
- Dongle-Free: Saves valuable USB ports.
- Multi-Device Pairing: Many Bluetooth mice can be paired with multiple devices and switched between them.
- Widely Compatible: Works with a vast range of modern laptops and desktops.
Maximizing Your Wireless Mouse Experience: Software and Customization
While simply getting your wireless Microsoft mouse connected is the primary goal, Microsoft offers ways to enhance its functionality and tailor it to your specific workflow. This often involves their dedicated software.
Microsoft Mouse and Keyboard Center: Unlocking Advanced Features
For many of its mice, Microsoft provides the “Microsoft Mouse and Keyboard Center” software. This application is your gateway to a host of customization options that can significantly boost your productivity.
How to Install the Software:
- Download from Microsoft: The best and most up-to-date way to get the Mouse and Keyboard Center is to download it directly from the official Microsoft website. Search for “Microsoft Mouse and Keyboard Center” on their support or download pages.
- Run the Installer: Once downloaded, run the setup file and follow the on-screen prompts. The installation process is typically straightforward.
- Launch the Application: After installation, launch the Microsoft Mouse and Keyboard Center. It should automatically detect your connected Microsoft mouse and keyboard.
Key Features and Customization Options:
- Button Reassignment: This is perhaps the most popular feature. You can reassign the functions of your mouse’s buttons. For example, you can set the side buttons to act as “copy” and “paste,” or assign specific keyboard shortcuts to them. This can dramatically speed up repetitive tasks.
- Scroll Wheel Customization: Adjust the scroll speed, enable or disable smooth scrolling, or even assign custom actions to tilting the scroll wheel (if your mouse supports it).
- Pointer Speed and Acceleration: Fine-tune how your cursor moves on the screen. You can adjust the sensitivity and acceleration to find the perfect balance for your preference.
- Battery Level Monitoring: Keep an eye on your mouse’s battery life directly within the software.
- Device-Specific Settings: If you have multiple Microsoft input devices, the software allows you to configure settings for each one individually.
- Programmable Macros: For more advanced users, the software might allow you to create simple macros, which are sequences of keystrokes and mouse clicks that can be triggered by a single button press.
Driver Updates and Troubleshooting
While modern operating systems are excellent at handling drivers, sometimes manual updates or troubleshooting are necessary to ensure optimal performance or resolve issues.
- Automatic Driver Updates: Windows Update will often automatically download and install drivers for your mouse when it’s connected.
- Manual Driver Updates: If you suspect a driver issue or want the latest version, you can:
- Via Device Manager (Windows): Right-click the Start button, select “Device Manager,” expand “Mice and other pointing devices,” right-click your Microsoft mouse, and select “Update driver.” You can choose to search automatically or browse your computer if you’ve downloaded drivers manually.
- Microsoft Website: As mentioned, the Microsoft Mouse and Keyboard Center is a great source for driver and firmware updates.
- Troubleshooting Common Issues:
- Mouse not moving: Check battery power, ensure the mouse is turned on, verify the USB transceiver is plugged in securely (if applicable), and confirm Bluetooth is enabled and paired (if applicable). Restart your computer.
- Cursor jumps or is erratic: This could be due to a dirty sensor on the underside of the mouse. Gently clean it with a dry, lint-free cloth. Also, ensure you’re using the mouse on a suitable surface – avoid highly reflective or uneven surfaces. Try a different USB port.
- Buttons not working as expected: This is often a software configuration issue. Ensure the Microsoft Mouse and Keyboard Center is installed and that your button assignments are correct. Reinstalling the software can sometimes resolve glitches.
- Connection drops: For RF wireless, ensure there aren’t too many other wireless devices causing interference. For Bluetooth, check that your computer’s Bluetooth drivers are up to date and that the mouse is within range.

Conclusion: Embracing Seamless Wireless Productivity
Installing a wireless Microsoft mouse is generally a straightforward process, designed to get you up and running quickly. Whether you’re connecting via the familiar USB transceiver or the modern convenience of Bluetooth, the steps are intuitive. By following this guide, you’ve learned not only how to establish a connection but also how to unlock the full potential of your device through software customization.
The ability to reassign buttons, fine-tune pointer settings, and monitor battery levels empowers you to create a computing experience that is both efficient and comfortable. In the ever-evolving landscape of technology, a reliable and well-configured mouse is a cornerstone of productivity. With your wireless Microsoft mouse now installed and optimized, you’re well-equipped to navigate your digital world with greater ease and precision. Enjoy the freedom and enhanced workflow that a quality wireless mouse brings to your daily tasks.
aViewFromTheCave is a participant in the Amazon Services LLC Associates Program, an affiliate advertising program designed to provide a means for sites to earn advertising fees by advertising and linking to Amazon.com. Amazon, the Amazon logo, AmazonSupply, and the AmazonSupply logo are trademarks of Amazon.com, Inc. or its affiliates. As an Amazon Associate we earn affiliate commissions from qualifying purchases.