
The prospect of upgrading your operating system can sometimes feel daunting, especially when dealing with a significant shift like moving to Windows 10. Whether you’re a seasoned tech enthusiast looking for a cleaner installation, a small business owner aiming to standardize your fleet, or an individual user simply wanting to experience the latest Microsoft has to offer, this guide will walk you through the entire process. We’ll cover everything from preparation to post-installation, ensuring a smooth and successful Windows 10 installation, all while keeping the core principles of the tech landscape, brand consciousness, and financial prudence in mind.
Preparing for Your Windows 10 Installation: The Foundation for Success
Before you even think about downloading or booting from installation media, meticulous preparation is key. This stage is critical for a seamless experience and to avoid potential data loss or compatibility issues. Think of it as laying the groundwork for your new digital home, ensuring everything is in place before you start building.
Backing Up Your Precious Data: The Digital Safety Net
The cardinal rule of any major system change is: back up everything important. While Windows 10 installation is generally a safe process, unforeseen circumstances can always arise. This includes documents, photos, videos, music, application settings, and any other files you deem irreplaceable.
- External Hard Drives: The most straightforward method is to copy your important files onto an external hard drive. Ensure the drive has sufficient capacity.
- Cloud Storage Services: Services like OneDrive, Google Drive, Dropbox, or iCloud offer convenient ways to back up your files. They provide an off-site backup, protecting your data from physical hardware failures. Many offer free tiers for smaller amounts of data, which can be a cost-effective solution for essential files.
- Backup Software: Dedicated backup software, both built into Windows (File History) and third-party options, can automate the backup process and offer more advanced features like incremental backups and system imaging.
Considering the “Money” aspect of our website’s focus, investing a small amount in a reliable external hard drive or a cloud storage subscription can be significantly cheaper than the cost of losing critical personal or business data.
Checking System Requirements and Hardware Compatibility: Avoiding Future Headaches
Windows 10, while efficient, still has specific hardware requirements. Ensuring your computer meets these minimums will guarantee a smooth installation and optimal performance post-upgrade.
- Processor: 1 gigahertz (GHz) or faster processor or SoC
- RAM: 1 gigabyte (GB) for 32-bit or 2 GB for 64-bit
- Hard disk space: 16 GB for 32-bit OS or 20 GB for 64-bit OS
- Graphics card: DirectX 9 or later with WDDM 1.0 driver
- Display: 800×600
Beyond these general requirements, it’s crucial to consider the compatibility of your existing hardware and peripherals. Graphics cards, network adapters, printers, and other peripherals might require updated drivers for Windows 10.
- Manufacturer Websites: Visit the websites of your computer manufacturer (Dell, HP, Lenovo, etc.) and individual hardware component manufacturers to check for Windows 10 drivers. Many manufacturers provide dedicated support pages for their older models.
- Windows Upgrade Assistant: Microsoft offers tools that can scan your system for compatibility issues before you begin the installation. This is a proactive step that can save you considerable troubleshooting time later.
From a “Tech” perspective, being aware of these requirements ensures you’re not trying to run a modern operating system on outdated hardware, which can lead to performance bottlenecks and a frustrating user experience.
Obtaining Your Windows 10 Installation Media: The Key to a Fresh Start
You have a few primary avenues for acquiring the necessary installation files for Windows 10. The choice often depends on whether you’re upgrading an existing system, performing a clean install, or installing on a new machine.
-
Media Creation Tool: This is the most recommended and direct method provided by Microsoft. The Media Creation Tool allows you to:
- Upgrade your current PC directly to Windows 10.
- Download an ISO file to create your own USB flash drive or DVD.
- Create installation media (USB or DVD) for another PC.
The tool ensures you are downloading the latest version of Windows 10.
-
Product Key: If you are performing a clean installation on a machine that previously had a licensed version of Windows 10, or if you have purchased a new license, you will need a valid Windows 10 product key. For existing Windows 7 or 8.1 machines that were eligible for the free upgrade, your digital license should automatically activate Windows 10 after installation.
From a “Brand” perspective, using official Microsoft tools like the Media Creation Tool ensures you’re getting a genuine and secure version of Windows 10, aligning with the brand’s commitment to integrity and security. This also reinforces your own brand’s credibility by using legitimate software.
The Installation Process: Step-by-Step to Your New Operating System
With your backups secured and installation media ready, you’re poised to begin the actual installation. This section breaks down the process into manageable steps, whether you opt for an upgrade or a clean install.
Performing a Windows 10 Upgrade: Seamless Transition
An upgrade installation replaces your existing operating system with Windows 10 while attempting to preserve your personal files, applications, and settings. This is often the quickest and most convenient method for many users.

- Run the Setup: If you’re upgrading directly from your current Windows version using the Media Creation Tool or by double-clicking the
setup.exefile from the downloaded ISO, follow the on-screen prompts. - Accept License Terms: Review and accept the Microsoft software license terms.
- Choose What to Keep: This is a crucial step. You’ll be presented with options:
- Keep personal files and apps: This is the default and recommended option for an upgrade.
- Keep personal files only: This will remove all installed applications but retain your documents, pictures, etc.
- Nothing: This will perform a clean installation, erasing everything.
- Ready to Install: The setup will confirm what it’s about to do. Click “Install” to begin the process. Your computer will restart multiple times.
The upgrade process can take anywhere from 30 minutes to several hours, depending on your computer’s speed and the amount of data being transferred.
Conducting a Clean Installation of Windows 10: A Fresh Start
A clean installation involves formatting your hard drive and installing Windows 10 from scratch. This method is ideal for resolving persistent issues, improving performance, or when you want to start with a completely blank slate.
Booting from Installation Media: The Gateway to a New System
- Insert Media: Insert your bootable USB flash drive or DVD into your computer.
- Restart Your PC: Restart your computer.
- Access Boot Menu/BIOS: As your computer starts, you’ll need to press a specific key (often F2, F10, F12, DEL, or ESC) to enter the BIOS or UEFI settings or to access the boot menu. The exact key varies by manufacturer and motherboard.
- Set Boot Order: In the BIOS/UEFI, navigate to the “Boot” or “Boot Order” section and set your USB drive or DVD drive as the first boot device.
- Save and Exit: Save your changes and exit the BIOS/UEFI. Your computer will restart and should now boot from the installation media.
The Installation Steps: Guided Setup
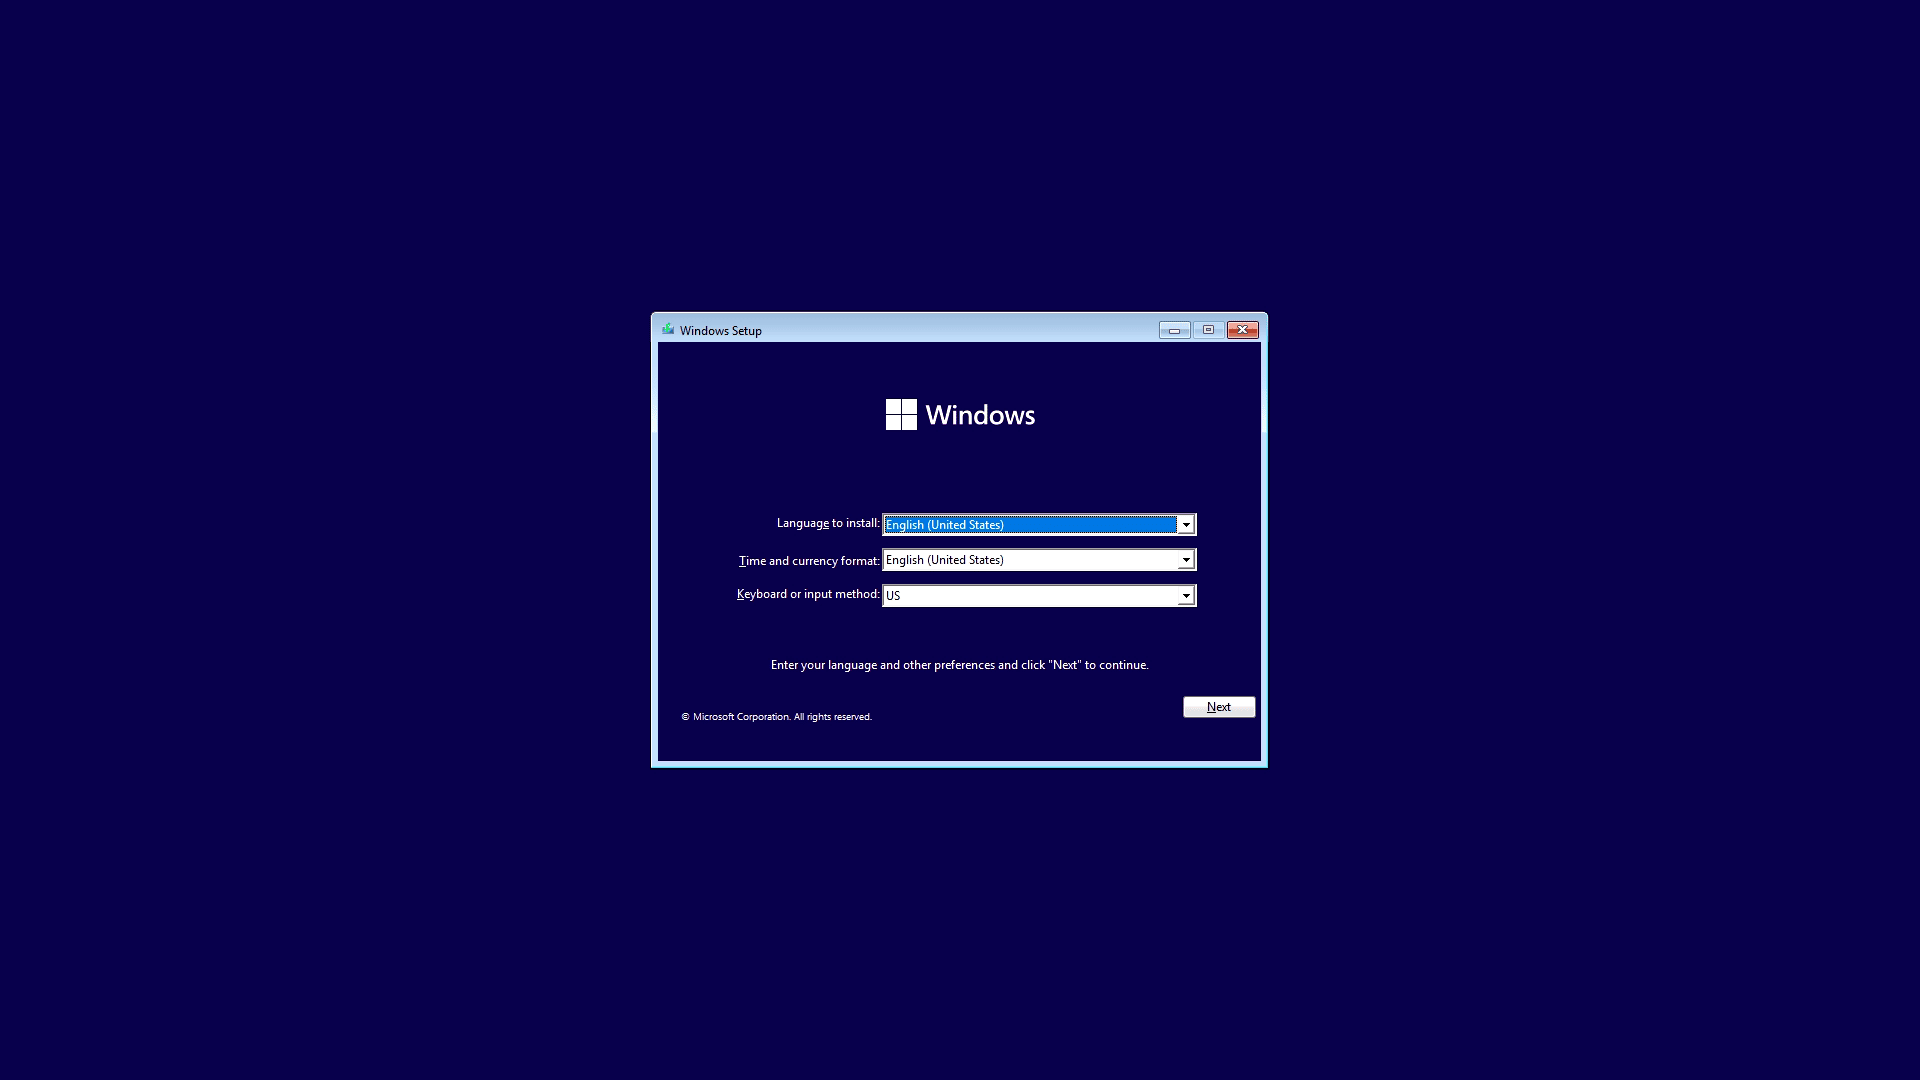
- Install Now: When prompted with “Press any key to boot from CD or DVD…” or similar, press any key. You will then see the Windows Setup screen. Click “Install now.”
- Product Key: Enter your Windows 10 product key. If you are reinstalling on a machine that was previously activated, you can click “I don’t have a product key” and Windows will activate automatically after installation via a digital license.
- Select Operating System: Choose the edition of Windows 10 you want to install (e.g., Windows 10 Home, Windows 10 Pro). Ensure it matches your license.
- Accept License Terms: Accept the Microsoft software license terms.
- Choose Installation Type: Select “Custom: Install Windows only (advanced).” This is where you initiate a clean installation.
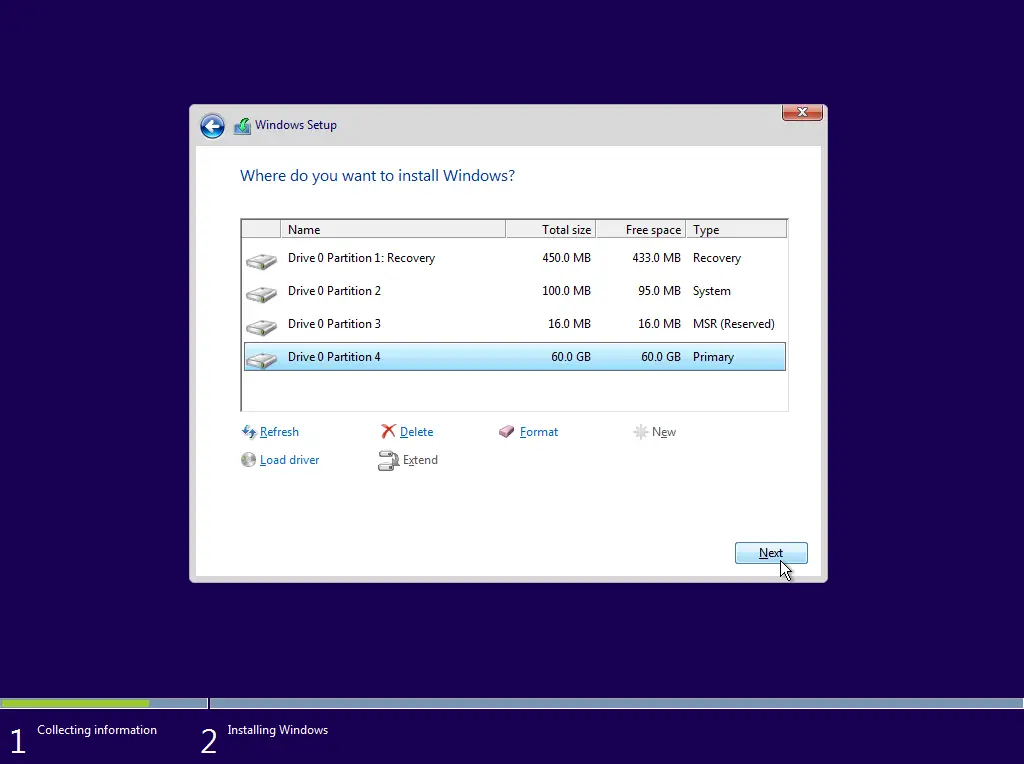
- Drive Selection and Formatting:
- You will see a list of all drives and partitions on your computer.
- Crucially, identify the drive where you want to install Windows 10. If you’re performing a complete clean install, you may want to delete existing partitions on that drive by selecting them and clicking “Delete.” Be absolutely certain you have backed up all data on these partitions before proceeding.
- Select the unallocated space and click “New” to create a new partition, or select an existing partition and click “Format.” Windows will automatically create the necessary system partitions.
- Select the primary partition where you want to install Windows 10 and click “Next.”
- Installation Progress: Windows will now copy files, install features, and install updates. Your computer will restart several times during this process.
This meticulous approach to drive selection is where the “Money” aspect of financial prudence comes into play. Misidentifying a drive and formatting it incorrectly can lead to costly data recovery attempts or the permanent loss of valuable information.
Post-Installation: Optimizing Your Windows 10 Experience
Once Windows 10 is successfully installed, the journey isn’t over. A few crucial steps will ensure your system is secure, up-to-date, and performing optimally, enhancing your overall “Tech” experience and potentially your productivity.
Running Windows Updates: The First Line of Defense and Performance Boost
Windows Update is a critical service that downloads and installs security patches, feature updates, and driver updates from Microsoft. Keeping your system updated is paramount for both security and stability.
- Automatic Updates: By default, Windows 10 automatically downloads and installs updates.
- Manual Check: You can manually check for updates by going to Settings > Update & Security > Windows Update and clicking “Check for updates.”
- Driver Updates: Windows Update often includes driver updates for your hardware. If a specific piece of hardware isn’t working correctly, checking for an update here is a good first step.
From a “Digital Security” standpoint, these updates are not just about new features; they are essential for patching vulnerabilities that could be exploited by malicious actors.
Installing Essential Software and Drivers: Personalizing Your Workspace
After Windows is up and running, you’ll want to install your preferred applications and ensure all your hardware is functioning correctly with the latest drivers.
- Drivers: While Windows Update installs many drivers, sometimes you might need to manually install or update them, especially for graphics cards, sound cards, or specific peripherals. Download the latest drivers directly from the manufacturer’s website.
- Essential Software: Reinstall your commonly used applications like web browsers (Chrome, Firefox), office suites (Microsoft Office, LibreOffice), media players, and any specialized software you require for work or leisure.
- Antivirus/Security Software: Even though Windows 10 comes with Windows Defender, many users prefer to install third-party antivirus solutions. Ensure you install your chosen security software early in the process.
This stage ties back to “Productivity.” Having your essential tools and a well-functioning system allows you to get back to work or enjoy your digital life as efficiently as possible.
Activating Windows and Licensing: Ensuring Legitimacy and Compliance
Finally, ensure your copy of Windows 10 is properly activated. This verifies that your copy of Windows is genuine and hasn’t been used on more devices than the Microsoft Software License Terms allow.
- Digital License: If you upgraded from a genuine copy of Windows 7 or 8.1, or purchased Windows 10 from the Microsoft Store, you likely have a digital license linked to your hardware. Activation should happen automatically.
- Product Key: If you purchased a retail copy of Windows 10, enter the product key in Settings > Update & Security > Activation.
- Troubleshooting Activation: If you encounter activation issues, Microsoft provides troubleshooting tools. You can also contact Microsoft Support for assistance.
From a “Brand” perspective, using legitimate and activated software enhances your professional image and ensures compliance with software licensing agreements, which is crucial for businesses and individuals alike. It avoids the risks associated with counterfeit software, such as malware and lack of support.
Installing Windows 10 can be a rewarding process, opening the door to new features, enhanced security, and improved performance. By following these steps meticulously, from preparation through to post-installation optimization, you can ensure a successful and smooth transition, empowering your digital life with the latest from Microsoft.
aViewFromTheCave is a participant in the Amazon Services LLC Associates Program, an affiliate advertising program designed to provide a means for sites to earn advertising fees by advertising and linking to Amazon.com. Amazon, the Amazon logo, AmazonSupply, and the AmazonSupply logo are trademarks of Amazon.com, Inc. or its affiliates. As an Amazon Associate we earn affiliate commissions from qualifying purchases.