
YouTube TV has revolutionized how many consumers access live television, blending the familiarity of traditional cable with the flexibility and digital advantages of streaming. A cornerstone of this modern TV experience is its robust Digital Video Recorder (DVR) functionality. Unlike older, hardware-dependent DVRs, YouTube TV leverages a cloud-based system, offering an entirely new paradigm for recording and watching your favorite shows, movies, and sports. Understanding this system is crucial for maximizing your subscription, allowing you to bypass schedules and watch content on your terms.
Understanding YouTube TV’s Cloud DVR Functionality
The shift from physical DVR boxes to cloud-based solutions marks a significant technological leap in television consumption. YouTube TV’s implementation is a prime example, providing a seamless and highly accessible recording experience that fundamentally changes how users interact with live broadcasts.
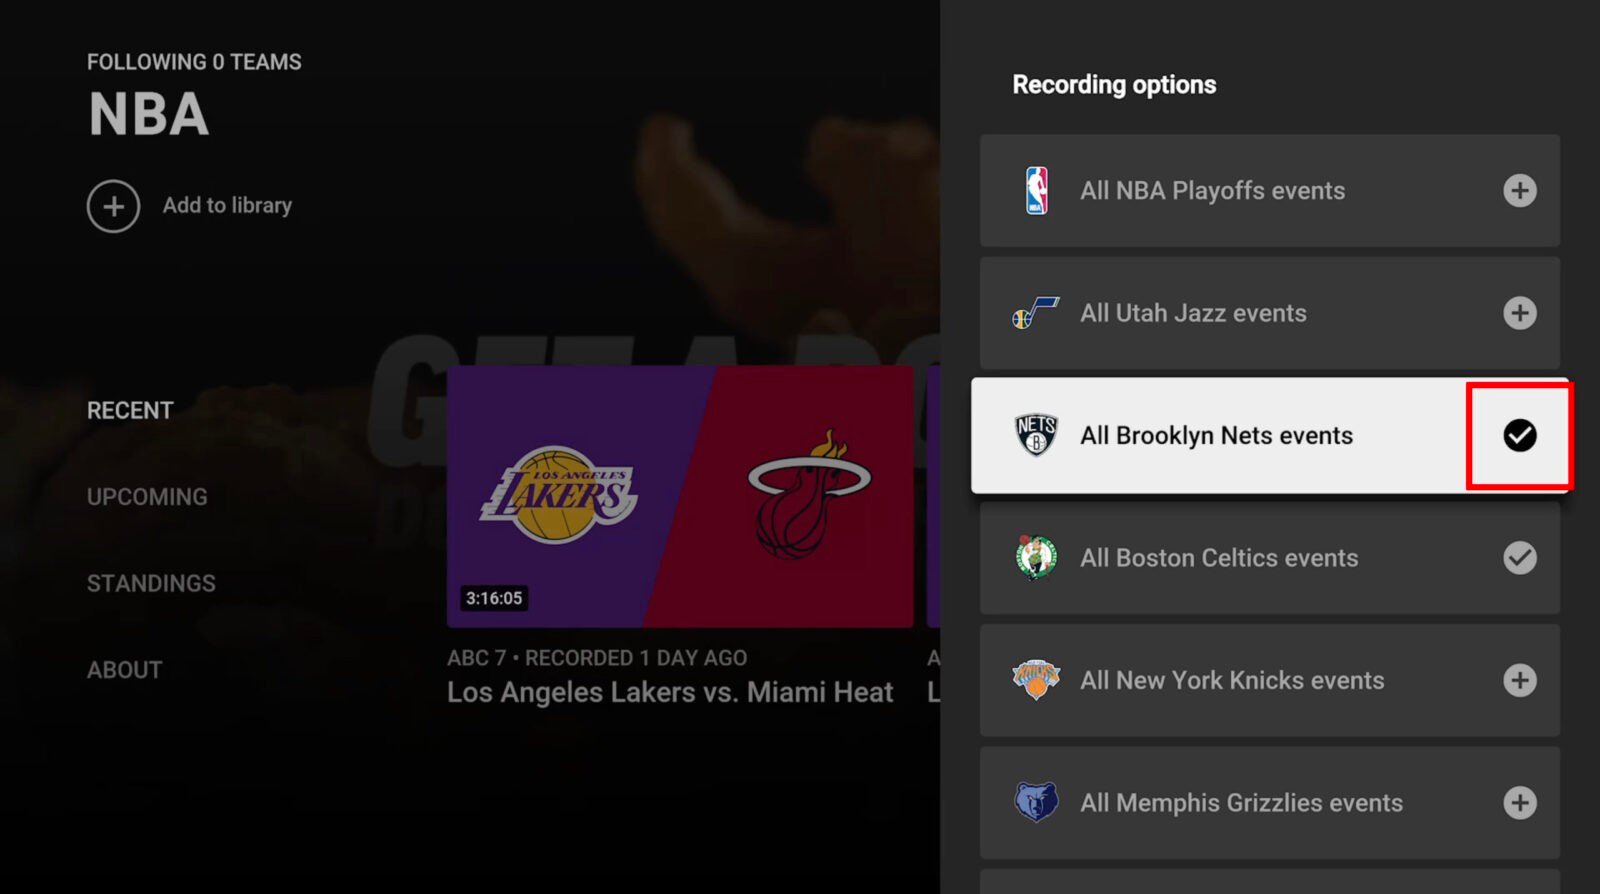
The Cloud DVR Advantage
At its core, YouTube TV’s DVR is a cloud-based service. This means that recordings are not stored on a local device in your home but rather on Google’s remote servers. This architecture offers several distinct advantages over traditional DVRs. Firstly, it eliminates the need for dedicated hardware, reducing clutter and the potential for device malfunctions. You don’t need to buy, install, or maintain a separate recording box. Secondly, accessibility is greatly enhanced. Because your recordings reside in the cloud, they are accessible from any device where you can log into your YouTube TV account – be it a smart TV, smartphone, tablet, computer, or streaming stick – as long as you have an internet connection. This provides unparalleled freedom to start watching a show on one device and seamlessly pick it up on another. Furthermore, the cloud handles all the technical heavy lifting, including storage management, ensuring your recordings are ready whenever you are.
Unlimited Storage and Its Nuances
One of YouTube TV’s most compelling features is its “unlimited” cloud DVR storage. This stands in stark contrast to most traditional DVRs, which often come with finite storage capacities, forcing users to constantly manage space and delete old recordings to make room for new ones. With YouTube TV, you can record as many shows, movies, and events as you wish simultaneously, without ever worrying about running out of space. If multiple recordings are scheduled for the same time slot, the system handles them all without conflict.
However, the term “unlimited” comes with an important nuance: expiration. While you can record an endless volume of content, most recordings are kept for a period of nine months. After this duration, they are automatically removed from your library. This policy is primarily due to licensing agreements with content providers, which dictate how long a broadcaster can make content available on-demand or via DVR. It’s a critical detail for users to remember, especially for shows they intend to rewatch or keep for an extended period. Some content, particularly on-demand versions provided directly by channels, might have different expiration rules or may be available for longer than the recorded DVR version.
Recording Expirations and Why They Matter
The nine-month expiration policy is a fundamental aspect of the YouTube TV DVR experience. For most users, this timeframe is more than sufficient to catch up on favorite shows or rewatch sports events. However, for those who wish to archive certain programs indefinitely or revisit them far into the future, it necessitates a change in perspective. It encourages a “watch it while it’s available” mindset rather than a permanent archiving approach.
Understanding these expirations helps manage expectations and strategize your viewing. YouTube TV typically provides notifications within the library indicating when a recording is nearing its expiration date. This allows users to prioritize watching content that is about to disappear. For recurring series, new recordings replace older ones as the nine-month window progresses, ensuring you always have the most recent episodes available for a substantial period. This system balances the convenience of unlimited storage with the realities of content licensing in the digital streaming landscape.
Step-by-Step Guide to Recording Content
Recording on YouTube TV is designed to be intuitive and user-friendly across all supported devices. Whether you’re planning ahead or catching a show just in time, the process is straightforward.
Recording Live Broadcasts
If you’re watching a program live and decide you want to save it to your library, the process is simple:
- While watching: Navigate to the player controls. On most devices, this involves a slight tap on the screen or pressing the “down” arrow on your remote to bring up the overlay.
- Locate the “Add” button: You’ll typically see a “+” icon or a button labeled “Add to Library.”
- Select “Add to Library”: Clicking this button instantly adds the current show, movie, or sporting event to your personal library. YouTube TV will record the remainder of the live broadcast from the point you initiated the recording. Crucially, the system will also often attempt to fetch the full episode/program from the beginning, if an on-demand version or a fully recorded DVR version from its start is available, giving you the complete experience even if you started recording mid-show.
Recording Upcoming Shows or Series
The most common way to use YouTube TV’s DVR is to schedule recordings for future broadcasts or entire series. This ensures you never miss an episode.
- Browse or Search:
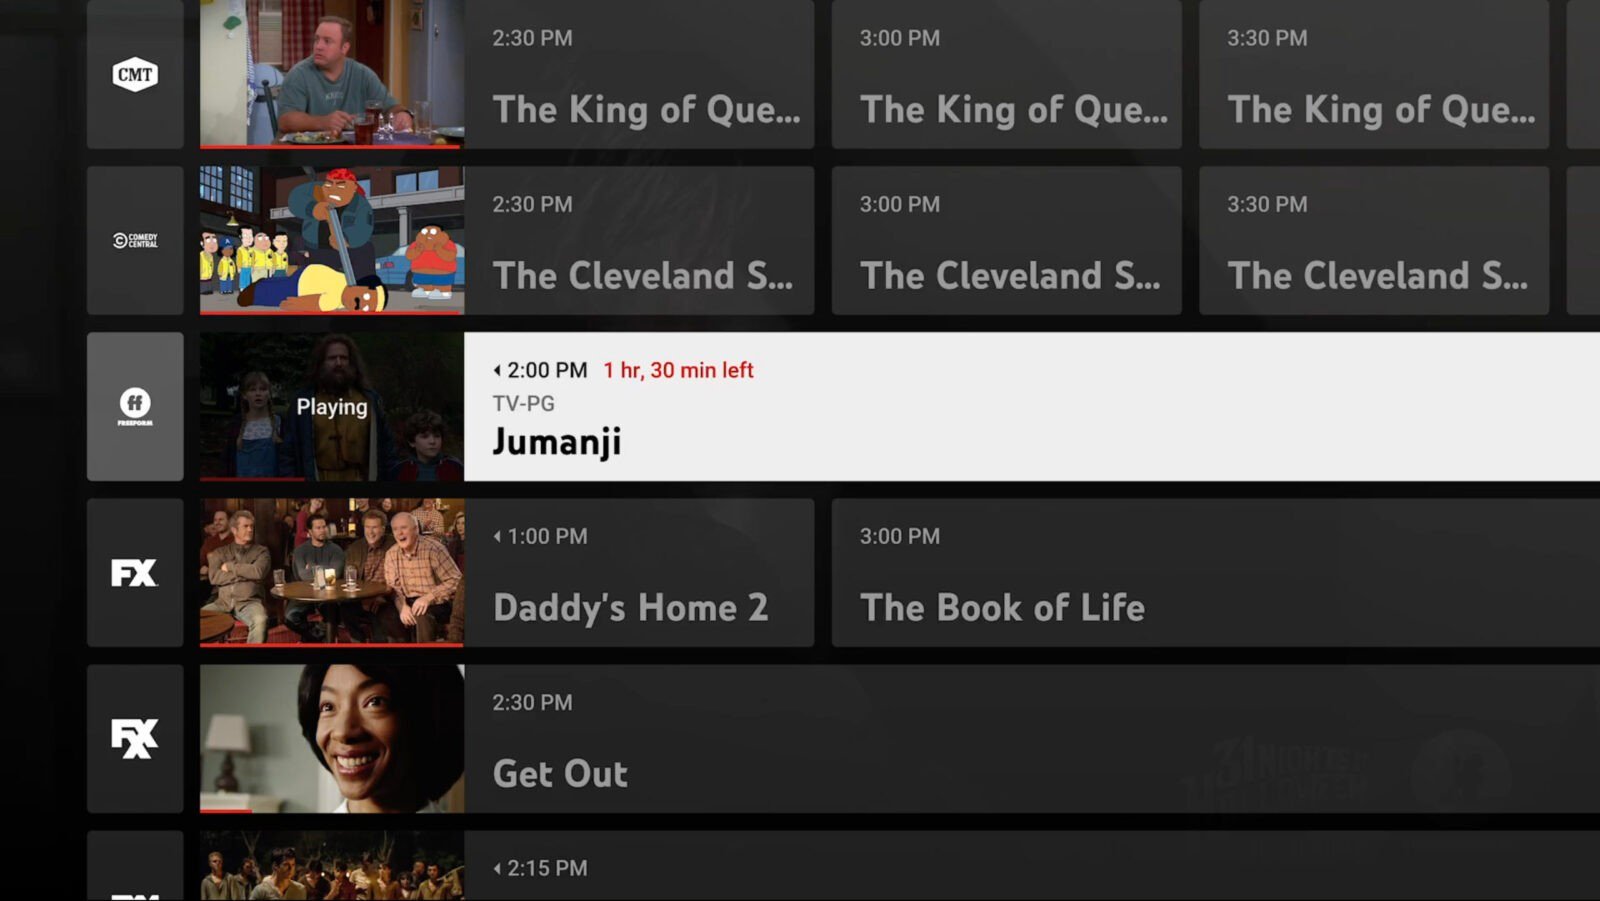
- From the Live Guide: Open the Live Guide and scroll through the channels and schedules. When you find a show you want to record, click on it.
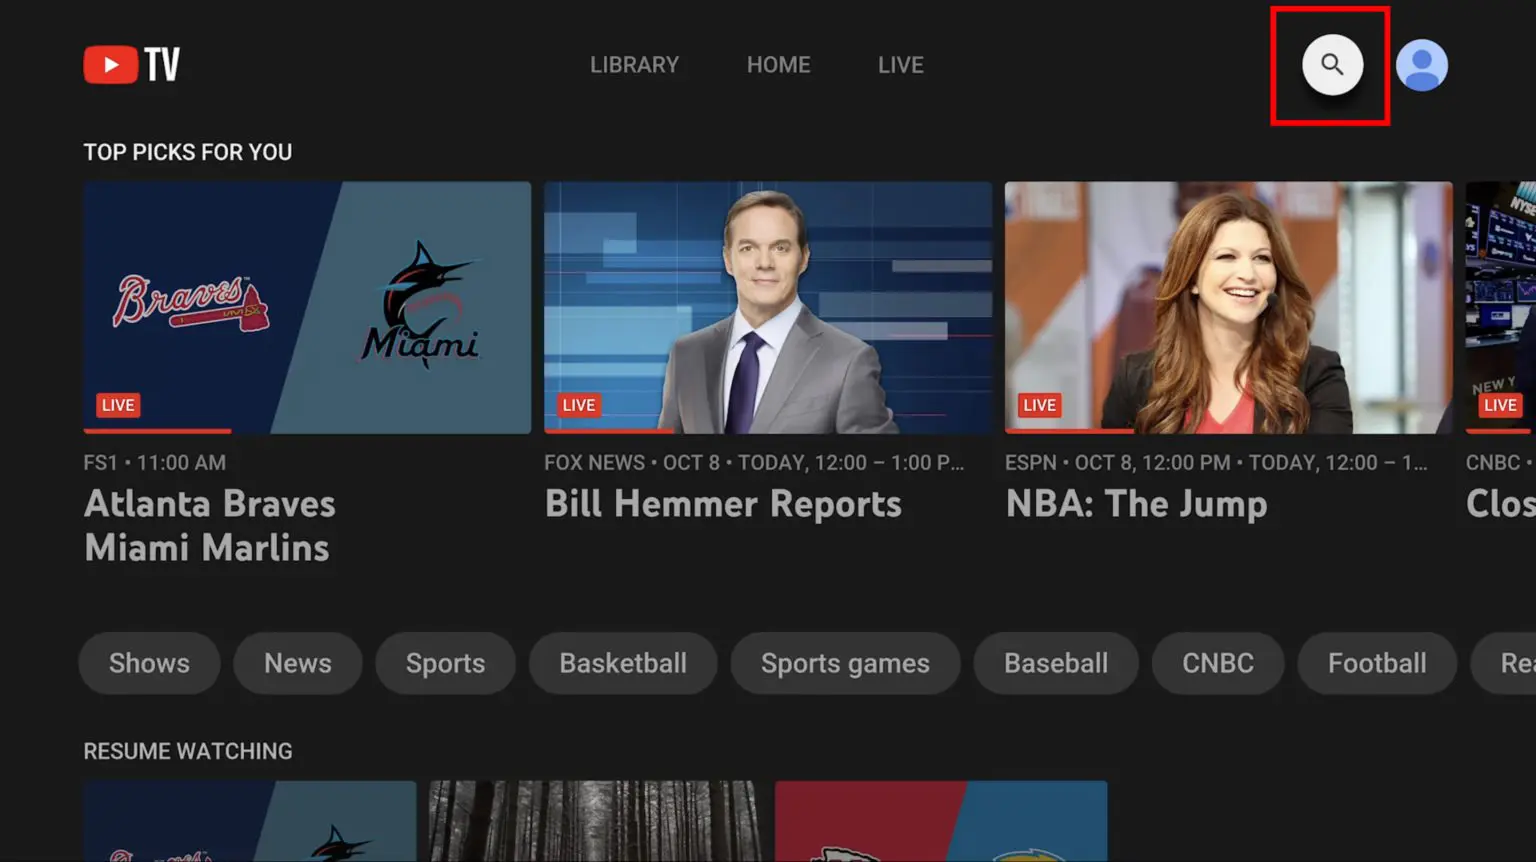
- From the Home screen: YouTube TV’s “Home” tab often highlights popular or suggested content. Click on any program that interests you.
- Using Search: If you know exactly what you’re looking for, use the search function (magnifying glass icon) to find specific shows, movies, or teams.
- Access Program Details: Once you’ve selected a program, you’ll be taken to its detail page. This page provides information like synopsis, cast, air times, and related content.
- Add to Library: On the program detail page, look for the “Add to Library” button, often represented by a “+” icon. Click this button.
- Series vs. Episode Recording (for series): For television series, YouTube TV will typically ask if you want to record “New episodes only” or “All episodes (new and re-runs).” Select your preference. Most users opt for “New episodes only” to avoid clutter, but “All episodes” is useful for binge-watching or catching up on older seasons if they air.
- Confirmation: Once added, the program or series will now appear in your “Library” tab, and all future airings matching your criteria will be automatically recorded.
Managing Your Library and Recordings
Your “Library” tab is the central hub for all your recorded content and any shows/movies you’ve chosen to follow.
- Accessing Your Library: Simply navigate to the “Library” tab within the YouTube TV interface.
- Organized Categories: Your library is intuitively organized into categories such as “New in your library,” “Movies,” “Shows,” “Sports,” and “Scheduled.” This makes it easy to find specific content.
- Removing Recordings/Series: To stop recording a series or remove a specific recording:
- Go to the show or movie in your Library.
- Click on the program details.
- You’ll see a button that says “Remove from Library” or has a checkmark indicating it’s already added. Clicking this will stop future recordings and remove current ones, although already-watched episodes might still persist for a short period before full removal.
- Sorting and Filtering: Within categories like “Shows,” you can often sort by “Most Recent” or “A-Z” to quickly locate what you want to watch.
Advanced Tips for Maximizing Your YouTube TV Recording Experience
Beyond the basic functions, YouTube TV offers several features and considerations that can enhance your recording and viewing experience.
Handling Regional Blackouts and Restrictions
Sports enthusiasts, in particular, often encounter regional blackouts. These are restrictions imposed by sports leagues and broadcasters that prevent certain games from being shown in specific geographical areas, even if you subscribe to the channel. YouTube TV, like other streaming services, is legally obligated to enforce these blackouts based on your detected location.
- Understanding the “Why”: Blackouts are typically tied to local broadcast rights. If a local station has exclusive rights to broadcast a game in your area, then national channels might be blacked out to protect that local broadcast.
- DVR’s Role: While the DVR will attempt to record a blacked-out game, you may not be able to play back the recording until the blackout period has expired. In some cases, if a game is entirely unavailable to your market live, the recording might also be restricted.
- Checking Blackout Status: YouTube TV usually provides on-screen notifications if a program is blacked out in your area. There are no direct workarounds within YouTube TV itself; using a VPN, for example, is against their terms of service and may lead to account suspension. It’s crucial to understand that DVR cannot circumvent these content licensing restrictions.
Optimizing Playback on Various Devices
YouTube TV is designed for multi-device compatibility, but optimizing playback requires a consistent internet connection and understanding device capabilities.
- Internet Speed: For optimal HD or 4K playback (where available), a stable and fast internet connection is paramount. Google recommends at least 3 Mbps for standard definition, 7 Mbps for a single 1080p stream, and 13 Mbps for reliable 4K streaming. Recorded content quality is dependent on the original broadcast quality and your internet speed during playback.
- Device Performance: Newer streaming devices (e.g., Roku Ultra, Apple TV 4K, latest Fire TV Sticks) and smart TVs with powerful processors will generally offer a smoother user interface and faster loading times for recordings. Older devices might experience occasional buffering or slower navigation.
- App Updates: Regularly ensure your YouTube TV app is updated on all devices. Updates often include performance improvements, bug fixes, and new features that can enhance your viewing experience.
- Casting and Mirroring: Utilize built-in casting features (Chromecast, AirPlay) to send recordings from your phone or tablet to a larger screen. This can sometimes offer a more stable connection than relying solely on a smart TV’s native app, especially if the TV’s Wi-Fi is weak.
Troubleshooting Common DVR Issues
While the cloud DVR is generally reliable, users might occasionally encounter issues.
- Missing Recordings:
- Check “Scheduled” tab: First, verify that the show was indeed scheduled to record.
- Check “New in your library”: Sometimes, new episodes are tucked within a series folder.
- Check “Expired”: Remember the 9-month expiration. The recording might have simply expired.
- Licensing Issues: Rarely, a network might pull a show or restrict recording rights unexpectedly.
- Internet Connection: While recording is cloud-based, your device needs a connection to schedule. If you scheduled it but then had prolonged internet outage at home, it might not have synced.
- Playback Problems (Buffering, Freezing):
- Internet Speed: Perform a speed test on your device. Insufficient bandwidth is the most common cause.
- Device Restart: A simple restart of your streaming device or smart TV can often resolve minor glitches.
- Router Restart: Rebooting your home router can clear network congestion.
- App Reinstall: On persistent issues, try uninstalling and reinstalling the YouTube TV app.
- Incorrect Episode/Version Recorded:
- Series Settings: If you selected “New episodes only” for a series, but a rerun aired, it won’t record. Adjust your series recording settings if you want all airings.
- On-Demand vs. DVR: Sometimes, YouTube TV offers an on-demand version of a show provided by the network. This isn’t your DVR recording and might have commercials you can’t skip, or a different expiration. Always look for the DVR version first (often identifiable by “Recorded by DVR” label).
Beyond Basic Recording: Exploring Related Features
YouTube TV isn’t just a DVR; it’s a comprehensive live TV streaming service with features that integrate seamlessly with your recording experience.
Customizing Your Live Guide for Easier Access
The Live Guide is your window to what’s currently airing and what’s coming up. While it offers all available channels by default, you can personalize it to prioritize your favorites and streamline your channel surfing.
- Reorder Channels: You can drag and drop channels to place your most watched networks at the top of the guide, reducing the need to scroll endlessly.
- Hide Unwanted Channels: If there are channels you never watch, you can hide them entirely from your guide, making it cleaner and more focused on your preferences.
- Create Custom Groups: While not a direct feature in the same way as traditional cable, the “Custom Guide” option effectively lets you select which channels appear and in what order, tailoring your browsing experience. This makes finding shows to record much faster.
Leveraging Profiles for Personalized Libraries
YouTube TV supports up to six individual accounts (family members) within a single household subscription. Each account gets its own personalized experience, including a distinct DVR library.
- Individual Libraries: When a family member records a show, it goes into their library, not a shared one. This prevents clutter and ensures that everyone’s “New in your library” section is relevant to them.
- Personalized Recommendations: Beyond recordings, each profile receives tailored content recommendations based on their viewing habits, further enhancing the personalized experience.
- Managing Profiles: The primary account holder can manage profiles, inviting family members and setting up their individual accounts, ensuring everyone gets the most out of the subscription, including their own, distinct cloud DVR.
Integration with Other Smart Home Devices
YouTube TV’s integration with the broader Google ecosystem and other smart home platforms extends its utility beyond standalone viewing.
- Google Assistant/Voice Control: If you have Google Assistant-enabled devices (like a Nest Hub, Google Home speaker, or even your phone), you can use voice commands to control YouTube TV. For example, “Hey Google, record [show name] on YouTube TV” or “Hey Google, play my recordings on YouTube TV.” This hands-free control simplifies scheduling and access.
- Chromecast Integration: Seamless casting from mobile devices to Chromecast-enabled TVs is a core feature, allowing you to easily send live or recorded content to your big screen with a tap.
- Cross-Device Continuity: The cloud-based nature ensures that your viewing progress, including where you left off in a recording, syncs across all your devices, providing a truly flexible and modern TV experience.
By understanding these advanced aspects, users can unlock the full potential of YouTube TV, transforming it from a simple streaming service into a personalized, powerful entertainment hub tailored to their specific needs.
aViewFromTheCave is a participant in the Amazon Services LLC Associates Program, an affiliate advertising program designed to provide a means for sites to earn advertising fees by advertising and linking to Amazon.com. Amazon, the Amazon logo, AmazonSupply, and the AmazonSupply logo are trademarks of Amazon.com, Inc. or its affiliates. As an Amazon Associate we earn affiliate commissions from qualifying purchases.