
The GNU Compiler Collection (GCC) is a cornerstone of modern software development, serving as the primary compiler for C, C++, Objective-C, Fortran, Ada, and Go. Whether you’re embarking on a journey into embedded systems, diving deep into high-performance computing, or simply building your first “Hello, World!” program, understanding how to install and utilize GCC is an indispensable skill. This guide will walk you through the process of installing GCC on various operating systems, ensuring you have the tools you need to bring your code to life.
GCC’s ubiquity and open-source nature have made it a go-to choice for developers across the globe. Its flexibility and continuous development by the GNU Project mean it’s constantly evolving to support new language features and hardware architectures. While the core installation process might seem straightforward, nuances exist depending on your operating system and specific development needs. This article aims to demystify these variations, providing clear, actionable steps for a successful GCC installation.
Understanding GCC and its Importance
Before we delve into the installation process, let’s briefly touch upon what GCC is and why it holds such significance in the tech landscape. GCC, at its heart, is a compiler. Compilers are essential software programs that translate human-readable source code, written in languages like C or C++, into machine code that a computer’s processor can understand and execute. Without compilers, the sophisticated software we use daily would be impossible to create.
GCC’s prominence stems from several key factors:
- Open Source and Free: As part of the GNU Project, GCC is free to use, distribute, and modify, making it an accessible tool for individuals, educational institutions, and commercial enterprises alike.
- Cross-Platform Compatibility: GCC is available on a vast array of operating systems, including Linux, macOS, and Windows, as well as numerous embedded systems. This allows developers to write code once and often compile it for multiple target platforms.
- Extensive Language Support: While initially focused on C, GCC has expanded its scope to support a wide range of programming languages, making it a versatile tool for diverse development projects.
- Performance and Optimization: GCC is renowned for its sophisticated optimization capabilities, enabling it to produce highly efficient and performant executable code. This is crucial for applications where speed and resource utilization are paramount.
- Active Development and Community: A vibrant community of developers actively contributes to GCC, ensuring its continuous improvement, bug fixes, and addition of new features.
In the broader context of the “Tech” category of this website, GCC plays a foundational role. It’s the engine that powers countless software applications, from operating systems themselves to the AI tools and productivity apps we interact with daily. Mastering GCC installation is akin to understanding how to set up the essential infrastructure for your digital creations.
Installing GCC on Linux
Linux is often considered the native environment for GCC, and the installation process is typically straightforward. Most Linux distributions include GCC in their package repositories, making it easily accessible through their respective package managers.
Using Package Managers (Recommended)
This is the most common and recommended method for installing GCC on Linux. It ensures that you get a stable, tested version and that all necessary dependencies are handled automatically.
For Debian/Ubuntu-based Systems (Debian, Ubuntu, Mint, etc.)
-
Update your package list:
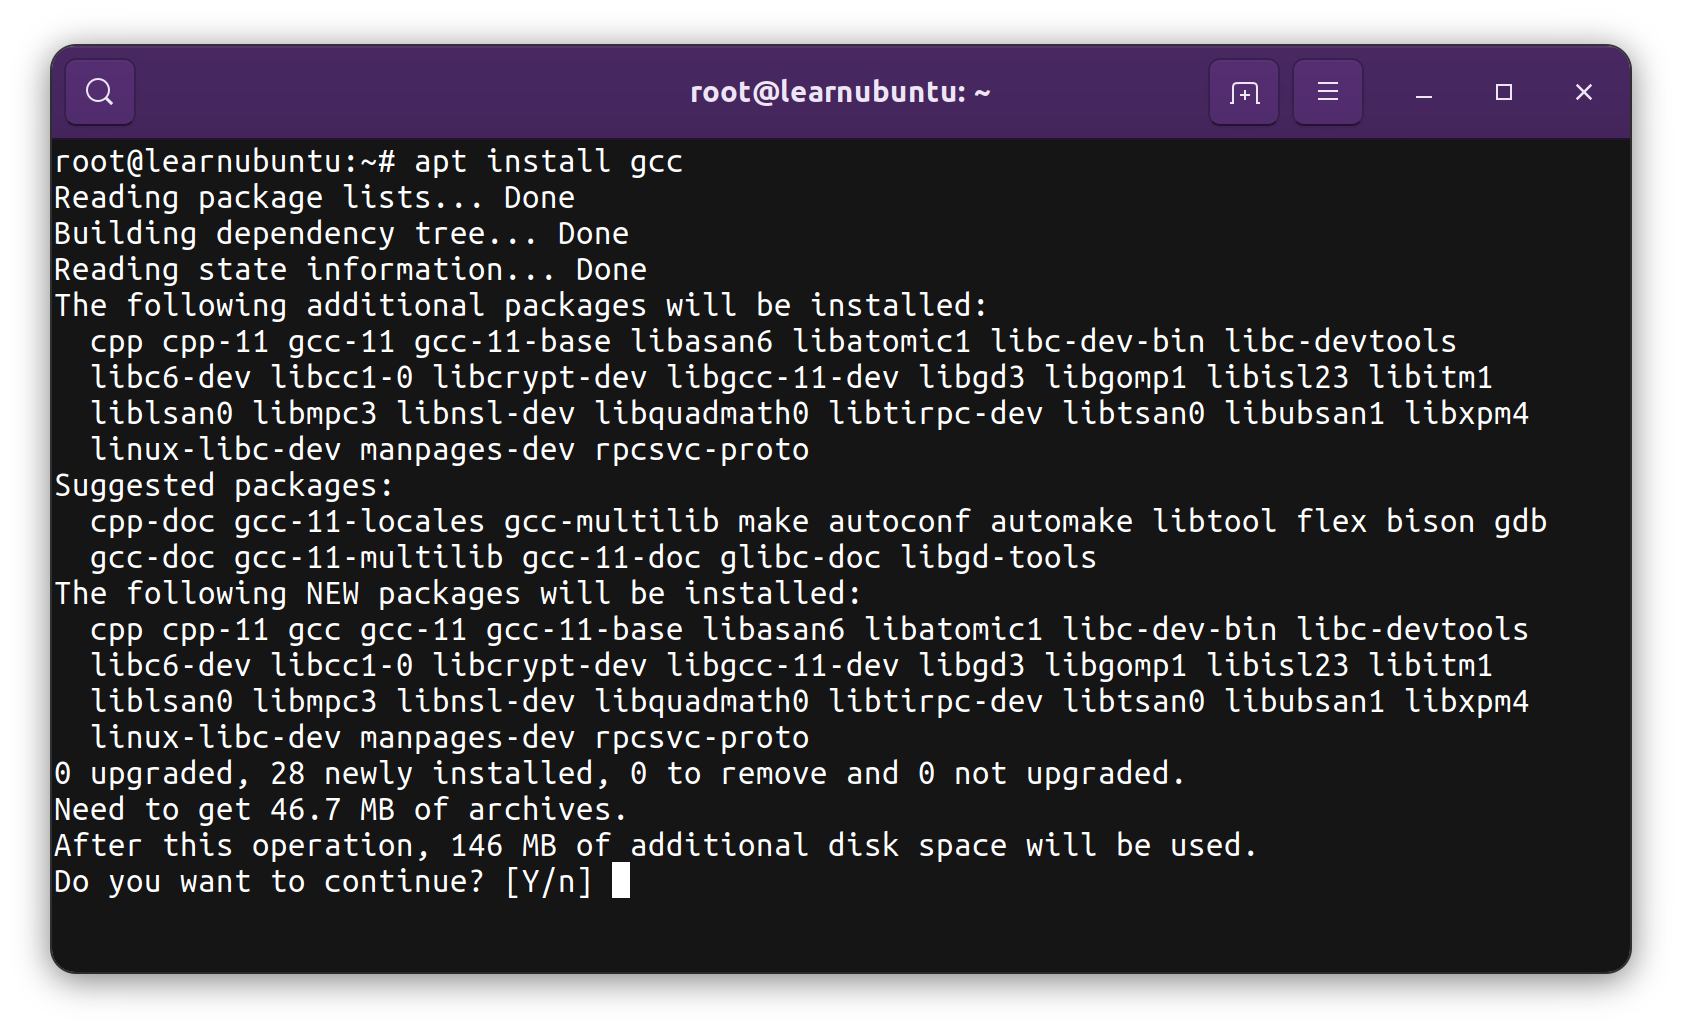
Open a terminal and run the following command to refresh the list of available software packages:sudo apt updateThis command downloads the latest information about available packages from the software repositories.
-
Install GCC:
To install the default GCC compiler package, use:sudo apt install build-essentialThe
build-essentialpackage is a meta-package that includes GCC, G++, make, and other essential tools for compiling software. If you specifically want to install GCC and G++ separately, you can use:sudo apt install gcc g++ -
Verify the installation:
After the installation completes, you can check the installed GCC version by running:
bash

gcc --version
This command should output information about the installed GCC version.
For Fedora/CentOS/RHEL-based Systems (Fedora, CentOS Stream, Rocky Linux, AlmaLinux, etc.)
-
Update your system:
It’s always a good practice to update your system before installing new software:sudo dnf update # For Fedora and newer RHEL-based systems # or sudo yum update # For older CentOS/RHEL systems -
Install GCC:
On these distributions, the GCC compiler is typically part of the “Development Tools” group. Install it using:sudo dnf groupinstall "Development Tools" # For Fedora and newer RHEL-based systems # or sudo yum groupinstall "Development Tools" # For older CentOS/RHEL systemsAlternatively, you can install GCC and G++ individually:
sudo dnf install gcc gcc-c++ # For Fedora and newer RHEL-based systems # or sudo yum install gcc gcc-c++ # For older CentOS/RHEL systems -
Verify the installation:
Check the GCC version:
bash

gcc --version
For Arch Linux and Derivatives (Manjaro, etc.)
-
Update your system:
sudo pacman -Syu -
Install GCC:
sudo pacman -S base-develThe
base-develpackage group includes GCC, make, and other essential build tools. -
Verify the installation:
bash

gcc --version
Compiling GCC from Source (Advanced)
While package managers are the easiest way, you might need to compile GCC from source for specific versions, custom configurations, or if your Linux distribution doesn’t have the desired version in its repositories. This is a more involved process and requires patience.
-
Download the GCC source code:
Visit the official GCC website (https://gcc.gnu.org/) to download the latest stable release or a specific version of the source code. You can usually find it as a.tar.gzfile. -
Extract the source code:
tar -xf gcc-X.Y.Z.tar.gz
cd gcc-X.Y.Z
(Replace
X.Y.Zwith the actual version number.) -
Install prerequisites:
GCC has dependencies, including GMP, MPFR, and MPC. You’ll need to install these development libraries. The specific package names vary by distribution. For example, on Debian/Ubuntu:sudo apt install libgmp-dev libmpfr-dev libmpc-devAnd on Fedora/CentOS:
sudo dnf install gmp-devel mpfr-devel libmpc-devel -
Configure the build:
It’s highly recommended to build GCC in a separate directory to keep your source tree clean.mkdir build cd build ../configure --prefix=/usr/local --enable-languages=c,c++ --disable-multilib--prefix=/usr/local: Specifies the installation directory.--enable-languages=c,c++: Specifies which languages to build the compiler for.--disable-multilib: For simplicity in this guide, we’re disabling multilib support, which allows compiling for multiple target ABIs (Application Binary Interfaces). You might want to enable this for broader compatibility.
-
Compile GCC:
This step can take a significant amount of time, depending on your system’s performance.make -j$(nproc)The
-j$(nproc)option uses all available CPU cores for faster compilation. -
Install GCC:
sudo make install -
Update your PATH (if necessary):
If you installed GCC in a non-standard location like/usr/local/bin, you might need to add it to your system’s PATH environment variable so your shell can find it.
bash

echo 'export PATH="/usr/local/bin:$PATH"' >> ~/.bashrc

source ~/.bashrc
Installing GCC on macOS
macOS, based on Unix, also has excellent support for GCC. The most common and recommended way to install GCC on macOS is through the Homebrew package manager.
Using Homebrew
Homebrew is a popular package manager for macOS that simplifies the installation of software.
-
Install Homebrew (if you don’t have it):
Open your Terminal application and paste the following command:/bin/bash -c "$(curl -fsSL https://raw.githubusercontent.com/Homebrew/install/HEAD/install.sh)"Follow the on-screen instructions to complete the installation.
-
Update Homebrew:
Once Homebrew is installed, update its package list:brew update -
Install GCC:
Homebrew installs GCC asgcc(for C) andg++(for C++), but it’s recommended to install it with a versioned name to avoid conflicts with the system’s Clang compiler.brew install gccThis command will install the latest stable version of GCC. Homebrew will often provide instructions on how to link to the new GCC executables.
-
Verify the installation:
After installation, Homebrew typically sets up symbolic links. To verify, you might need to look for versioned executables. For example, if you installed GCC 13, you would check:
bash

gcc-13 --version

g++-13 --version
Homebrew will inform you if you need to add these to your PATH or if it has done so automatically. Often, you’ll need to add an alias to usegccandg++as the Homebrew-installed versions. Check Homebrew’s output for specific instructions.
Using MacPorts
Another popular package manager for macOS is MacPorts. If you prefer MacPorts, follow these steps:
-
Install MacPorts (if you don’t have it):
Download the installer for your macOS version from the official MacPorts website (https://www.macports.org/install.php) and follow the installation instructions. -
Update MacPorts:
Open your Terminal and run:sudo port selfupdate -
Install GCC:
You can install a specific version of GCC or the latest available.sudo port install gcc13 # Installs GCC version 13To make this version the default
gccandg++on your system, you might need to run:sudo port select --set gcc mp-gcc13 sudo port select --set g++ mp-g++13 -
Verify the installation:
bash

gcc --version

g++ --version
Compiling GCC from Source on macOS (Advanced)
Similar to Linux, you can compile GCC from source on macOS. This is more complex and requires Xcode and its Command Line Tools to be installed, along with GMP, MPFR, and MPC libraries. Homebrew can be used to install these prerequisites:
brew install gmp mpfr libmpc
Then, follow the compilation steps similar to those outlined for Linux, adjusting paths as needed for macOS.
Installing GCC on Windows
Installing GCC on Windows is less common for native Windows development, where Microsoft’s Visual Studio and its C++ compiler are dominant. However, for cross-compilation (e.g., for embedded systems) or for developers who prefer a Unix-like environment on Windows, there are several excellent options.
Using MinGW-w64
MinGW-w64 (Minimalist GNU for Windows) is a popular choice for a native Windows port of GCC. It provides a development environment that includes GCC and other GNU tools.
-
Download the MinGW-w64 Installer:
Visit the MinGW-w64 website (https://mingw-w64.org/doku.php/download) and download a suitable installer. The most common approach is to download the installer from a reputable mirror, such as the one provided byMSYS2. -
Install MinGW-w64:
Run the downloaded installer. You’ll have options to choose the architecture (32-bit or 64-bit), the threading model (posix or win32), and the C++ standard library (libstdc++ ordwm). For most modern 64-bit development, choose thex86_64-posix-sehoption. Choose a sensible installation directory (e.g.,C:MinGW). -
Add GCC to your PATH:
After installation, you need to add thebindirectory of your MinGW-w64 installation to your Windows System PATH environment variable.- Search for “Environment Variables” in the Windows search bar and select “Edit the system environment variables.”
- Click the “Environment Variables…” button.
- In the “System variables” section, find the
Pathvariable and click “Edit…”. - Click “New” and add the path to your MinGW-w64
bindirectory (e.g.,C:MinGWbin). - Click “OK” on all open windows to save the changes.
-
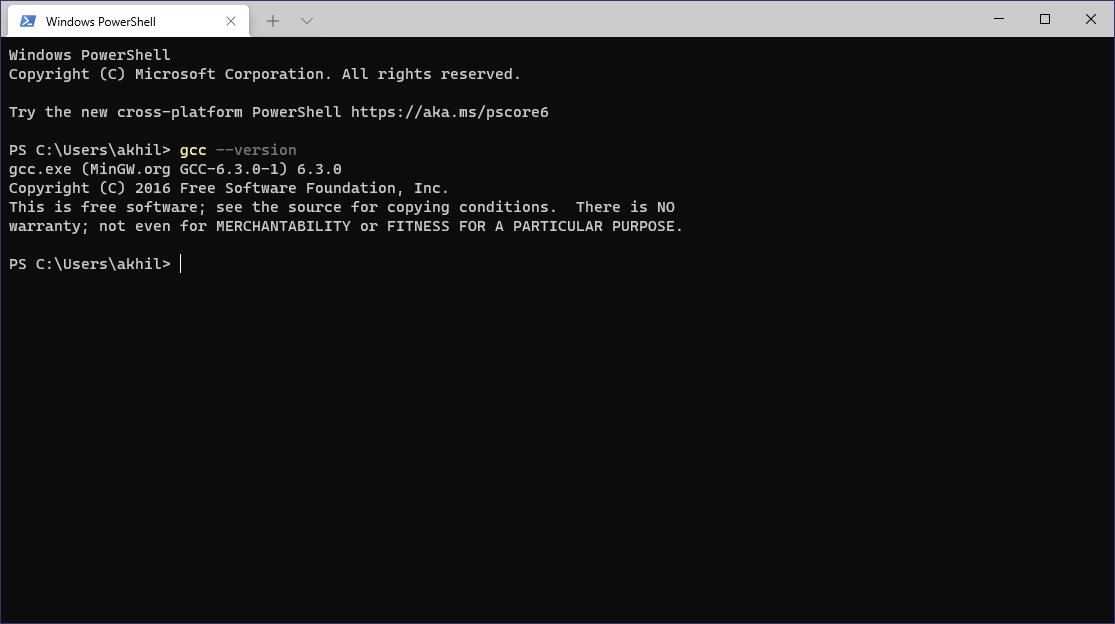
Verify the installation:
Open a new Command Prompt or PowerShell window and run:
cmd

gcc --version

g++ --version
You should see the GCC version information.
Using MSYS2
MSYS2 is a software distribution and building platform for Windows that provides a Unix-like shell environment. It uses its own package manager, pacman (from Arch Linux), to install software, including up-to-date versions of GCC.
-
Download and Install MSYS2:
Go to the MSYS2 website (https://www.msys2.org/) and download the installer. Follow the on-screen instructions. -
Update MSYS2:
After installation, launch the MSYS2 terminal. First, update the base system:pacman -SyuYou might need to close and reopen the terminal and run
pacman -Suagain to ensure everything is up-to-date. -
Install GCC:
MSYS2 provides different GCC toolchains. The most common aremingw-w64-x86_64-gccfor 64-bit Windows development andmingw-w64-i686-gccfor 32-bit development. To install the 64-bit version:pacman -S mingw-w64-x86_64-gccThis will install GCC, G++, and other related tools.
-
Configure your PATH:
MSYS2’spacmanusually handles adding the necessary executables to the environment. However, you might need to ensure that themingw64/bindirectory (or similar, depending on your installation) is in your system’s PATH if you want to usegccandg++from regular Windows Command Prompt or PowerShell windows outside of the MSYS2 terminal. -
Verify the installation:
Open a regular Command Prompt or PowerShell window and run:
cmd

gcc --version

g++ --version
Using the Windows Subsystem for Linux (WSL)
WSL allows you to run a Linux environment directly on Windows. This is an excellent option if you want a full Linux development experience, including GCC, without dual-booting or using virtual machines.
-
Install WSL:
Open PowerShell as an administrator and run:wsl --installThis will install WSL and a default Linux distribution (usually Ubuntu). You may need to restart your computer.
-
Launch your Linux Distribution:
Open your installed Linux distribution from the Start menu. -
Install GCC within WSL:
Once inside your Linux environment (e.g., Ubuntu), use its package manager to install GCC, just as you would on a native Linux system:sudo apt update sudo apt install build-essential -
Verify the installation:
bash

gcc --version
You can also compile and run C/C++ programs within the WSL environment.

Conclusion
Installing GCC is a crucial step for any aspiring or seasoned developer. While the process can vary slightly across different operating systems, the underlying principles remain the same: obtaining the compiler and ensuring your system can find and execute it. For Linux and macOS, package managers like apt, dnf, pacman, and brew offer the most streamlined and recommended installation methods. On Windows, MinGW-w64, MSYS2, or the Windows Subsystem for Linux provide robust environments for GCC development.
By following the steps outlined in this guide, you’ll be well-equipped to set up GCC on your preferred platform. This foundational step opens the door to a world of software creation, from simple scripts to complex applications. As you progress in your development journey, understanding GCC’s capabilities and how to manage its versions will become increasingly valuable, contributing to your overall productivity and technical prowess within the ever-evolving “Tech” landscape.
aViewFromTheCave is a participant in the Amazon Services LLC Associates Program, an affiliate advertising program designed to provide a means for sites to earn advertising fees by advertising and linking to Amazon.com. Amazon, the Amazon logo, AmazonSupply, and the AmazonSupply logo are trademarks of Amazon.com, Inc. or its affiliates. As an Amazon Associate we earn affiliate commissions from qualifying purchases.